Several Common Methods for Image Watermark Removal, a Basic Skill for Digital Workers
Here are some simple watermark removal methods and ideas:
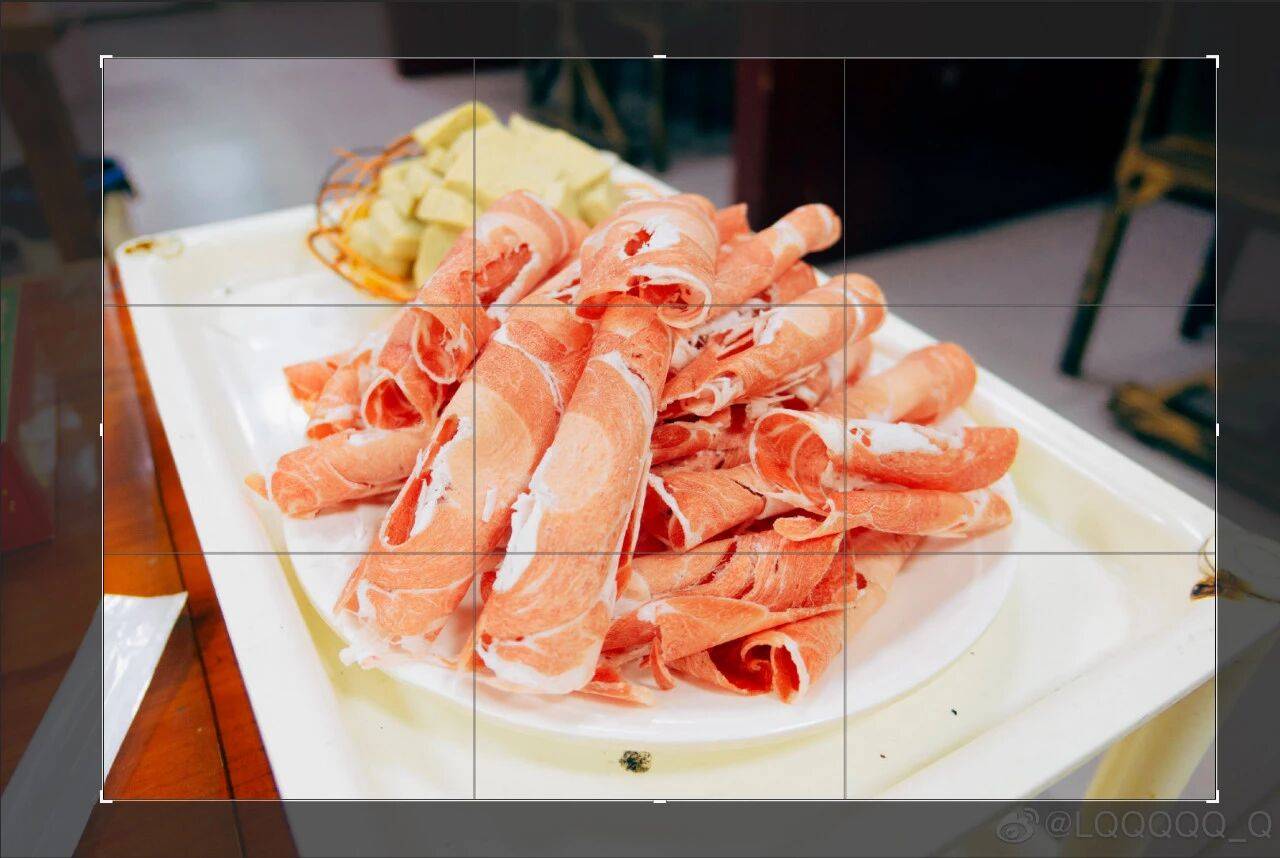
1. Simply crop it out.
When the watermark’s location hardly affects the main subject, this is a great lazy-person fix. My common approach is:
a. Select and screenshot, for example on WeChat, using the shortcut Alt+A, suitable when image quality requirements are not high.
b. Right-click – Edit, use Windows Paint to crop the edges. Using ‘Edit’ from the right-click menu opens Windows Paint, which is faster than using ‘Open with’ or opening Paint first and then using the ‘Open’ function to load the image. Using Paint for image resizing and converting from .png to .jpg format is also very fast, ideal for scenarios with specific requirements for image size and dimensions when uploading.
c. The Crop Tool in Photoshop. Photoshop has higher system requirements and opens slower, which is why I prefer using Paint.
When faced with tasks that Paint can handle, don’t easily open Photoshop, and avoid searching online for those dazzling SaaS small tools and software—this is even a more advanced skill than knowing how to use PS or how to search.
2. The Brush.
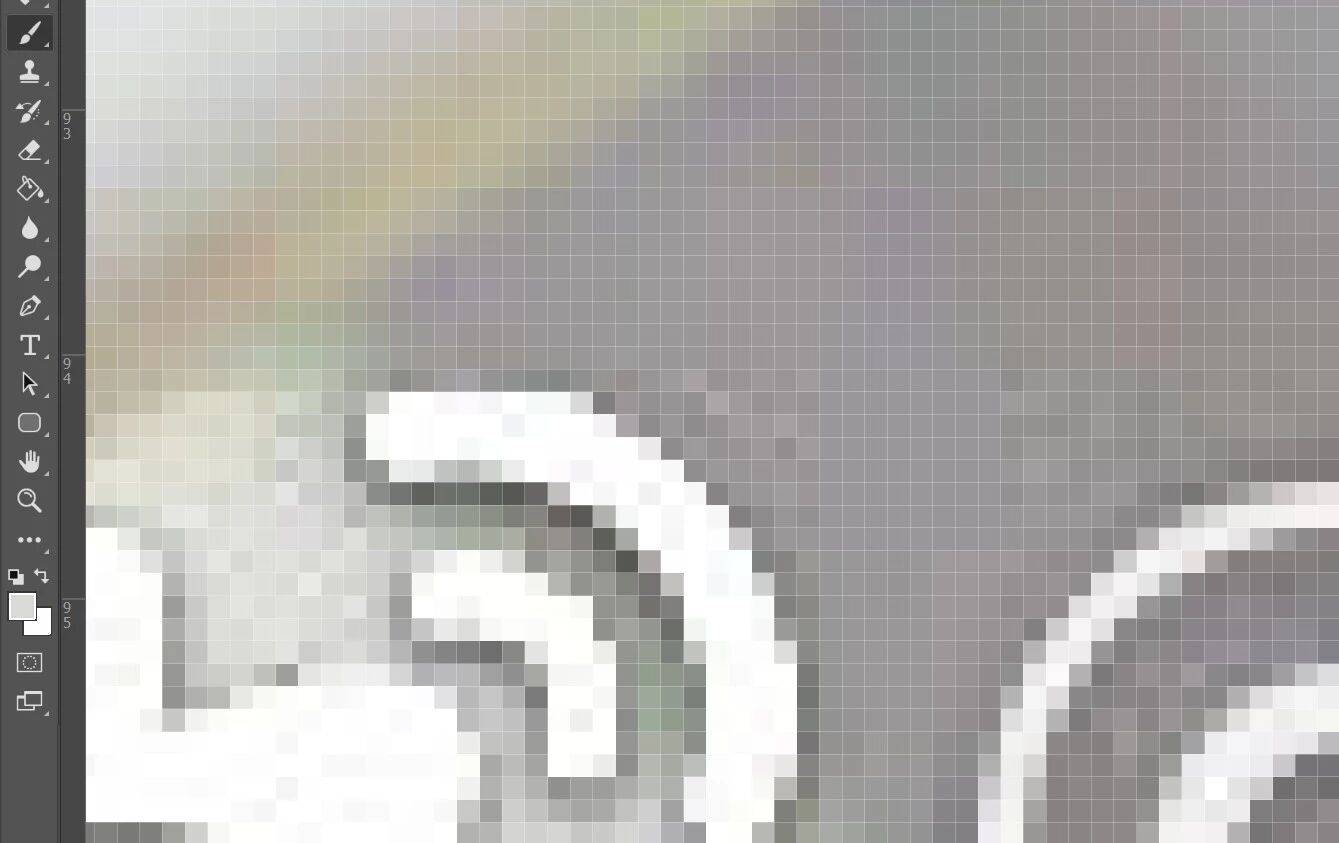
When other methods don’t work well, manually painting over the watermark often yields surprising results. I typically zoom in to a level where pixels are visible after initial processing and manually adjust colors. There’s not much to say here; like clipping, it’s pure manual labor. Sometimes, it unexpectedly produces outstanding results.
3. Content-Aware Fill.
Most ‘one-click watermark removal’ tools, including Photoshop, fall into this category. My common approach is:
In Photoshop, first use a selection or lasso tool to create a selection that includes the watermark, right-click – Fill, choose ‘Content-Aware’ for the fill content, and confirm. If unsatisfied with the automatic sampling area for content-aware fill, you can manually select the sampling area via ‘Edit – Content-Aware Fill’.

Depending on the situation, the Spot Healing Brush Tool group (including the Healing Brush, Patch Tool, etc.) might also be used. For specific usage, you can search on Baidu. I broadly categorize this tool group with Content-Aware Fill, as they both use internal algorithms to adapt to the surrounding environment. The Healing Brush is very similar to the Clone Stamp Tool, but the difference is that the Clone Stamp Tool clones 100% without any processing.
Additionally, regarding Content-Aware Fill, there’s a quite practical feature called ‘Content-Aware Scale’, which is very effective for handling situations where the image width is insufficient. I’ve created an effect image below, but I won’t explain the operation method this time—you can search for it on Baidu.

4. Blending Modes.
Here are two examples.
a. Floor plan with watermark.

This image, including the watermark, only has three colors: black, white, and gray. The gray watermark is relatively light. Therefore, simply turning the light gray into white can remove the watermark. Obviously, adjusting the levels can achieve this; the shortcut is Ctrl+L. Even if the requirements are not strict, just adding a “Lighten” layer blending mode effect will work.
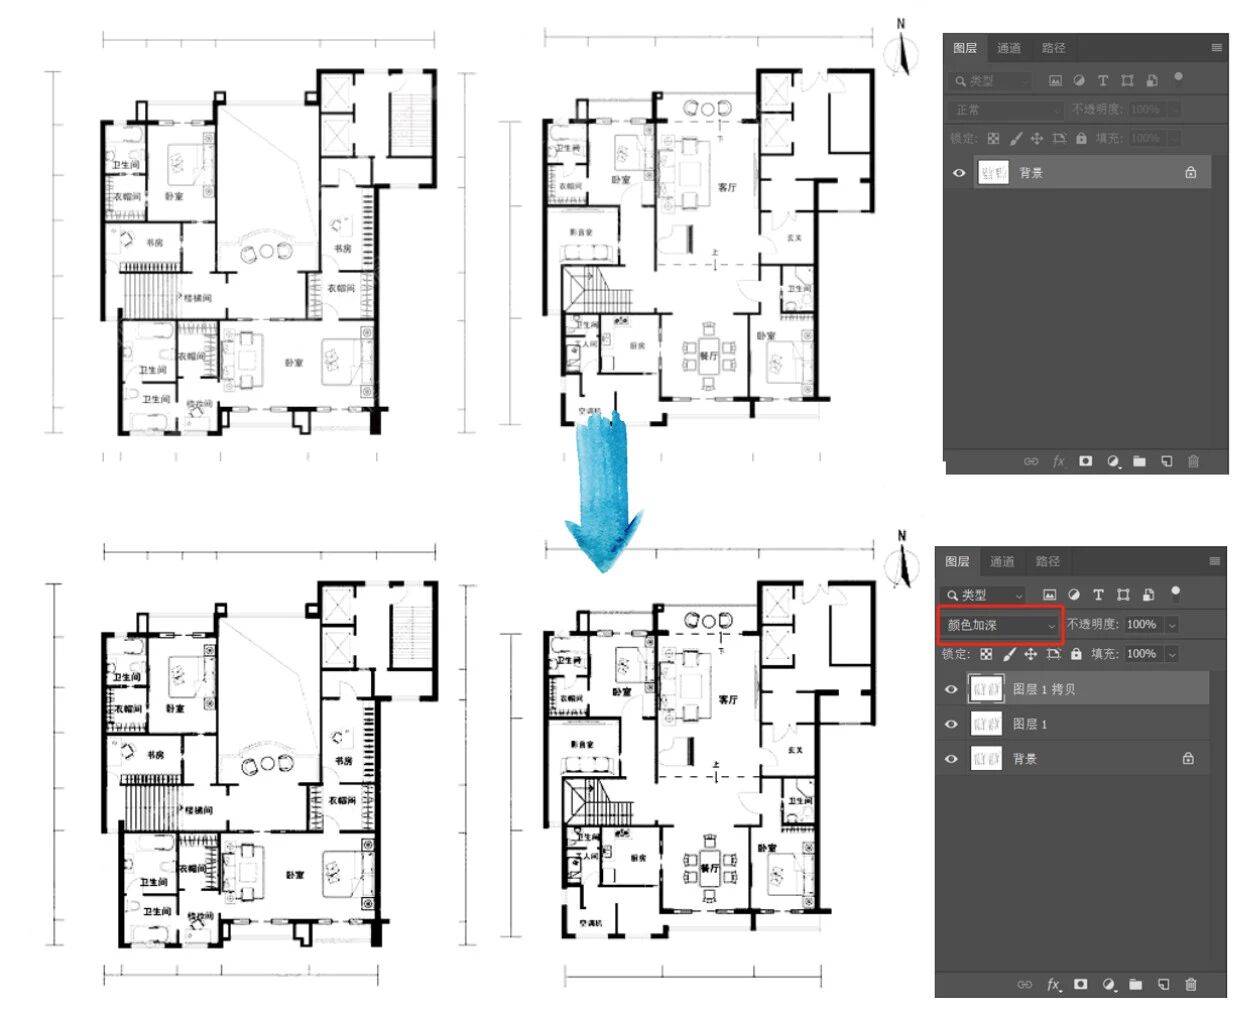
For example: Ctrl+J to duplicate the layer, select “Hard Light” as the blending mode, and the result is shown in the image below. Note that you must duplicate a layer; since it’s a (layer) “blending” mode, you first need at least two layers to “blend”.

However, I still choose to adjust the levels. Ctrl+L to open “Levels”, lower the upper limit of “Input Levels” until the watermark disappears.
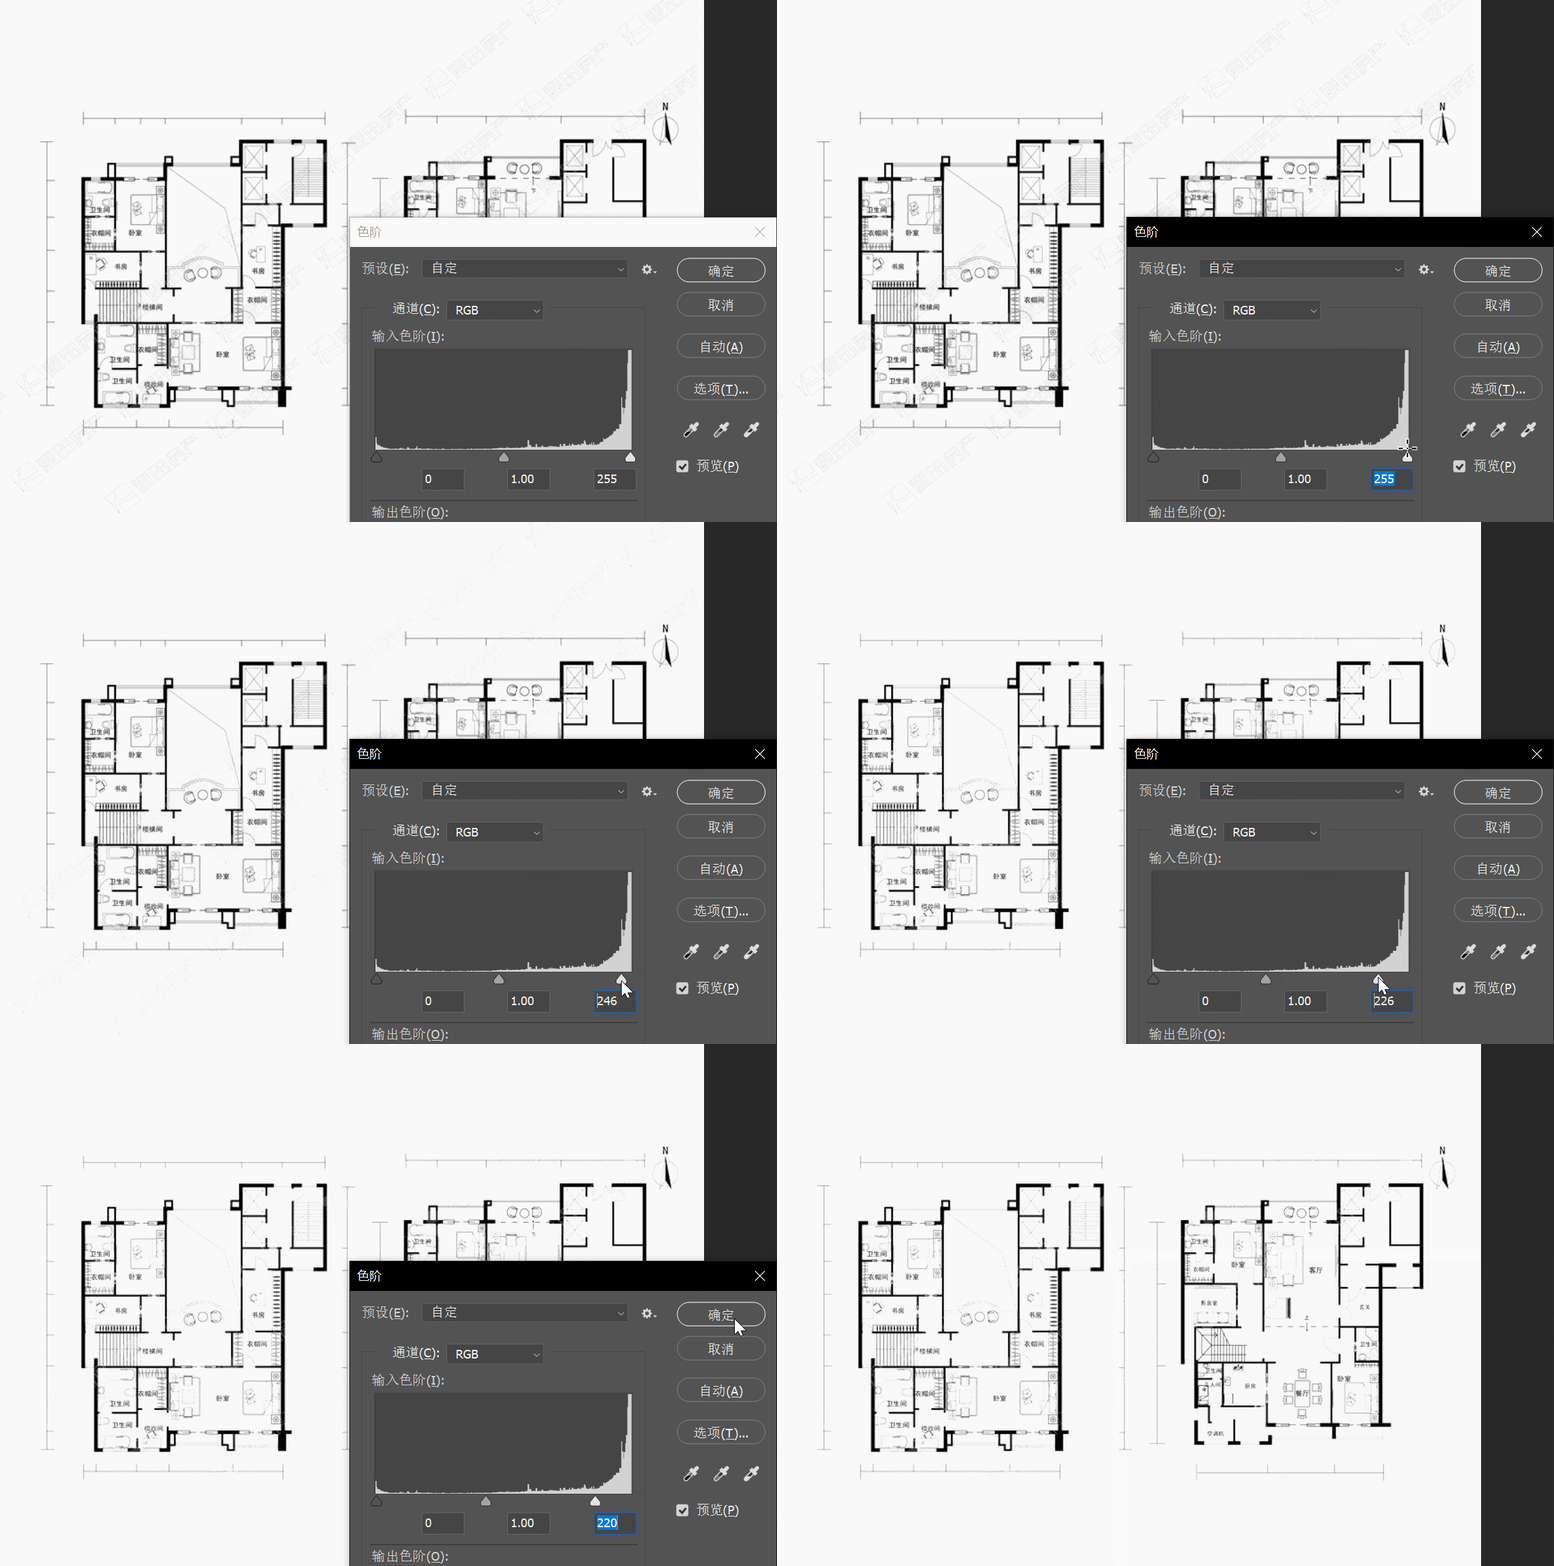
After adjusting the input levels, the overall color may be lighter than the original image. At this point, you can duplicate the layer, and set the blending mode of the upper layer to “Color Burn”. If the color is not dark enough, you can duplicate another layer.
b. Product image with watermark.

Select a complete watermark from a blank area, copy it, and apply “Invert” (shortcut Ctrl+I).

Change the blending mode of this inverted layer to “Color Dodge”, copy it and move it over other watermarks, use arrow keys to finely adjust the position until it completely covers the other watermarks. The effect is shown in the animated image below.

That’s all.

Image source: pexels