I’m sick of talking about large language models and DeepSeek, so let’s change the pace.
Let me share an image upscaling model I’ve been using for a while, which is relatively obscure but really useful. It’s not widely used in China, but it’s excellent. It can upscale an image almost losslessly with minimal redrawing, preserving as much of the original quality as possible.
No need to beat around the bush—the model is named: 4xNomos8kSCHAT-L.
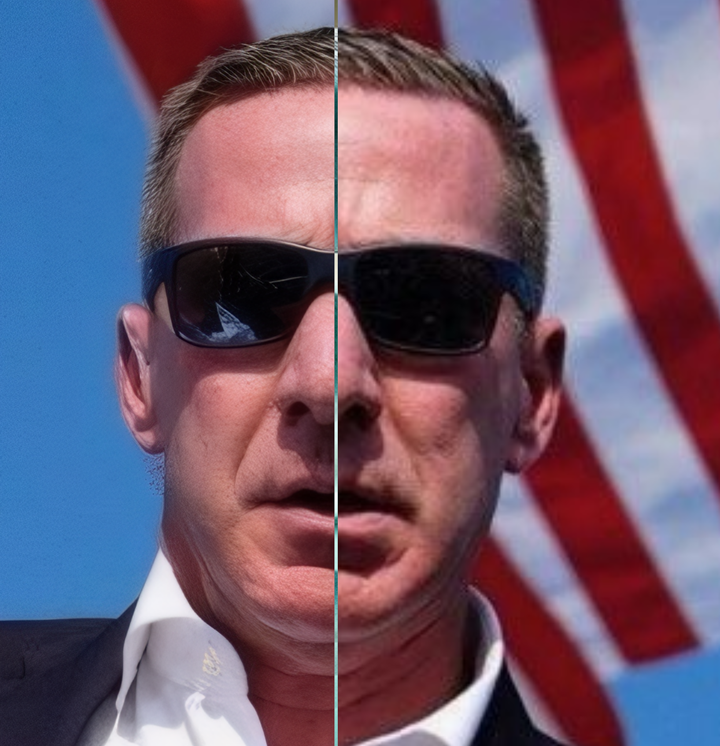
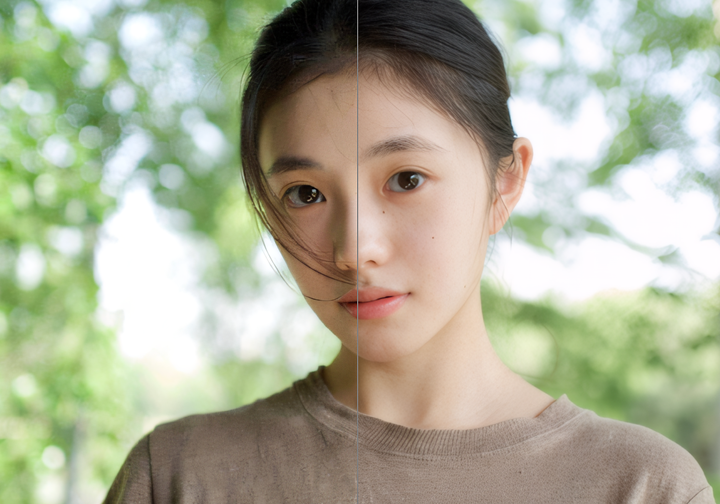
Here’s a demonstration of the effect: the left side is the upscaled version, and the right side is the original image:
You can find this model by searching on Google, or if you’re too lazy to search, you can directly refer to this article:4xNomos8kSCHAT-L。
(To use this model, you’ll need a computer or cloud computer with decent specs and some basic knowledge of ComfyUI operations. If you don’t have access to these right now, you can save this for later.)
Many people prefer using SUPIR for image upscaling, and of course, SUPIR is good too.
But I think its issues are also quite obvious.
First, it can easily cause out-of-memory errors with large images.
Whether the original image is large or the upscaling factor is high, it can lead to memory overflow.
Upscaling a photo of around 3 million pixels isn’t too much to ask, really.
But as a user with an RTX 4090, I can confirm that this is quite challenging even for consumer-grade graphics cards.

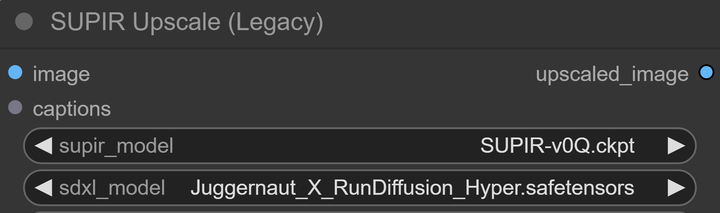
Second, SUPIR requires two models.
One is the SUPIR model, and the other is an SDXL model.
Having this SDXL model means it will resample the image, which can easily introduce unnecessary variables.
Even if you only use a quality prompt and set s_noise very low, the fact is that it redraws the image.
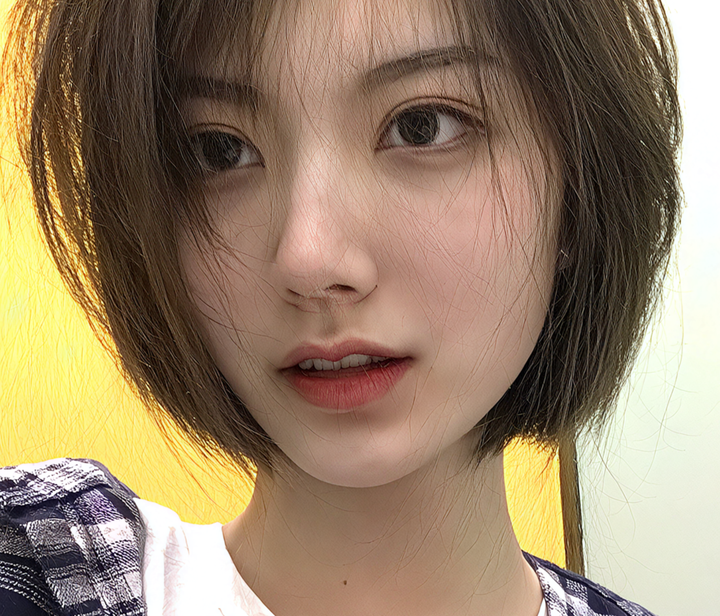
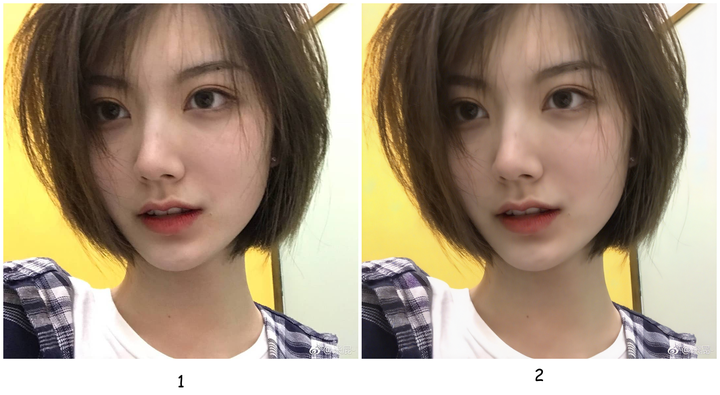
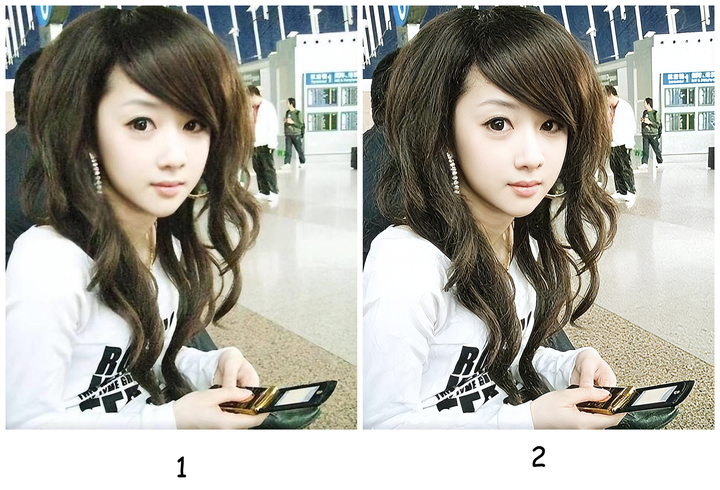
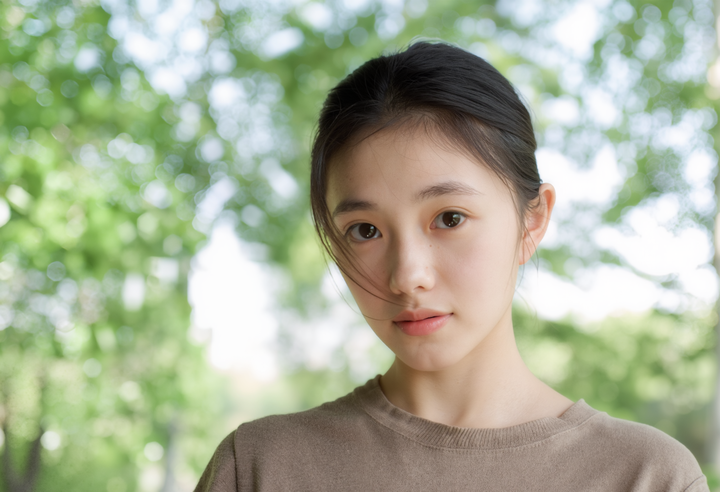
For example, using the Juggernaut model, which is the most commonly used with SUPIR, and only applying quality prompts, I upscale this photo of a girl:

Zooming in on the details, what’s with the hair in front of the face and on the wall behind?
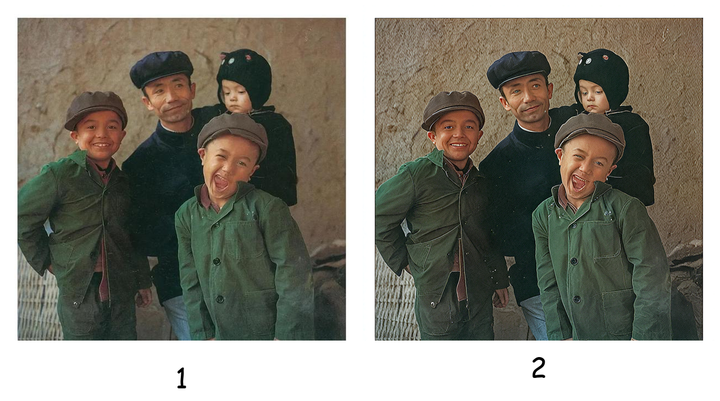
Changing the SDXL model produces a different result. For instance, without modifying any other parameters, if I switch to the LEOSAM HelloWorld New World model, the hair issue disappears. However, since the HelloWorld model has built-in skin smoothing for portraits, it might appear slightly blurred.
Let me show a few more.
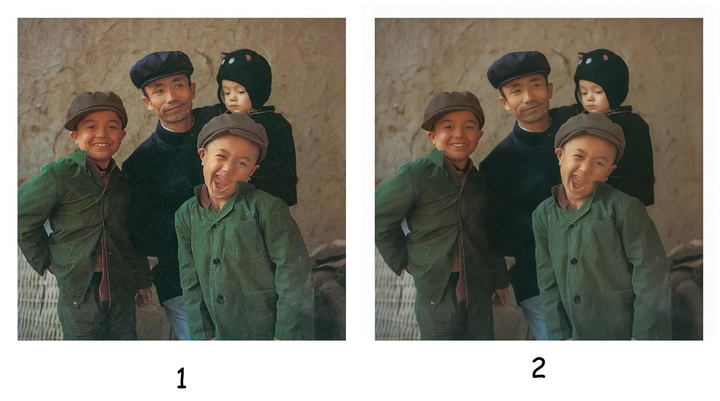
Juggernaut:
HelloWorld:

Juggernaut:
HelloWorld:
(SUPIR is actually quite suitable for restoring old photos.)
The difference is quite noticeable, right?
It’s heavily influenced by the SDXL model.
Moreover, when it comes to commercial use, adding an extra SDXL model complicates things significantly.
This is where 4xNomos8k excels.
It’s just one upscaling model that handles the task independently.
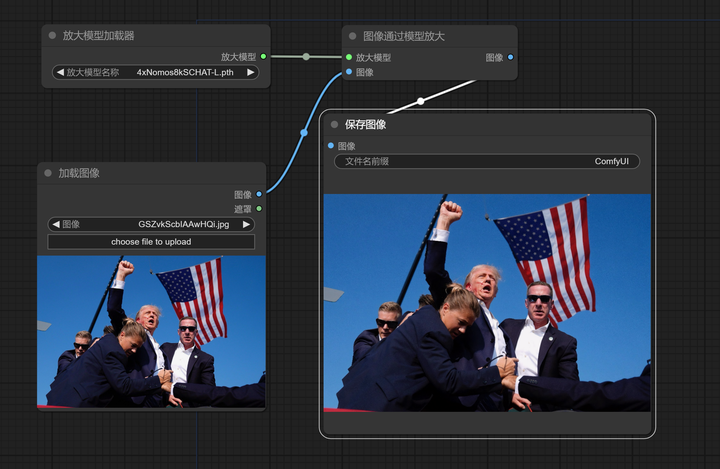
Upscale by 4x, simple as that:
It can be used commercially.
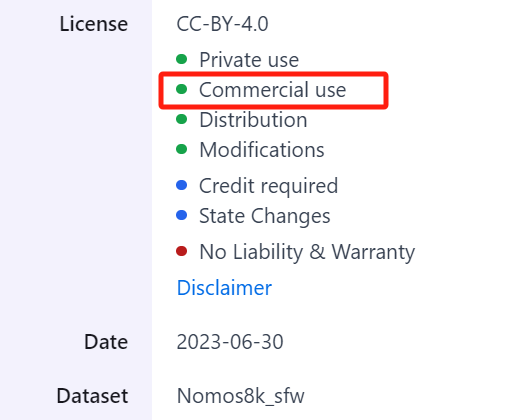
And it stays as faithful to the original image as possible.
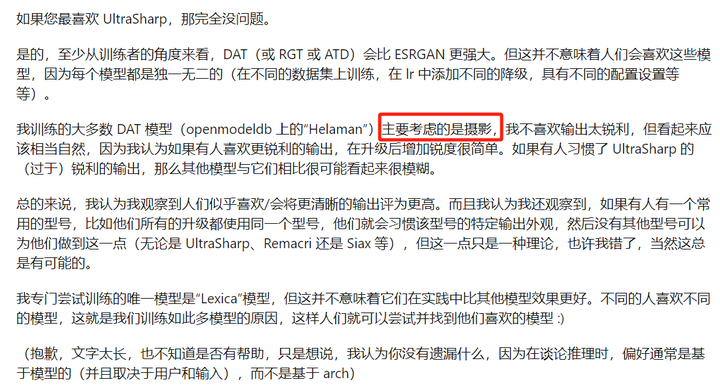
Here are some opinions posted by the author on Reddit (viewable via Google Translate):


Therefore, this upscaling model is very suitable for upscaling real-life photos (excluding damaged old photos, of course).
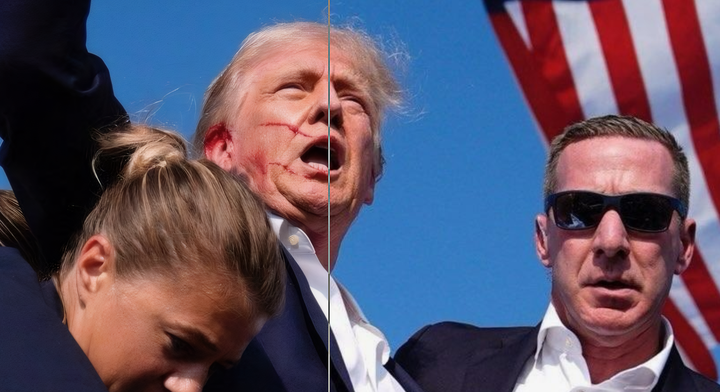
For instance, this world-famous photo that was just upscaled:
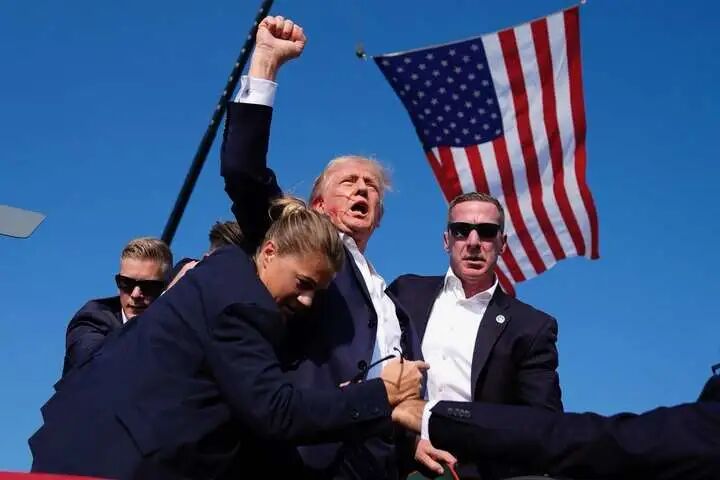
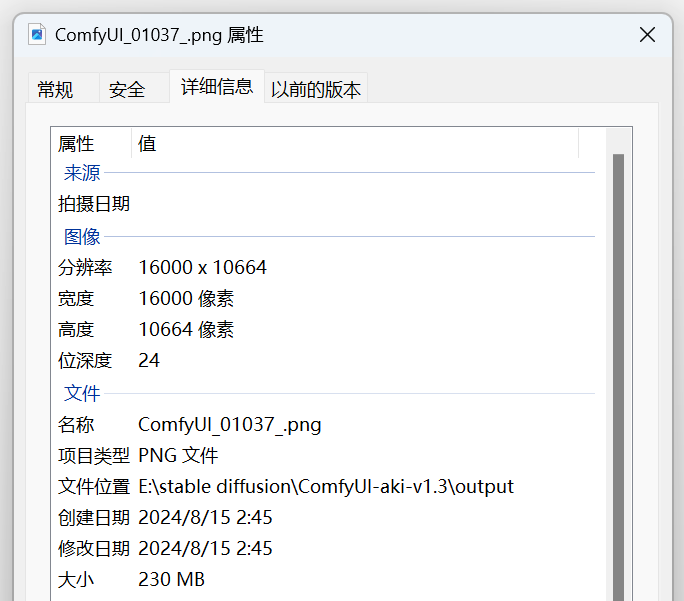
Let’s look at the original image and the enlarged dimensions:
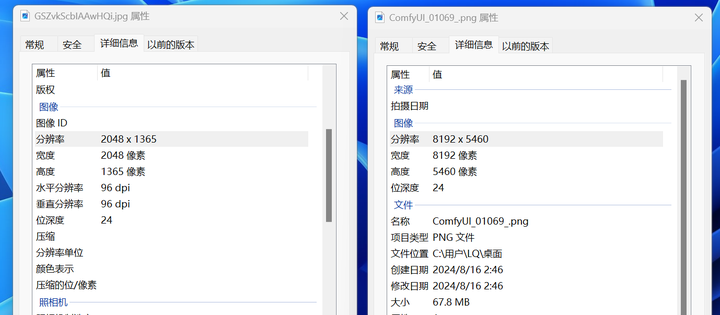
From less than 3 megapixels directly enlarged to nearly 45 megapixels.
This is still with a small original image; enlarging to over 150 megapixels is also completely fine, without running out of VRAM.
Images of this size can’t be uploaded, so let’s directly screenshot the details: the left side is the enlarged version, and the right side is the original.
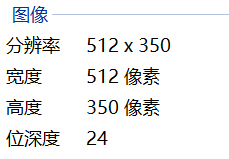
Let’s find another small original image, like this one:

The original image is 512*350, which can already be considered blurry, right? Why not su… okay, I’ll put the meme away.
After enlargement:

Details:
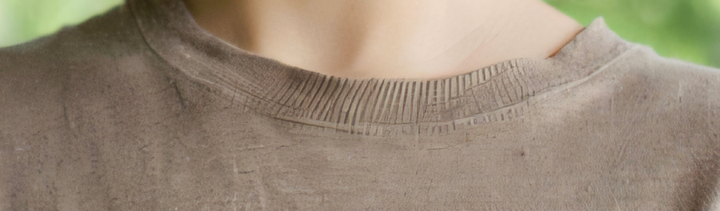
This time, I’ve reversed the connection of the comparison node. On the right is the enlarged version. Notice the position of the mole—it hasn’t changed at all, completely faithful to the original.
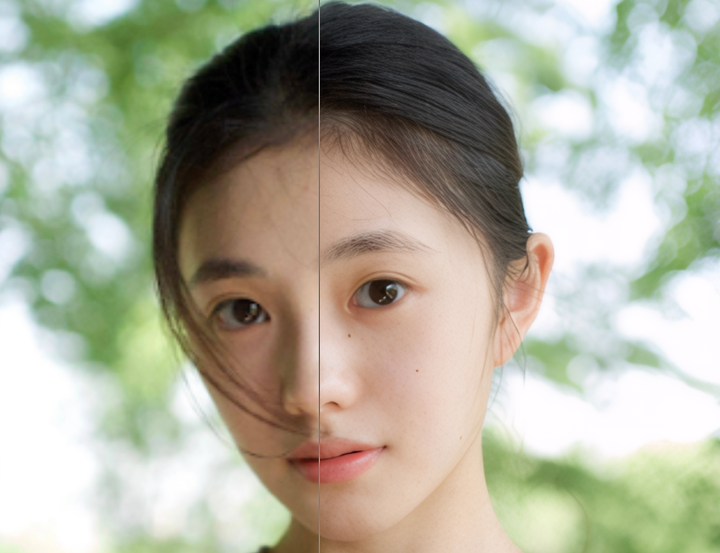
Also, pay attention to the clothing details, which are all sufficiently restored:
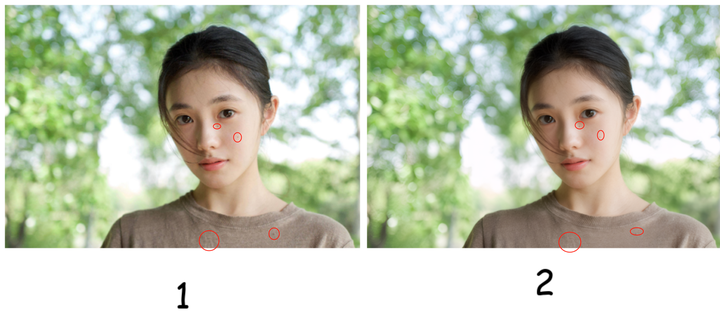
Let’s do it again with the most familiar 4x-UltraSharp.
After enlargement:

Below: left is 4x-UltraSharp, right is 4xNomos8kSCHAT-L.
UltraSharp comes with built-in sharpening, which looks clearer at first glance, but upon closer inspection, it’s not natural enough.
Especially in the details, UltraSharp shows obvious distortion.
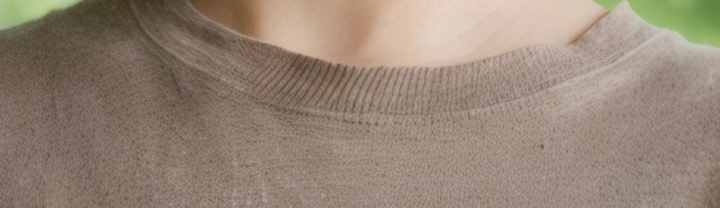
4x-UltraSharp sweater details ⬇️
4xNomos8kSCHAT-L Sweater Details ⬇️
4x-UltraSharp Hair Strands ⬇️
4xNomos8kSCHAT-L Hair Strands ⬇️
If you say, I just want to have an image generation model redraw some details, I don’t intend to use it commercially, and I don’t mind if it’s not completely identical to the original image, I just want to resample and upscale to get better image quality.
That’s perfectly fine.
I’ll use 4xNomos8kSCHAT-L for the upscaling model, and switch the redraw model to the fp16 version of flux.1 dev for you. How does that sound?
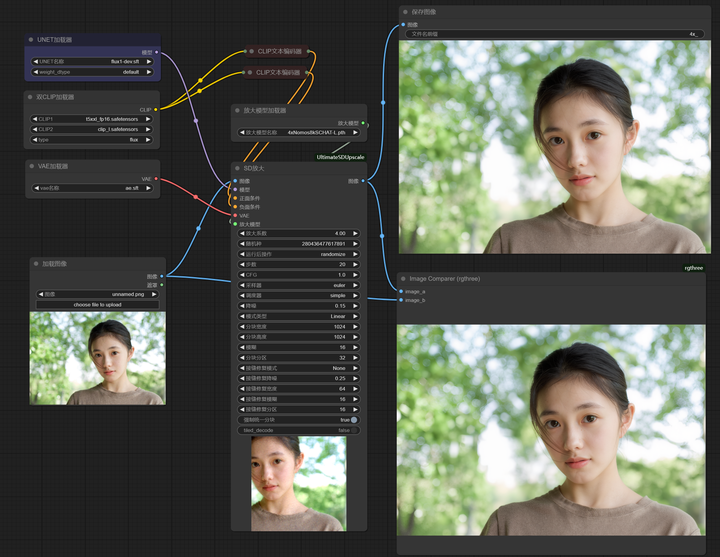
This enhancement should be sufficient.
Details of skin and lips:
flux Redraw + Upscale ⬇️
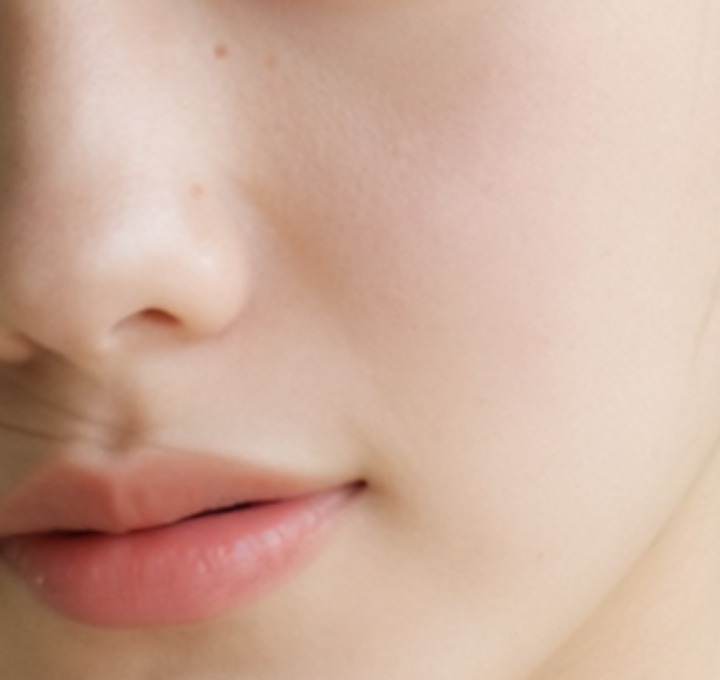
Original Image Upscaled ⬇️
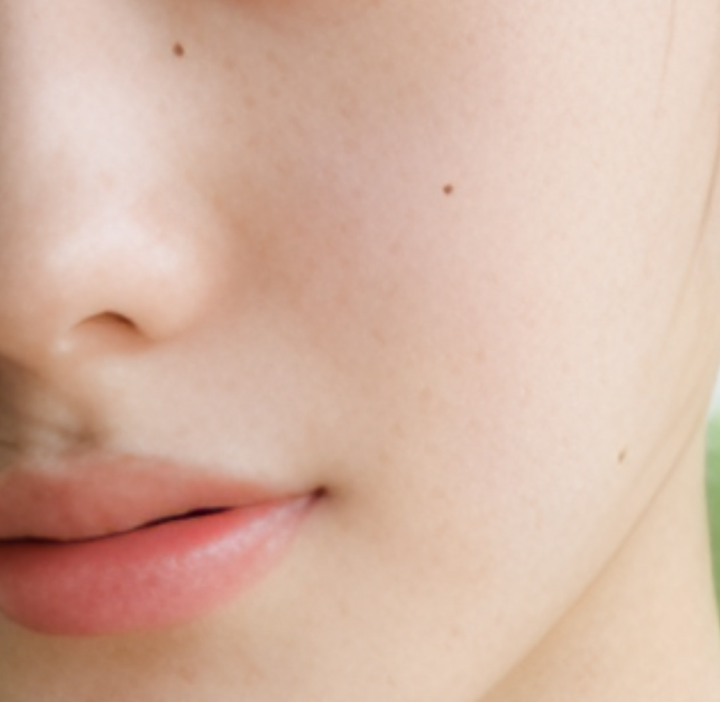
Original Image ⬇️

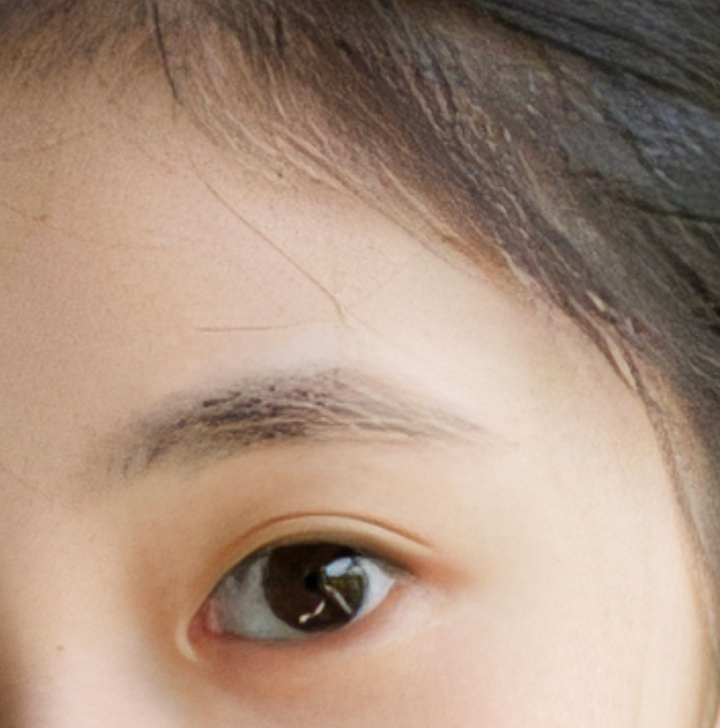
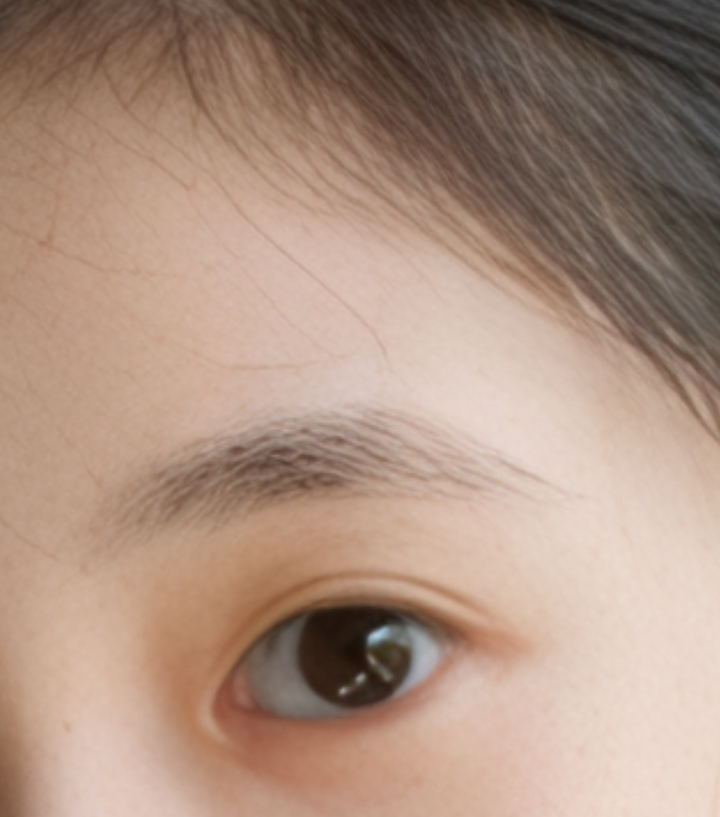
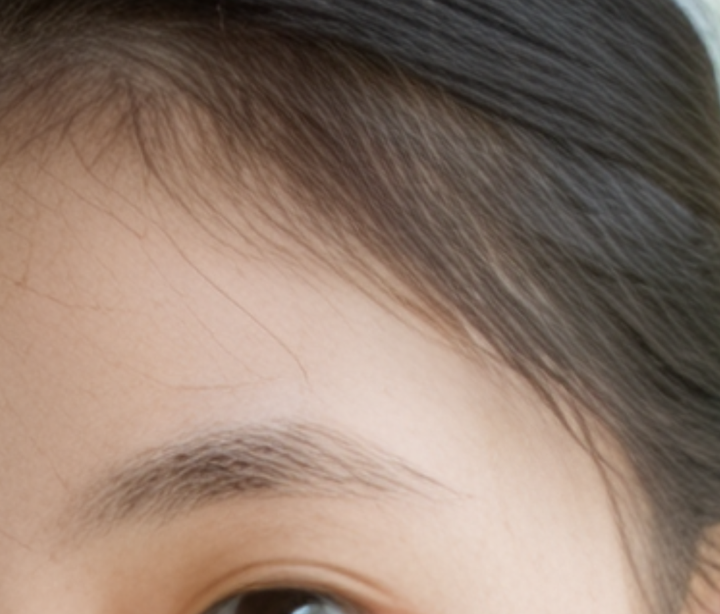
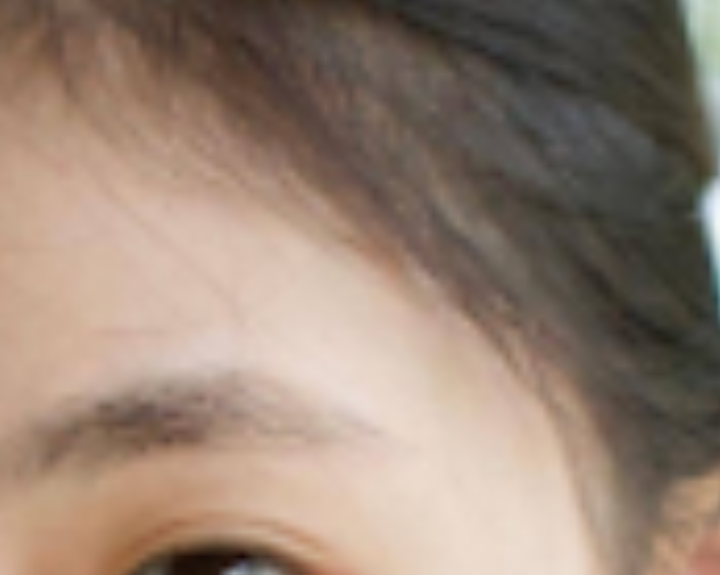
Details of eyebrows and hair:
flux Redraw + Upscale ⬇️
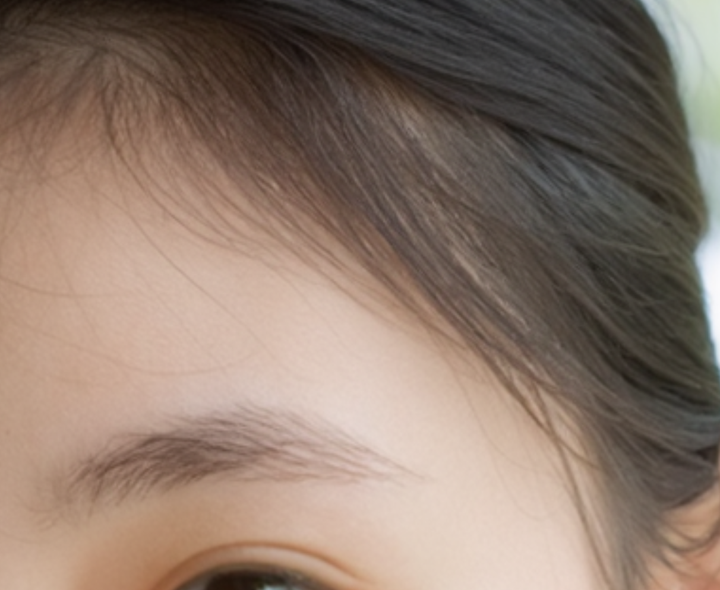
Original Image Upscaled ⬇️
Original Image ⬇️
Place the model files in the modelsupscale_models folder.
Enjoy。