There’s a new type of “big sucker” in the AI era, called the genuine Chinese Photoshop user.
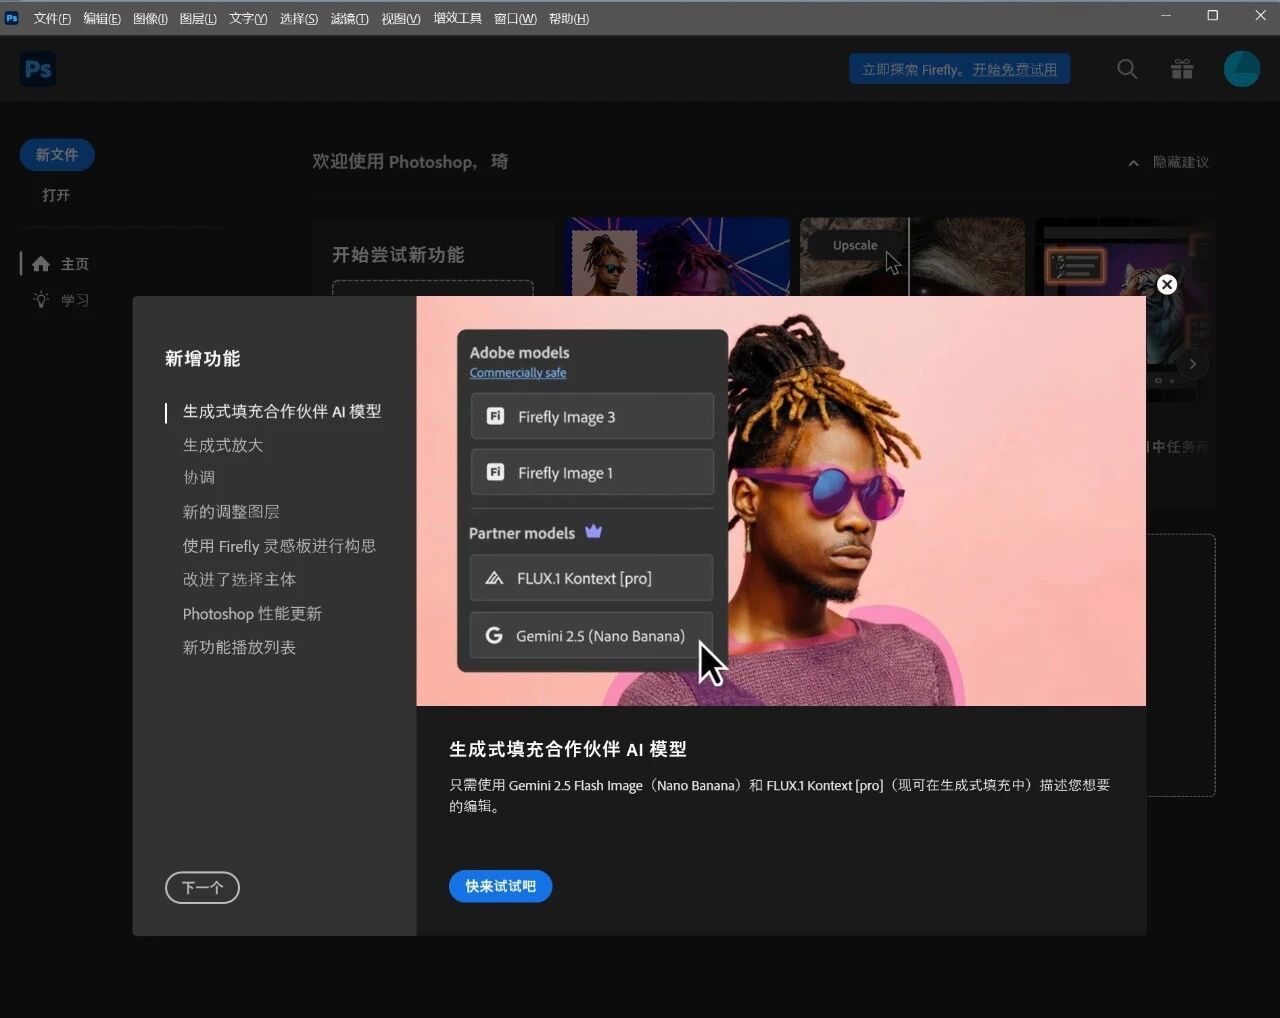
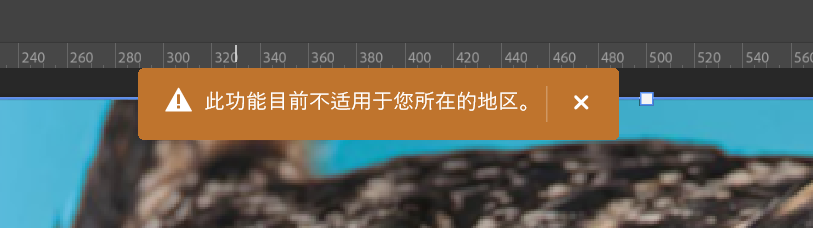
Not a single new feature rollout is missed, but the moment you try to use it, you get a prompt saying this feature is not available in your region.
Well done, Adobe, you’ve completely lost your shame.
However, using generative AI fill in a creative production environment like Photoshop is actually quite important.
Although AI image editing models have become increasingly powerful and widespread over the past period—just browse the comment sections on Douyin, Xiaohongshu, or Bilibili, and you’ll see meme images edited by users everywhere using Doubao—there’s still a somewhat awkward issue. Most of these AI-edited images are used for sharing in group chats, Moments, or social media, where netizens have a good laugh together, and they basically don’t appear in scenarios with higher demands for image quality.
The reason is simple: for most users, or rather most AI image editing products, the default operational logic is to input the entire image plus a prompt, and then output the entire image. In this process, constrained by computing power and other factors, there’s a clear bottleneck in the final output image quality—the higher the quality of the input original image, the more drastically the quality of the output image declines.
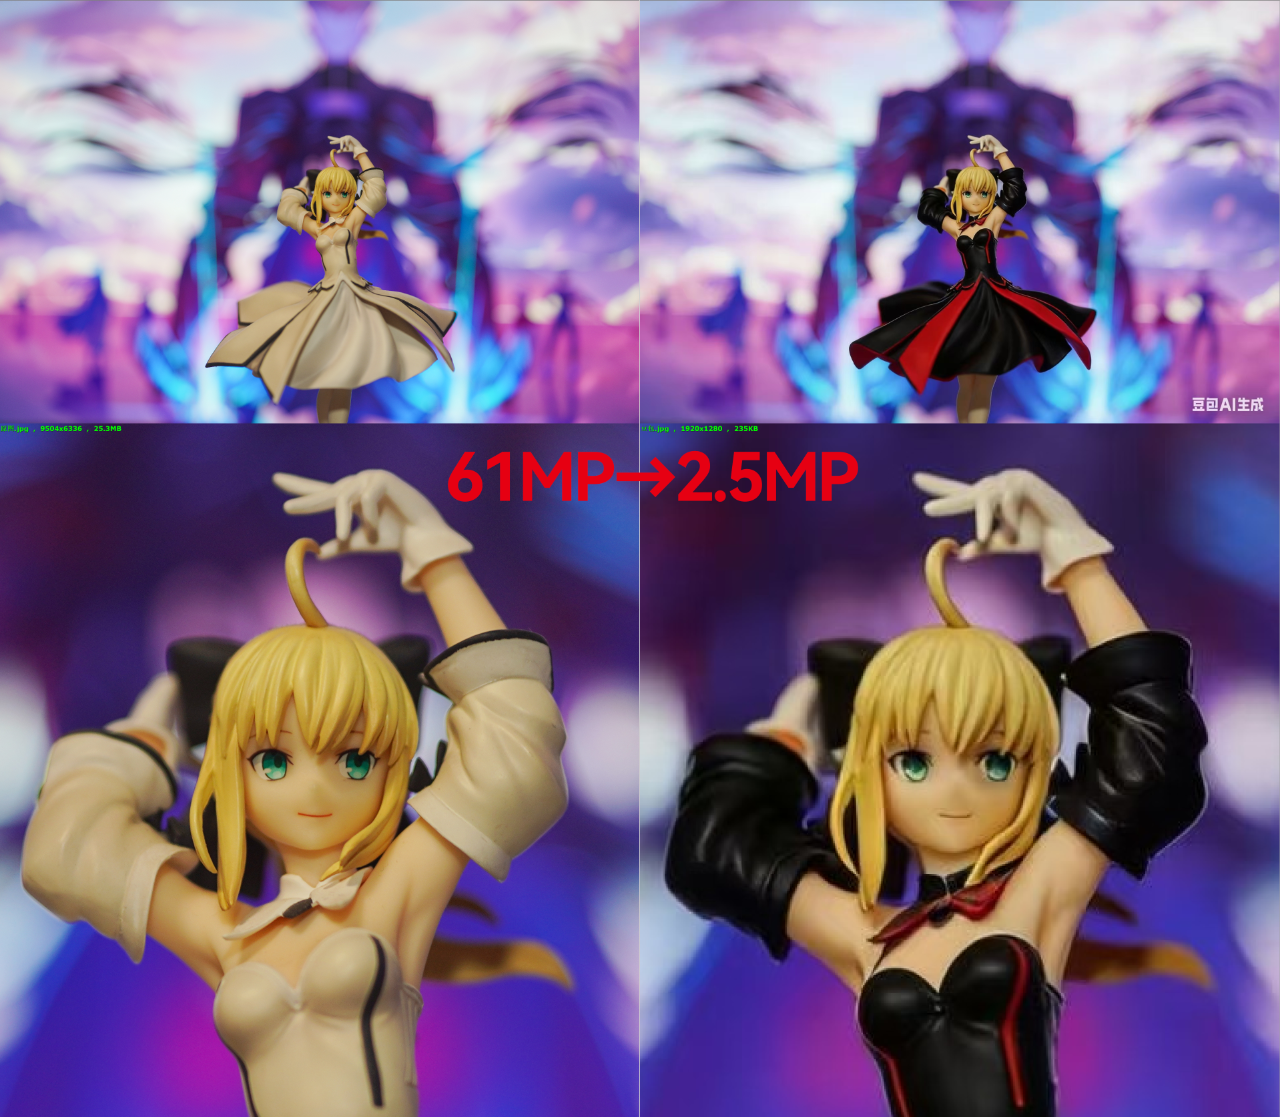
Currently, the maximum output size for image editing large models is 1:1 4K (usually requiring payment), approximately 16 million pixels. When converted to more common photo ratios like 3:4 or 2:3, it’s roughly around 12 million pixels. More commonly, without payment, such as using the Doubao App directly, the “edited” images are only about 1.4 to 3 million pixels. Meanwhile, mainstream digital camera CMOS sensors today essentially start at 24 million pixels.
With whole-image input and whole-image output, it’s difficult to meet the demands of high-quality image processing just in terms of resolution, let alone changes in color gamut and color depth, and the risk of unintentional editing in non-target areas due to full-image input.
The whole-image editing approach is neither elegant nor efficient for high-quality image processing, and performing localized selection repainting in PS is precisely what can solve this problem.
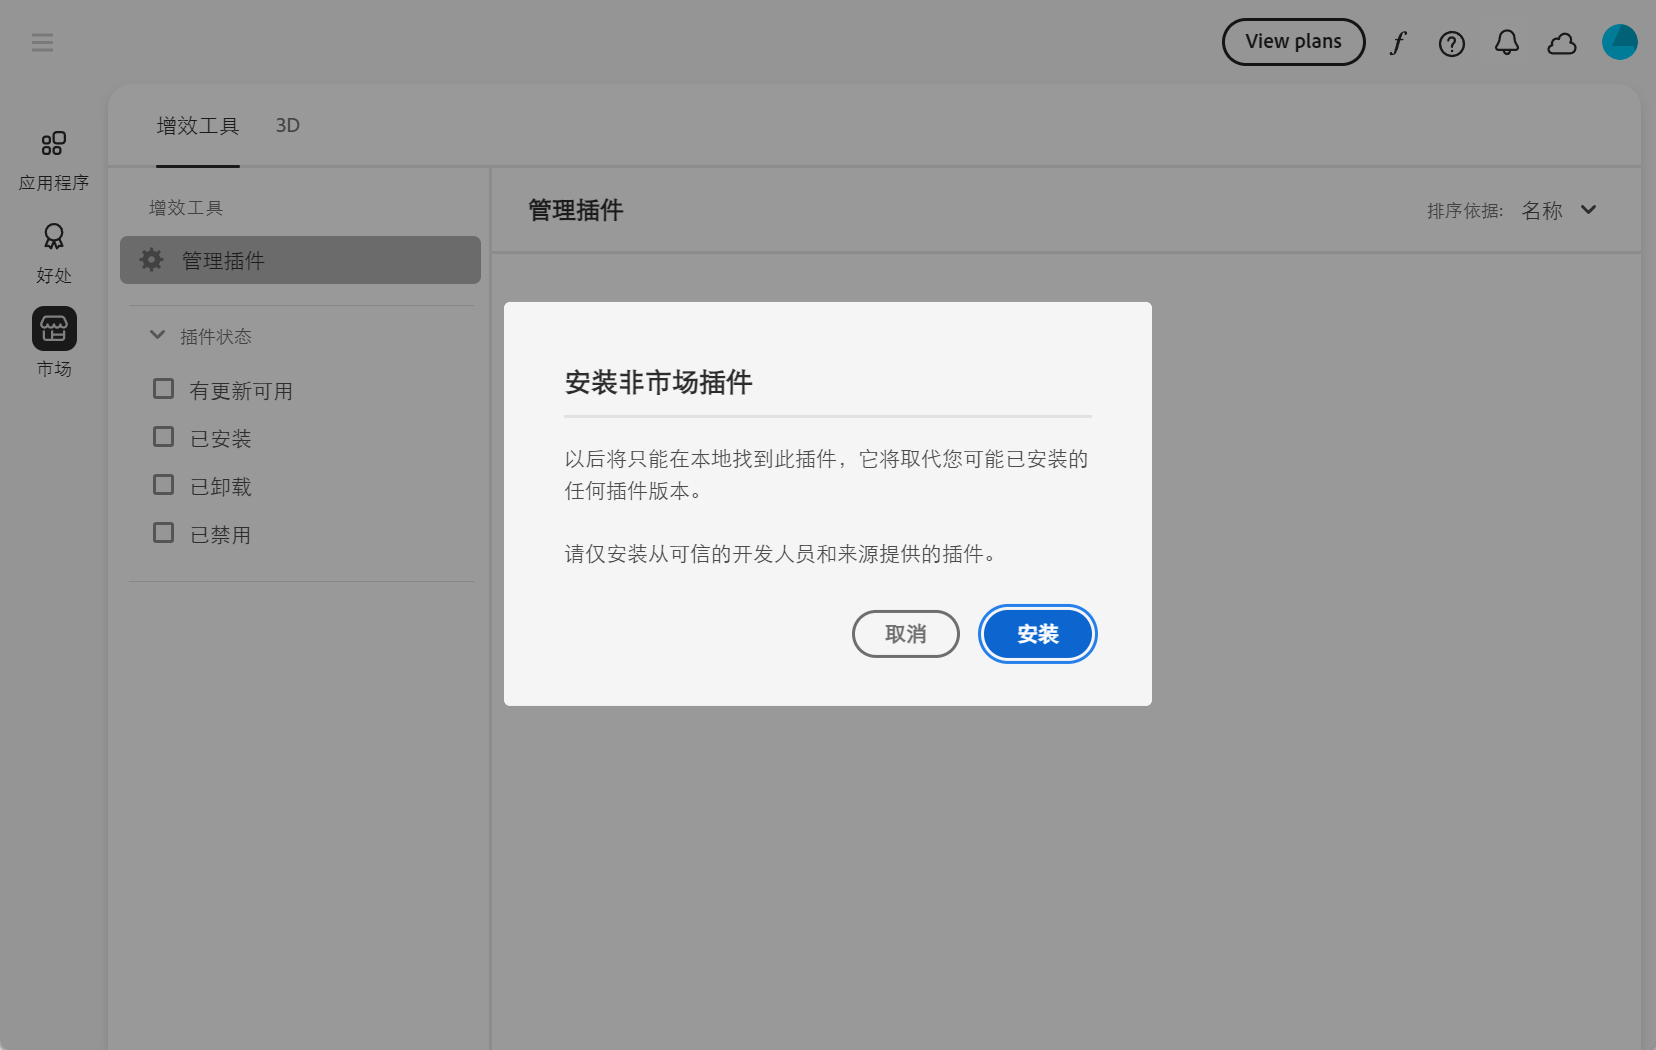
But as mentioned earlier, Adobe’s generative fill feature isn’t available in mainland China. What to do?
Don’t panic. Through an AI plugin, you can use AI image editing within Photoshop.
The plugin is named SD-PPP, open-source and free.
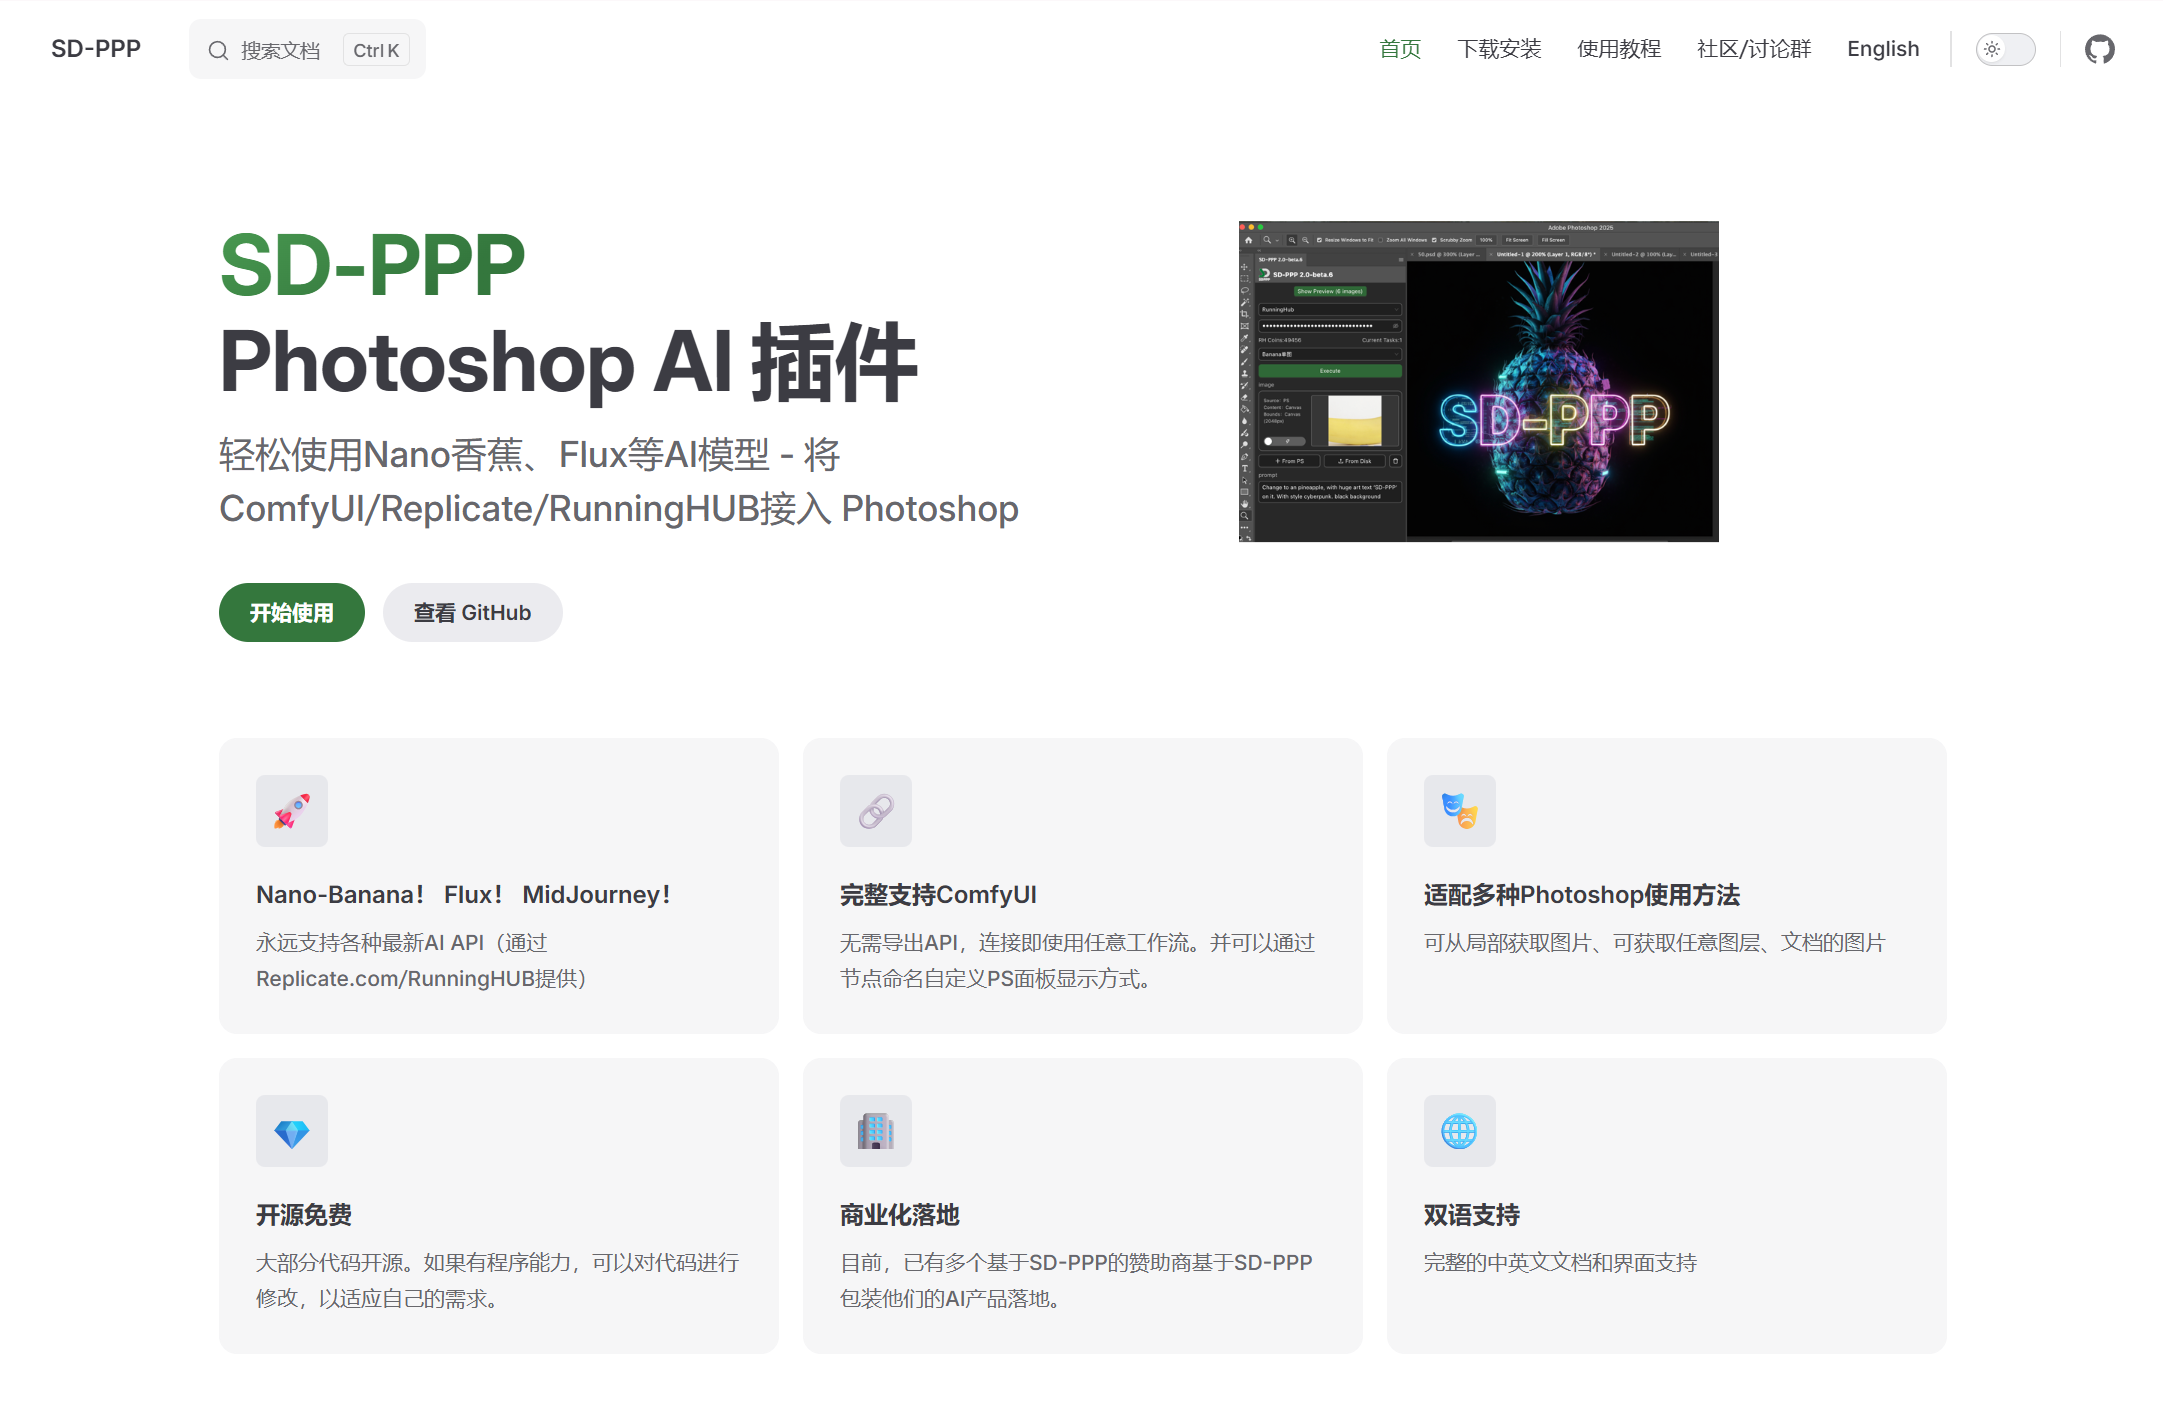
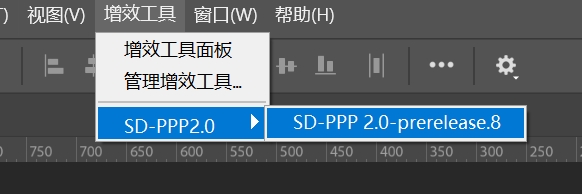
We directly go to the SD-PPP official website https://sdppp.zombee.tech/, click “Download & Install” in the top right corner, then download the ZIP archive and extract it to the plugins folder in the Photoshop installation directory. If you have Adobe Creative Cloud installed, it’s even more convenient; just download the CCX plugin and double-click to install.
After installation, you can find the plugin in the PS Plugins menu.
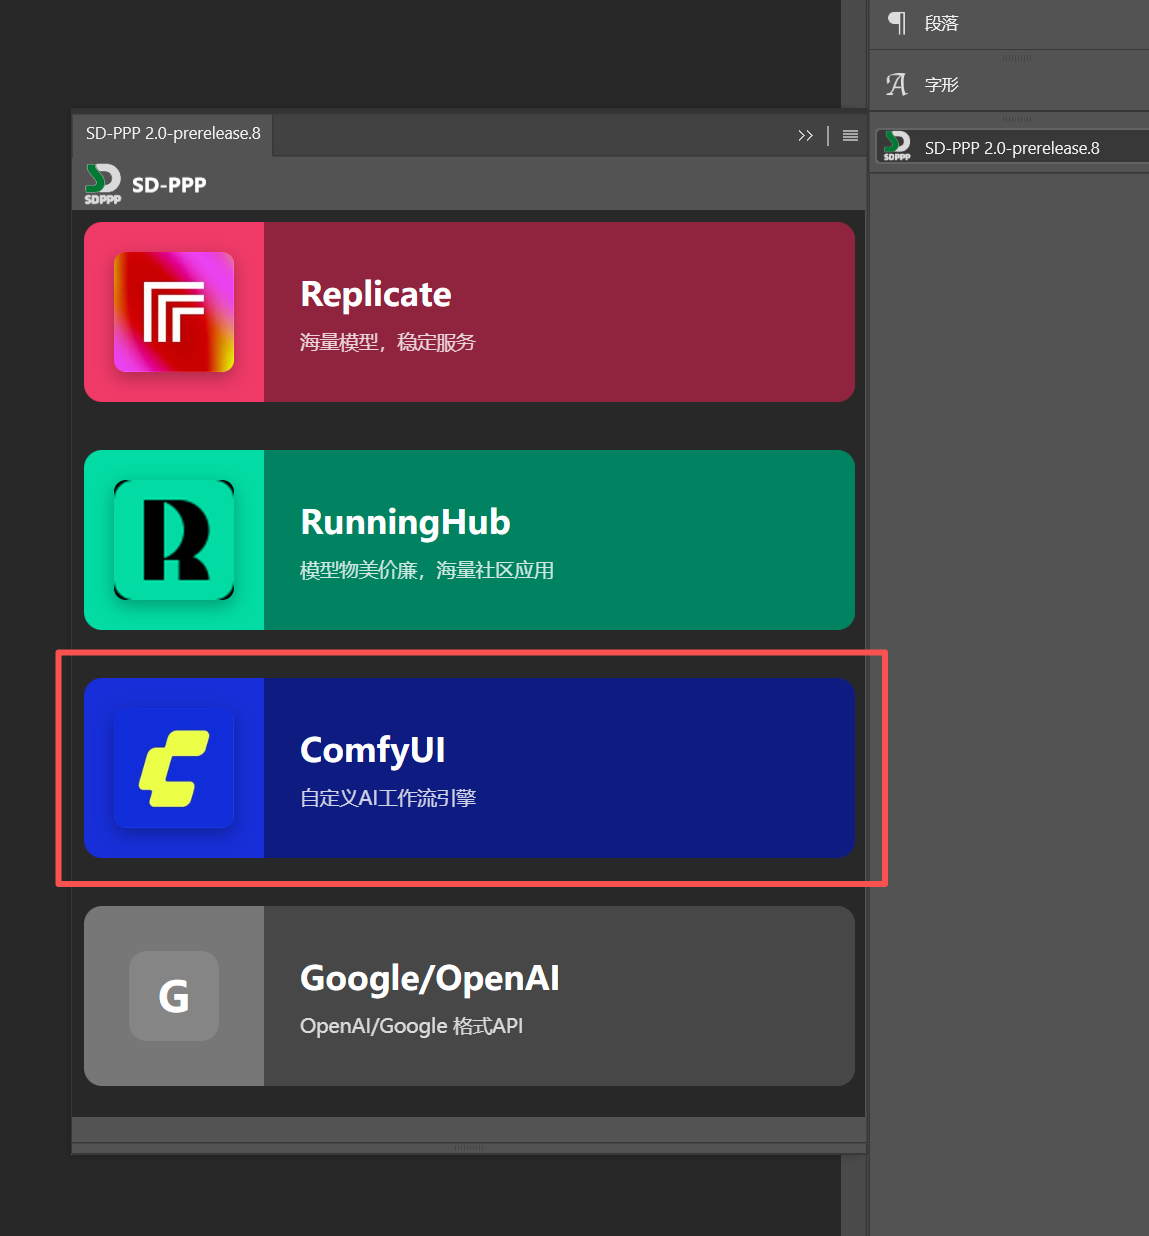
Currently, SD-PPP supports direct integration with Google/OpenAI format and Replicate APIs, and can also connect to ComfyUI (including local deployment and cloud computing rental platforms like Xiangong Cloud) or RunningHUB. Except for ComfyUI, all require API connection configuration, which is very simple; refer to the basic tutorials on the website.
Among the four, I recommend using ComfyUI or RunningHUB for higher customizability.
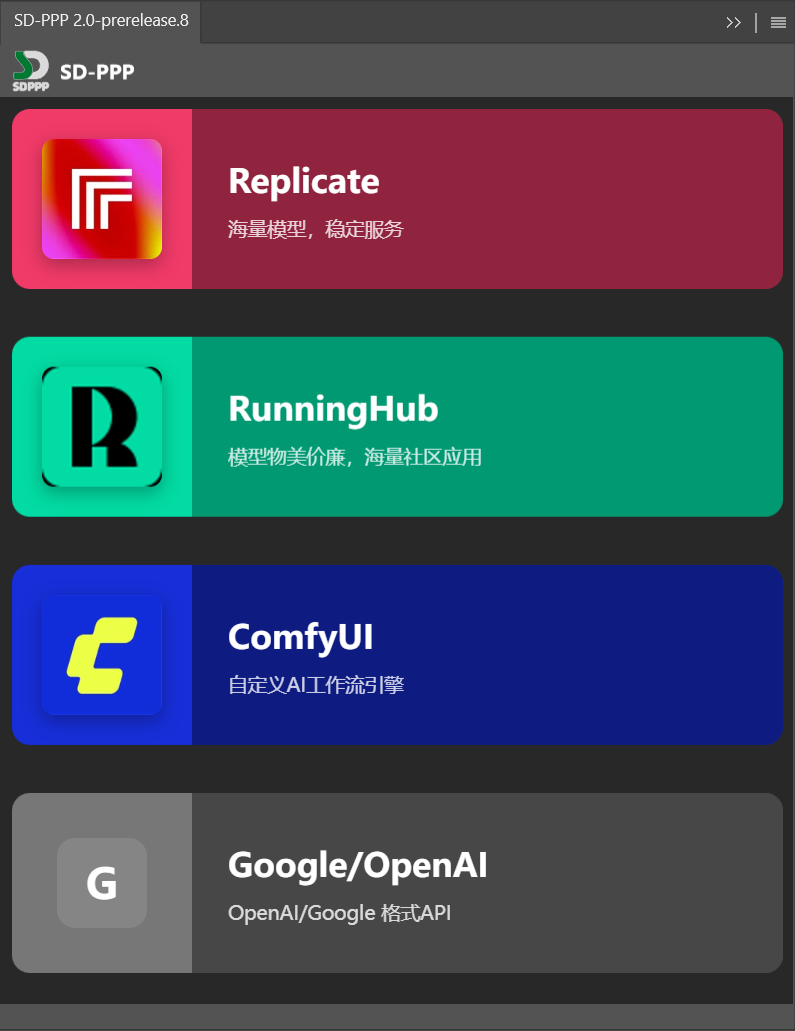
RunningHUB can be roughly understood as a highly customized and operated online version of ComfyUI by a third party. If you don’t have the conditions to deploy ComfyUI yourself, you can consider using it; there will be some minor limitations, but it’s more convenient. Their usage methods and logic are basically the same, so I’ll demonstrate directly with local ComfyUI.
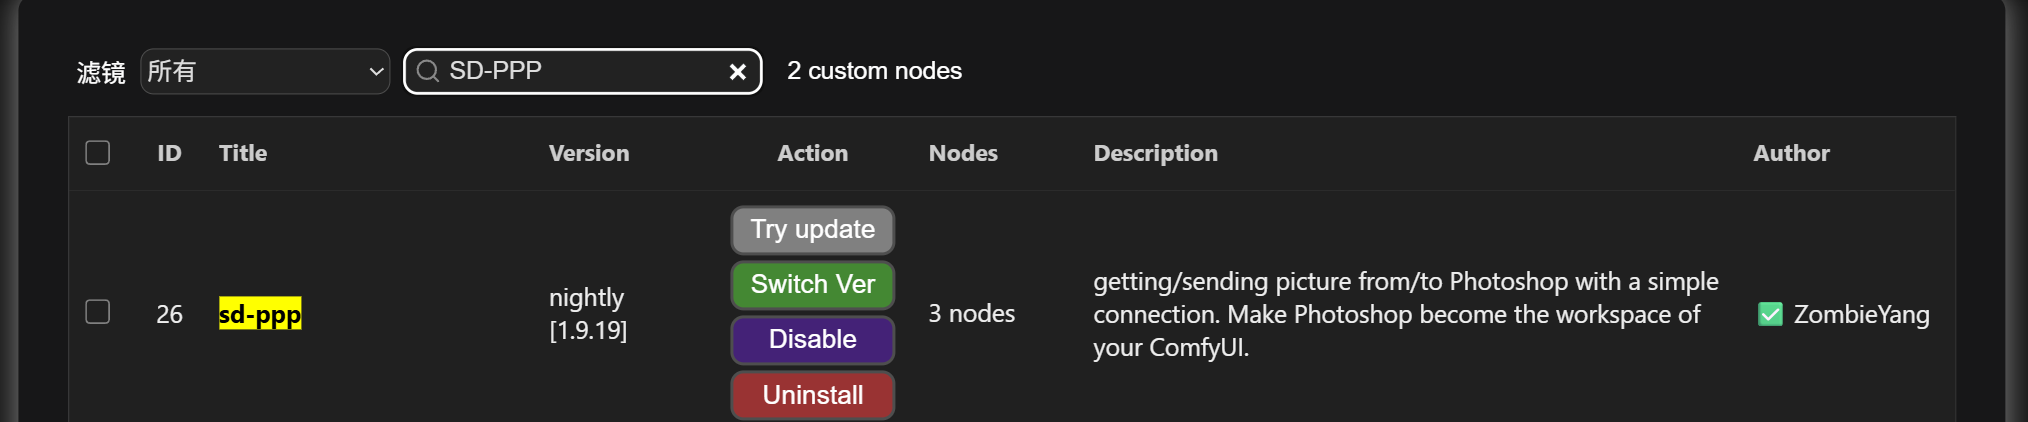
Local ComfyUI requires manually installing the extension, which is very simple. Open the node manager, search for SD-PPP, and click install.
After installation and restarting ComfyUI, a new SD-PPP tab appears in the left menu, indicating successful installation.
You can use any ComfyUI image editing workflow you commonly use, whether local, API-based, Flux.1 Kontext, Jimeng, or Nano Banana Pro—they all work.
Before the release of Z-Image-Edit, I think my favorite image editing model was still Qwen-Image-Edit, so I’ll use that to demonstrate from scratch.
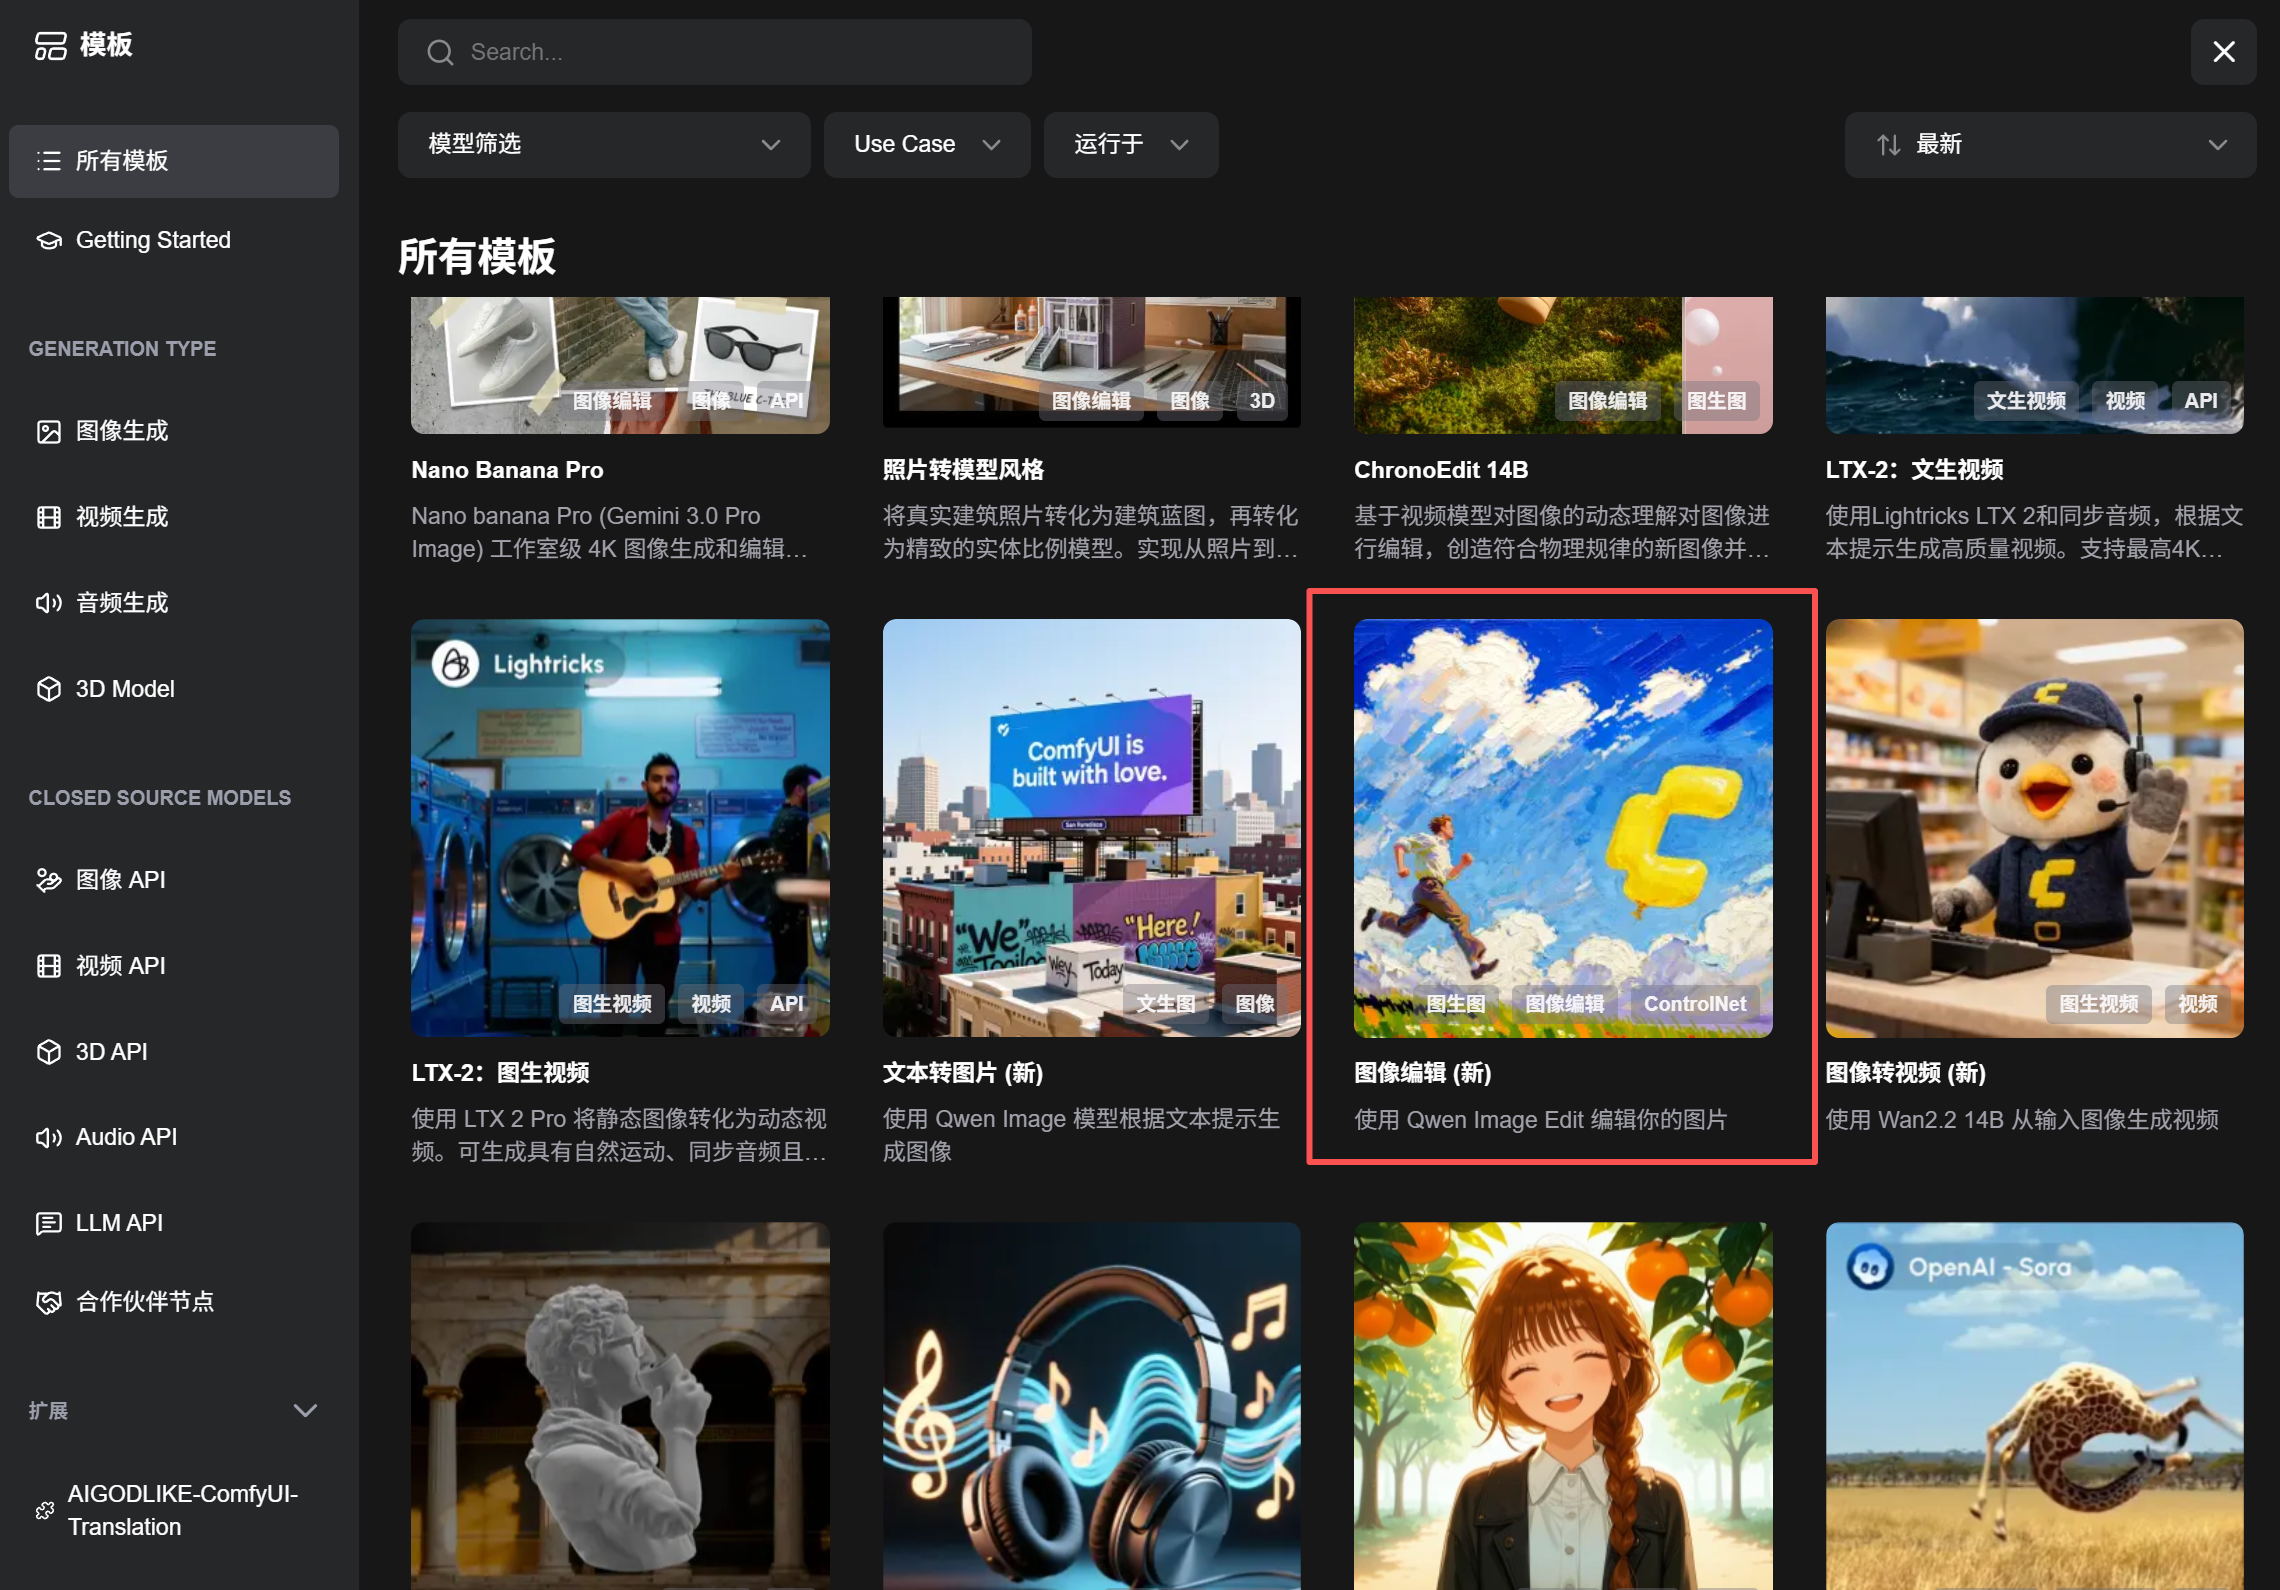
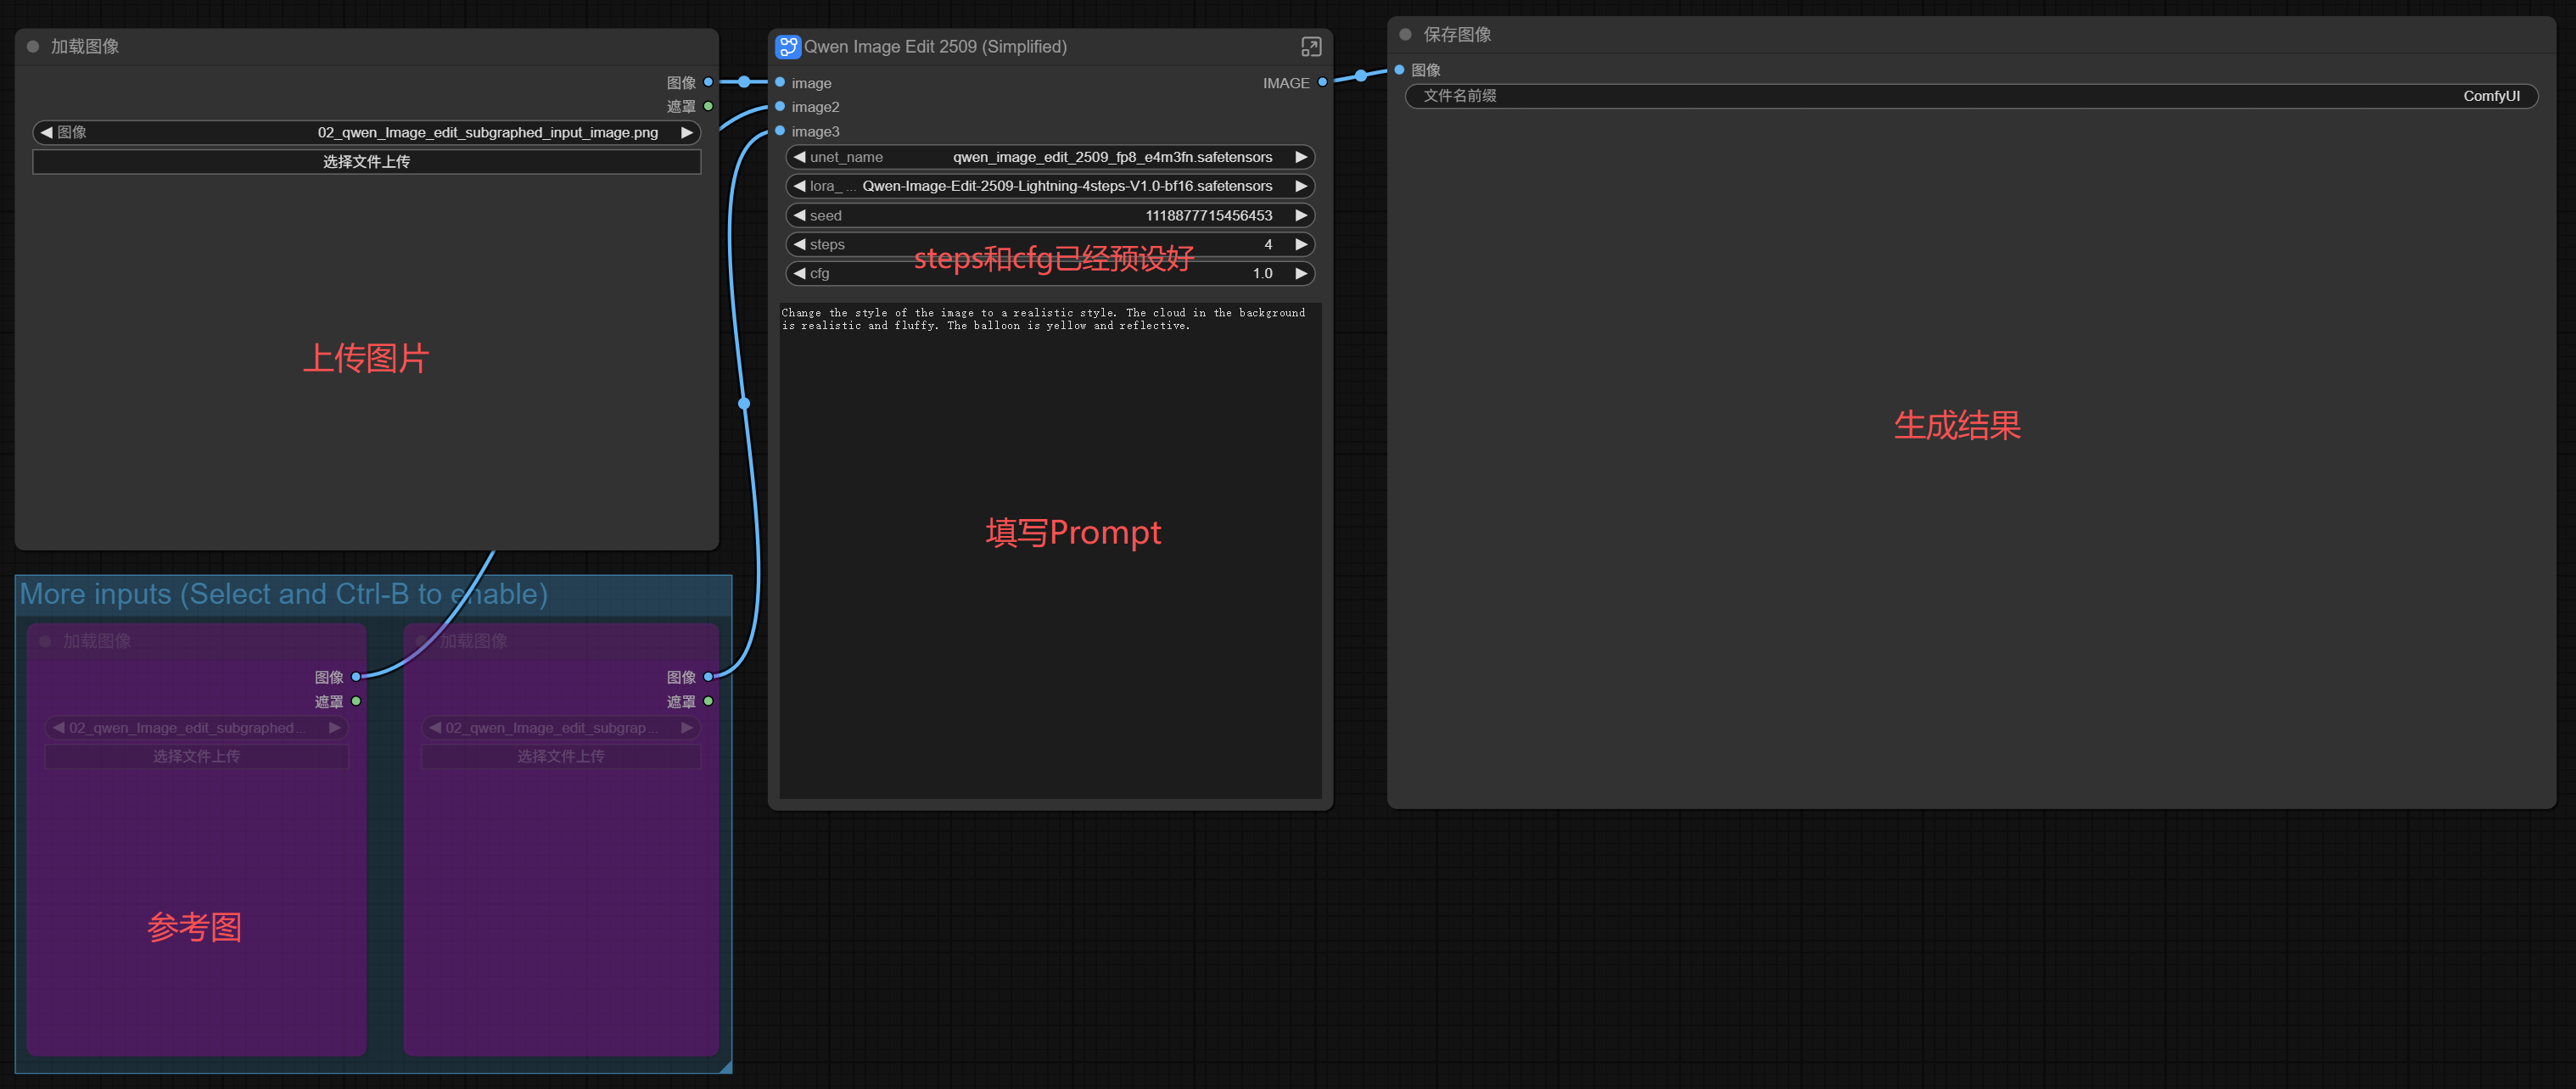
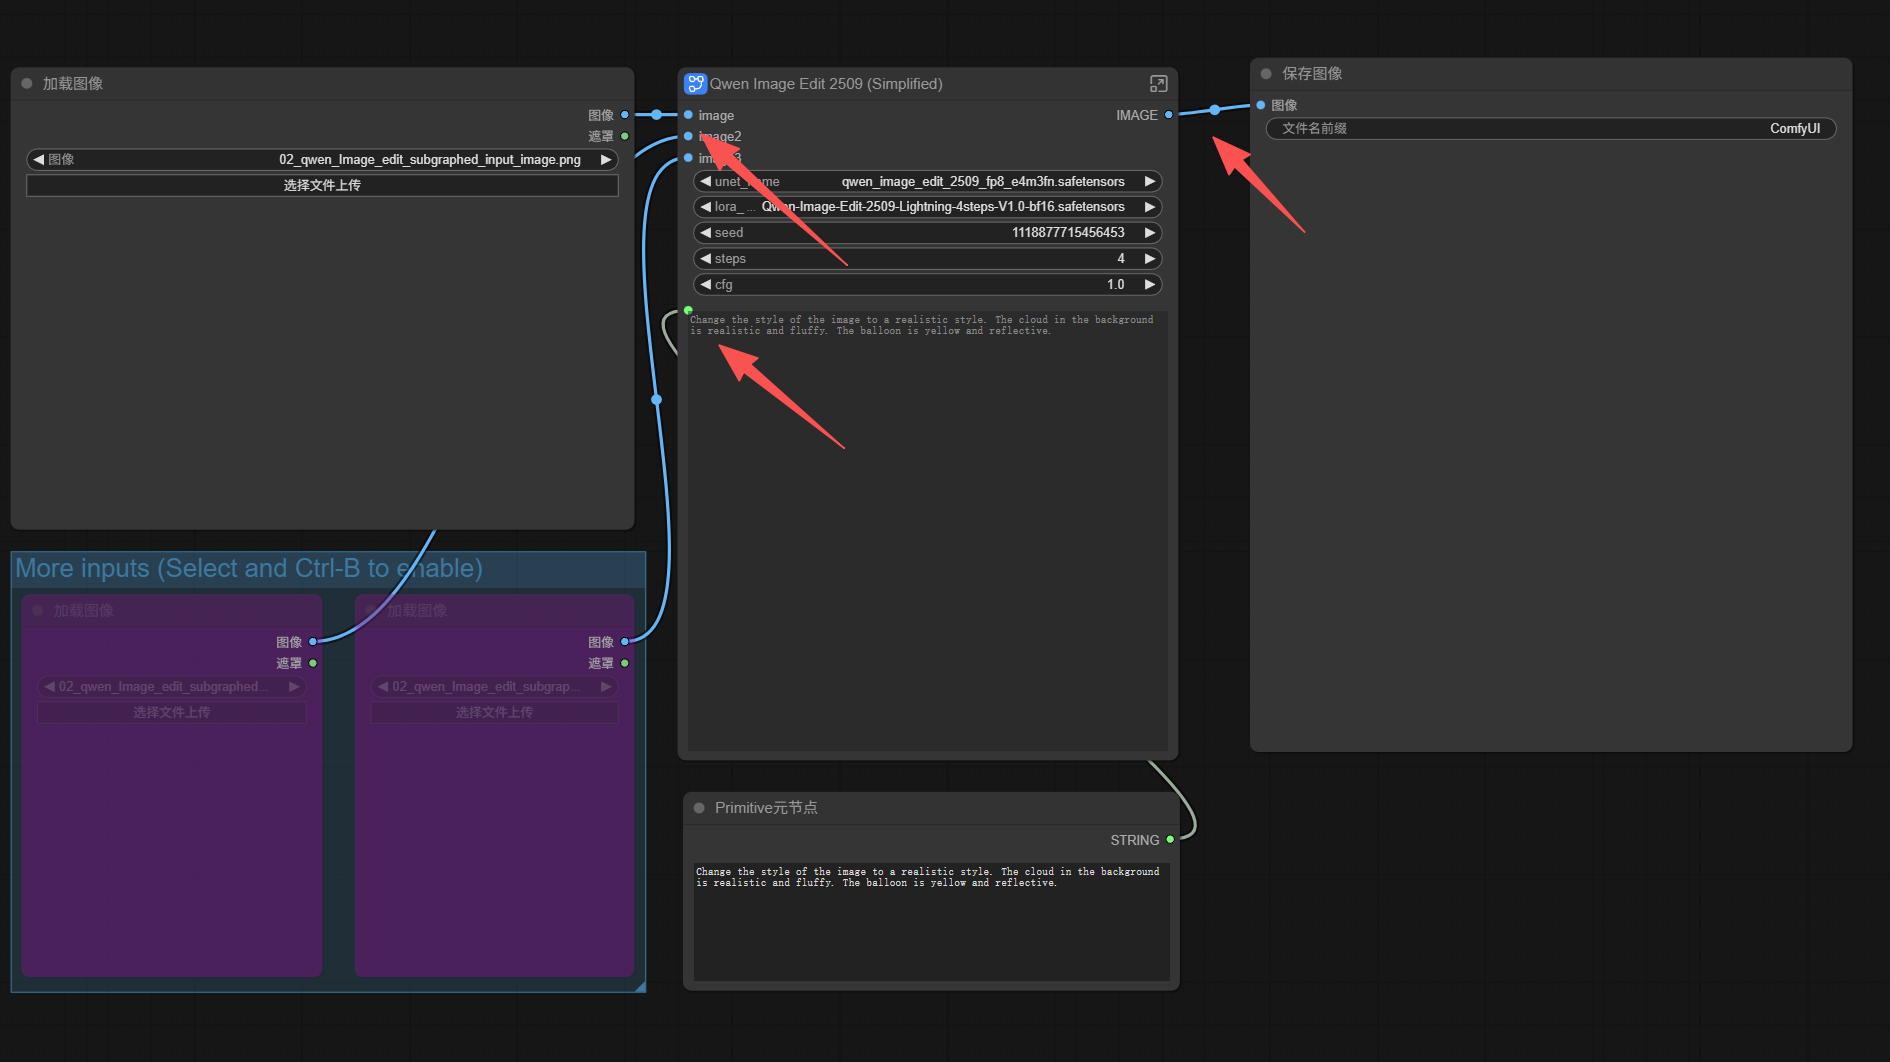
First, create a basic workflow. We can directly use ComfyUI’s built-in template. Find the “Image Editing (New)” below, open it, and follow the prompts to download the model and 4-step LoRA.
It’s a very basic workflow, not much to say. The functional areas are as follows:
If run directly in ComfyUI, you just upload the image, write the prompt, click the run button, and you’re done.
But to use it in PS, we need to make a small adjustment.
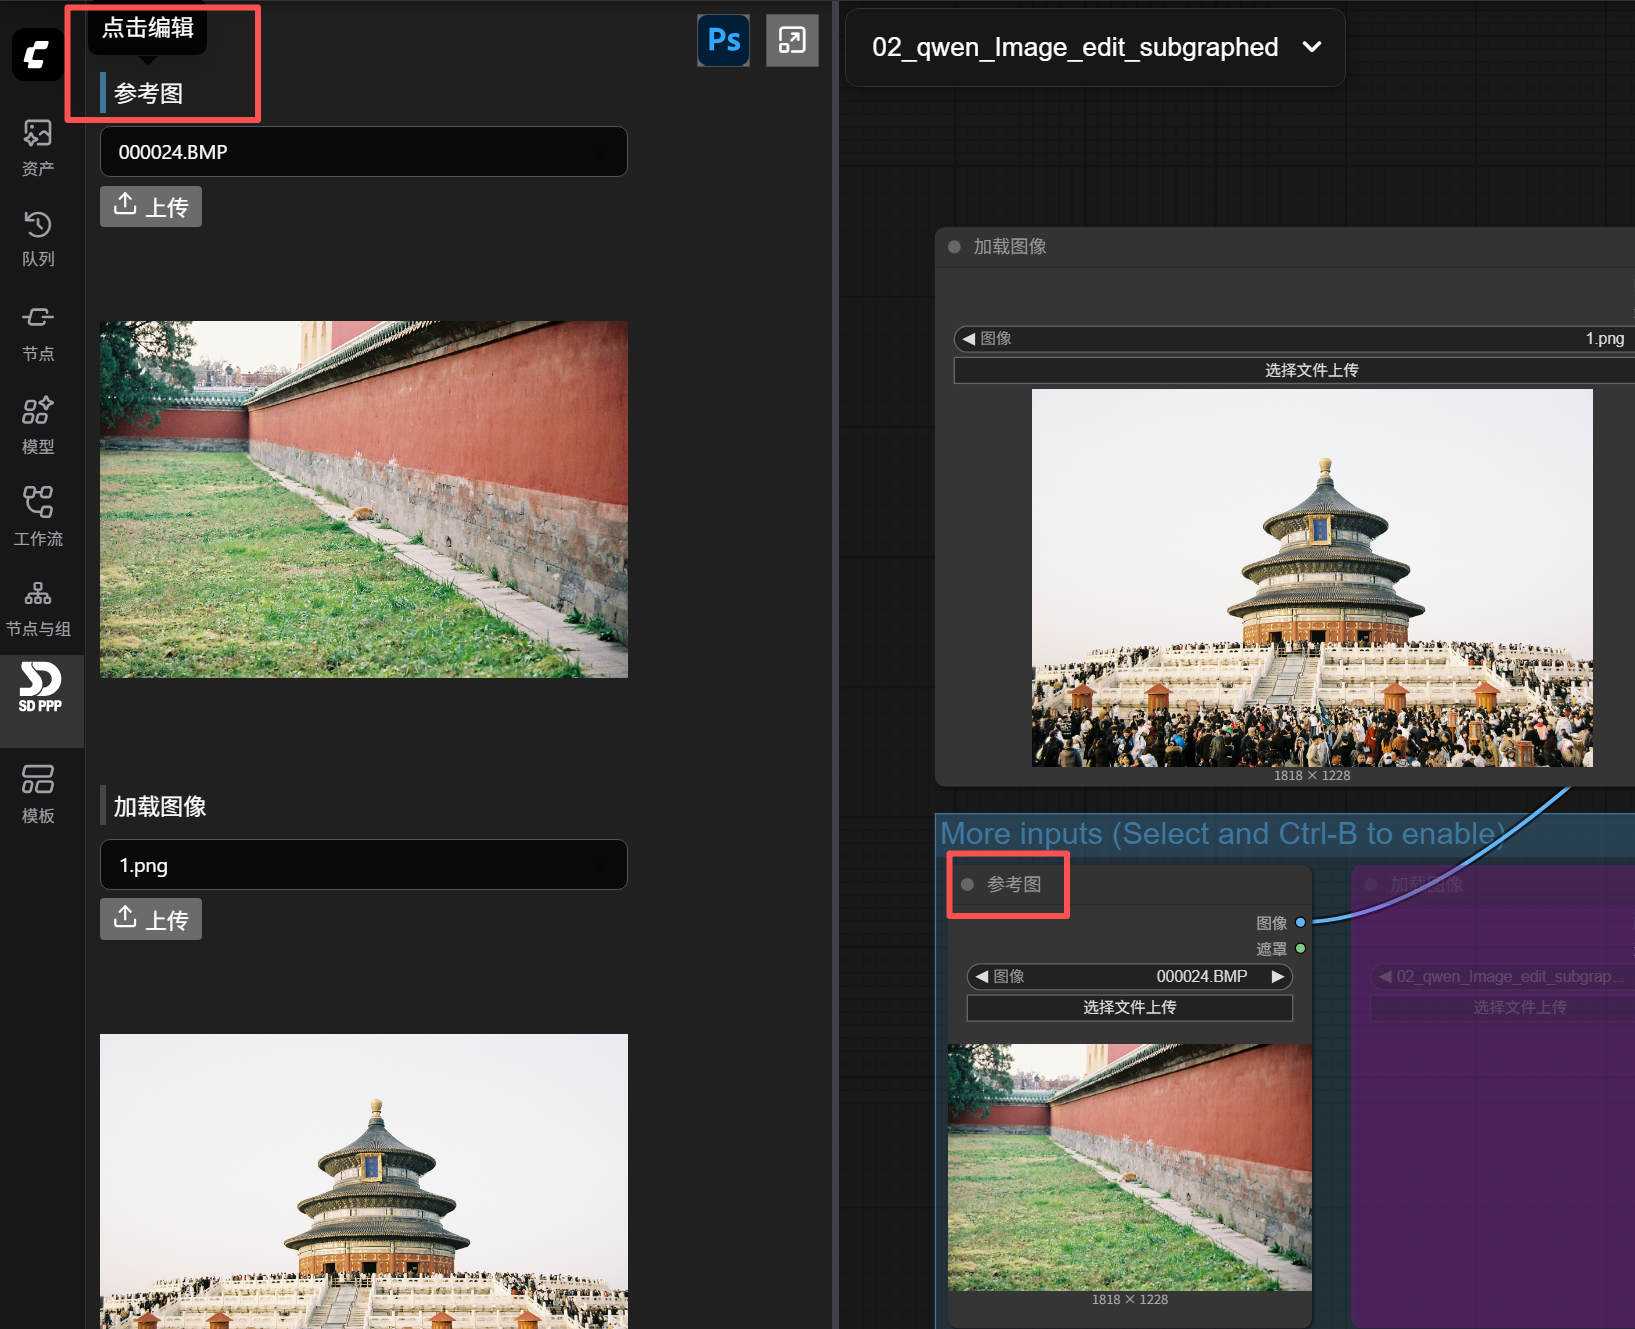
Click open the SD-PPP extension on the left, and you’ll find a “Load Image” in the panel.
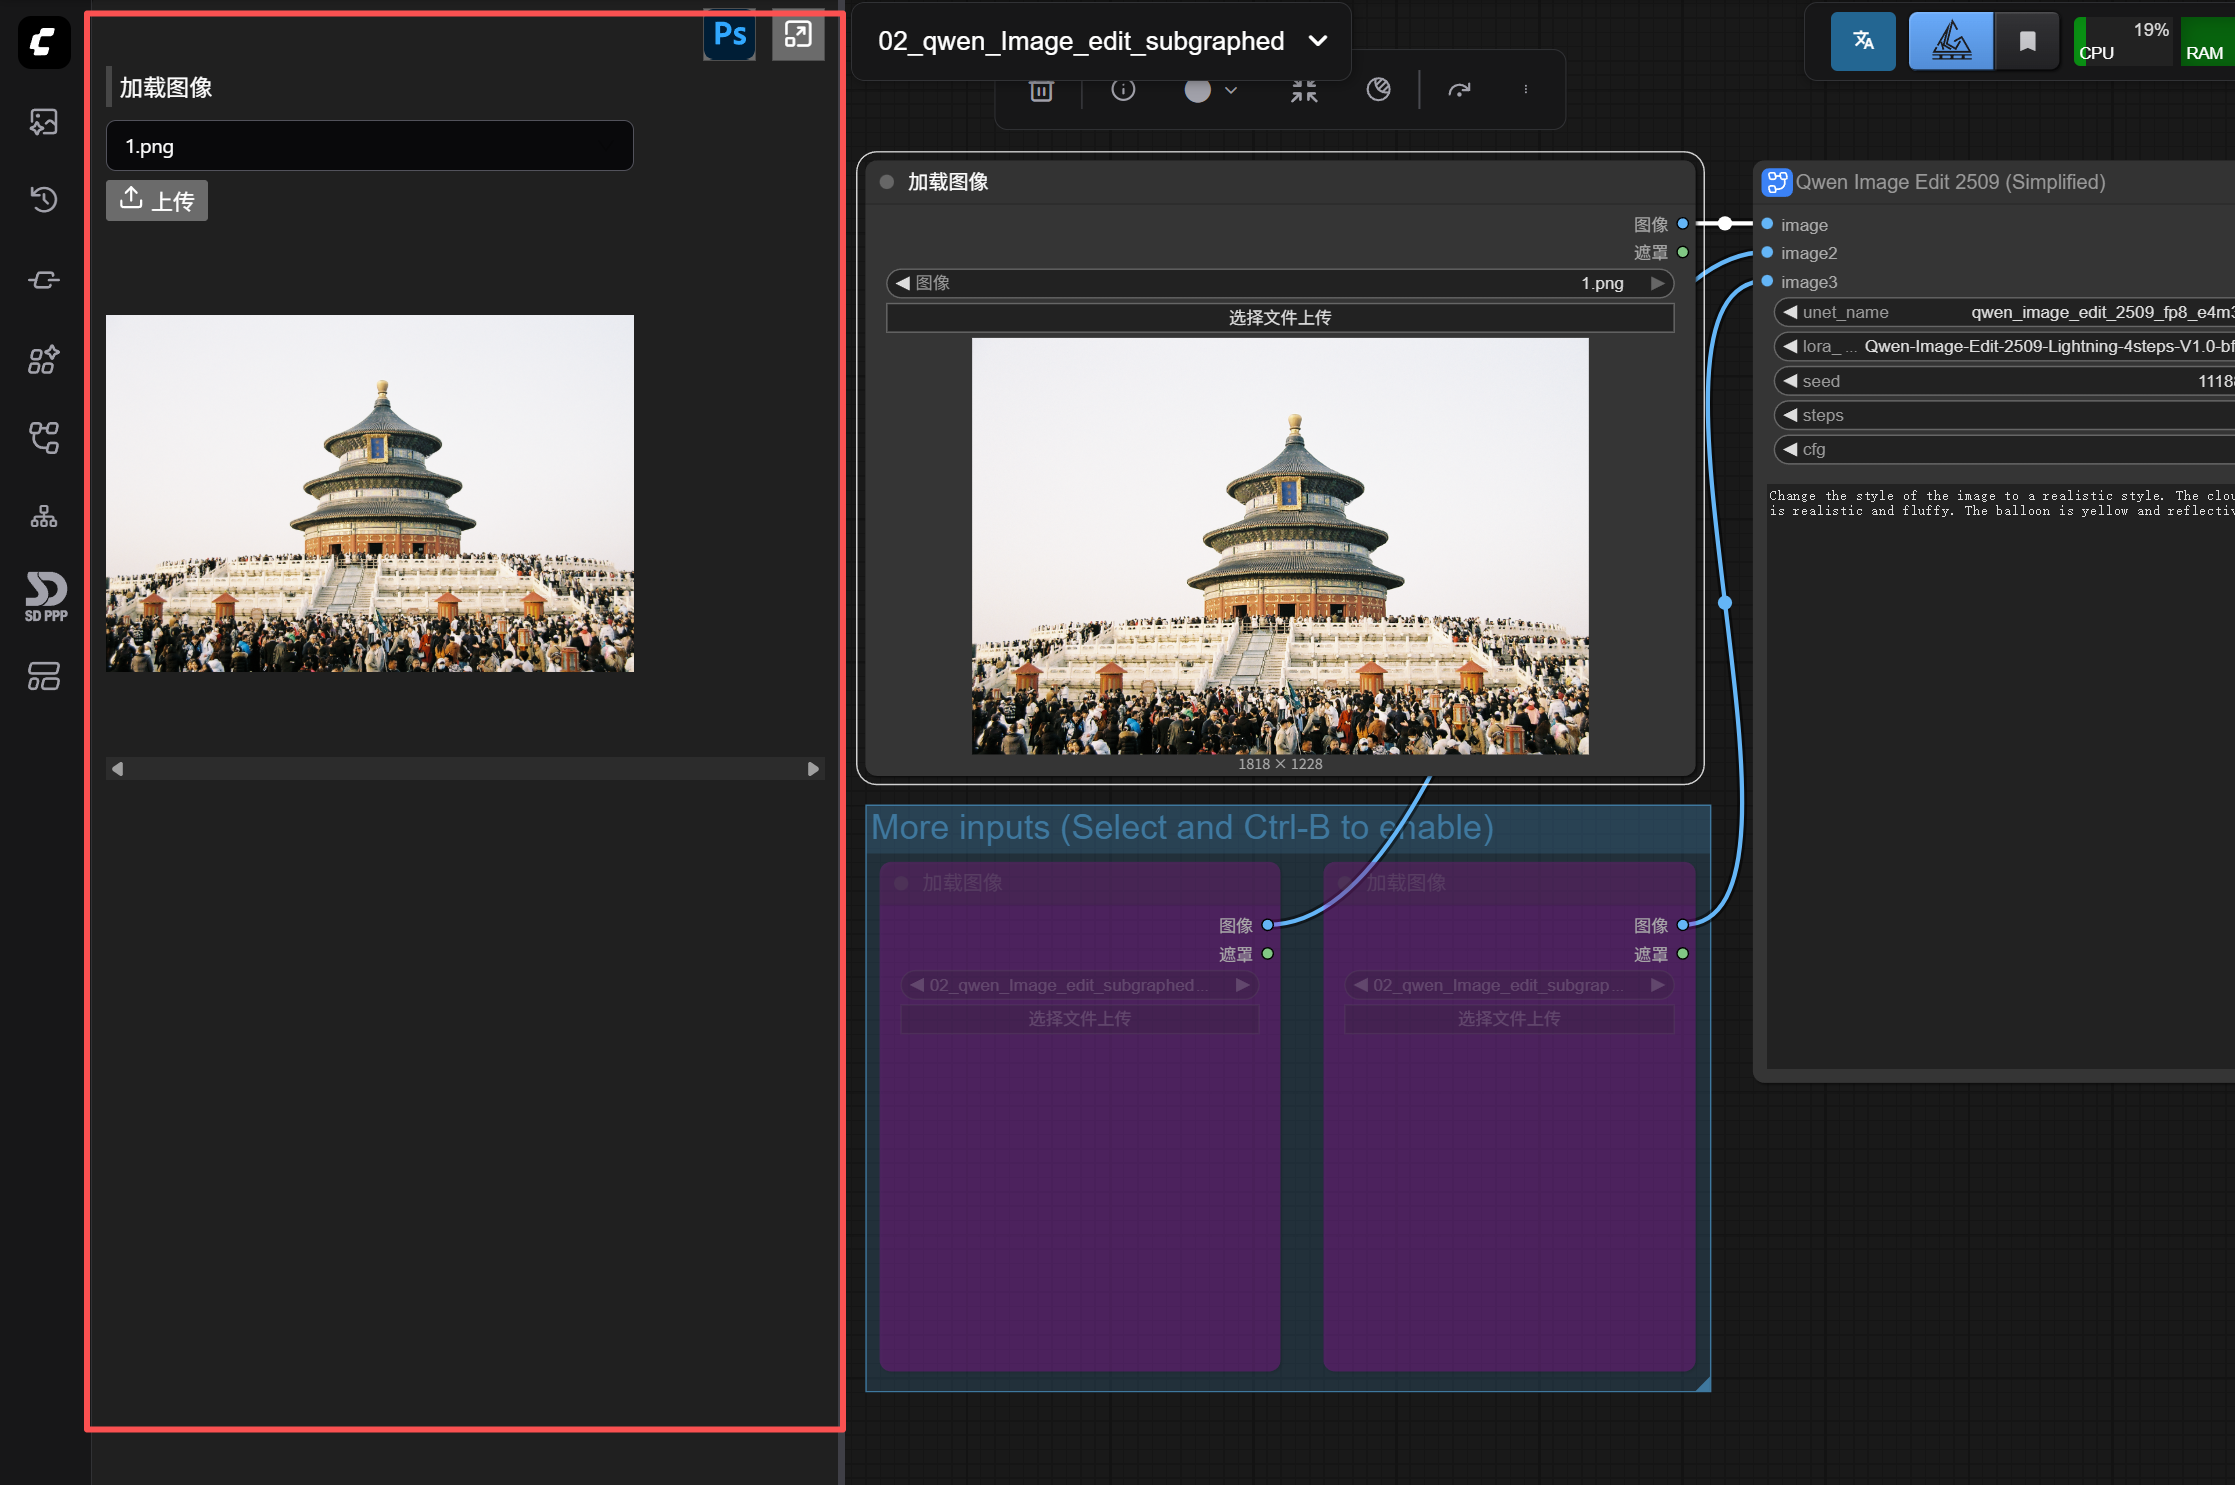
Actually, the panel for this extension in ComfyUI is exactly the panel in the Photoshop plugin. You can think of it this way: what’s circled in red in the panel above is what you’ll have in your PS plugin interface.
The “Load Image” node is recognized by default by SD-PPP and appears in the panel.
For example, if I now enable another “Load Image” node for a reference area, this node also appears in the left panel.

For easier distinction, you can click to modify the node name in the panel. You’ll see that the node name in the workflow also changes synchronously (some versions of ComfyUI have a bug where the node name in the workflow resets after refreshing the page, but it doesn’t matter; the one modified in the panel won’t change).
As mentioned earlier, this left panel configured in ComfyUI is essentially the operating panel for our PS plugin. So, think about it, what’s missing now?
Obviously, we need a place to input the prompt.
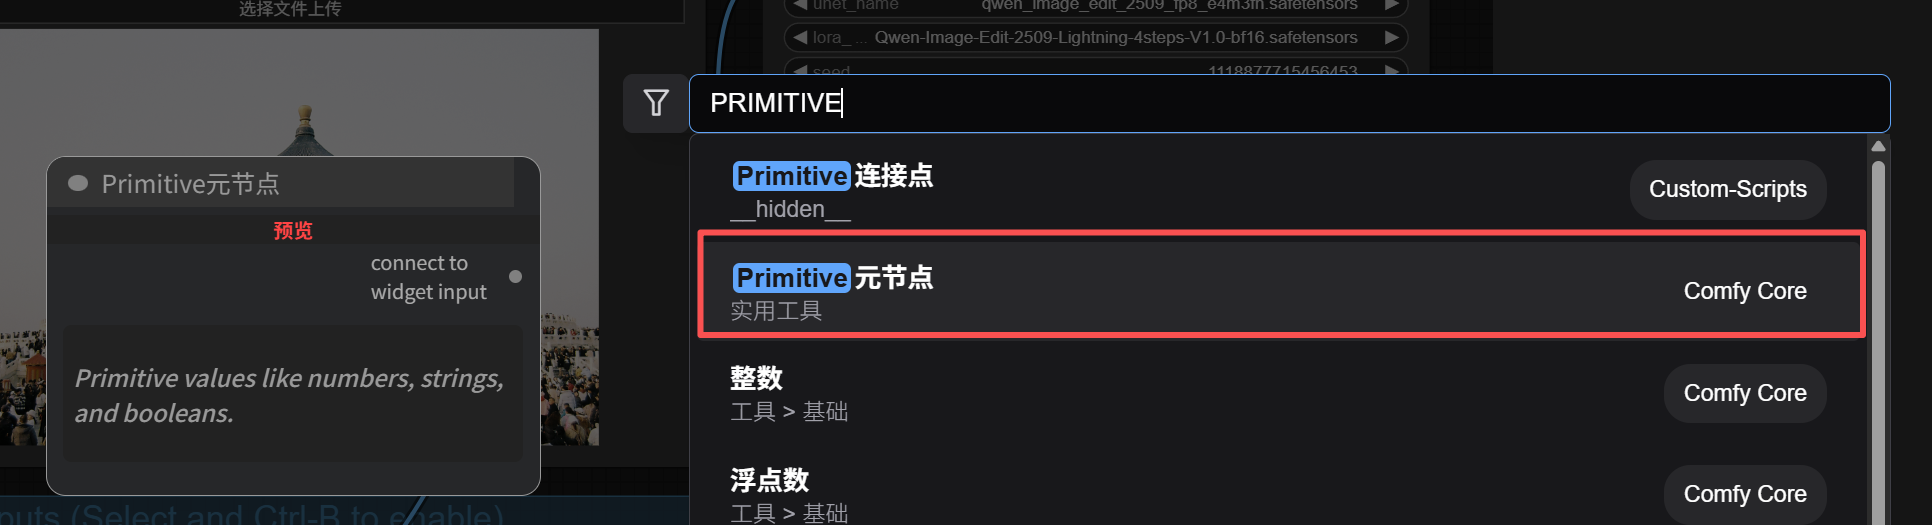
Double-click on the blank area to add a new node—”Primitive Meta Node”. This is a basic ComfyUI node and doesn’t require separate installation.
After adding the Primitive Meta Node, connect it to the Qwen Image Edit node’s Prompt input box (the connection point is in the top left corner of the text box). You’ll see a Prompt text input box appear on the Primitive Meta Node. Here you can edit the prompt, which automatically syncs to the Qwen Image Edit node’s Prompt input box.
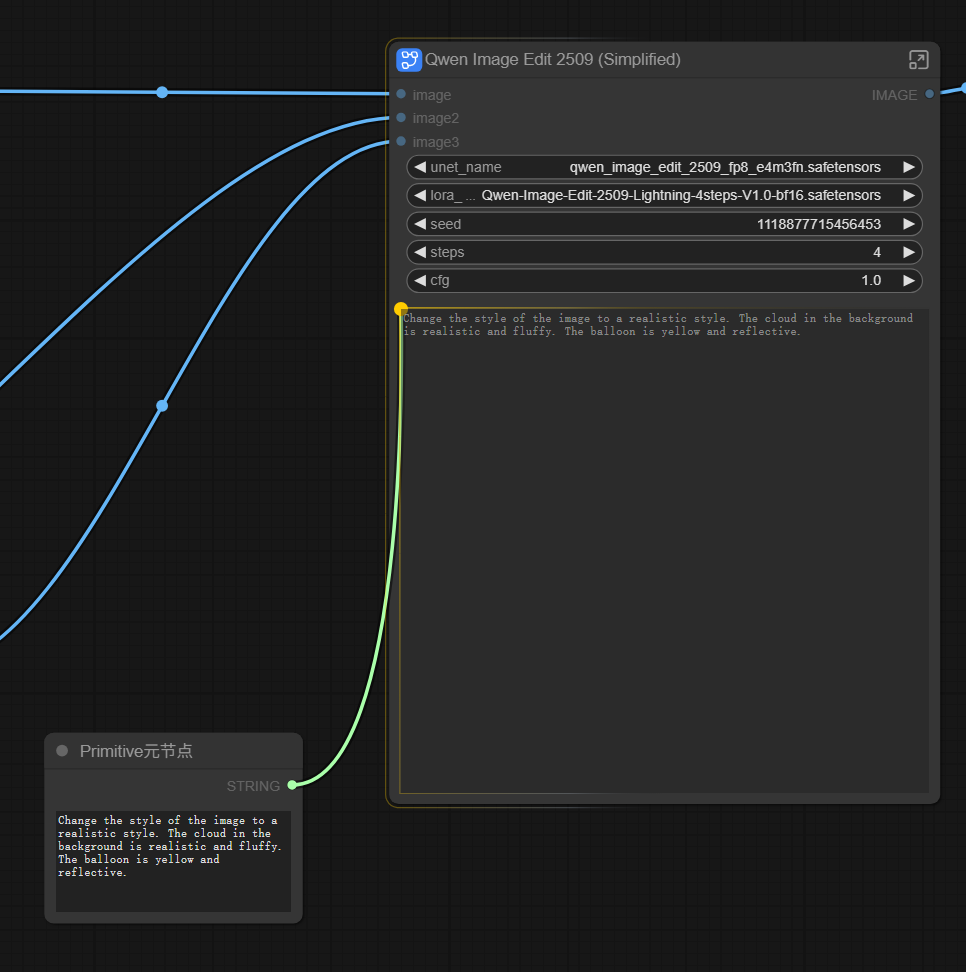
Simultaneously, a Prompt input box also appears on the SD-PPP panel on the left.
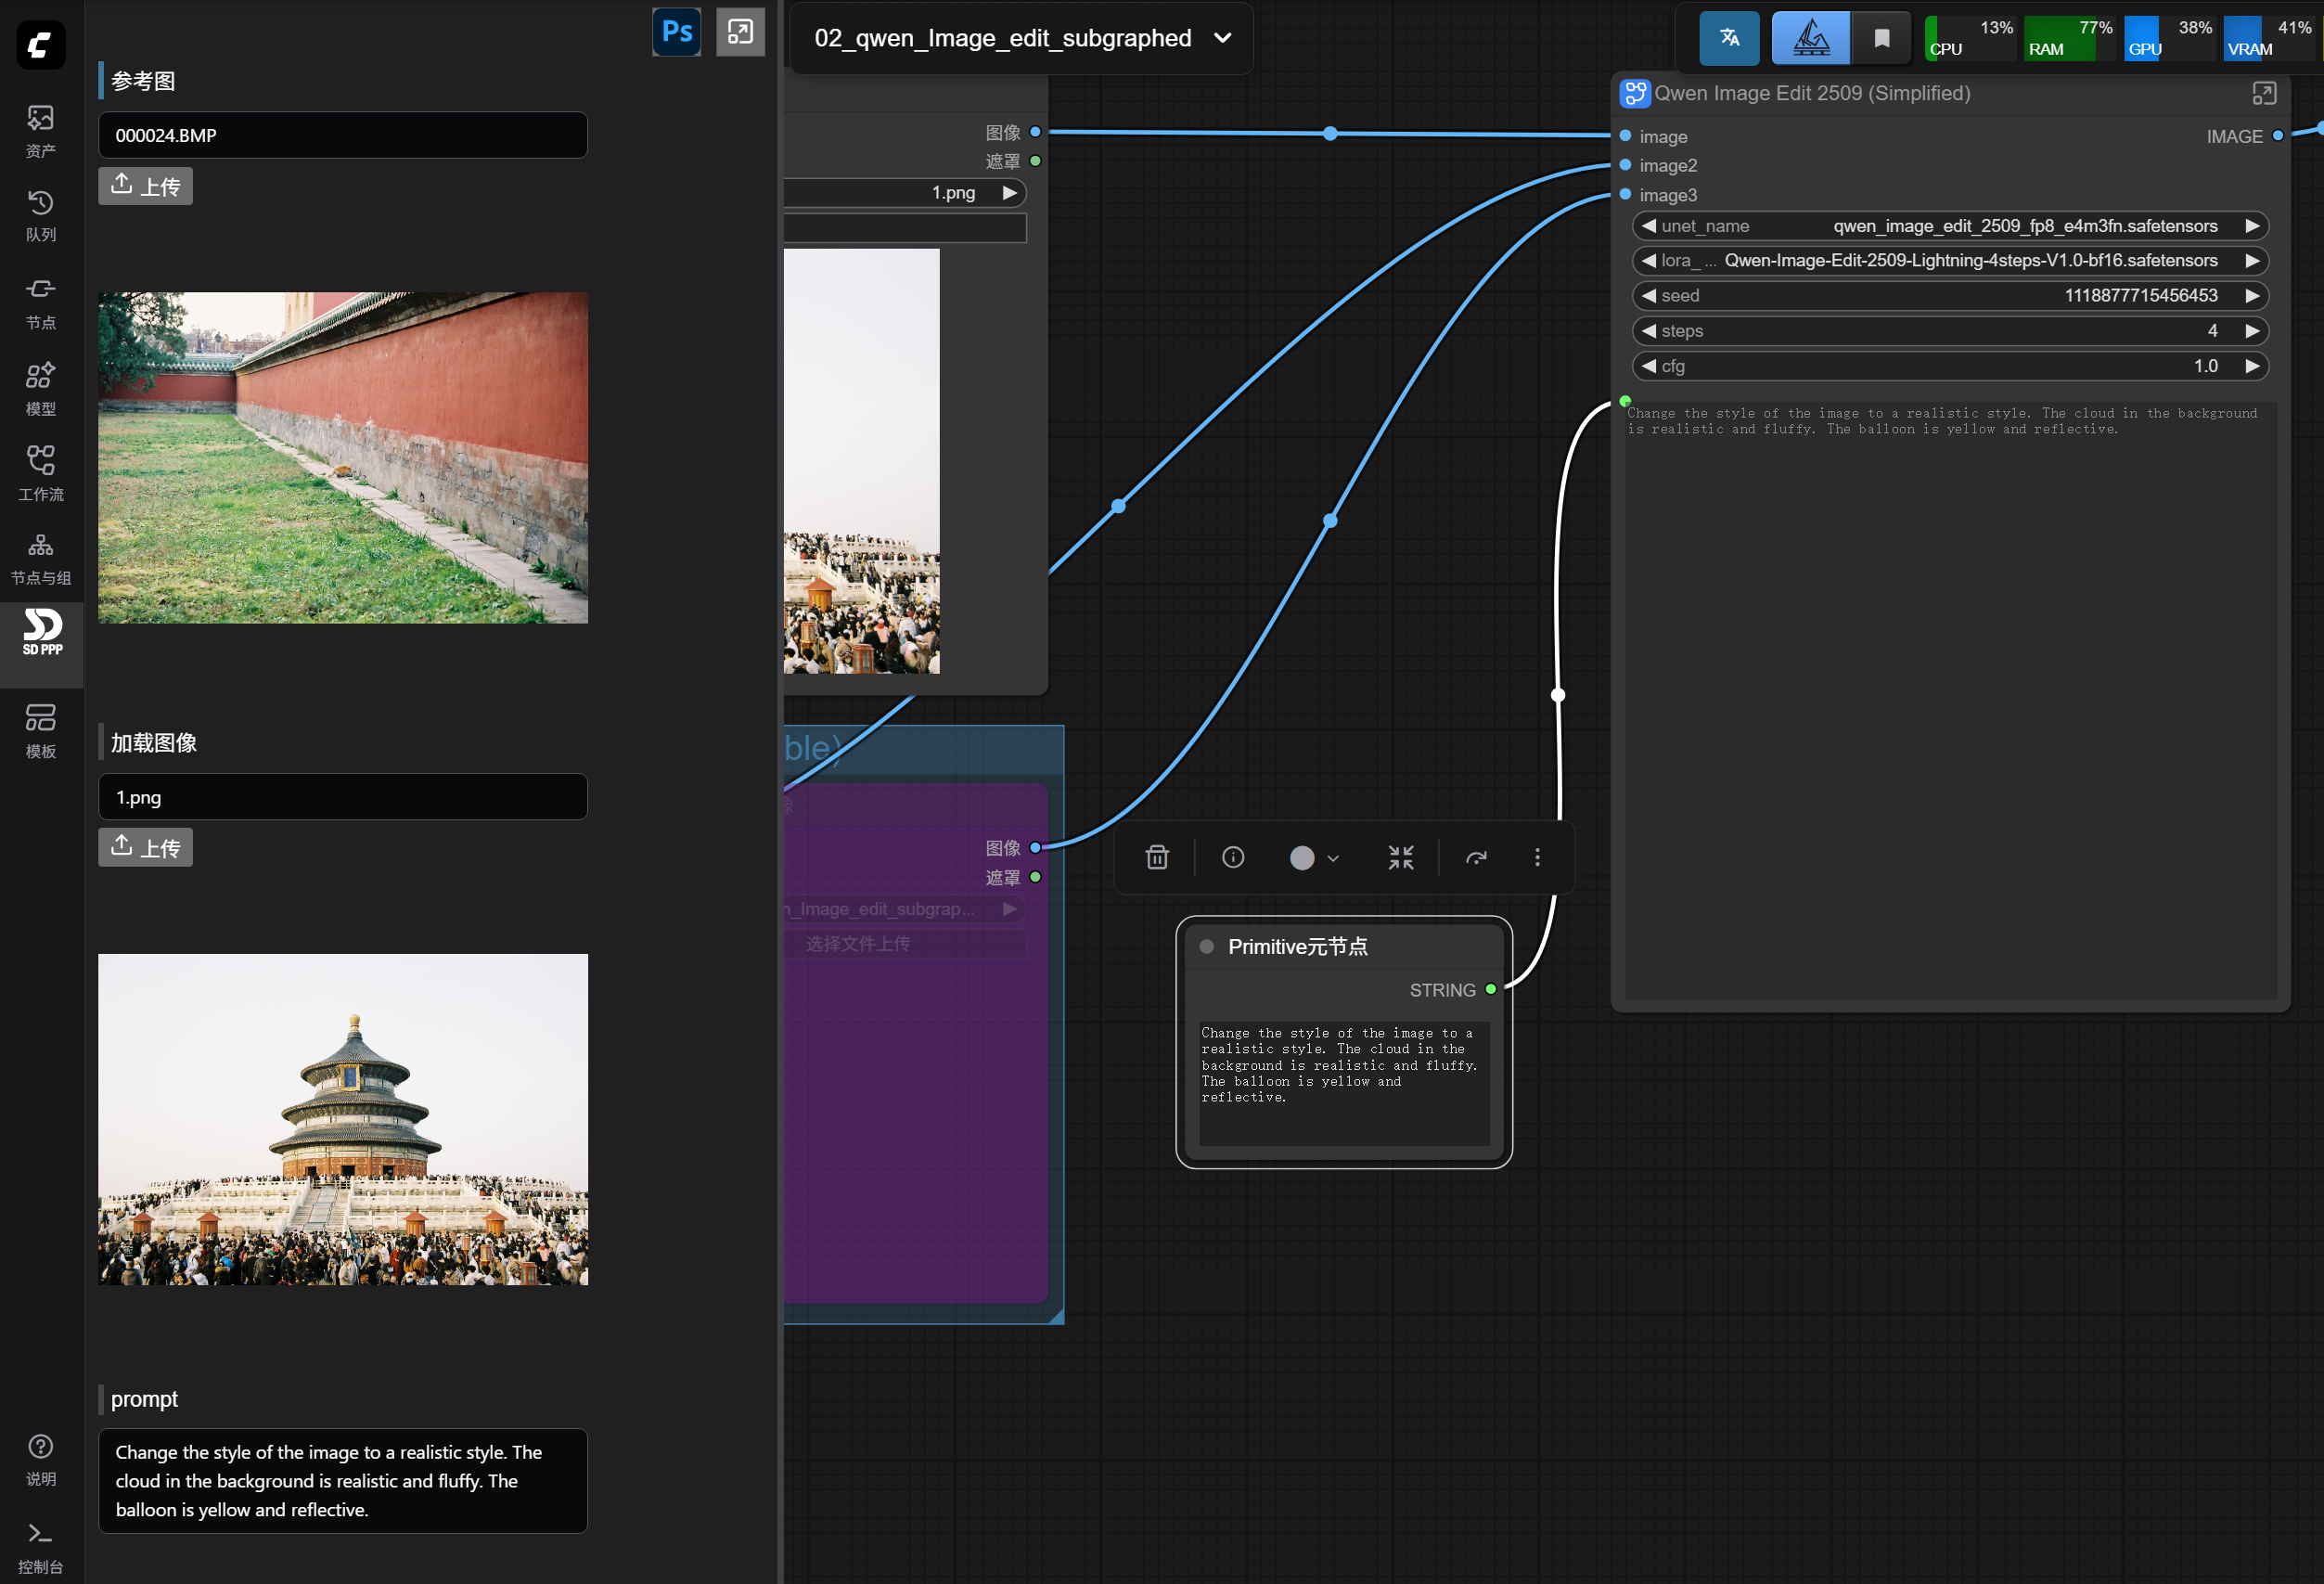
Now the several input ports on the panel can already implement the functions of this simple workflow.
We save the workflow, naming it “00-qwen-demo-workflow”.
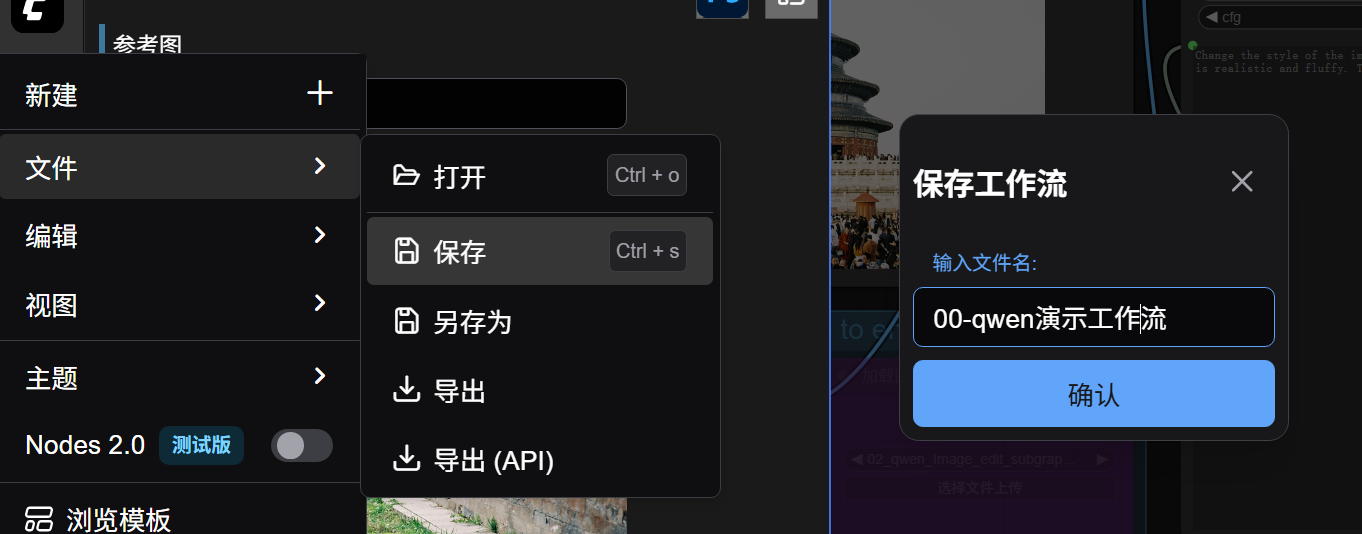
Note: You must save here.
Only workflows saved to the workflow folder can be loaded in Photoshop.
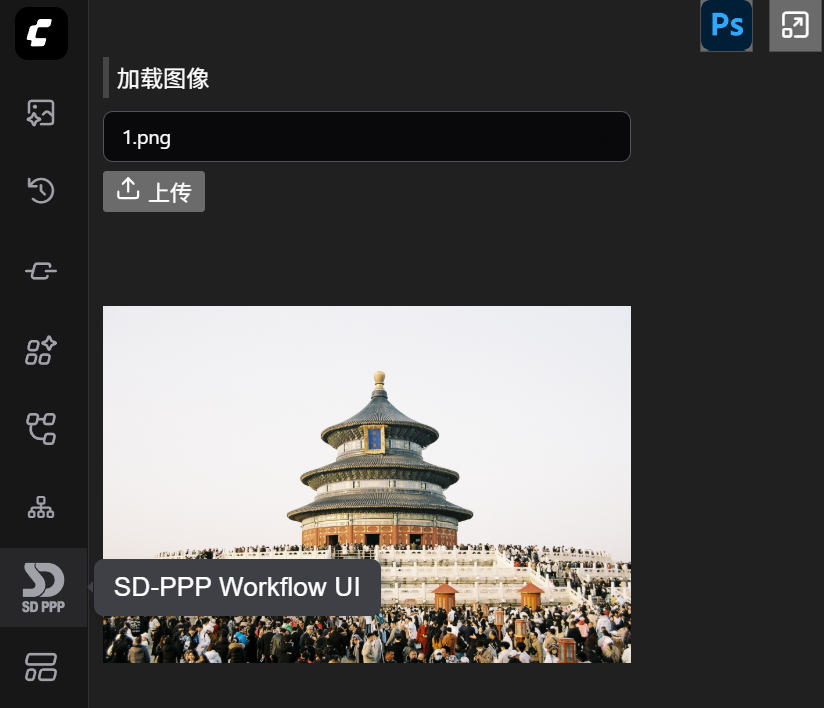
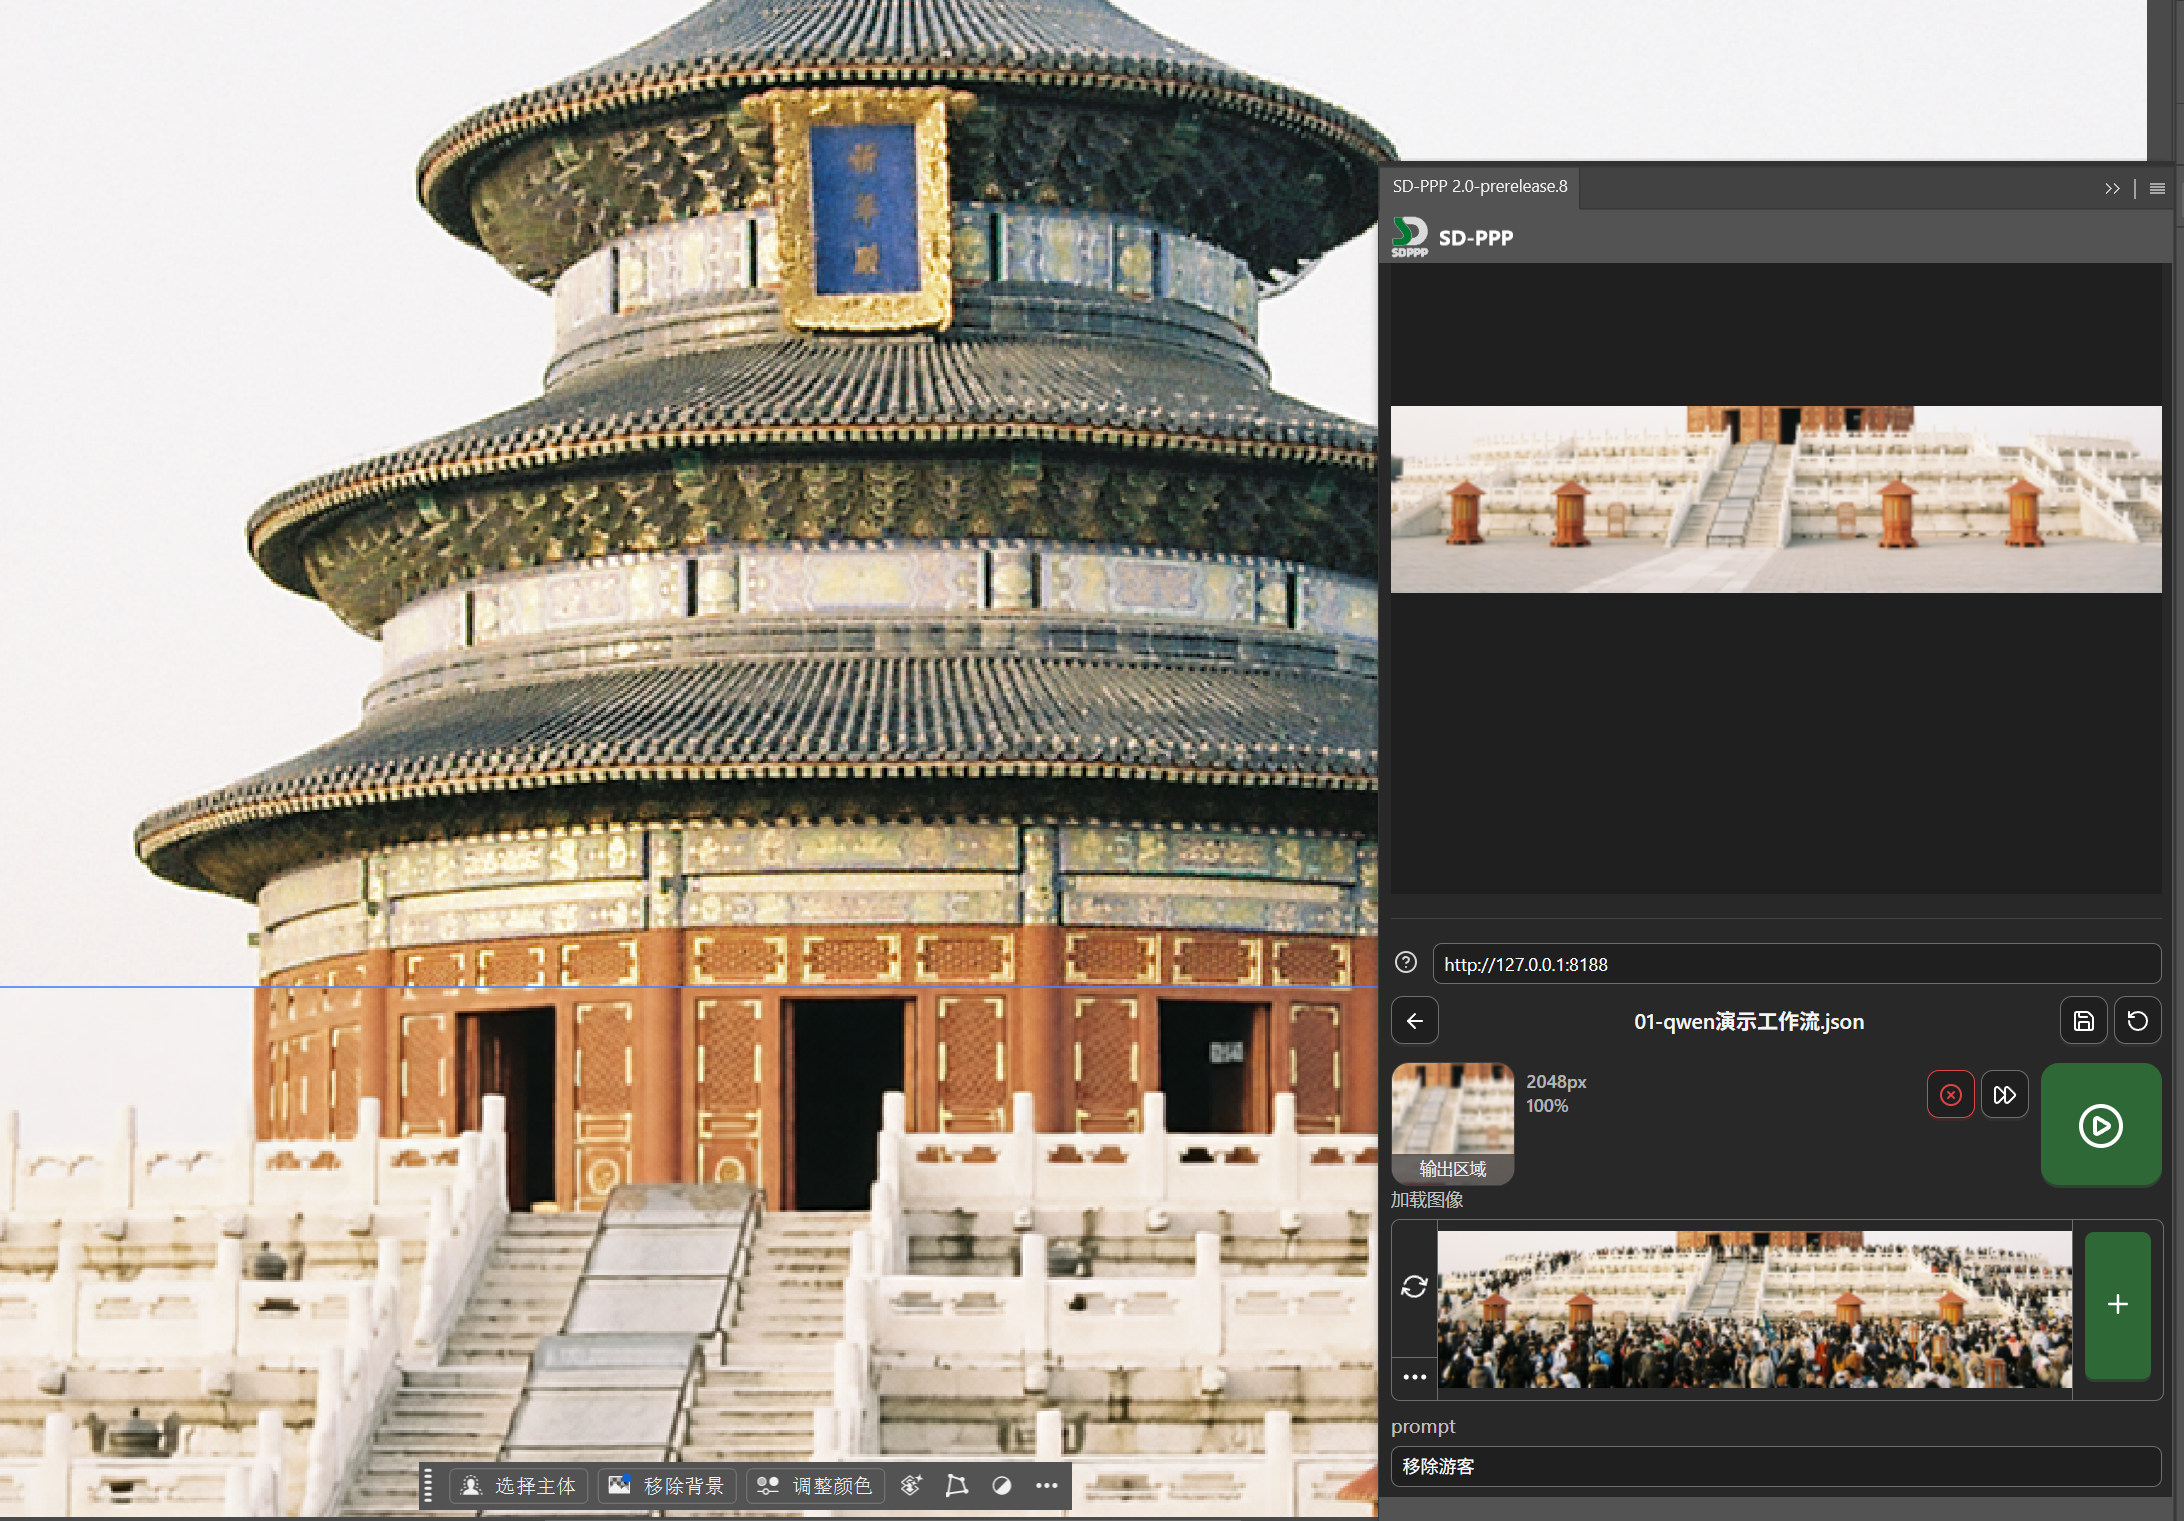
Now we go to PS Plugins, enable the plugin, and open the plugin panel.
Select ComfyUI.
The connection address is already filled in by default in the plugin. The web version of ComfyUI is usually http://127.0.0.1:8188/. The default listening port for the official ComfyUI client should be 8000, but in my own tests, it always fails for some reason. If your client also doesn’t work, I suggest switching to the web version; the Qiuye integration pack works fine in my tests.

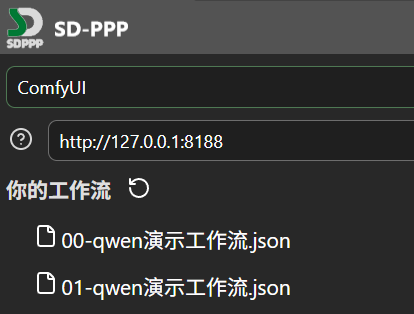
After successful connection, all saved workflows should appear below, like the “00-qwen-demo-workflow” we just saved.
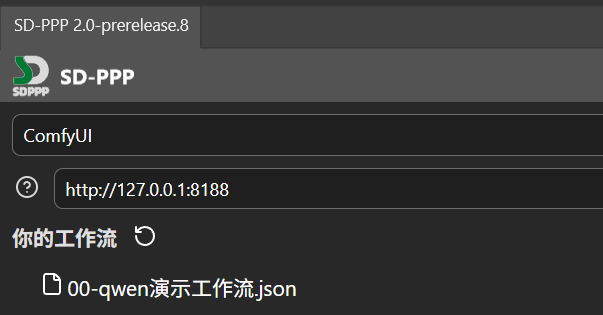
Let’s find an image to test. Click on the workflow name to load the workflow.
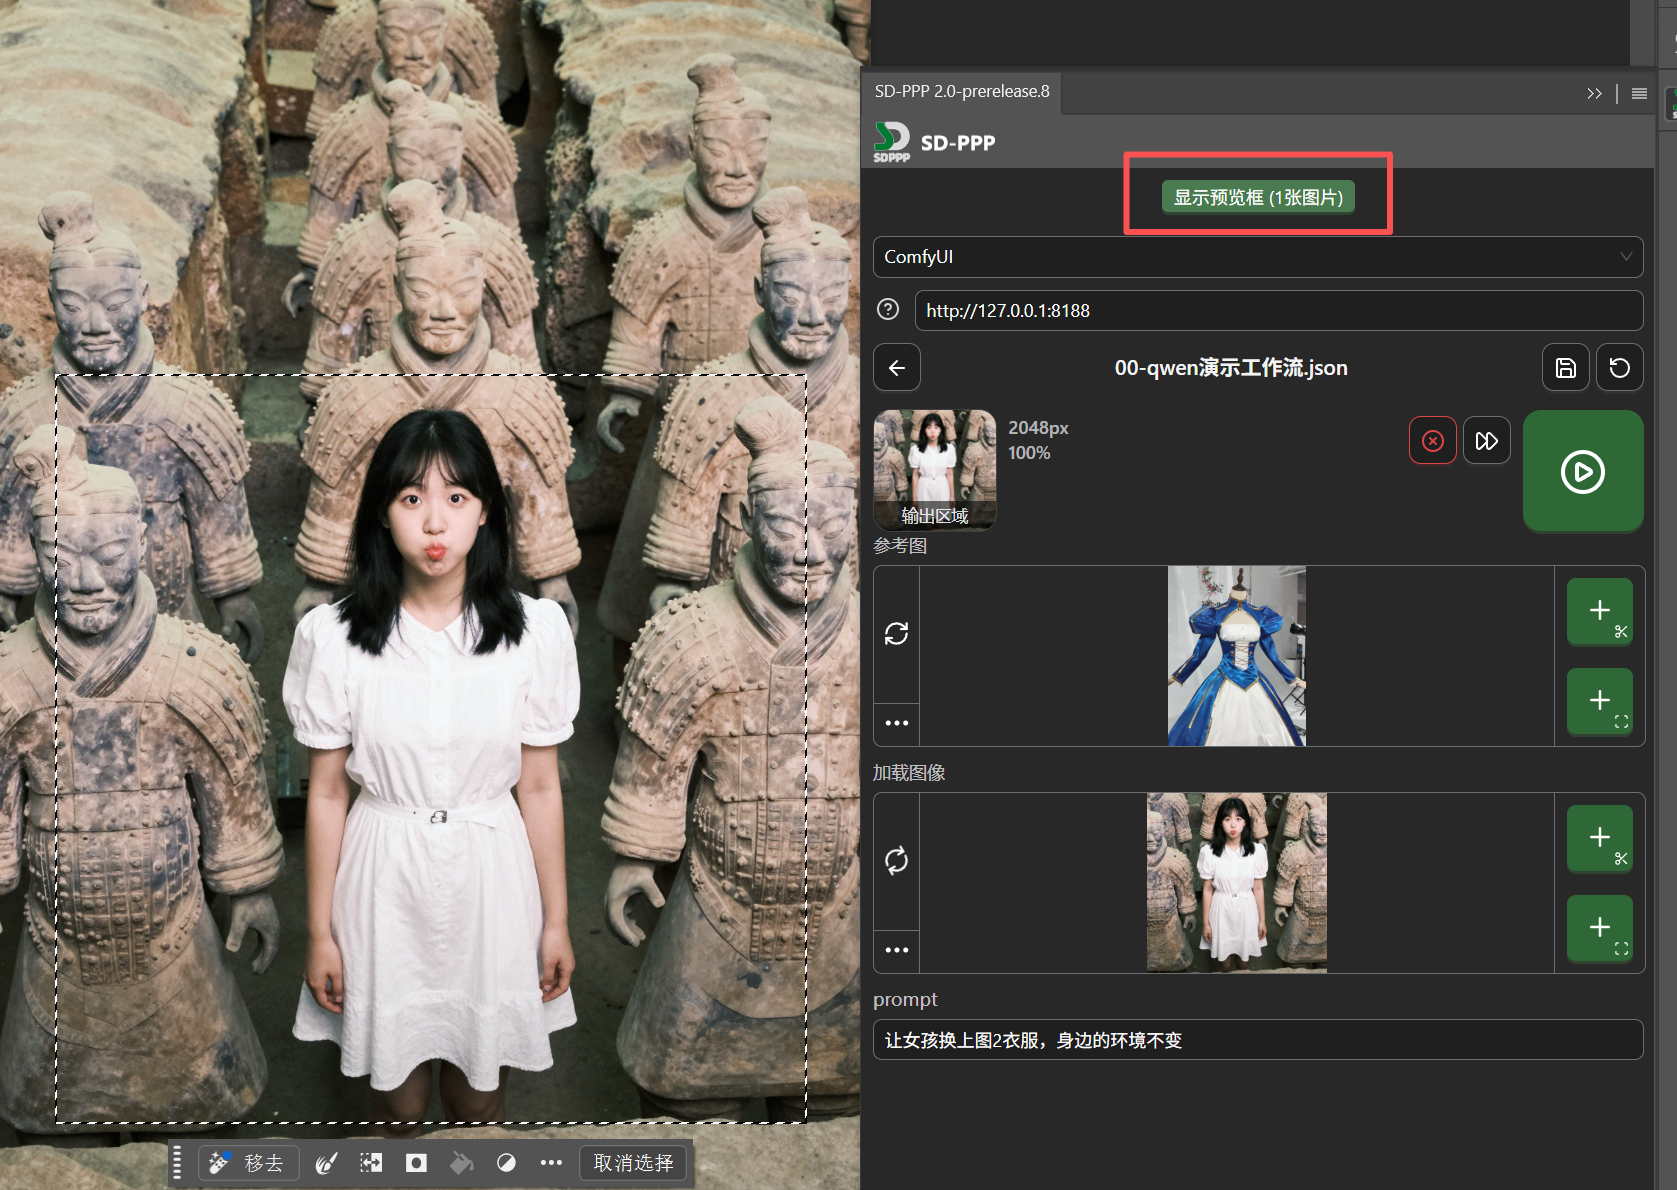
Now you can see the three input ports we configured earlier in the plugin panel: reference image, load image, and prompt.
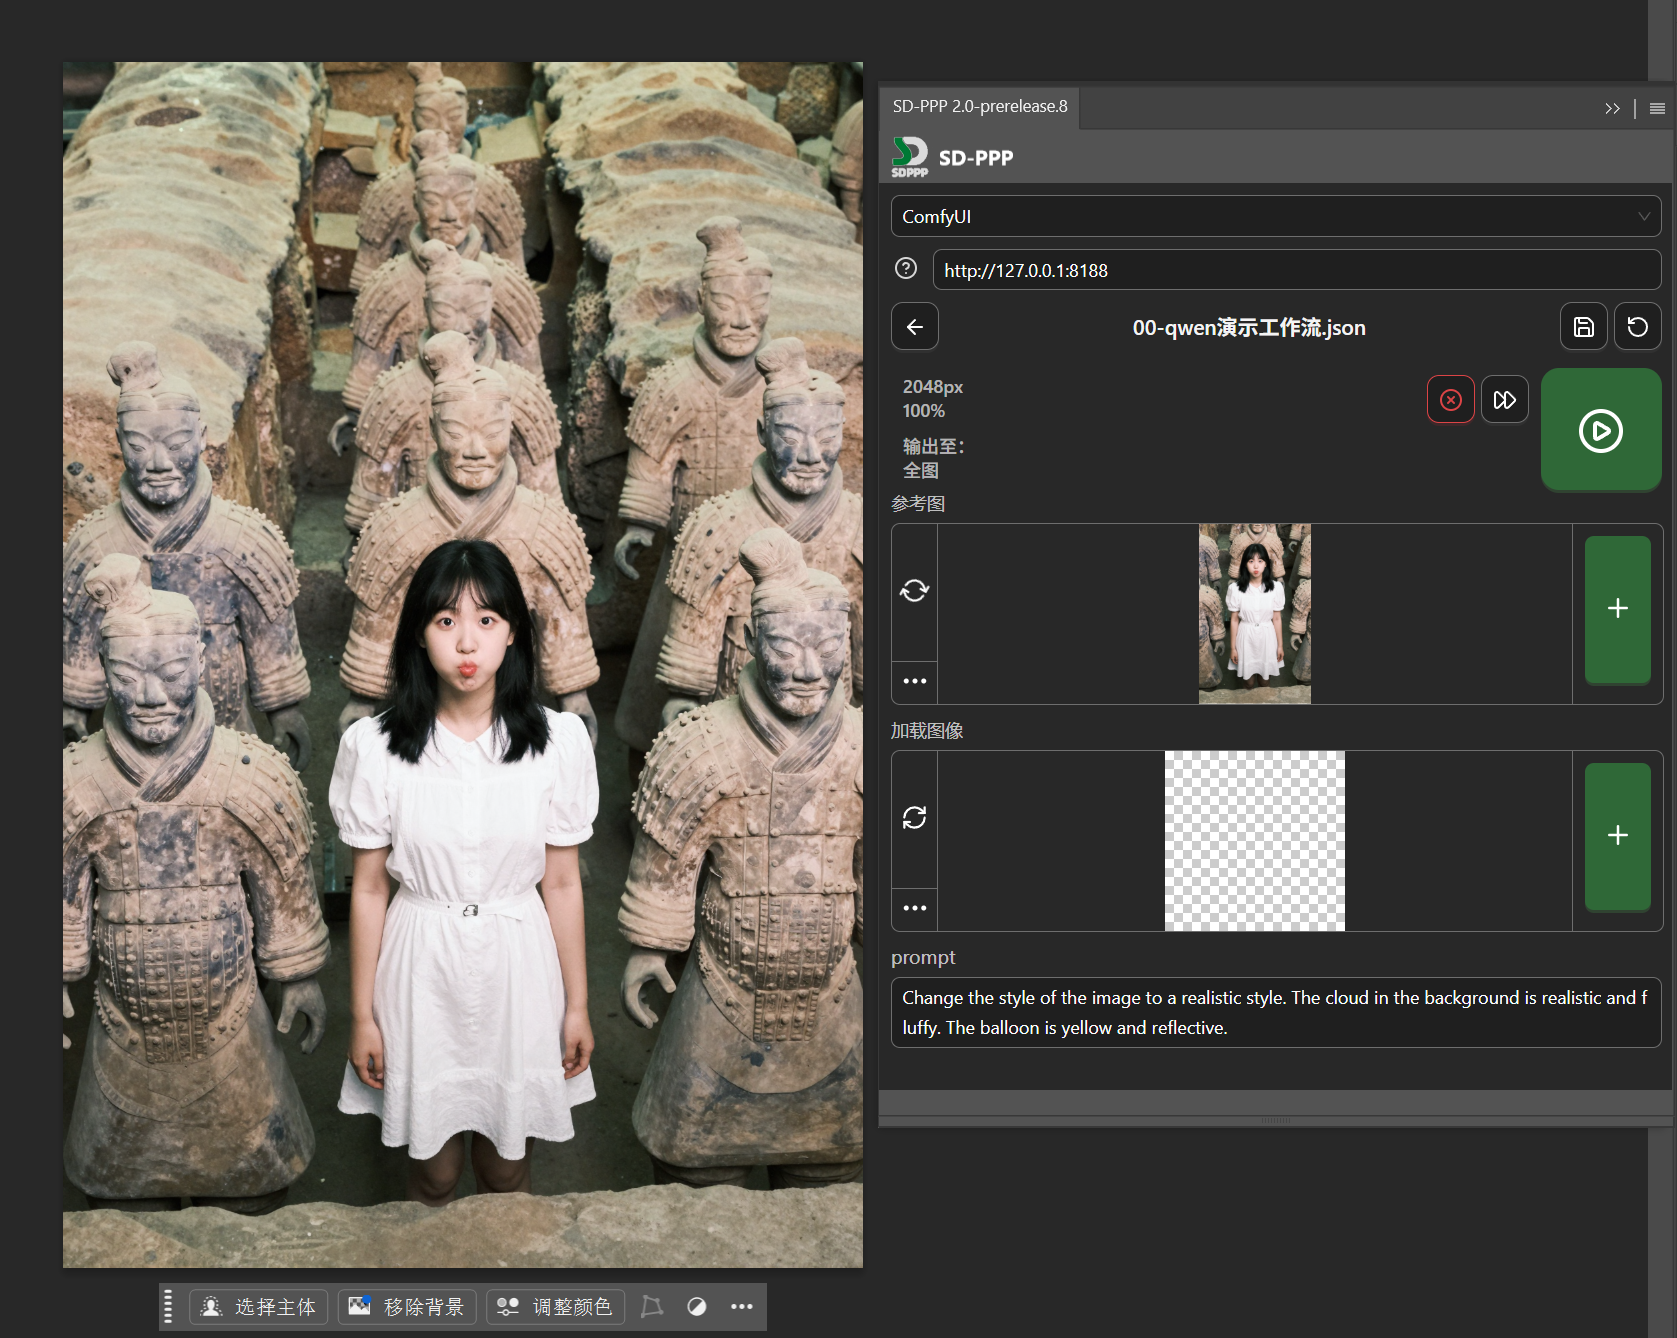
Let’s change the girl’s outfit.
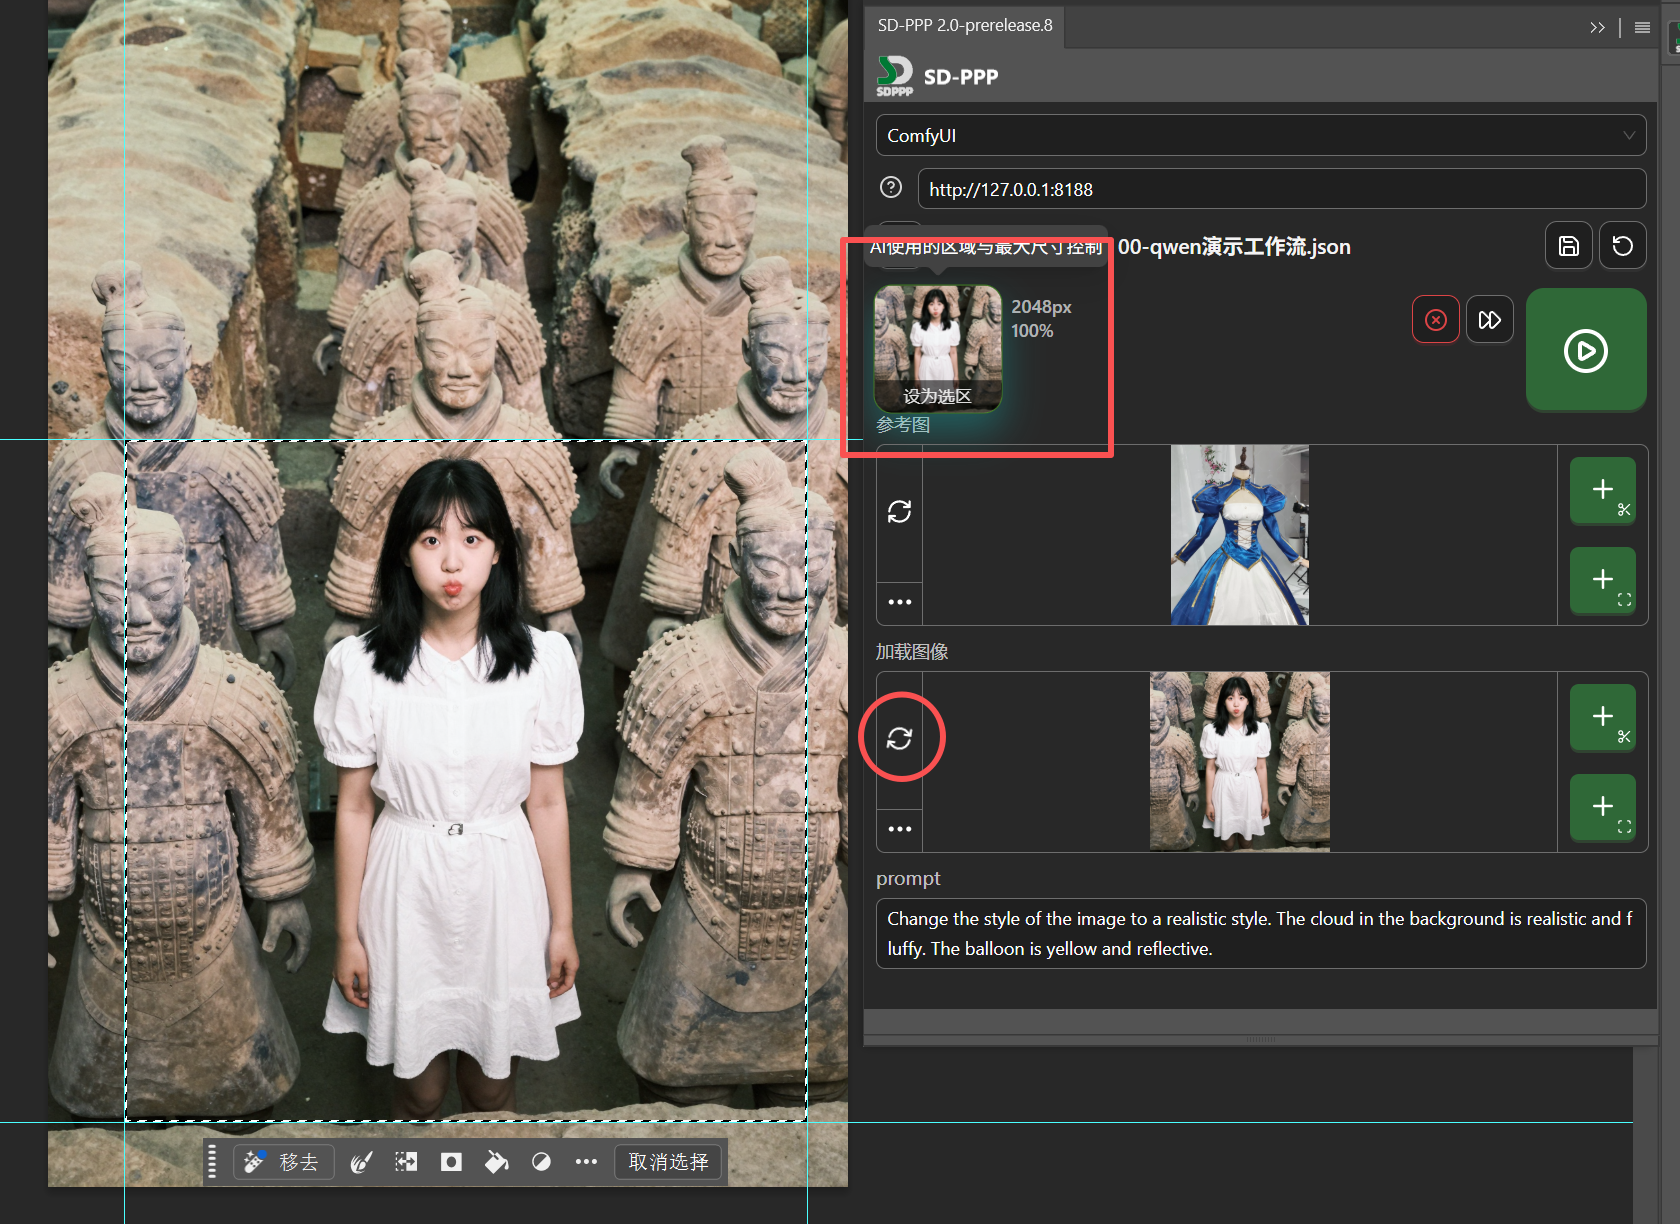
Note here: the “Reference Image”, which is the “Load Image” node connected to image2 in the workflow, is sorted to the top alphabetically and by default reads the original image we opened. This is incorrect and needs to be changed.
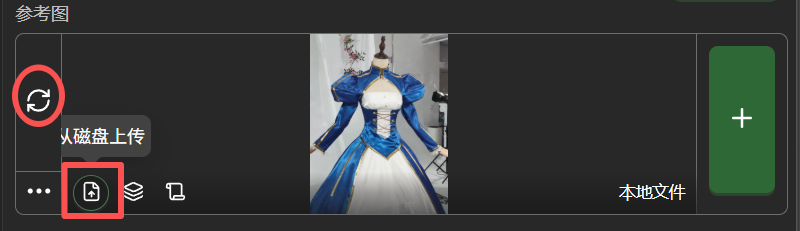
In the image below, the icon in the left red circle is constantly spinning, indicating that when changes occur on the canvas side, the loaded image here will automatically update. We generally want the reference image to remain fixed and not change arbitrarily, so click this icon to stop it spinning and turn off this function. Then hover the mouse over the three dots in the bottom left corner, and in the expanded options, select “Upload from Disk” to upload a clothing image.
Next is the original image for “Load Image”.
We only want to repaint locally to replace the girl’s clothing, so use the rectangular marquee tool to select the girl.
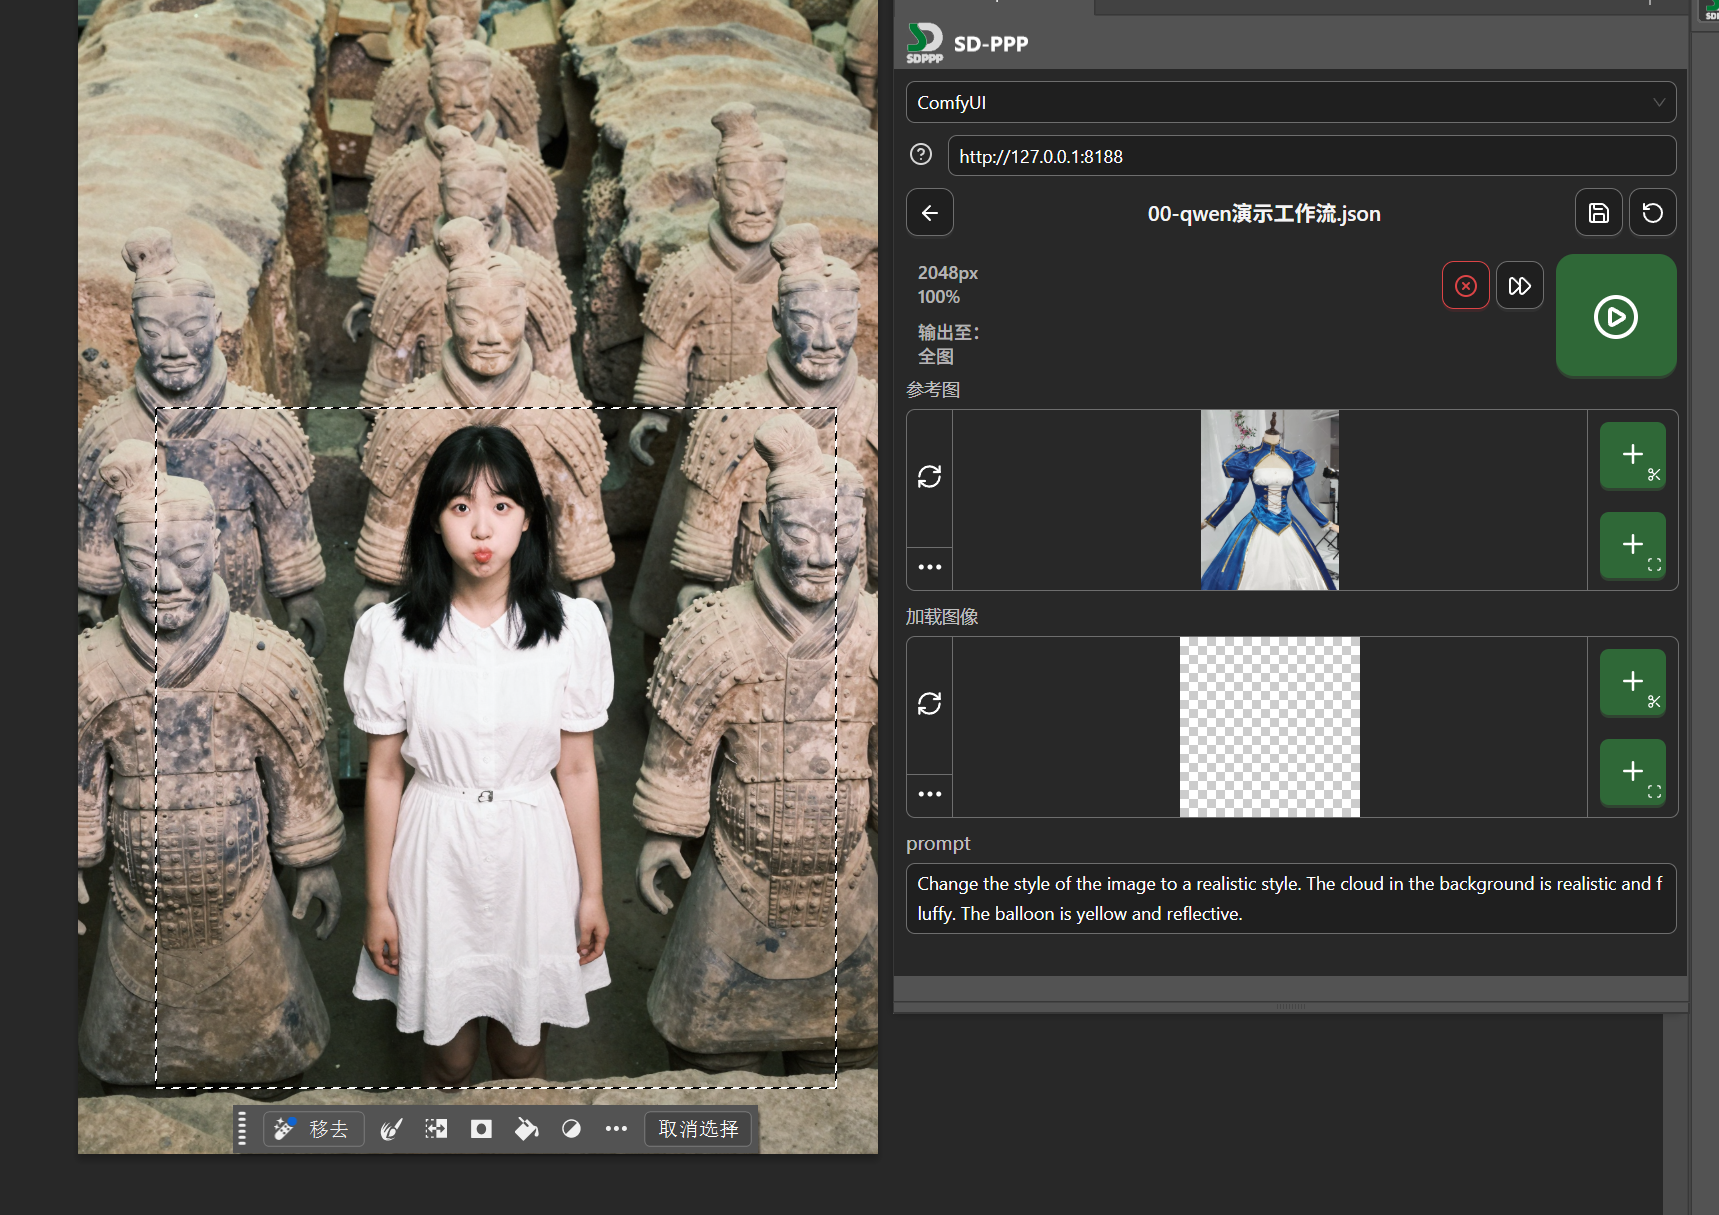
For the part being modified, we want it to update automatically as the selection operation changes, so click the auto-update switch to make it spin.
Then configure the output area. Click “Output To” above the reference image, change it to “Set as Selection”. After clicking, guide lines will be automatically created on the canvas based on the selection boundary. This now represents that the AI-processed image will (as a new layer) be returned to this selected area. Since we enabled auto-update for “Load Image” earlier, the input image loaded by the “Load Image” node automatically becomes the image cropped from the original by the output selection we just set.
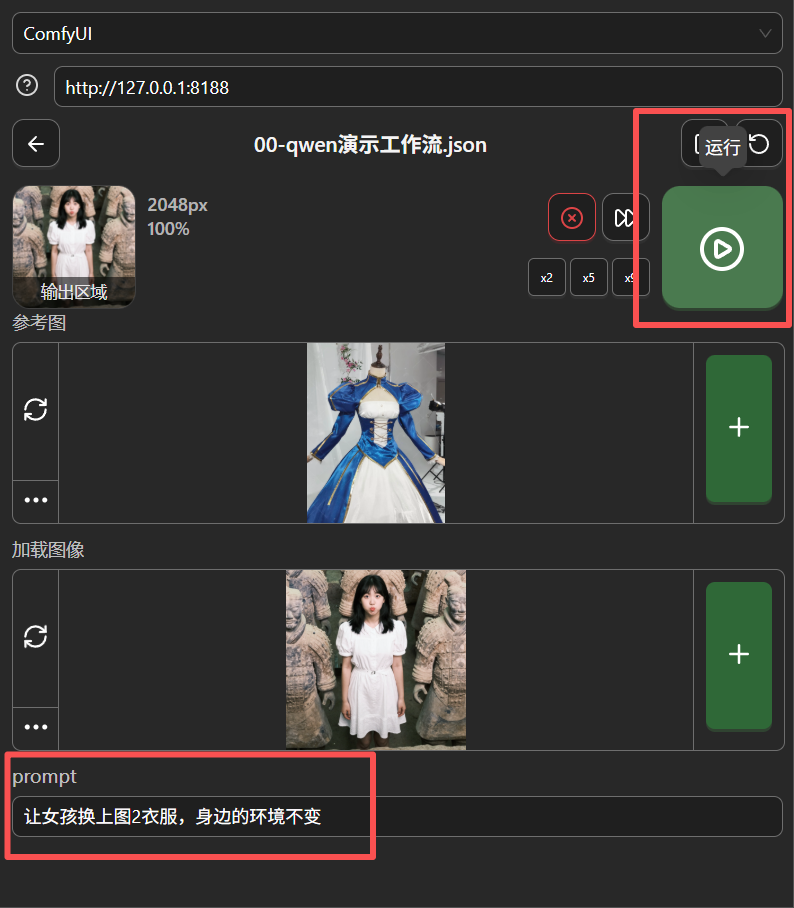
Enter in the Prompt: Make the girl wear the clothes from image 2, keep the surrounding environment unchanged.
Then click the run button.
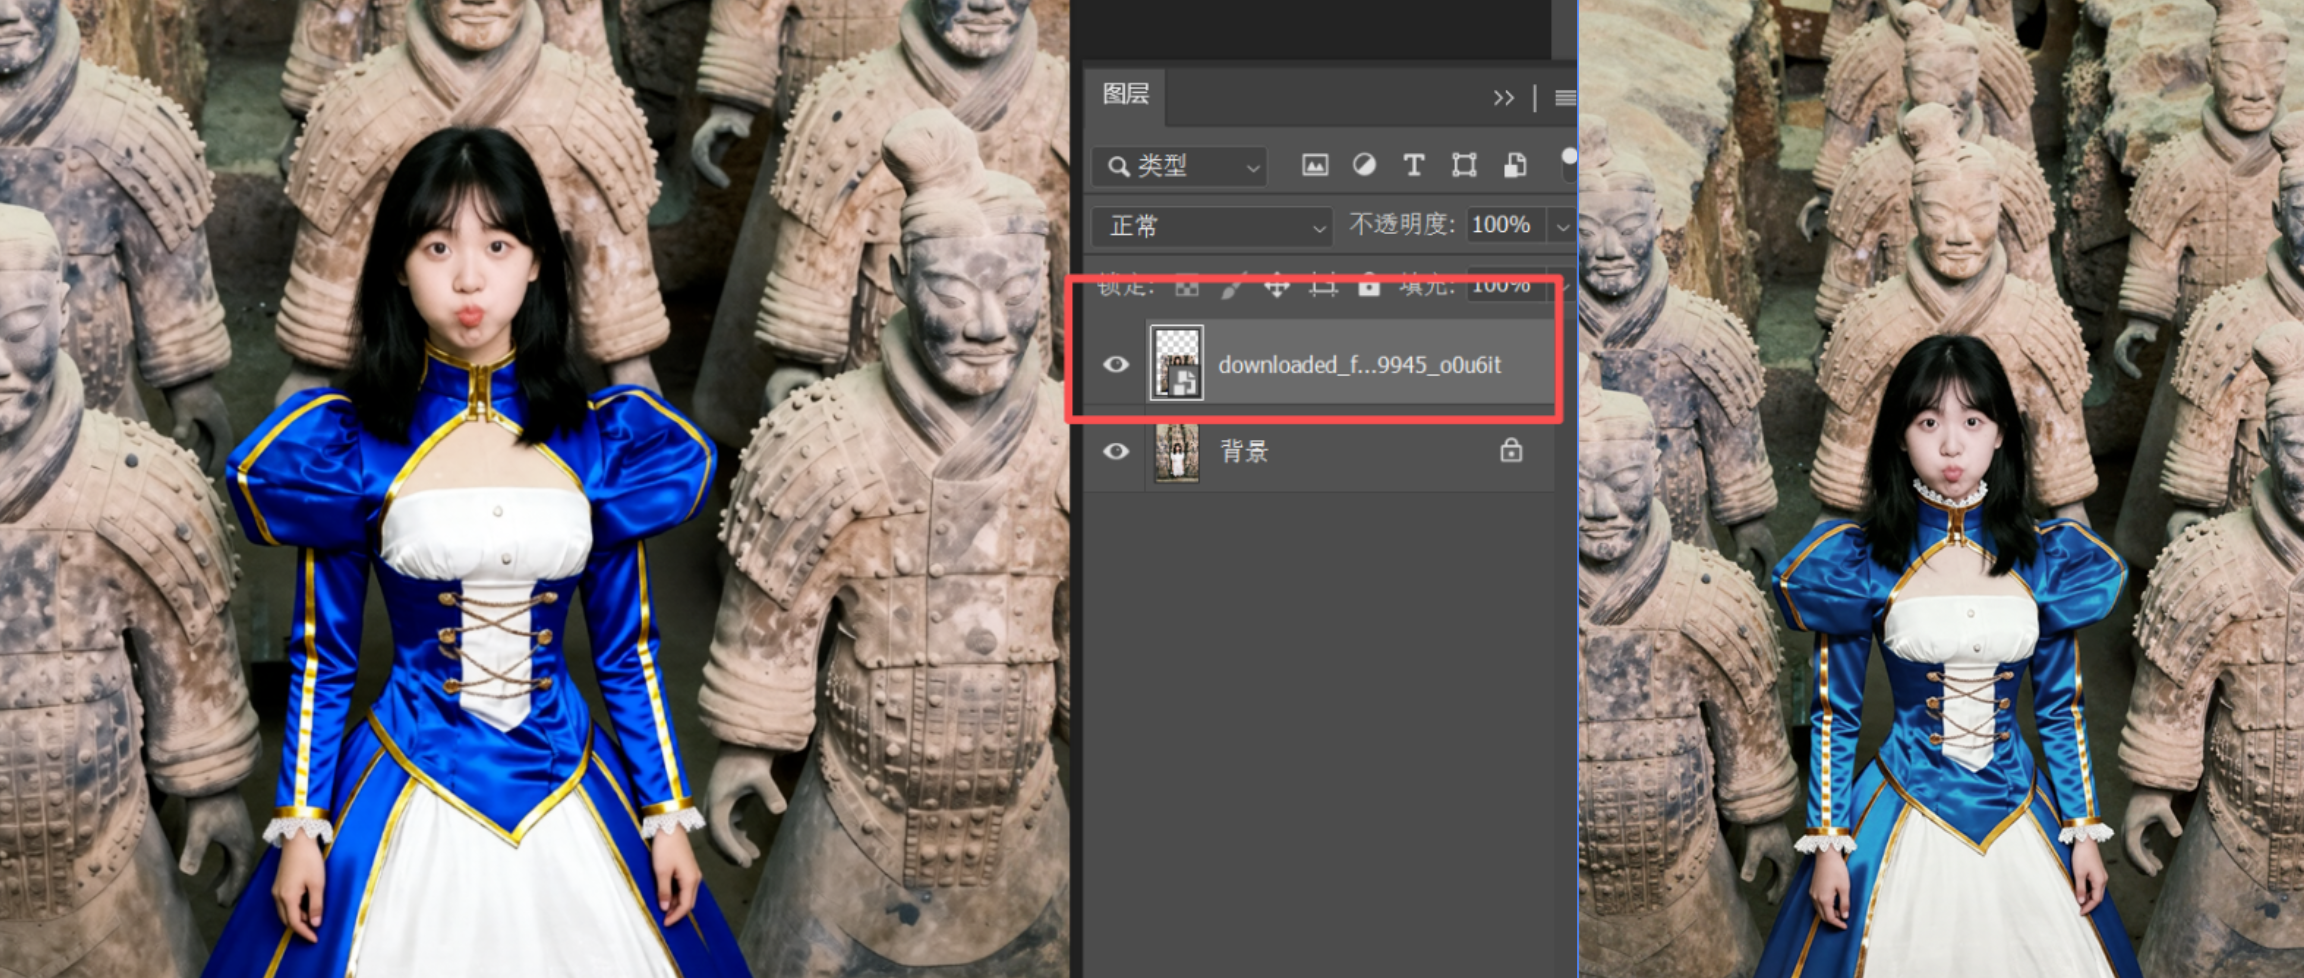
After running, a result preview will appear above.
Hover the mouse over the preview image, click the send button that appears below the image, and the image is sent back to the selection area.

And the AI-edited content is returned as an independent layer, making secondary editing very convenient.
For example, I can adjust the color of the subject’s clothing while minimizing the impact on the surrounding environment and the color of the terracotta warriors.
Compared to referencing another image for clothing or object replacement, directly adjusting and fixing flaws in the original image (commonly known as “photo editing”) is obviously more common. So, we should also have a workflow that edits the image directly without using a reference image.
You don’t need to start from scratch following the previous steps. Just ignore the reference image node in ComfyUI, then use the “Save As” function to save a new workflow.
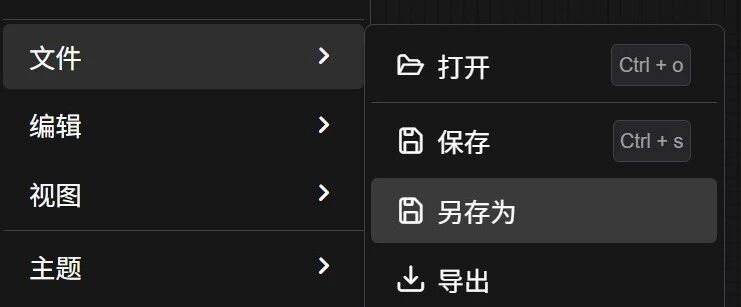
Let’s name it “01-qwen-demo-workflow”. Of course, you can give it a name that better distinguishes its function.
This is a photo I took at the Hall of Prayer for Good Harvests in the Temple of Heaven:
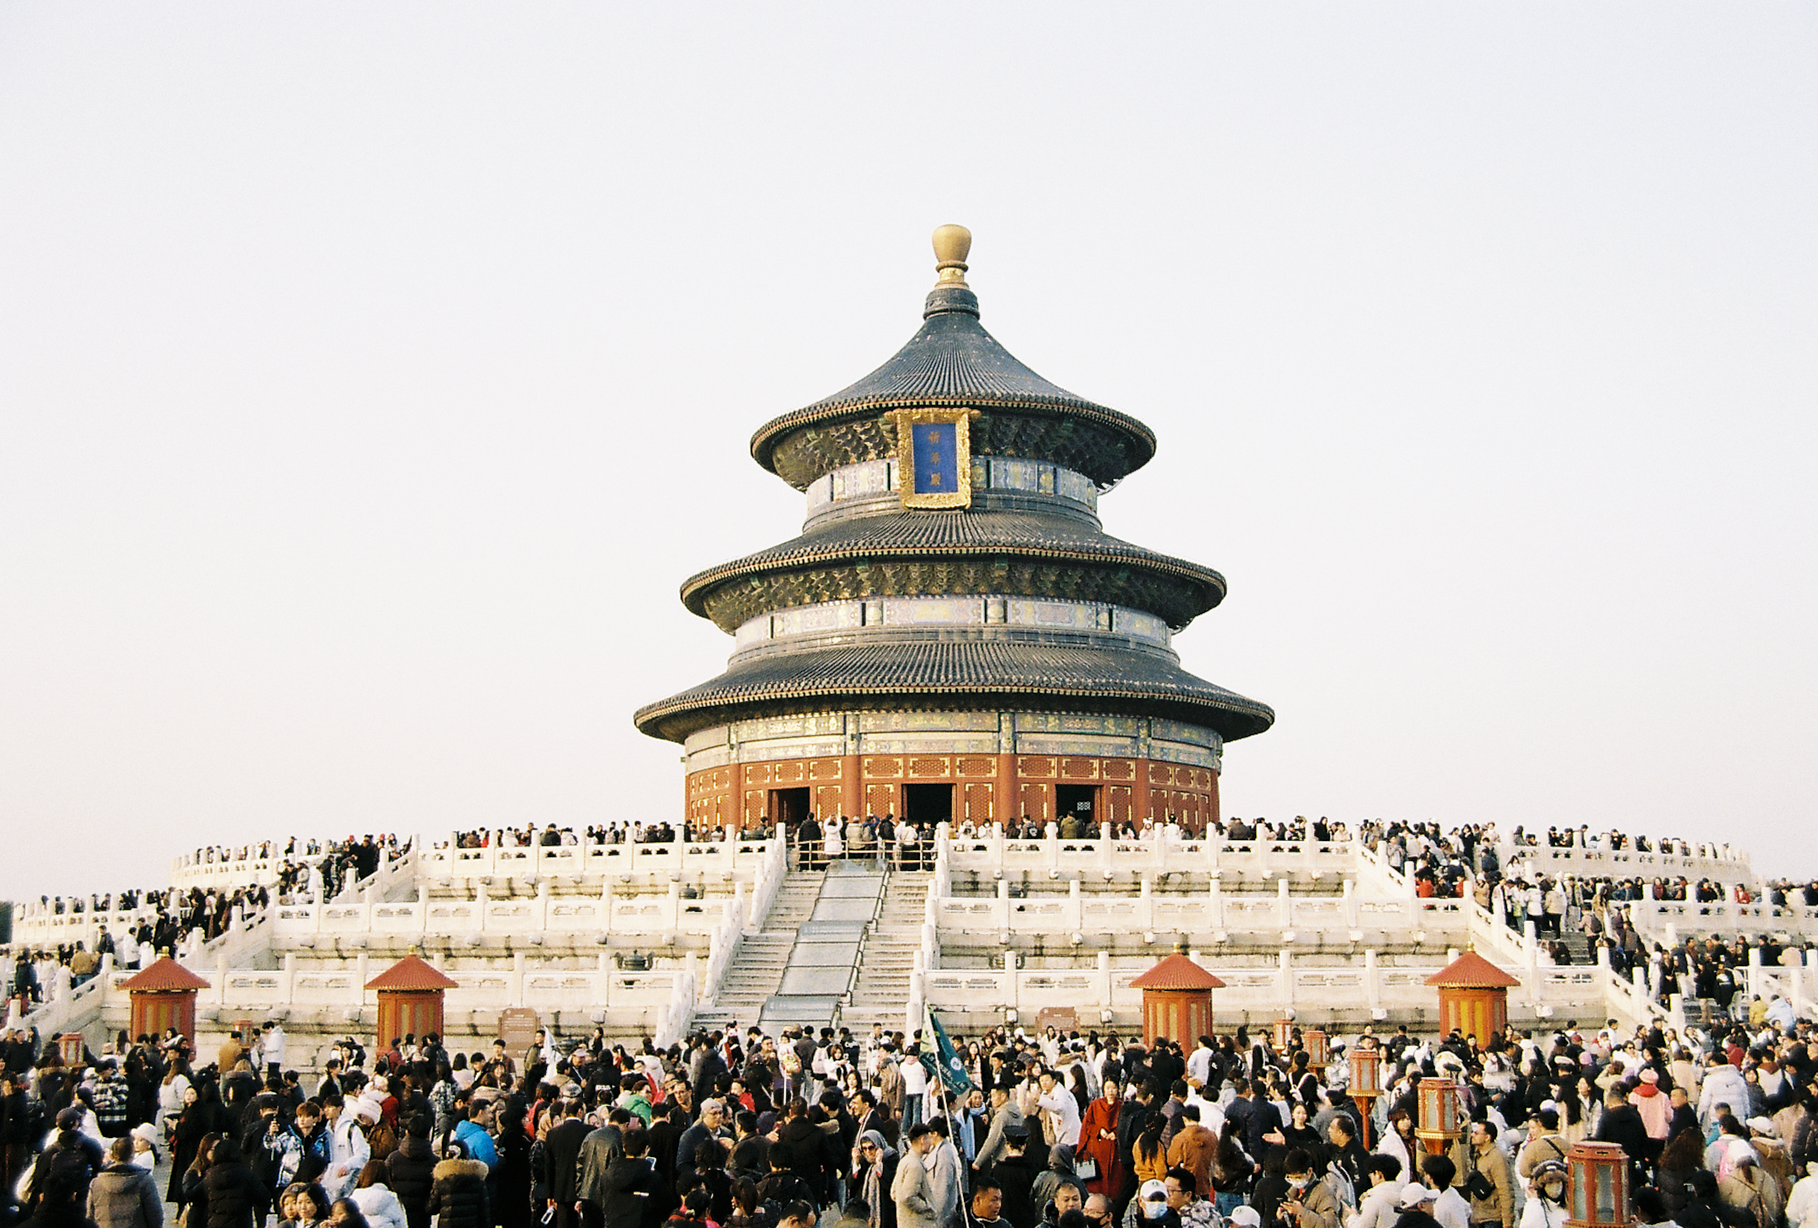
It was a Saturday, and you can see there are many tourists. With so many people, it’s difficult to remove them using traditional PS tools, but with AI, it’s much more convenient.
Also, since this photo was shot on film and scanned with a relatively affordable service, the digital file resolution is not high, only 1818×1228.
So, when I directly input the entire image into ComfyUI, trying to get AI to remove tourists, problems started to arise.
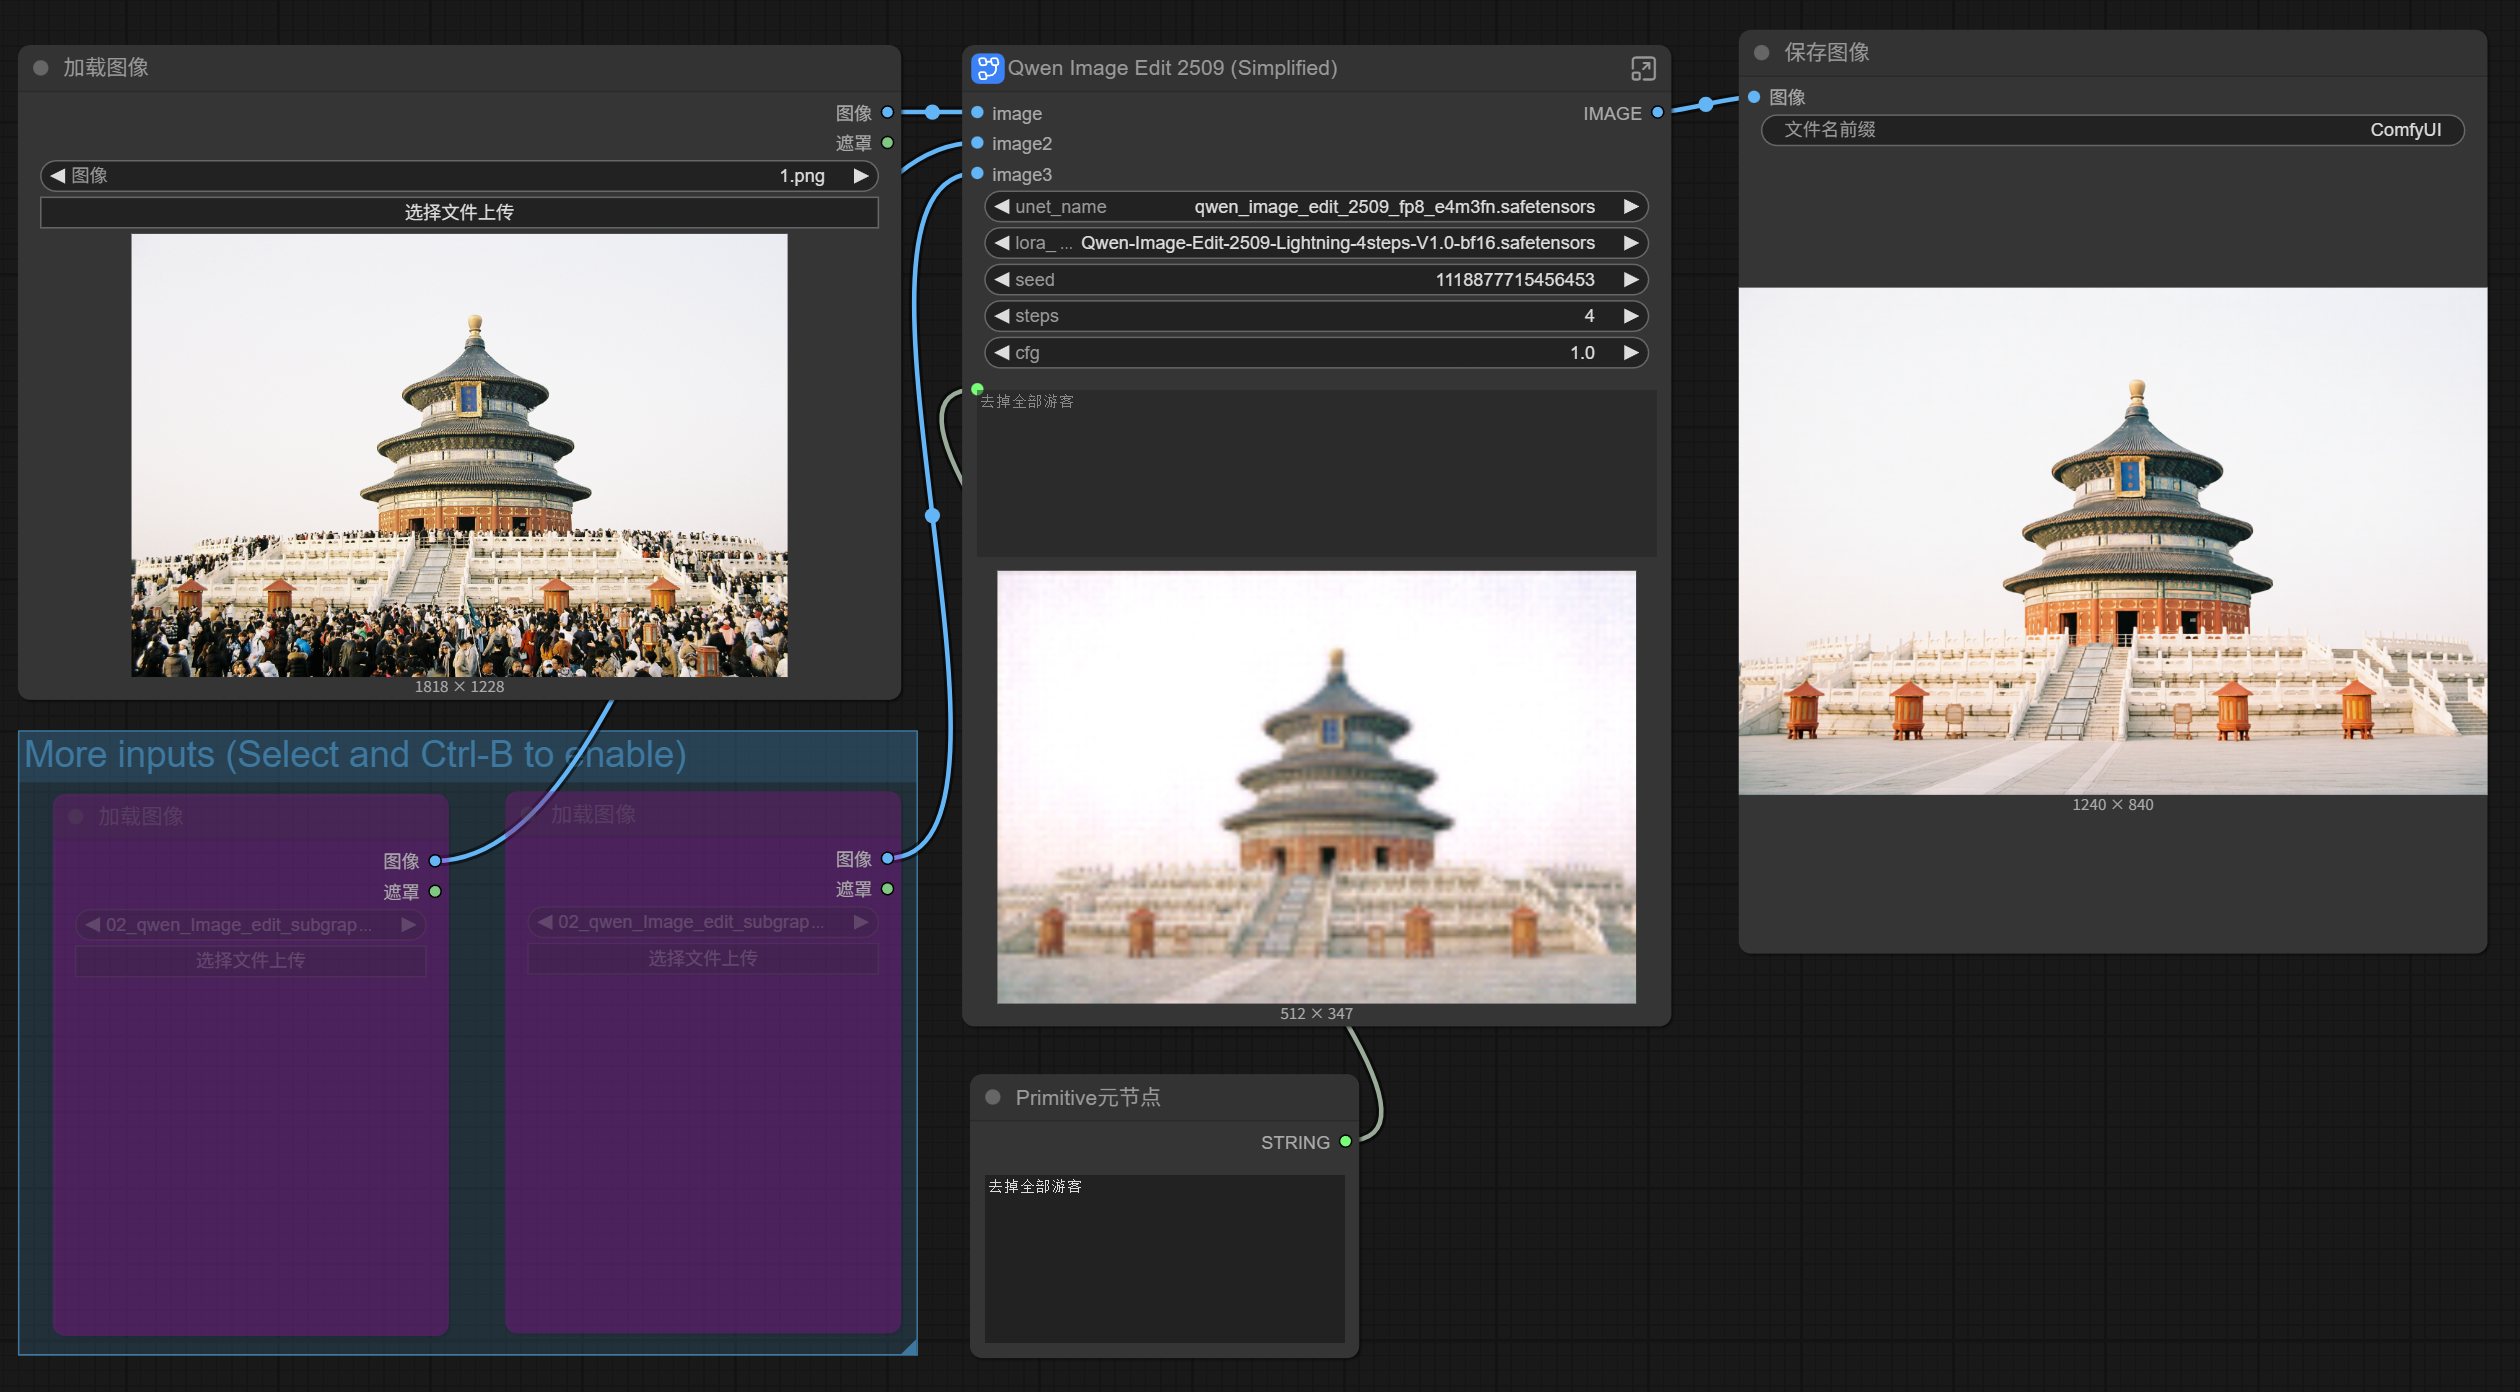
Not only was the image compressed further, but the originally faintly visible golden characters “Hall of Prayer for Good Harvests” shrank into three dots, and the blue glazed tiles on the eaves also looked strange, like corrugated cardboard.
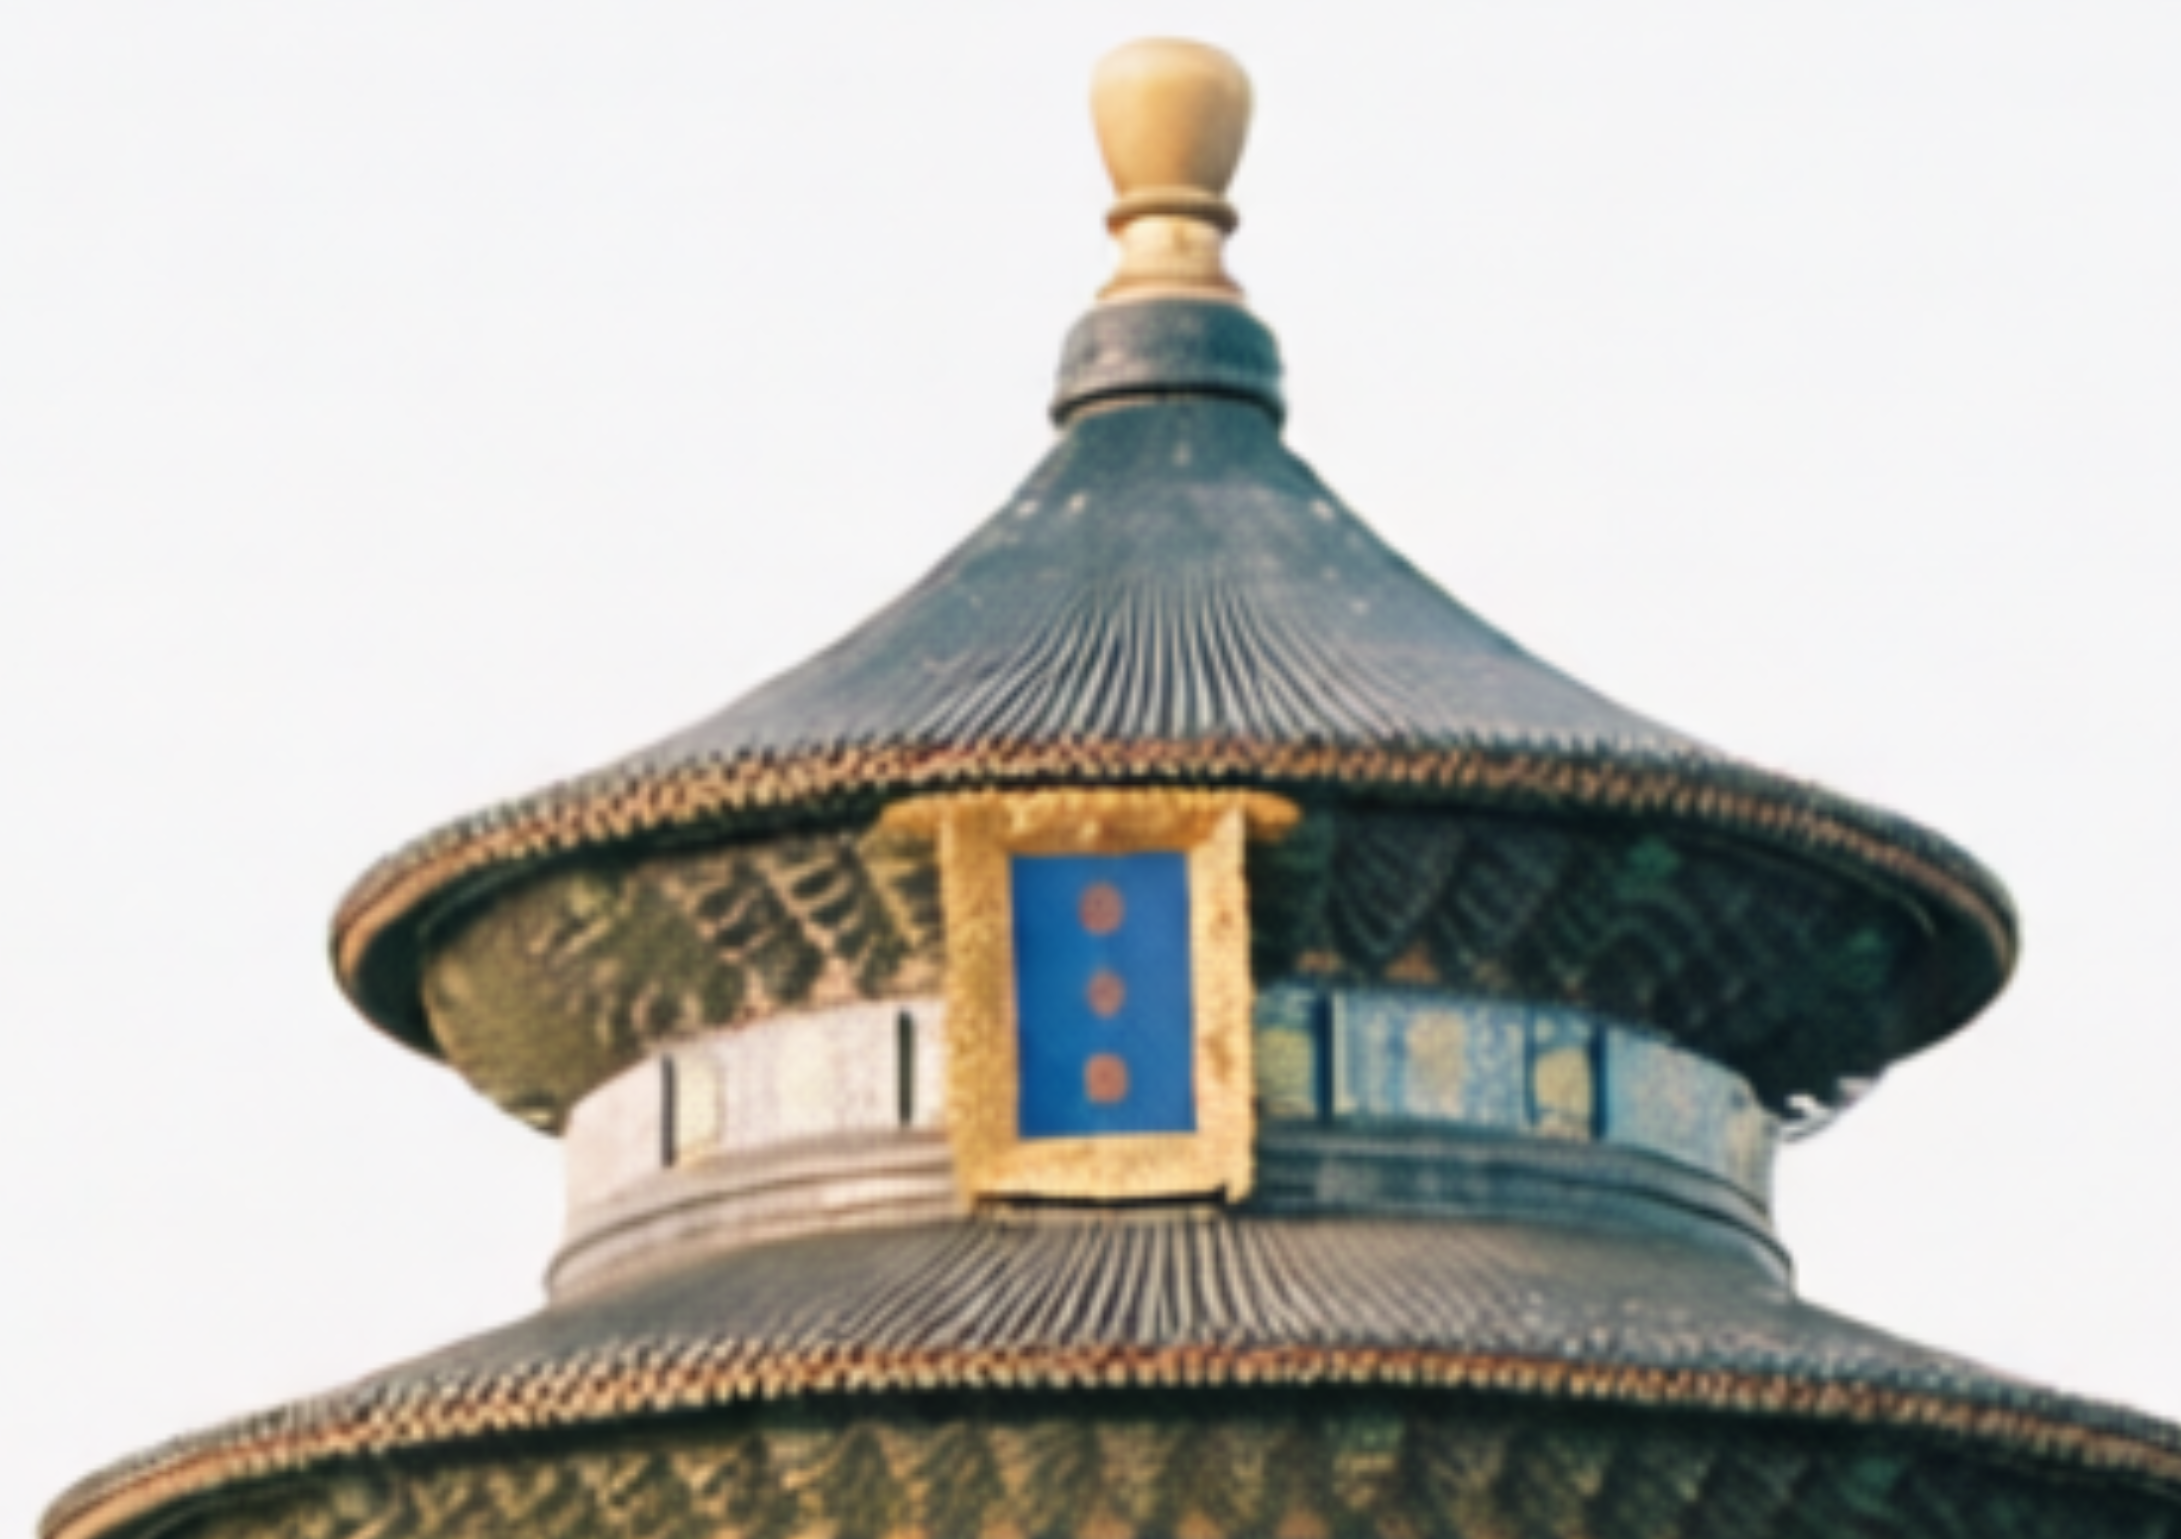
At times like this, localized selection repainting can come in handy.
We can create a selection only for the base of the Circular Mound Altar and perform AI tourist removal, so the Hall of Prayer for Good Harvests above won’t be affected.
The Qwen model, when handling this structurally complex building, will still have some minor misalignment of edge texture lines. But this is a small issue; since we’re already in the PS environment, we can just duplicate a layer, manually align and fix it by erasing and blending.
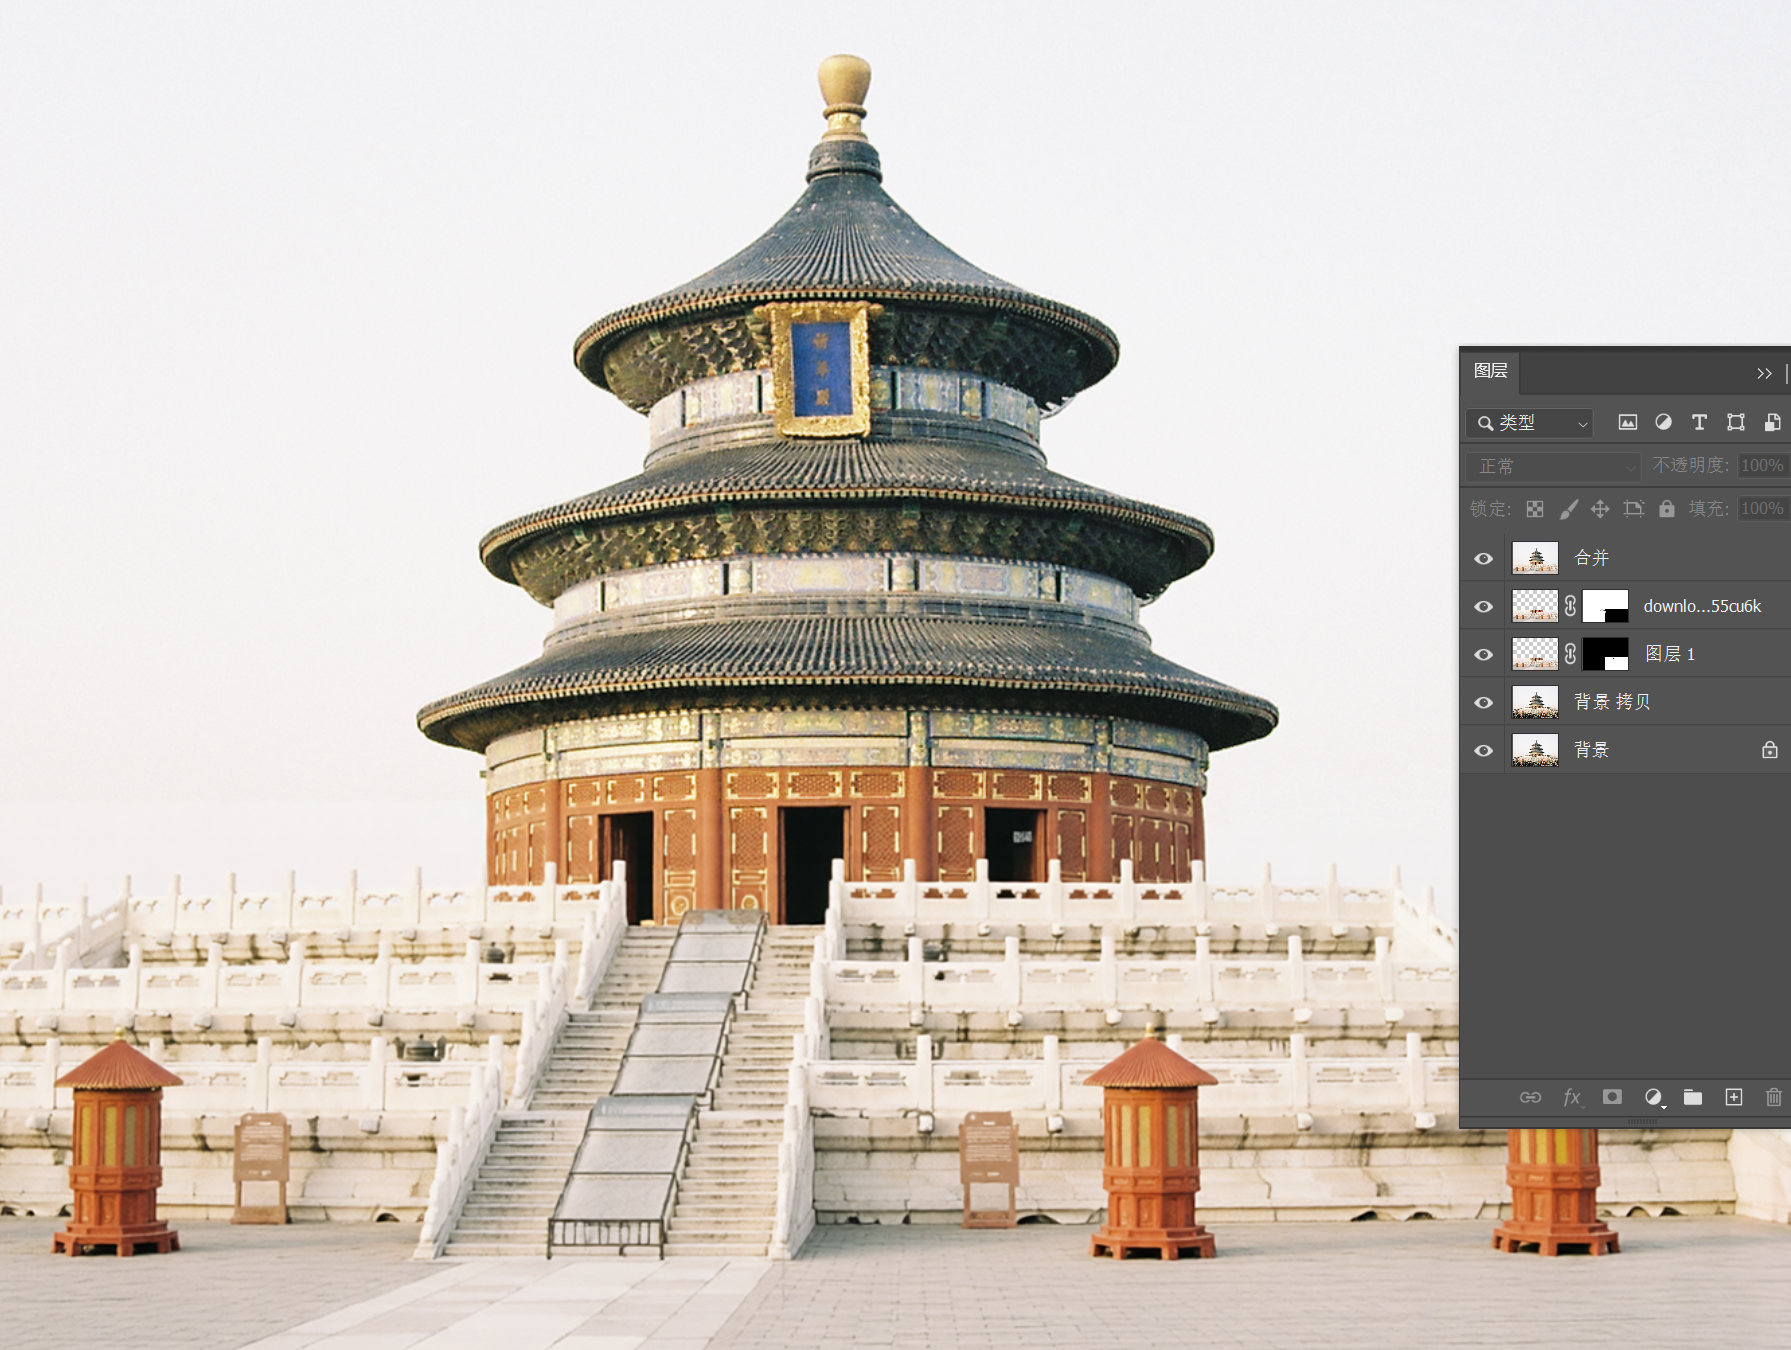
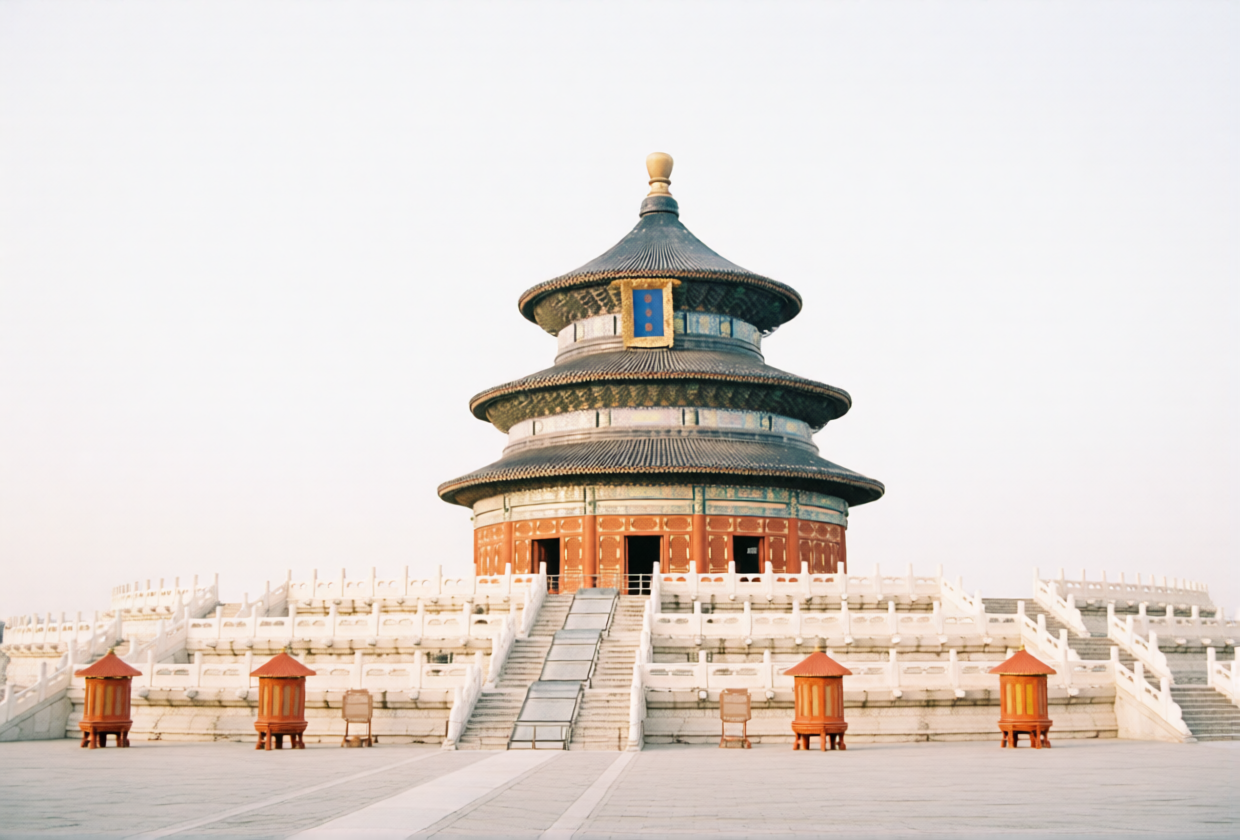
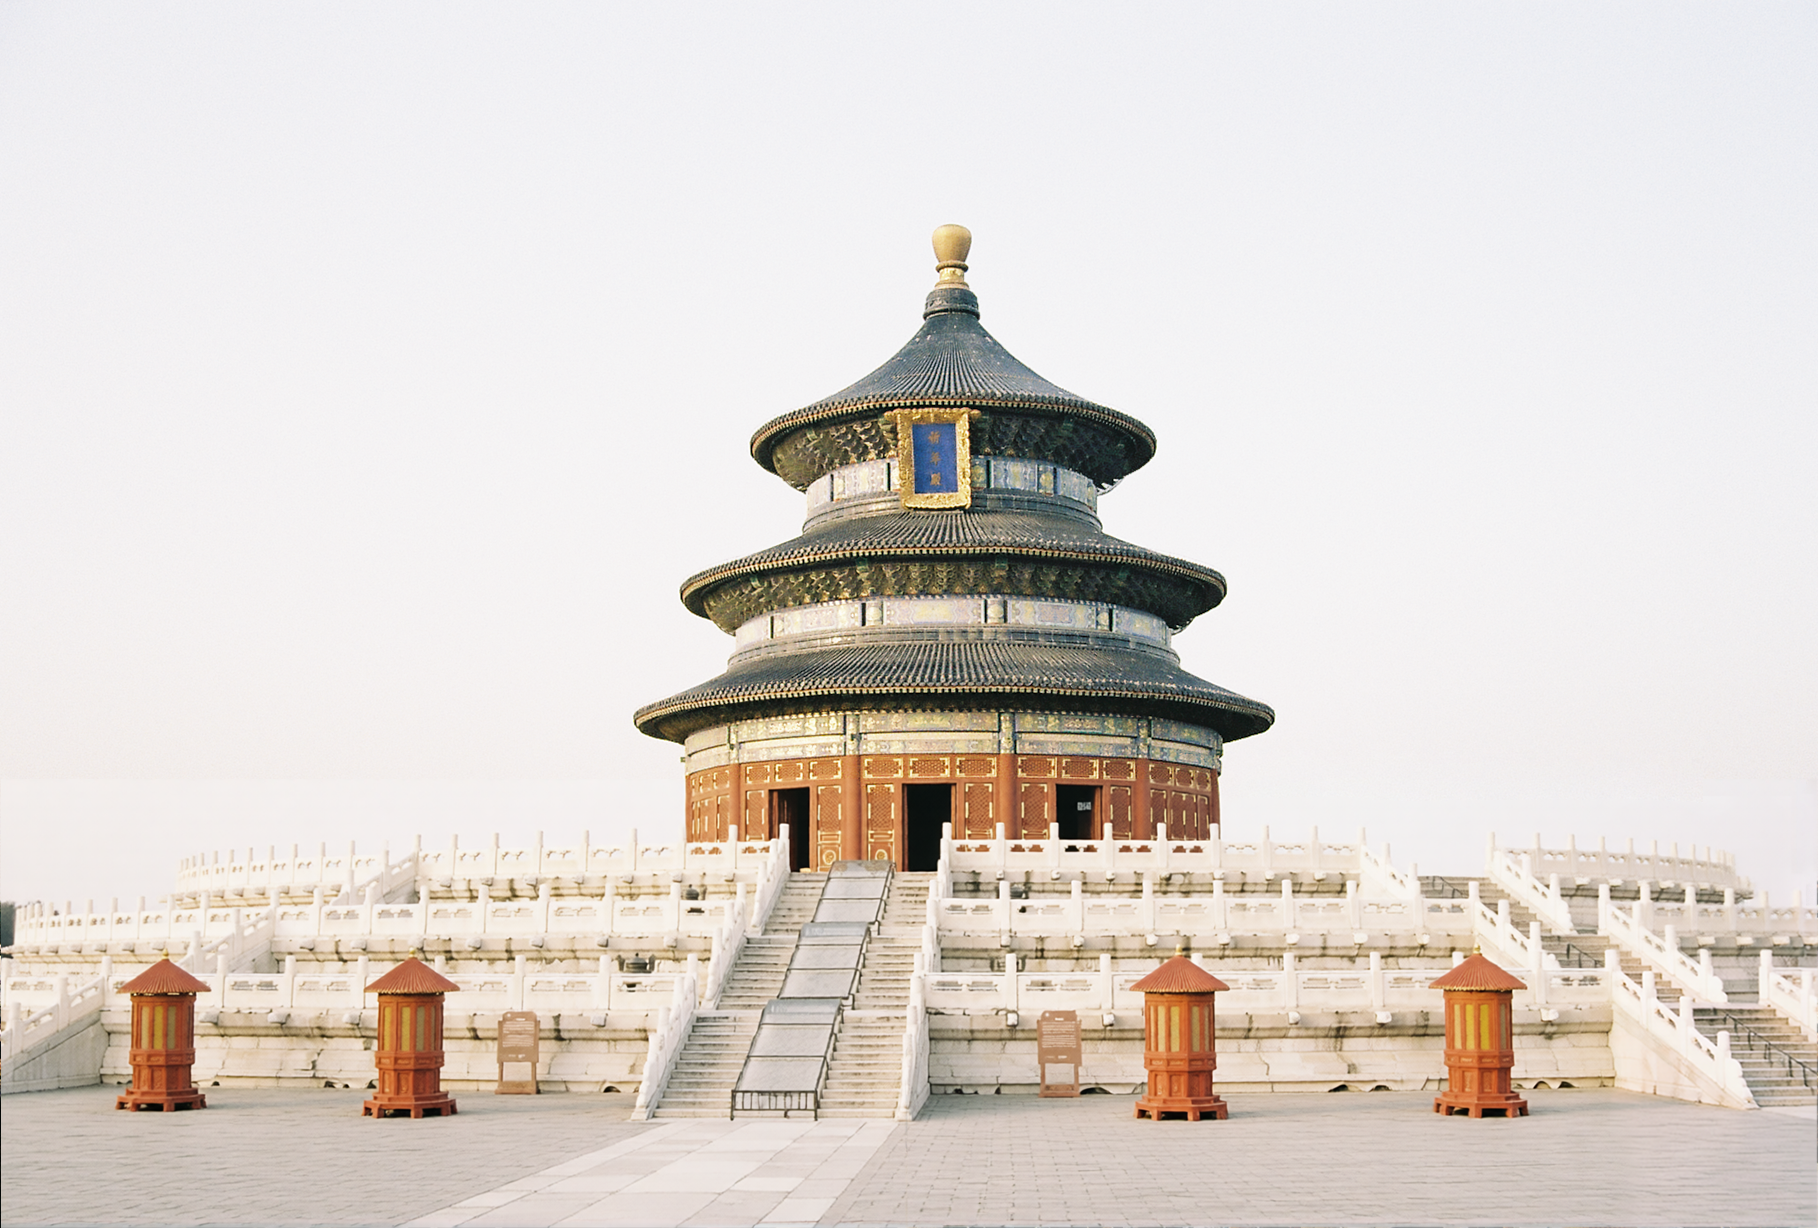
A tourist-free version of the Hall of Prayer for Good Harvests photo is newly presented:
It’s also useful for portrait photo processing.
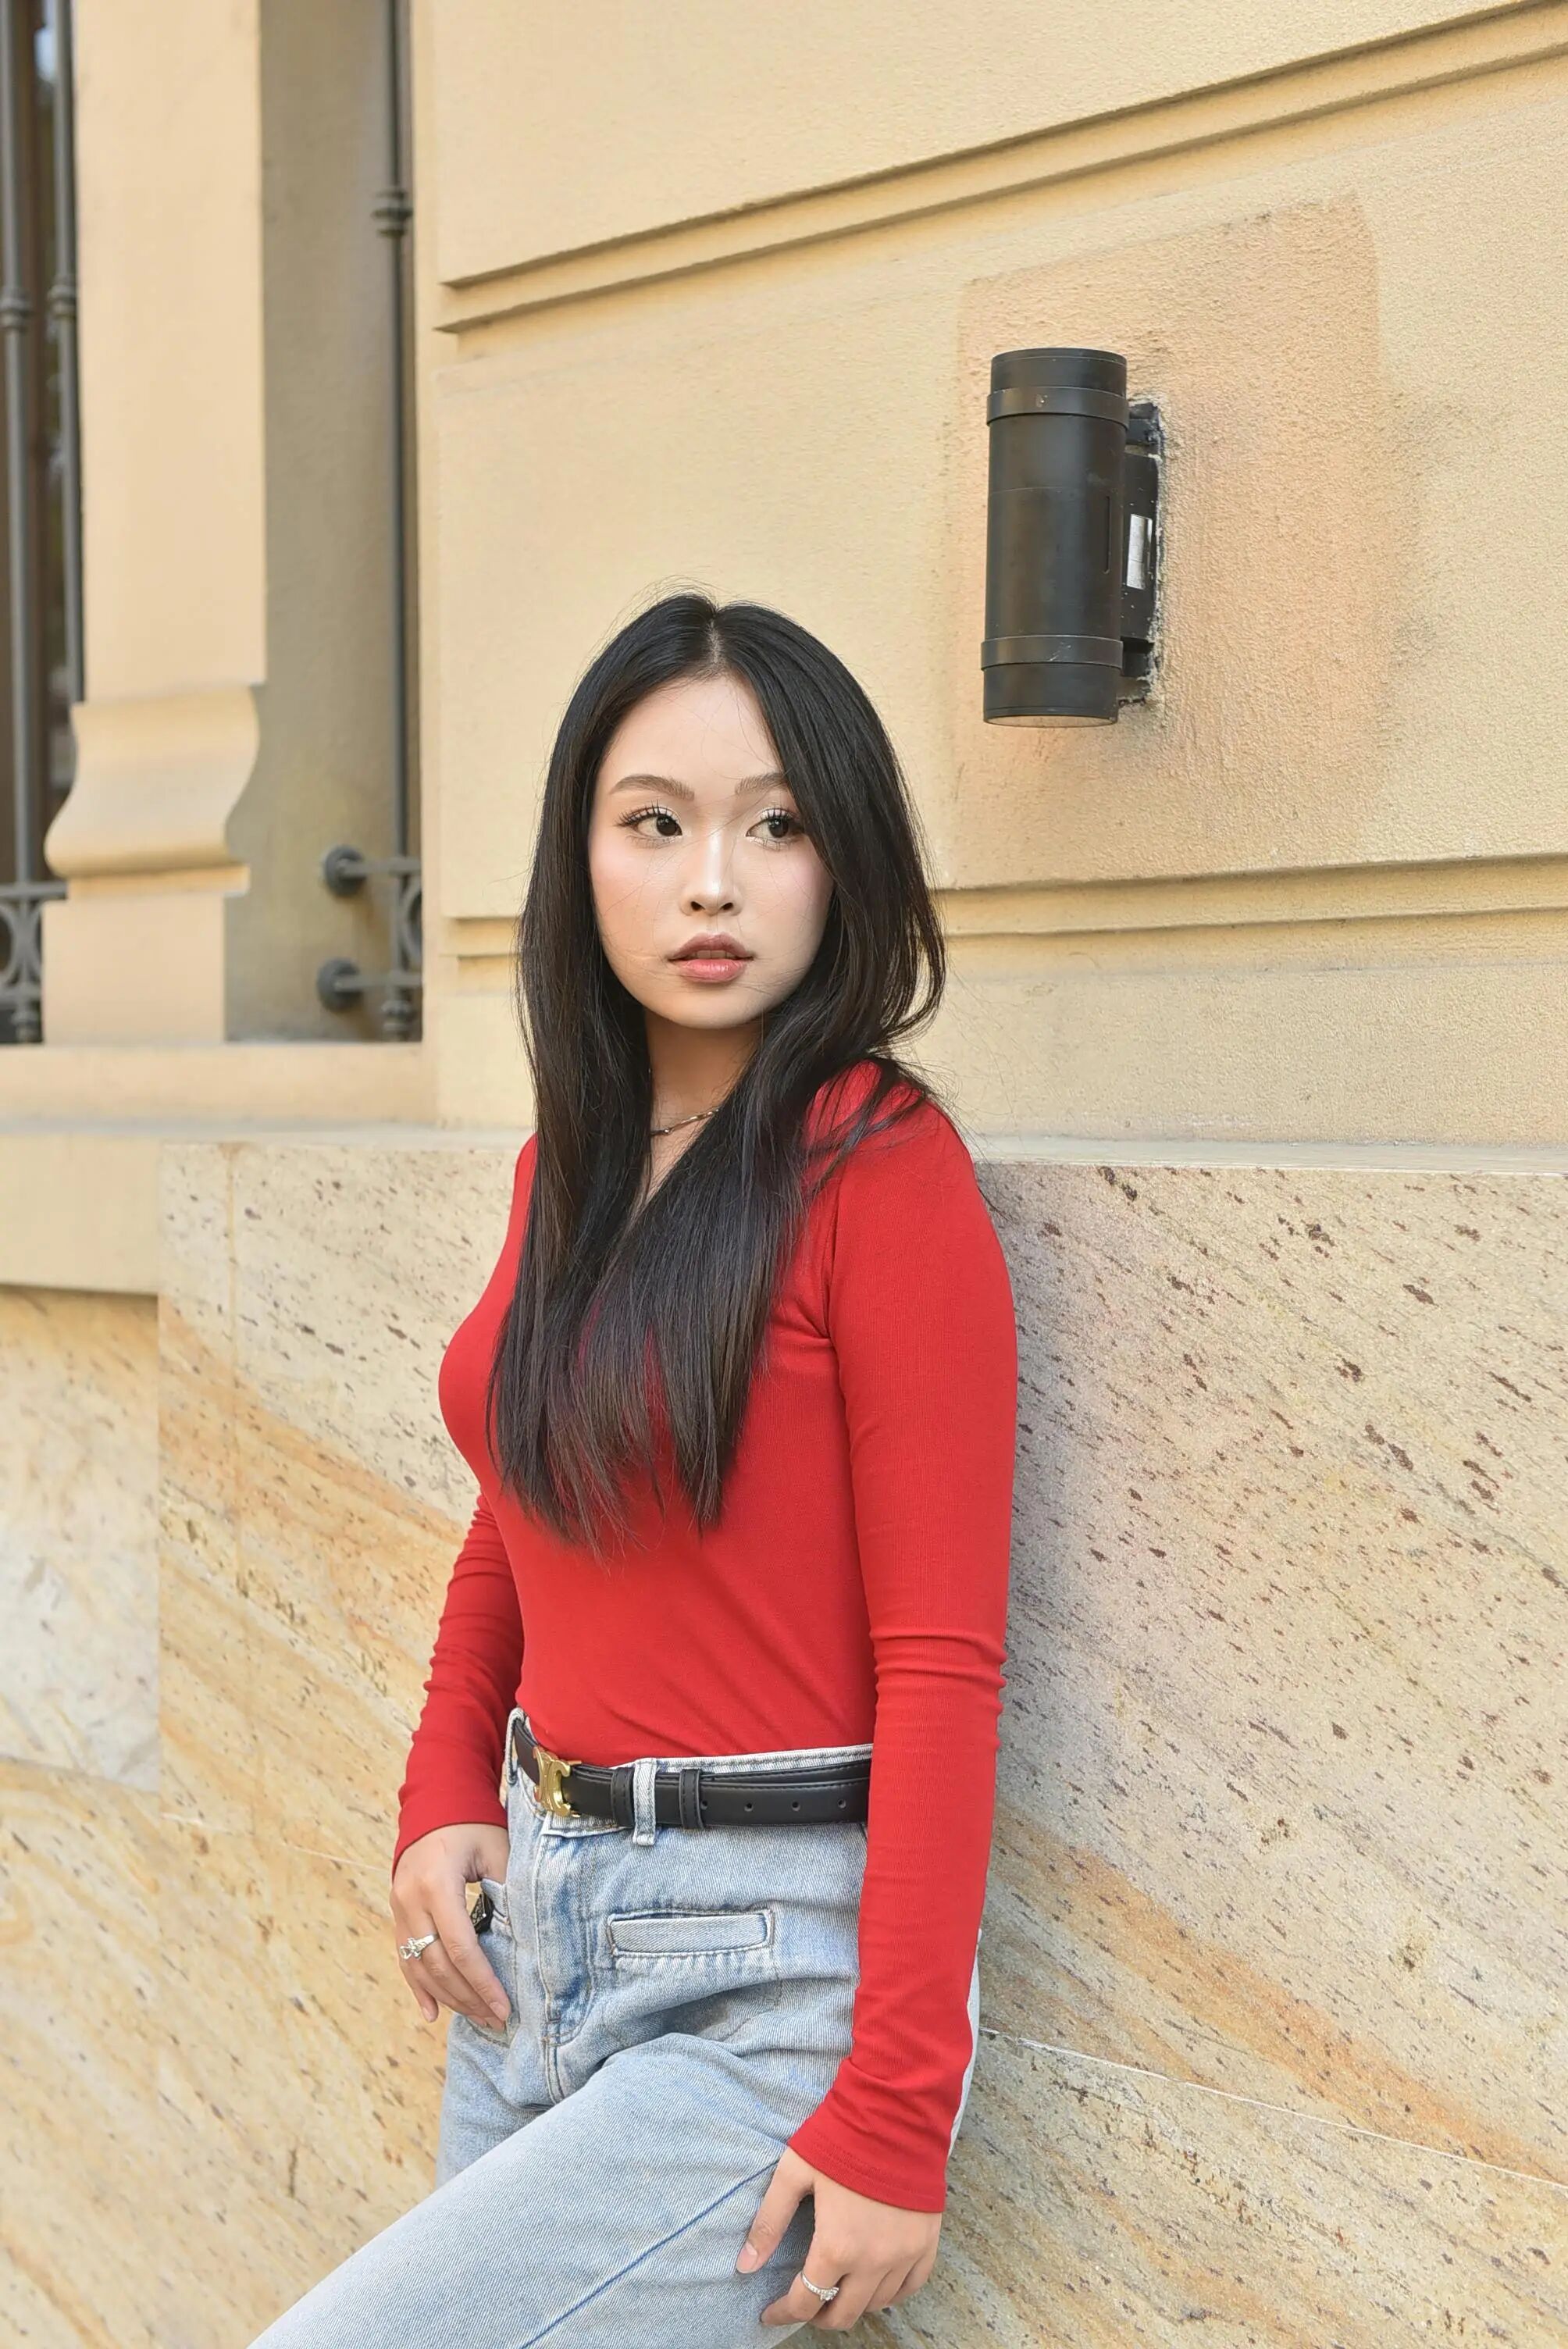
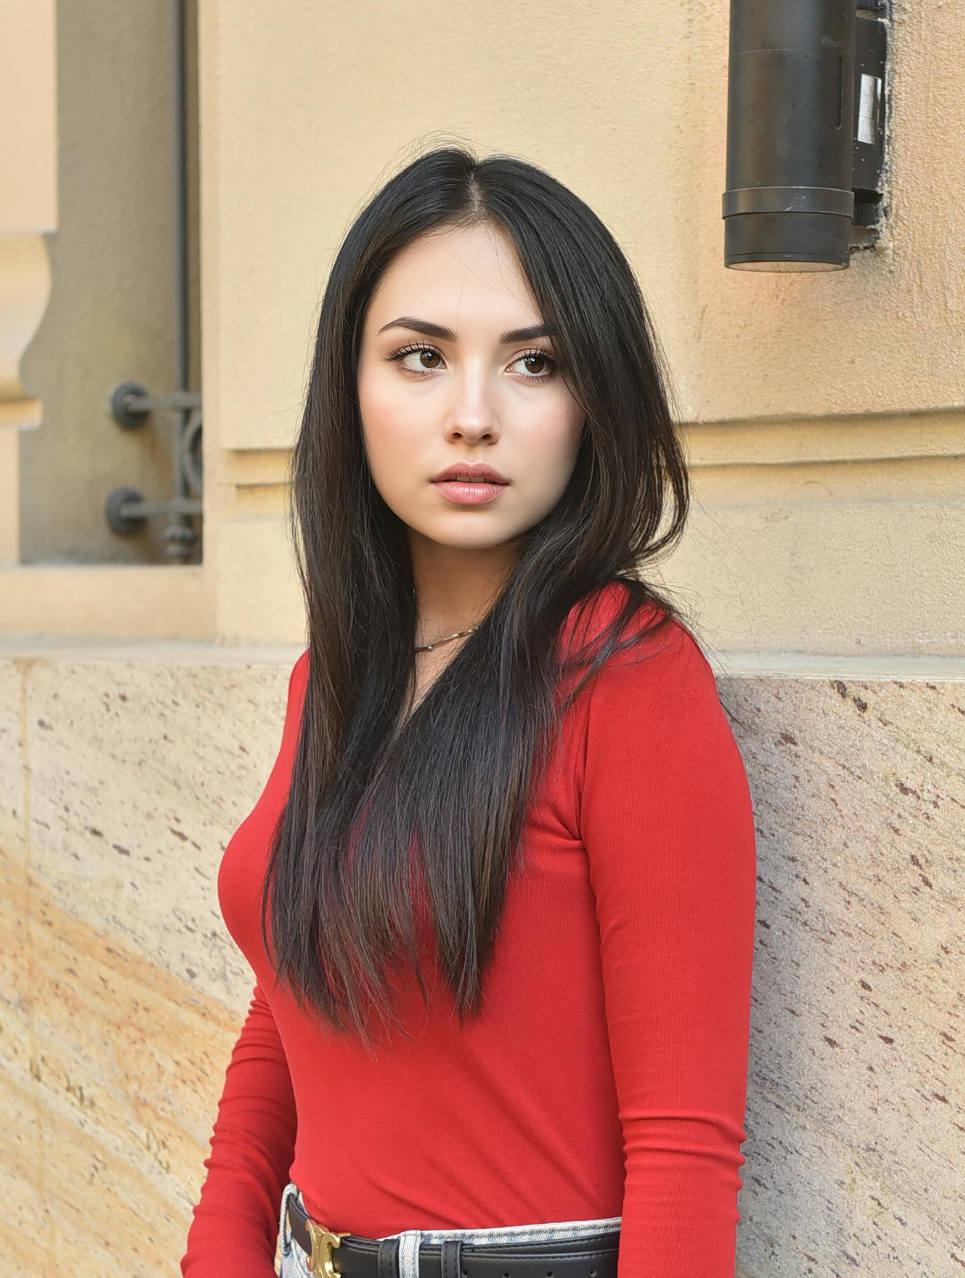
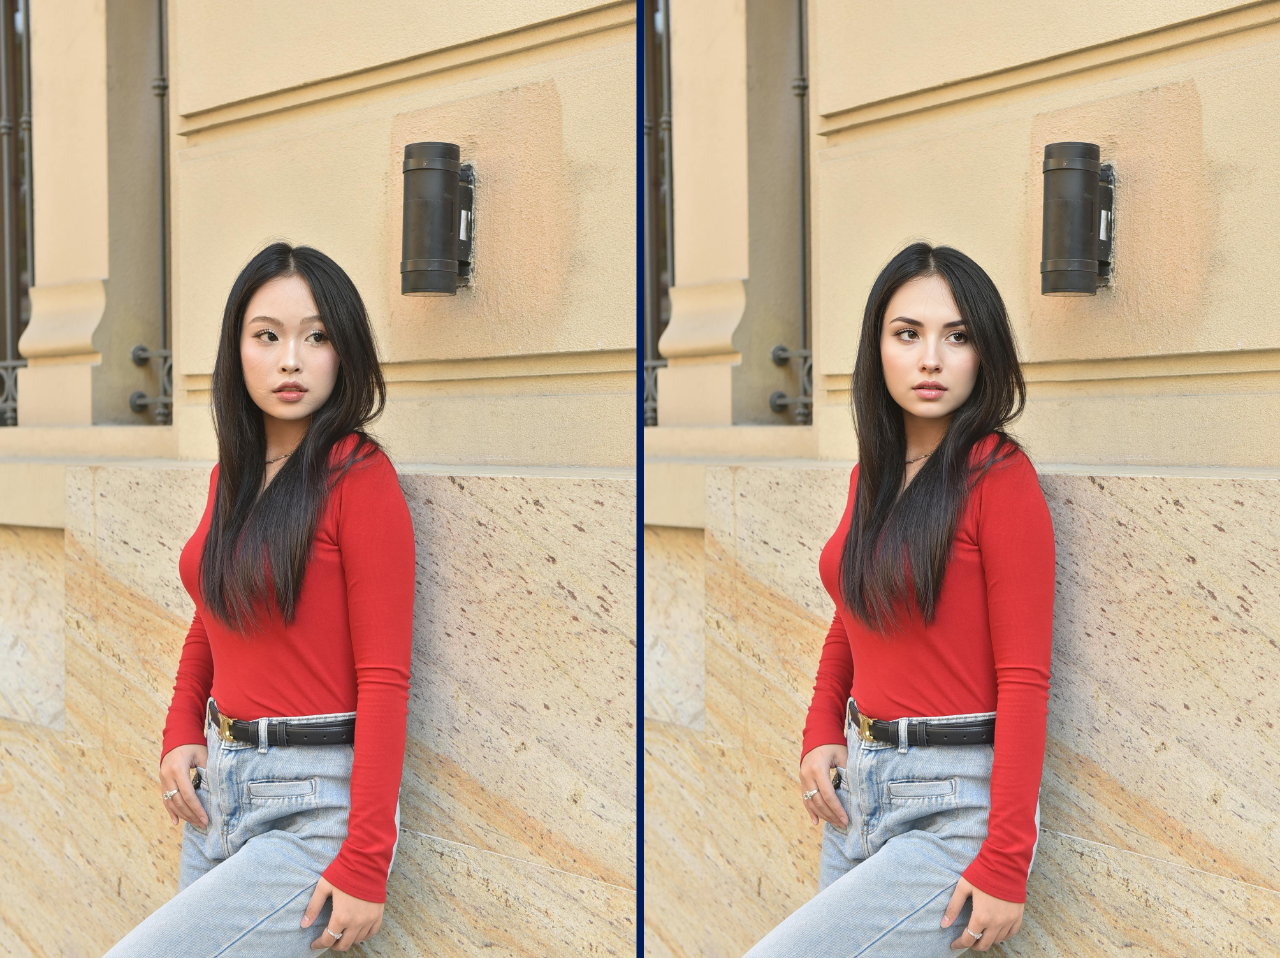
This is a portrait photo following the CC0 license, allowing free use, from Vietnamese photographer Felix Young. We’ll use this image as an operational example:
First, a tip about creating selections.
If you use the rectangular marquee tool to draw a selection randomly, especially for a small area, you’ll most likely encounter the returned image not aligning with the original. This is because in latent diffusion workflows, the image width and height must be divisible by the model’s latent downsampling factor. For common open-source image generation models like Flux.1, Qwen-Image, etc., since SD3 and later, this factor is mostly 16. When the width and height values are not divisible by 16, the ComfyUI node will automatically align the dimensions to the nearest multiple of 16. If the manually drawn selection’s width and height happen not to be multiples of 16, the returned image will naturally show an offset.
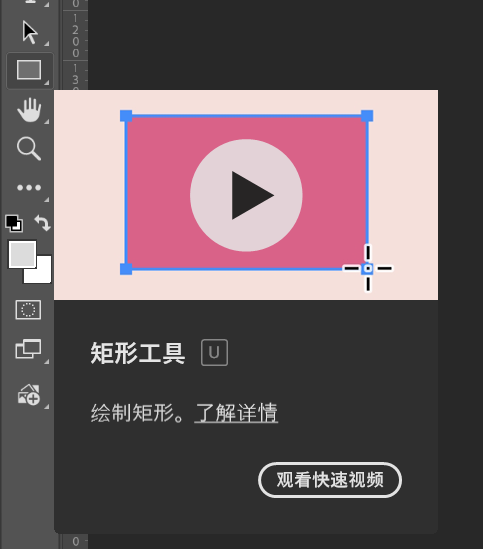
To avoid offset, instead of directly using the selection tool to draw a selection, we can first use the rectangle tool to create a rectangle with width and height that are multiples of 16, reduce its opacity, and place this rectangle over the desired area in the image.
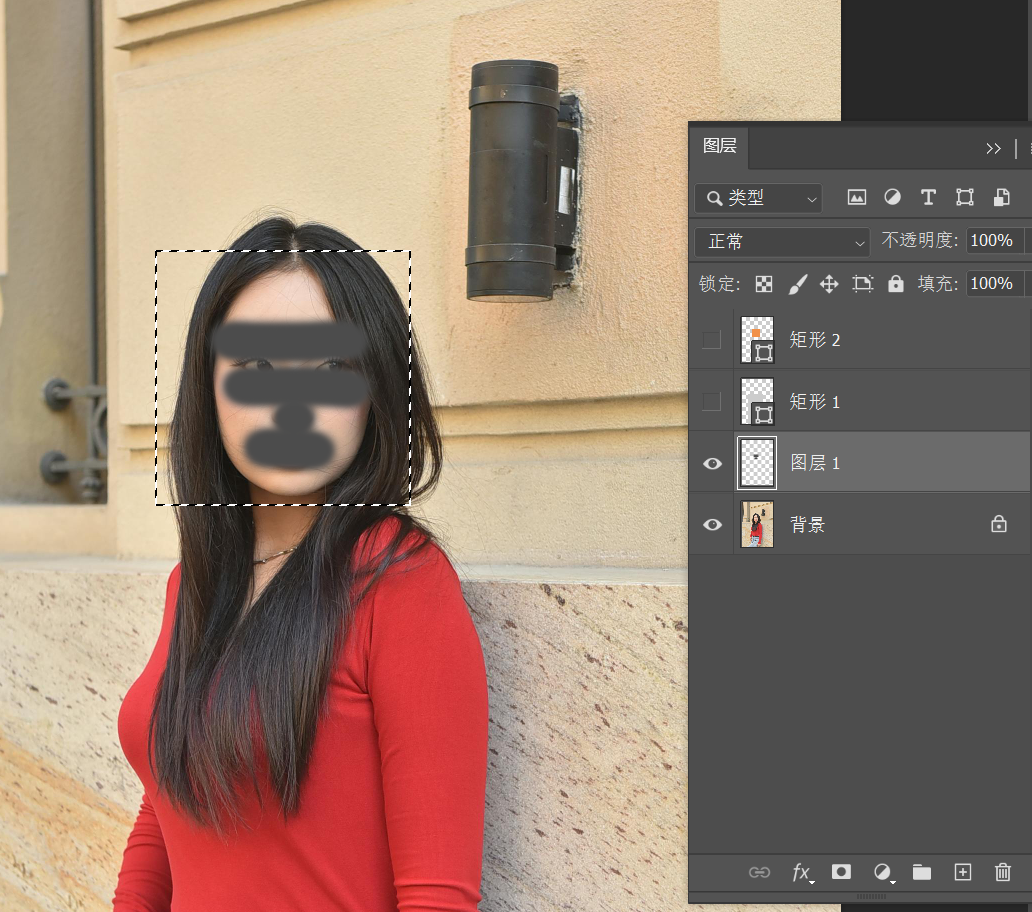
For example, for this portrait photo with a resolution of 2008×3008, if I want to adjust the model’s red top, I would create a 960×2016 rectangle. If I want to adjust the model’s facial expression, I could create a 512×512 rectangle.
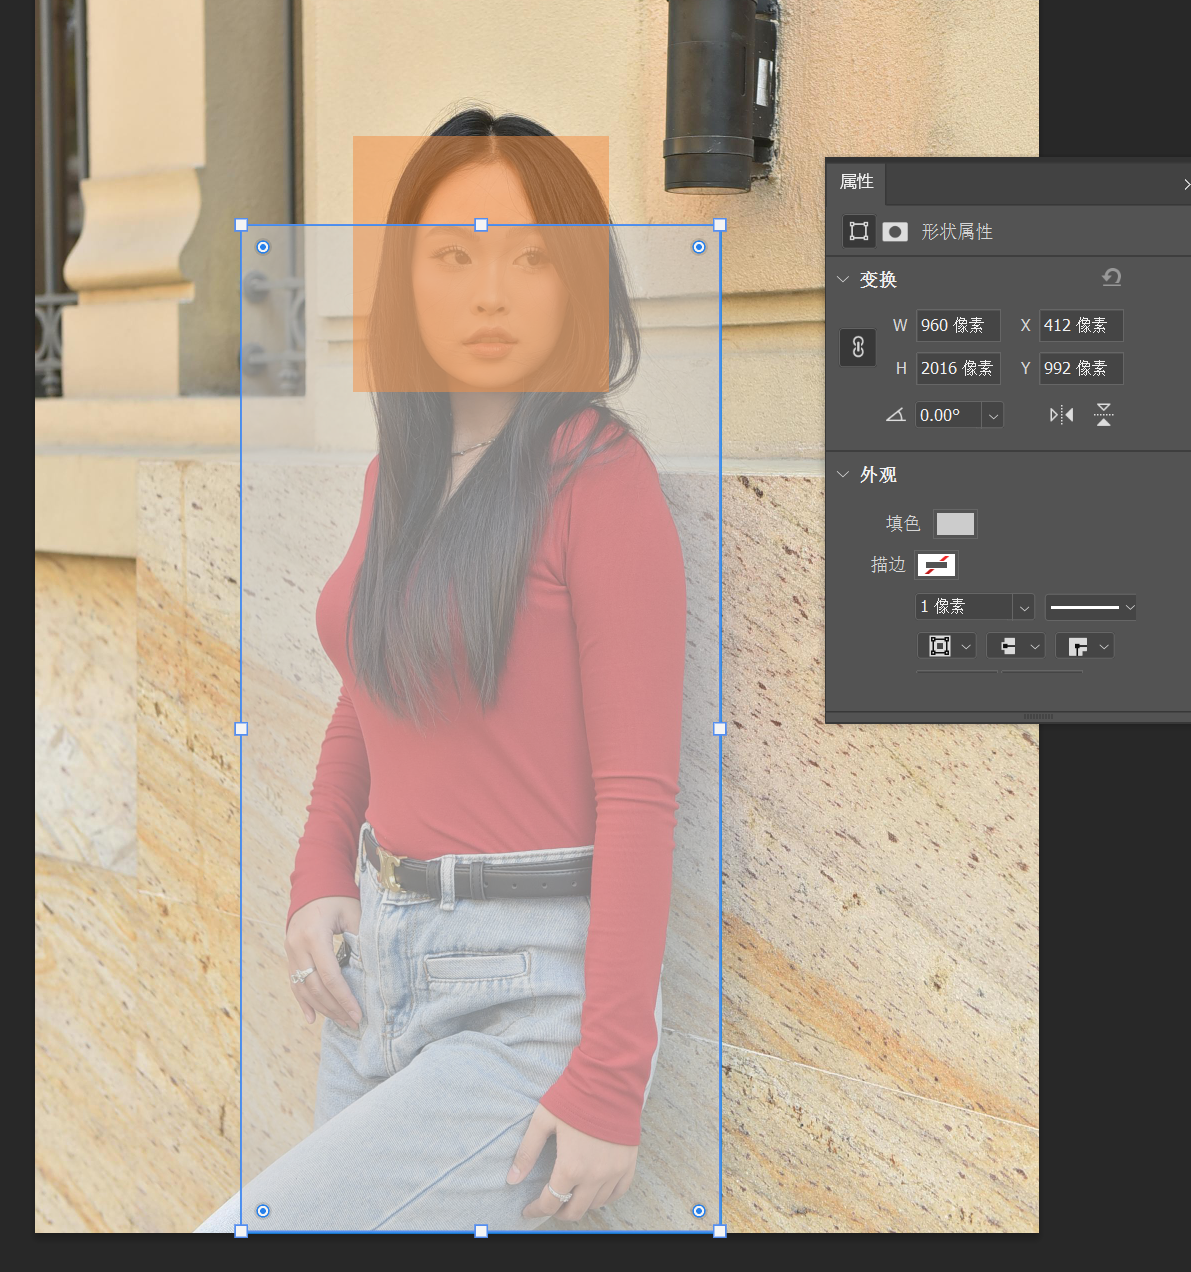
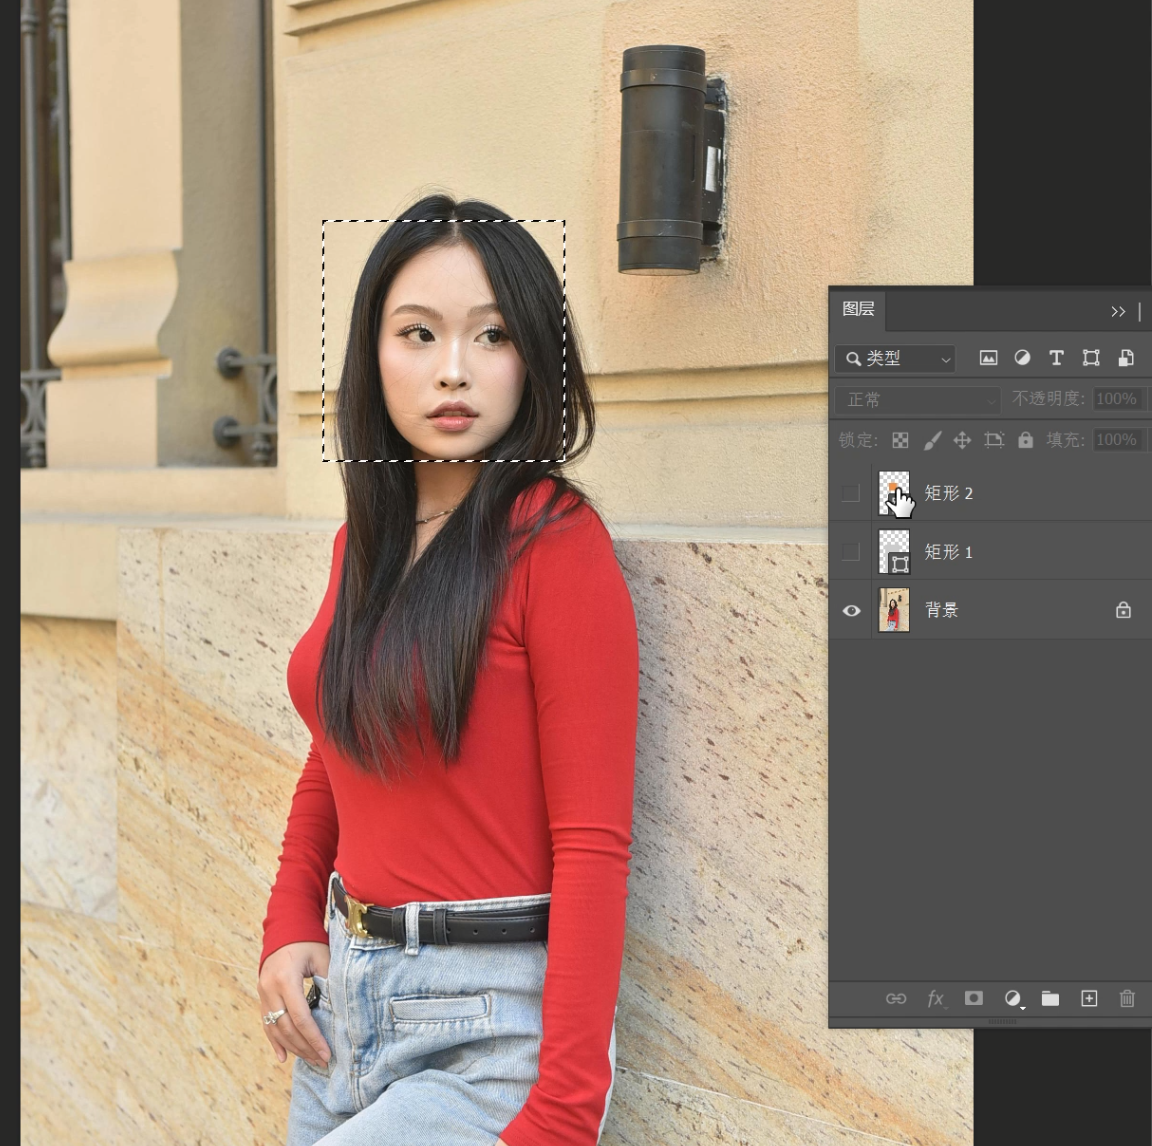
After positioning, hide the rectangle layer. Hold down the Ctrl key and click the rectangle layer’s thumbnail to create a selection based on this rectangle.
For example, looking at the environment in this photo now, I think it has a somewhat European style.
So I want to use it on a PPT page showcasing European elements, but the model in the photo is an Asian beauty, which doesn’t match well, and I can’t find other images at the moment. So I can use the “Rectangle 2” facial selection to repaint the model’s facial features, effectively swapping her out for a European model.
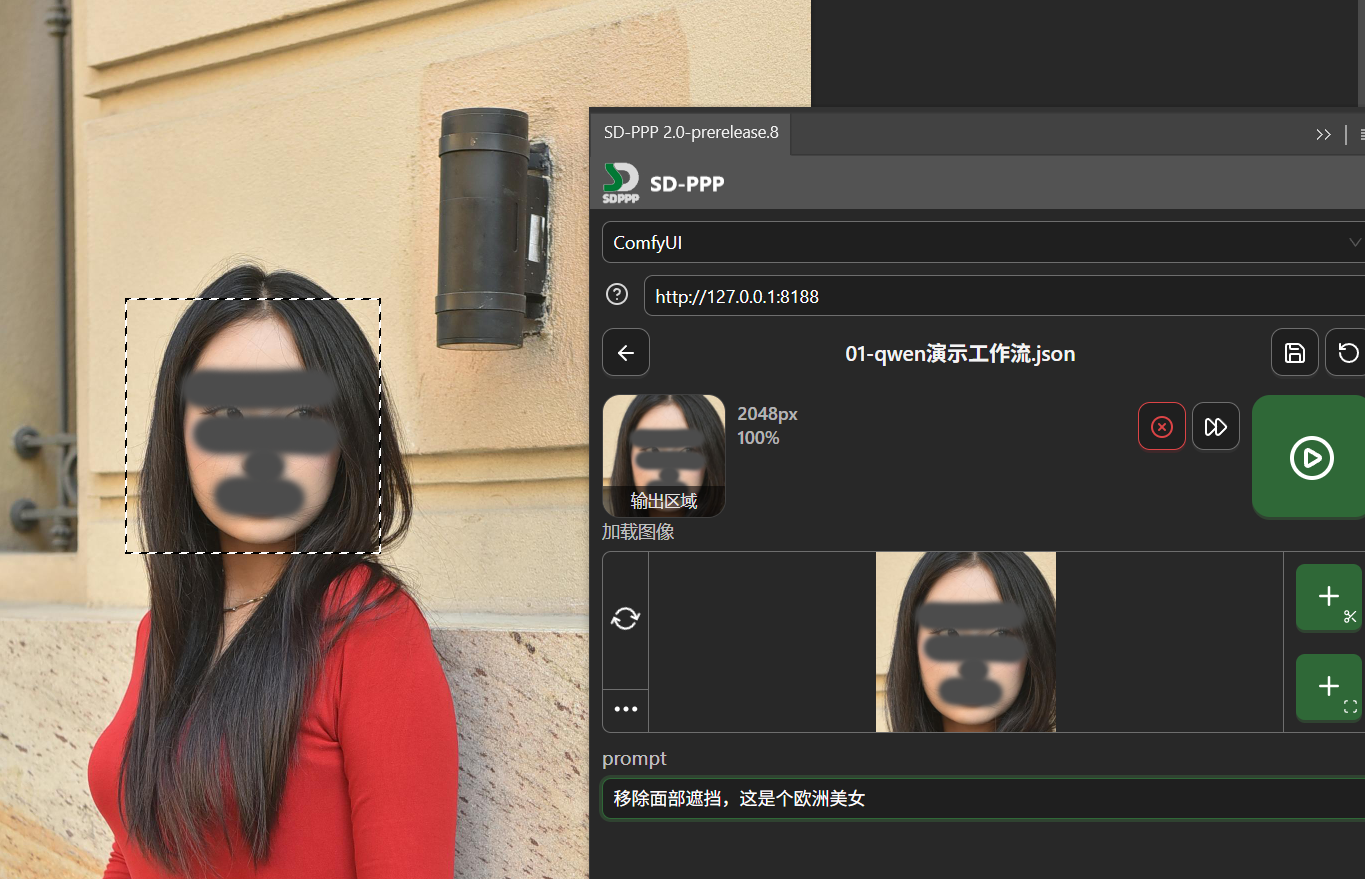
Create a new layer and paint over the model’s facial features. How much you paint can be adjusted based on the desired degree of change.
Then instruct the AI to remove the facial obstructions, telling it this is a European beauty.
After running, the AI returns the image:
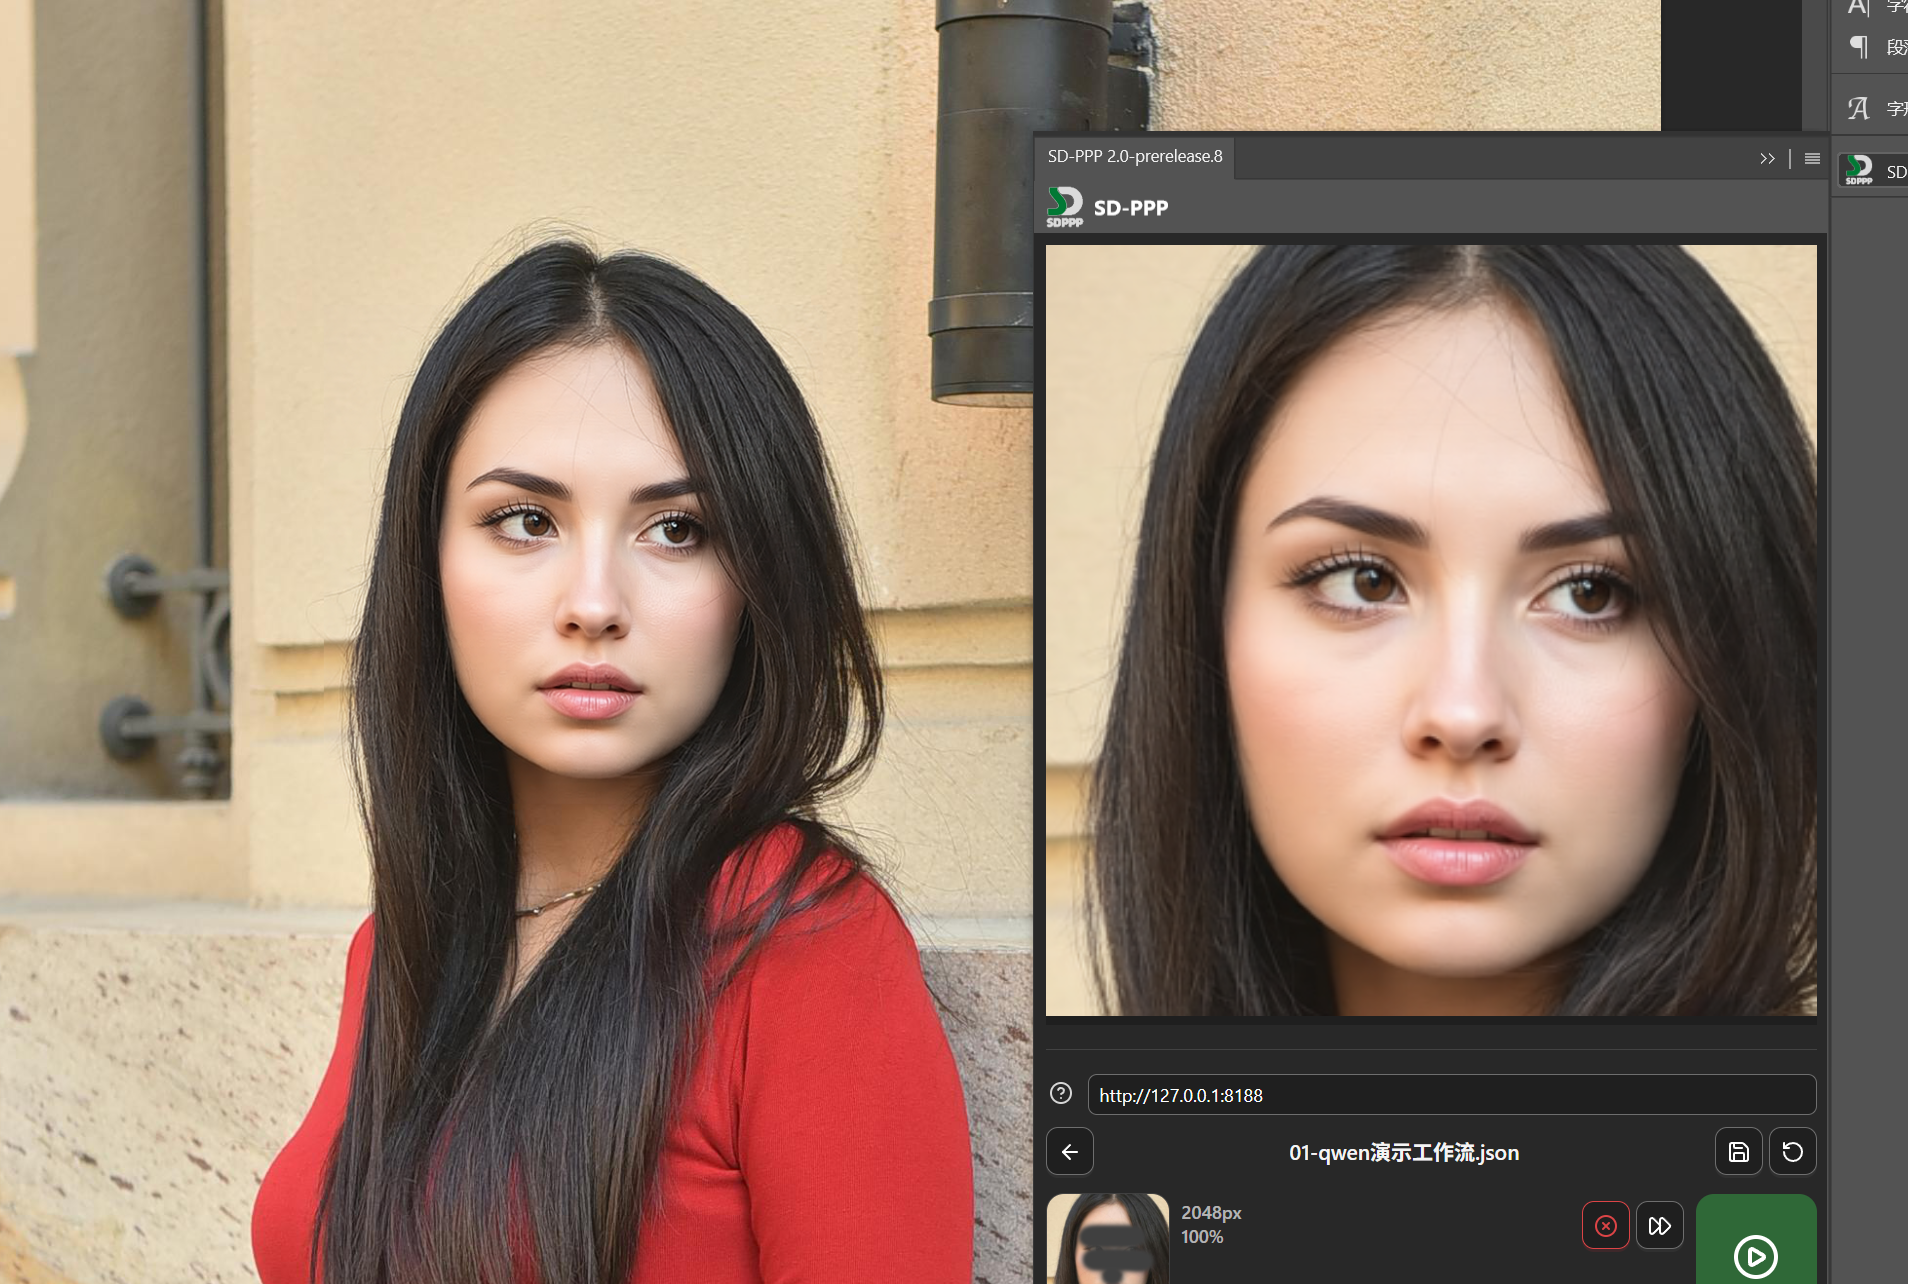
This time the result is decent, just the face is slightly reddish.
But sometimes, especially when the original image has rich colors and strong contrast, the AI output results can have color casts. The Qwen-Image-Edit model is particularly prone to this. This color cast can be improved to some extent with certain LoRAs, but it can’t be completely eliminated and can also affect image generation speed and quality.
But it doesn’t matter. Since we’re already in PS, we can certainly use PS methods to handle it.
We use the same selection as the repaint, copy a copy of the selected content from the original image, which is Layer 2 below (other layers are hidden for clarity in the illustration, but it’s not necessary in practice).
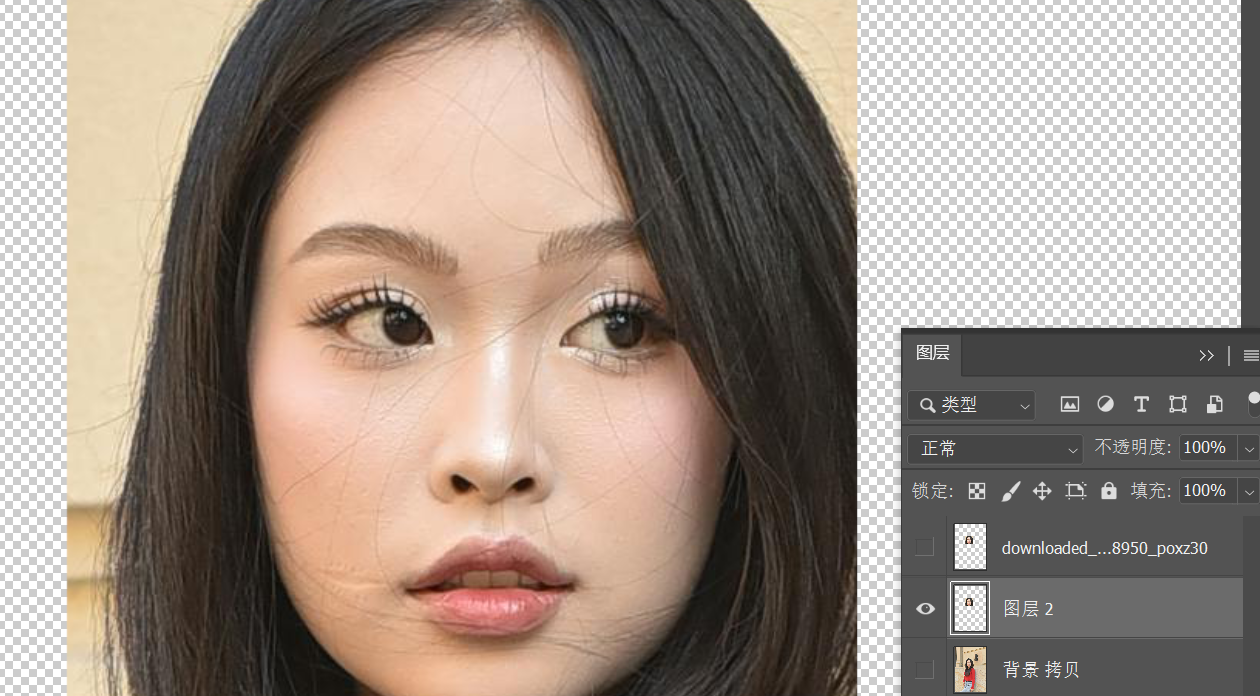
Then first select the layer returned after AI modification, and find Image > Adjustments > Match Color in the PS menu.
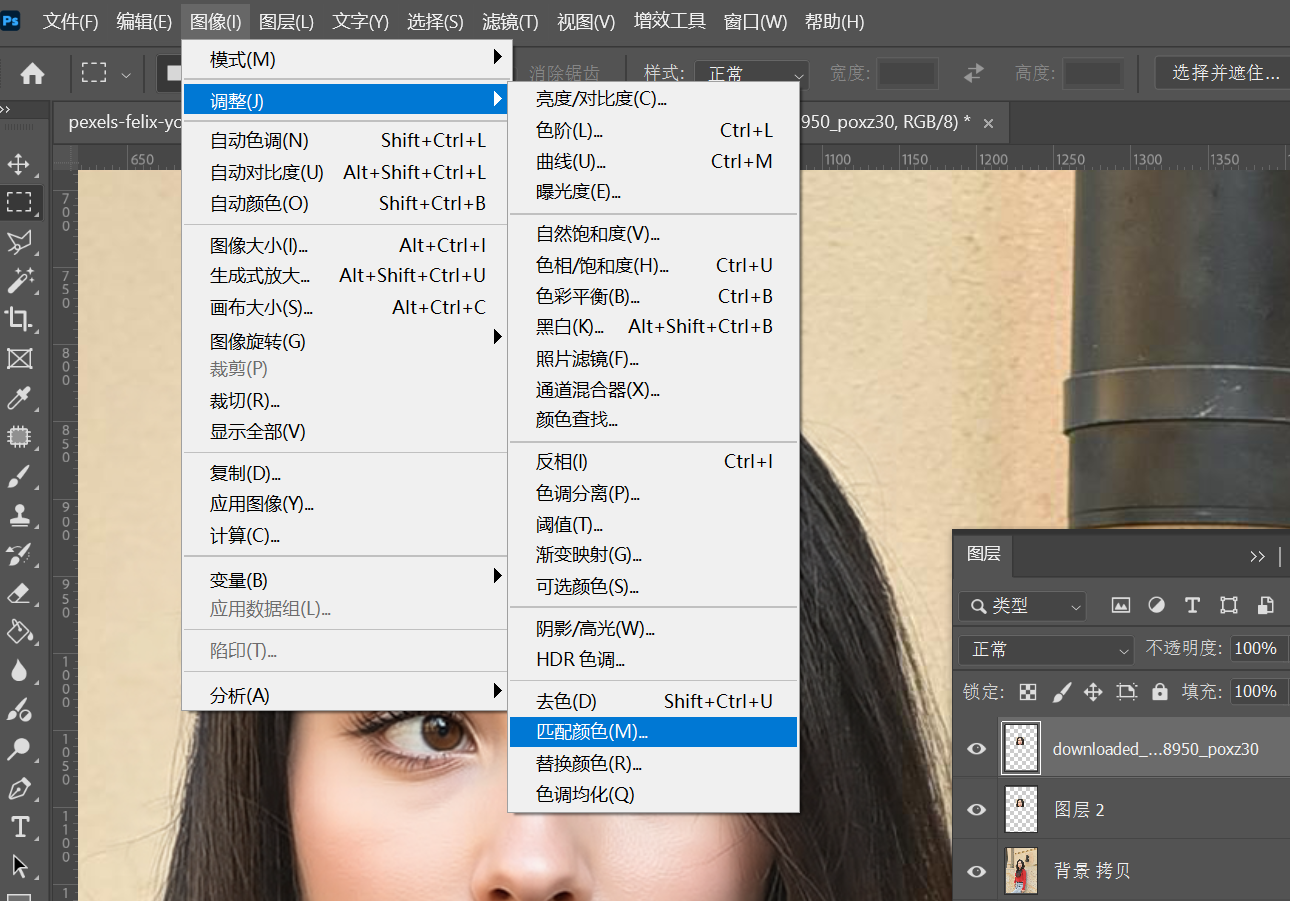
Source selects the current file, Layer selects Layer 2.
This operation means making the color of the AI-generated facial selection match the color of the same area in the original image.
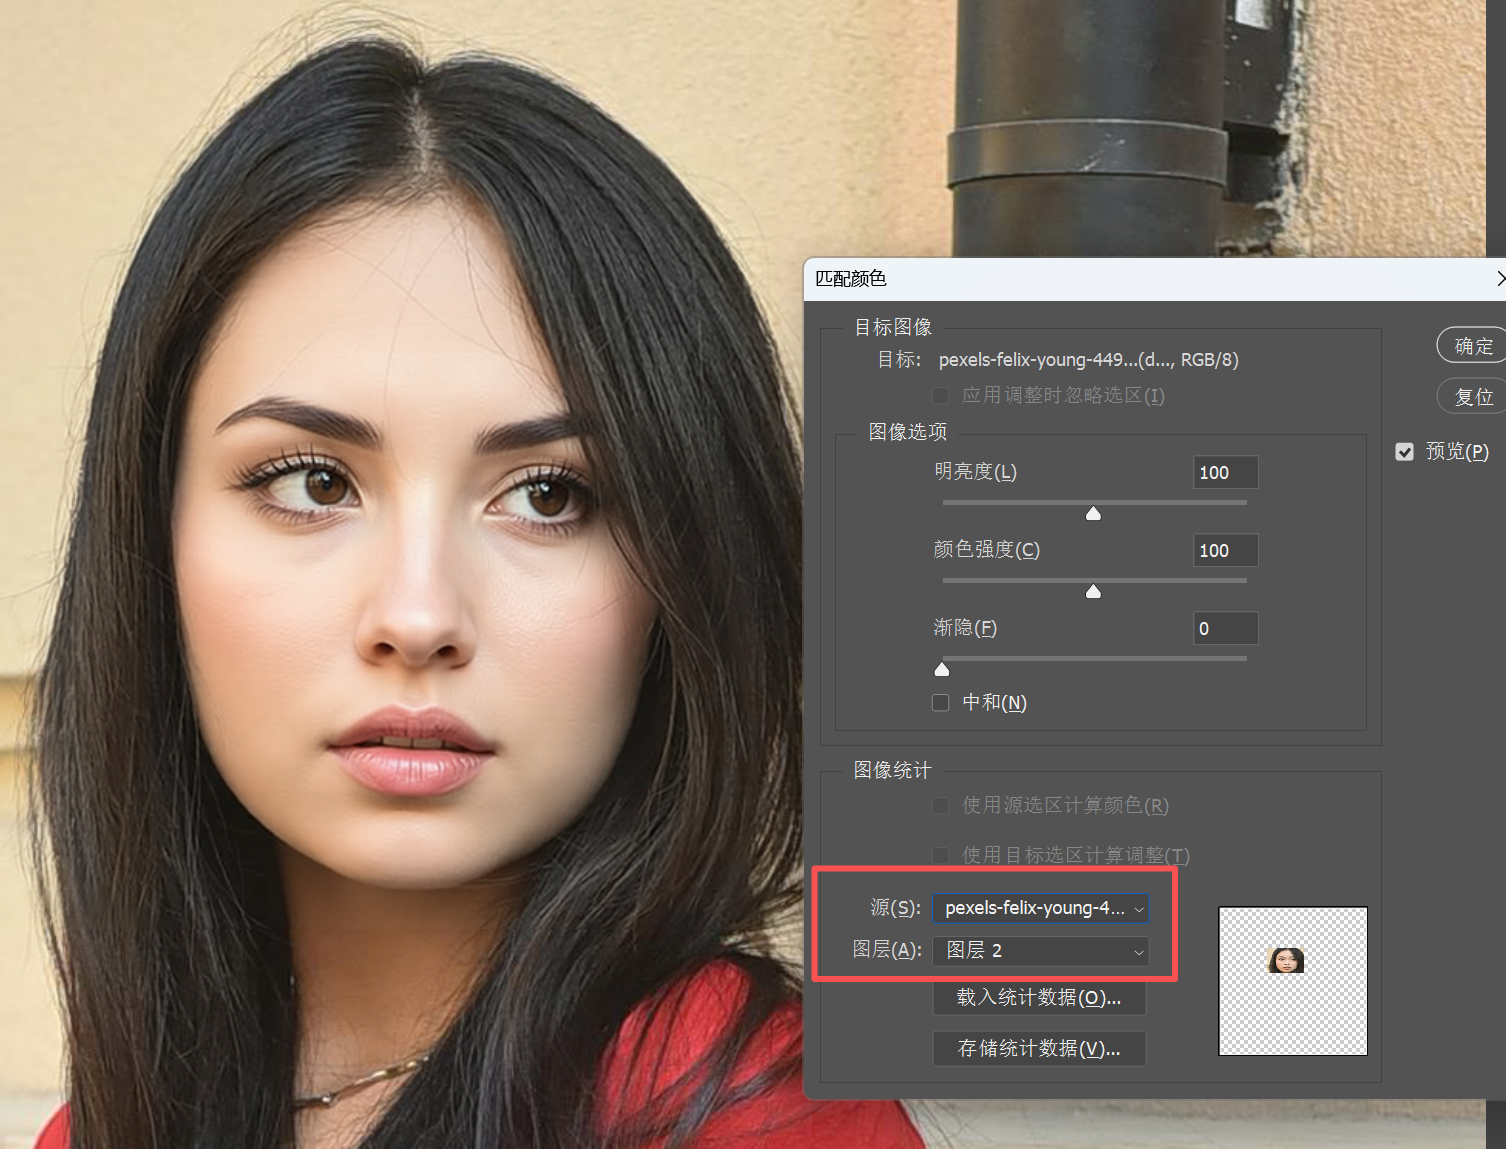
Let’s show a comparison; the change should be visible. The originally reddish facial color is now more harmonious with the overall image.
Oops, the original image has too few problems, it’s got me stumped.
Let me insert a case on the fly.
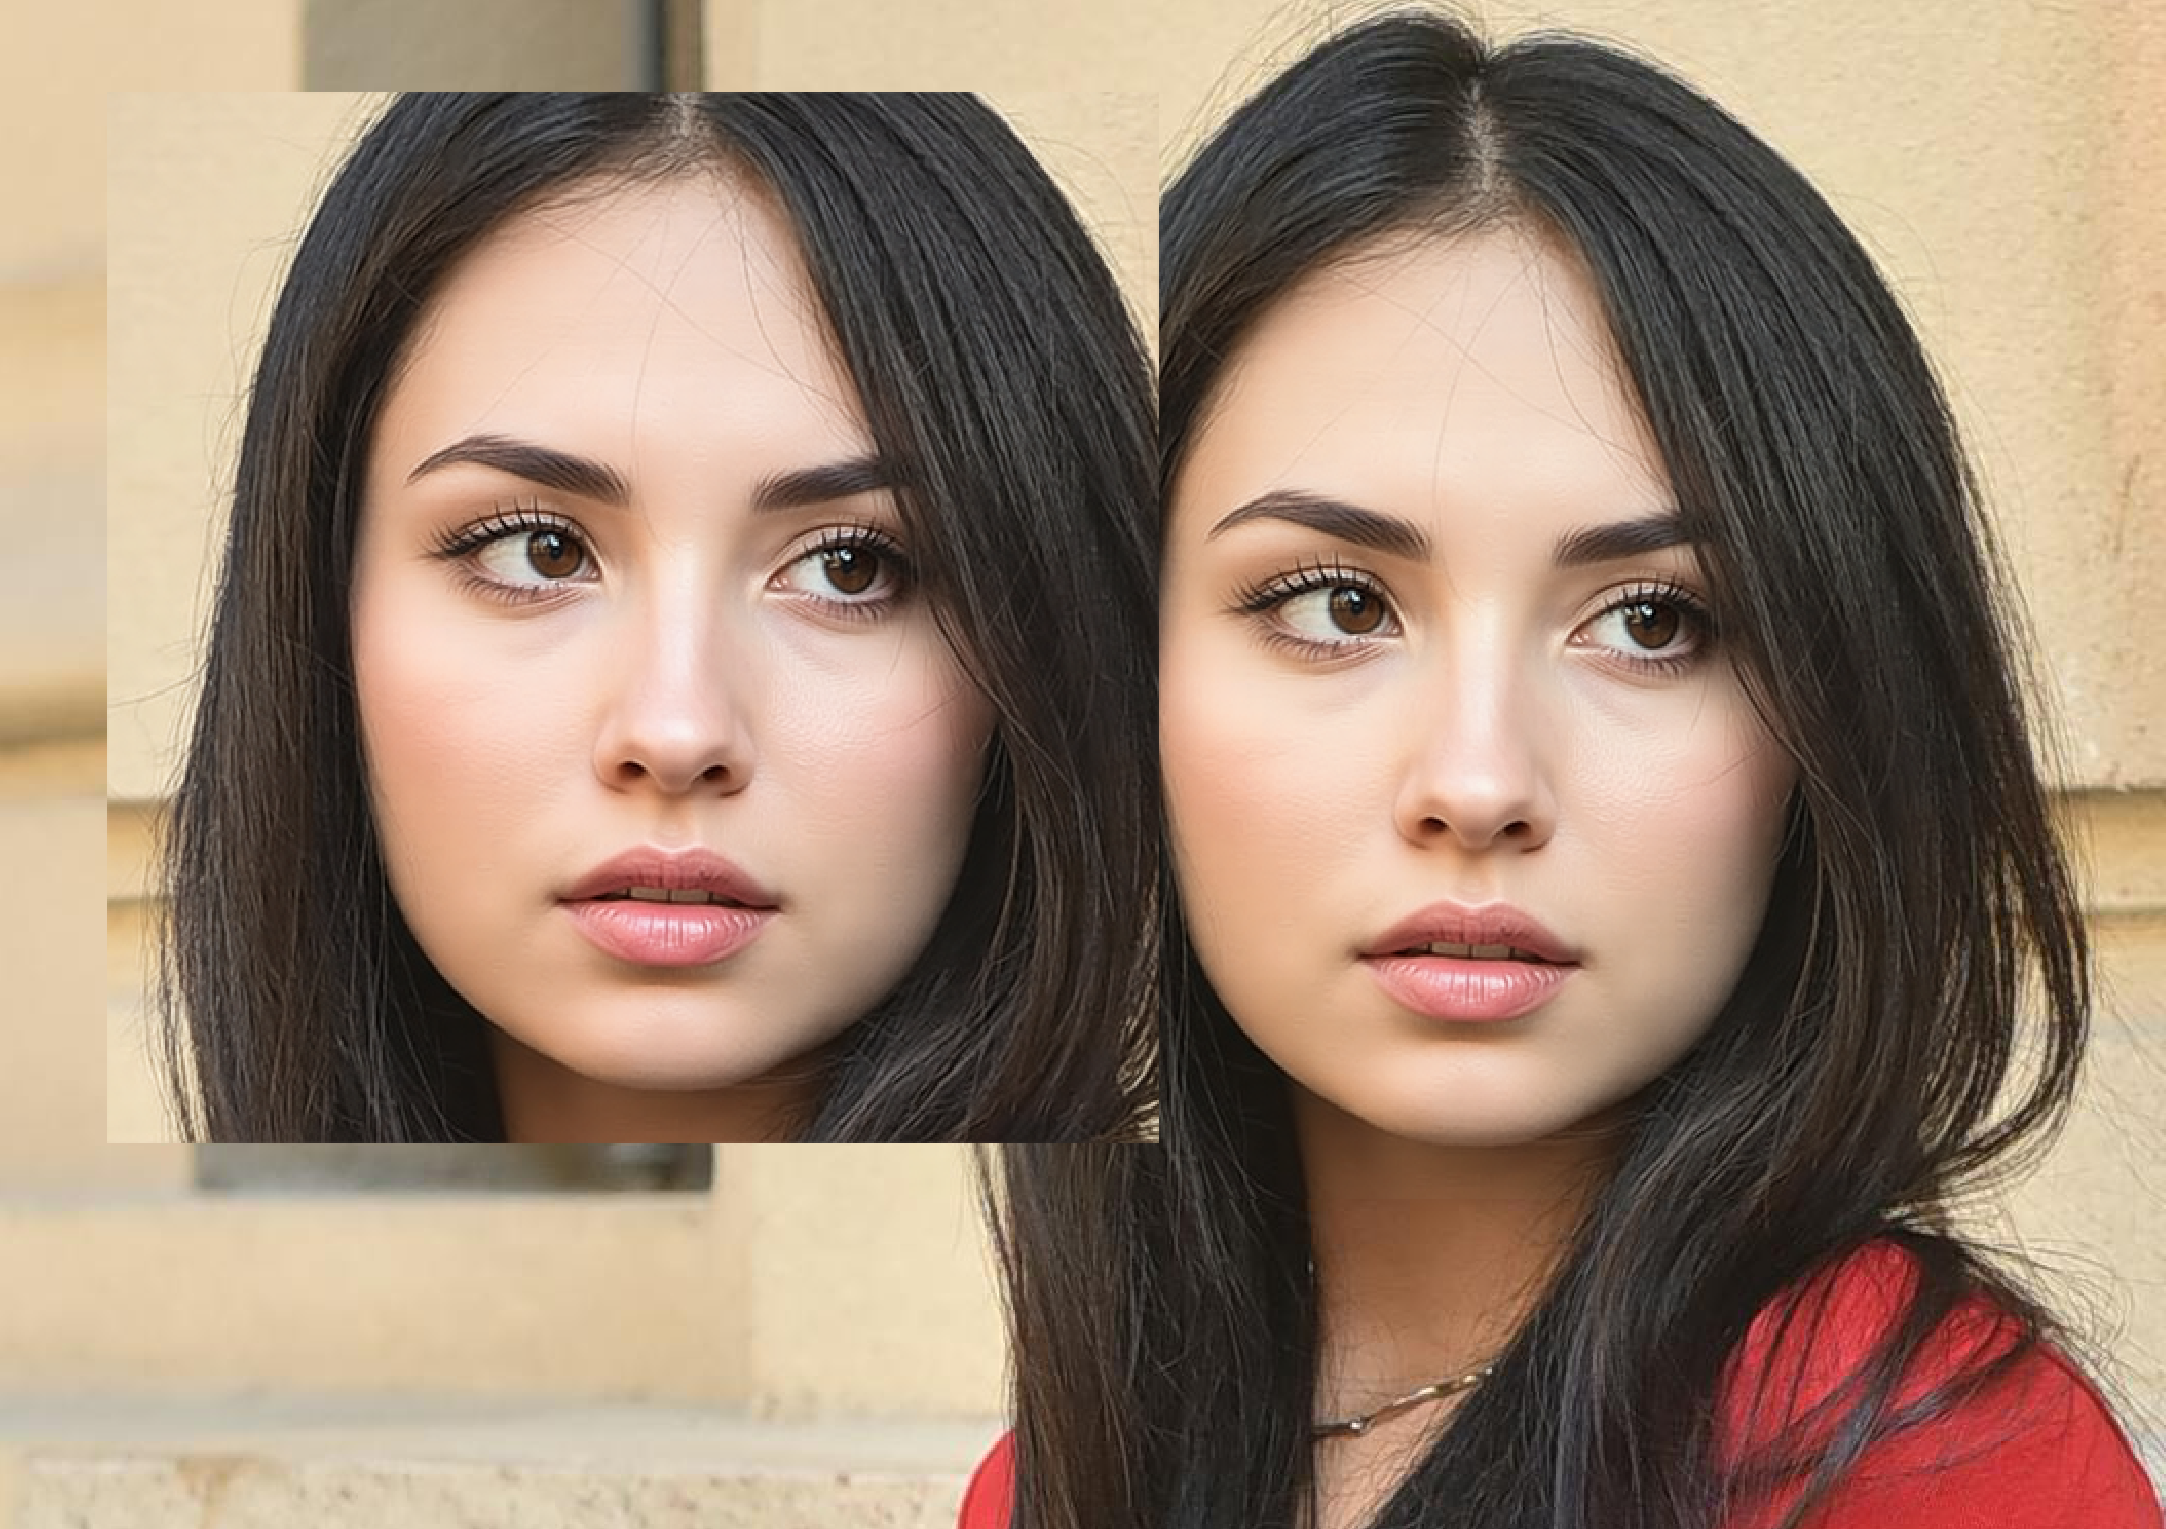
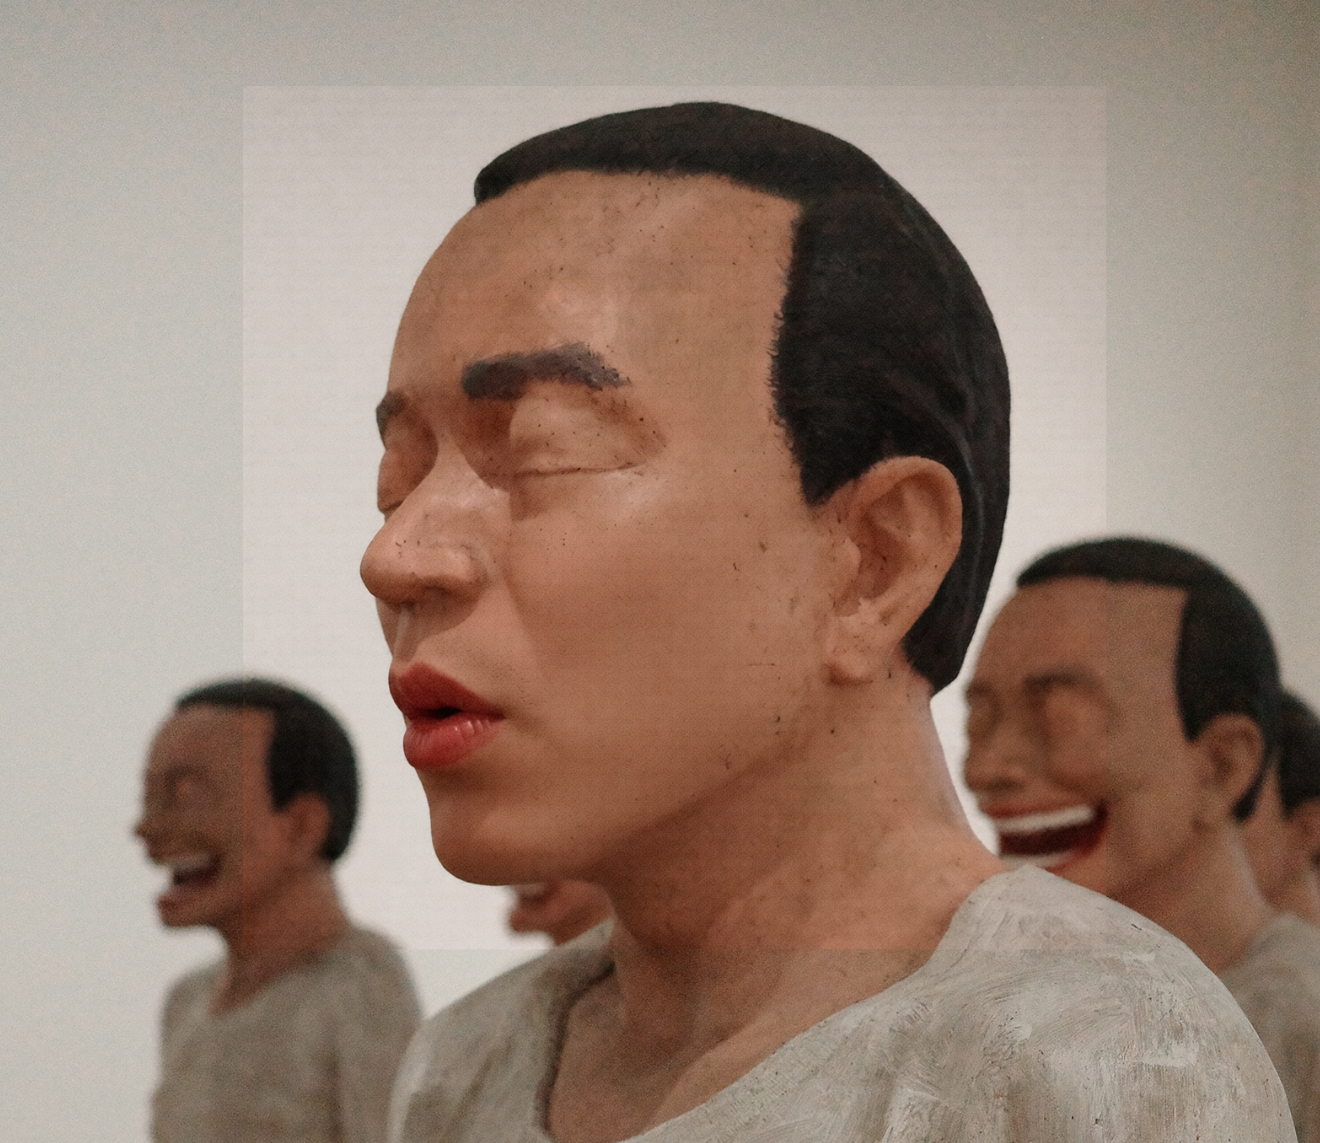
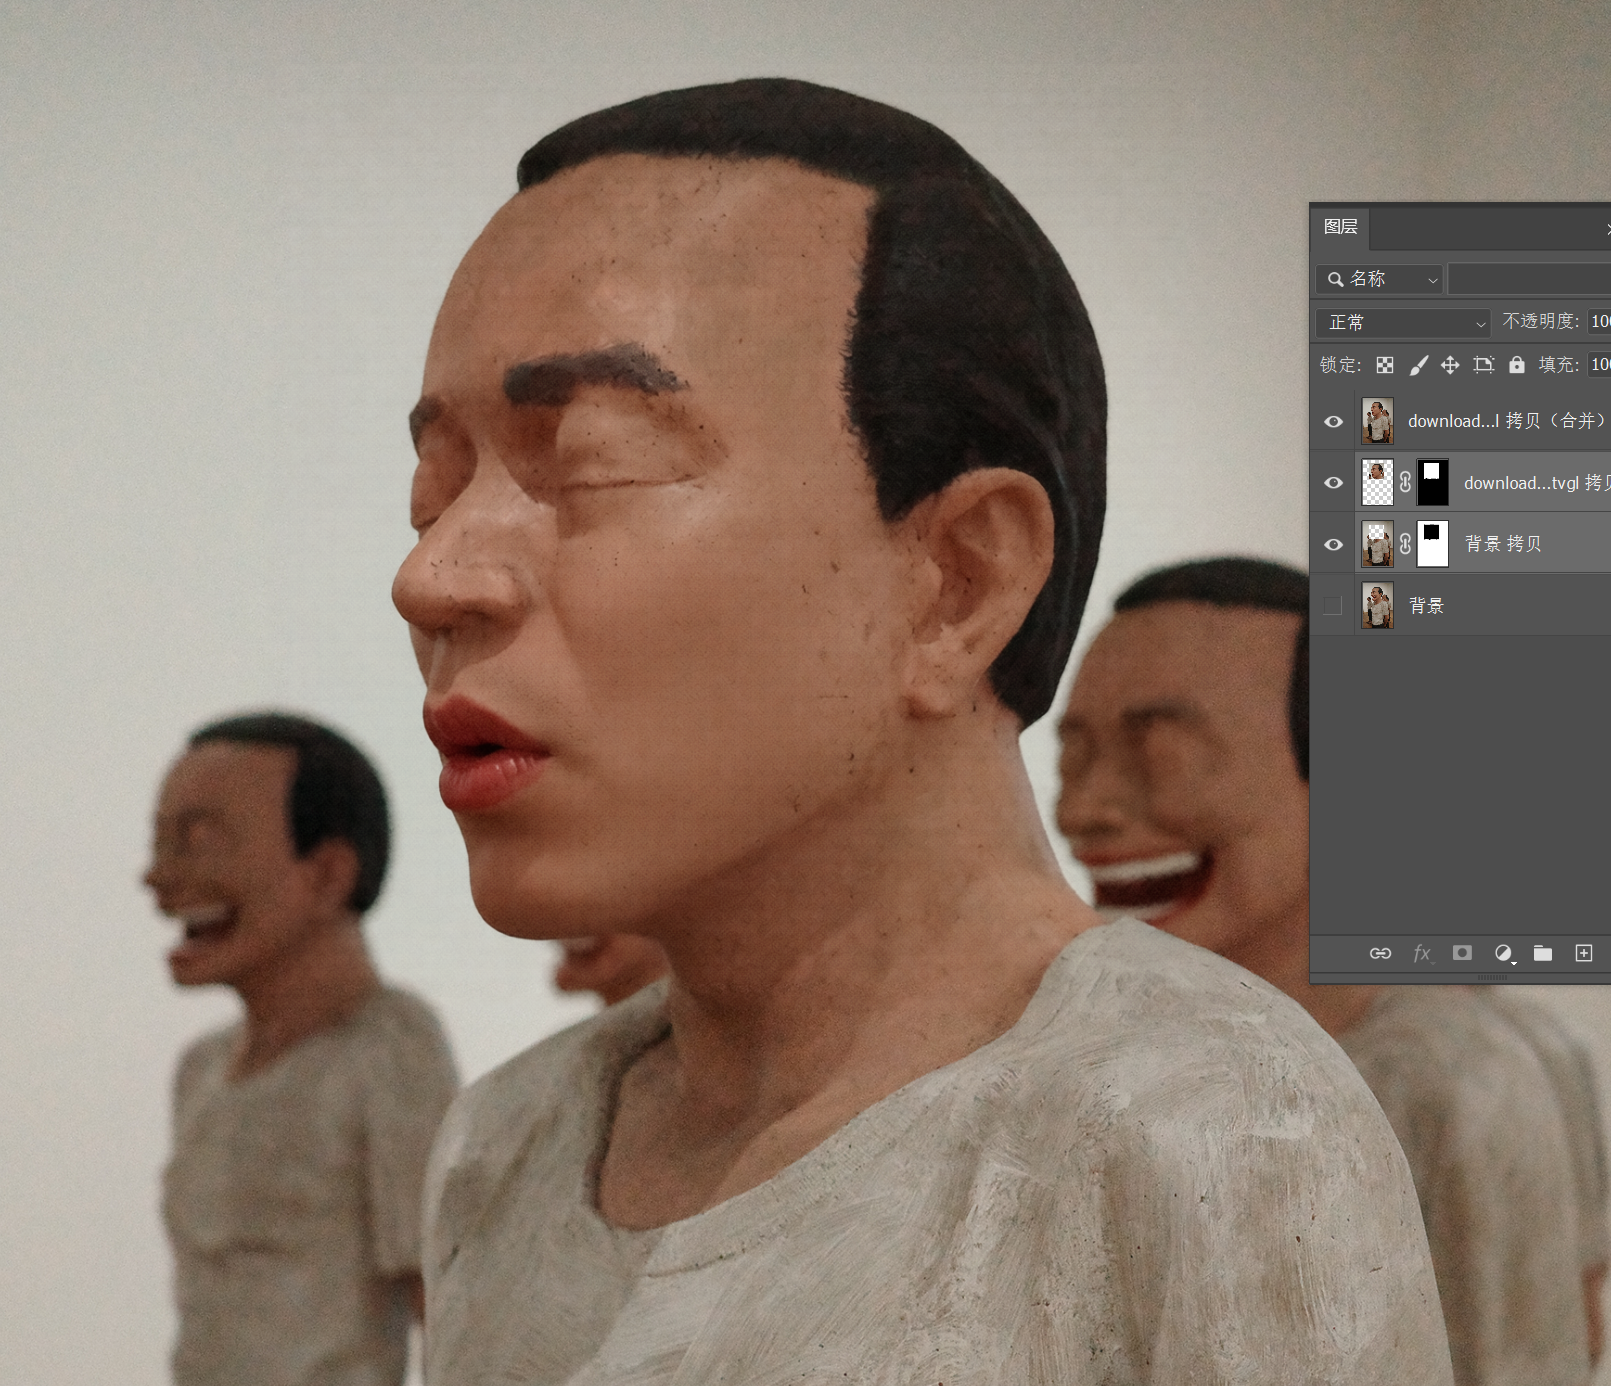
This is an exhibit I photographed at the M+ Museum in Hong Kong:
I’m now using AI to make the person in front close their mouth.
In this image, we can see a relatively obvious color cast.
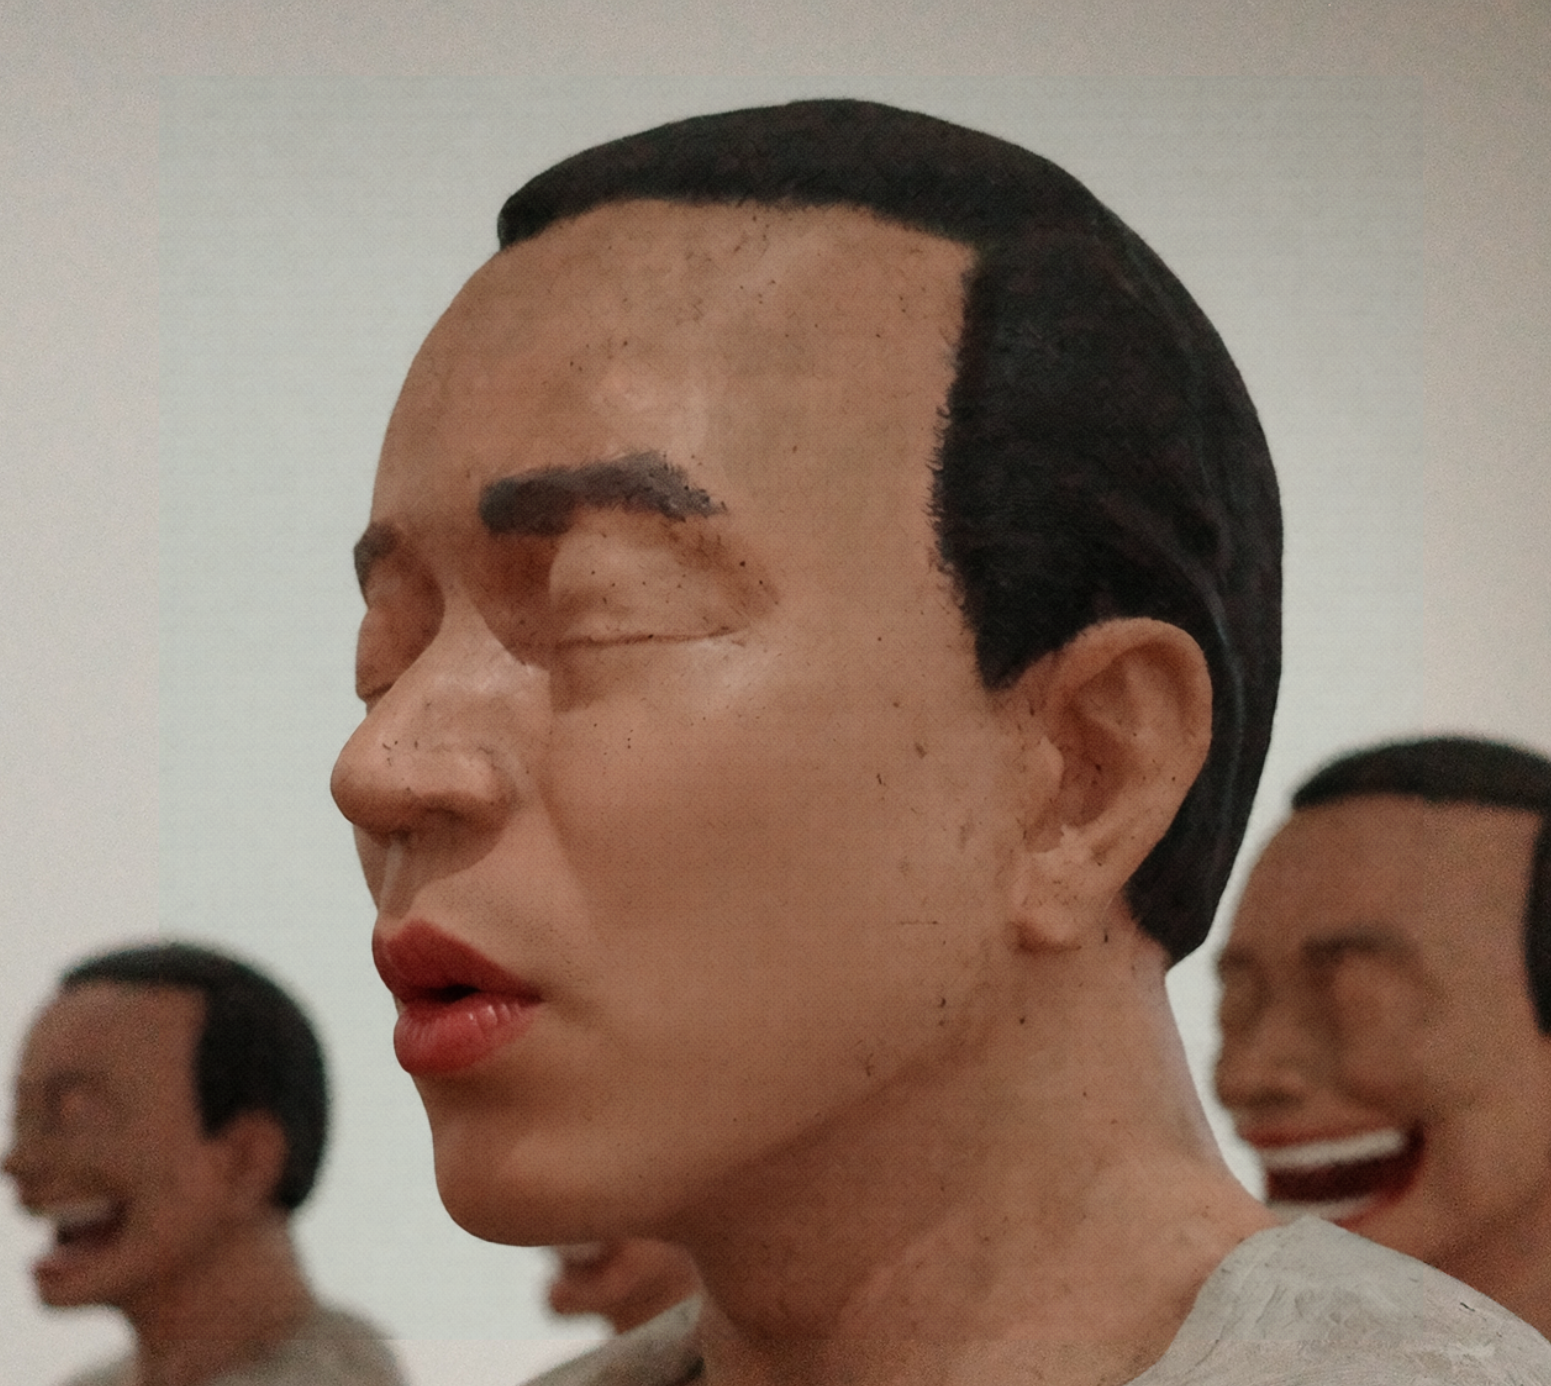
After matching colors, the color difference at the joint between the heads of the two people in the back, outside the focal plane, is significantly improved, but upon close inspection, you can still see a slight cyan tint.
How to handle it? You don’t need to manually adjust colors or paint and erase; you only need a slight touch of depth-of-field compositing.
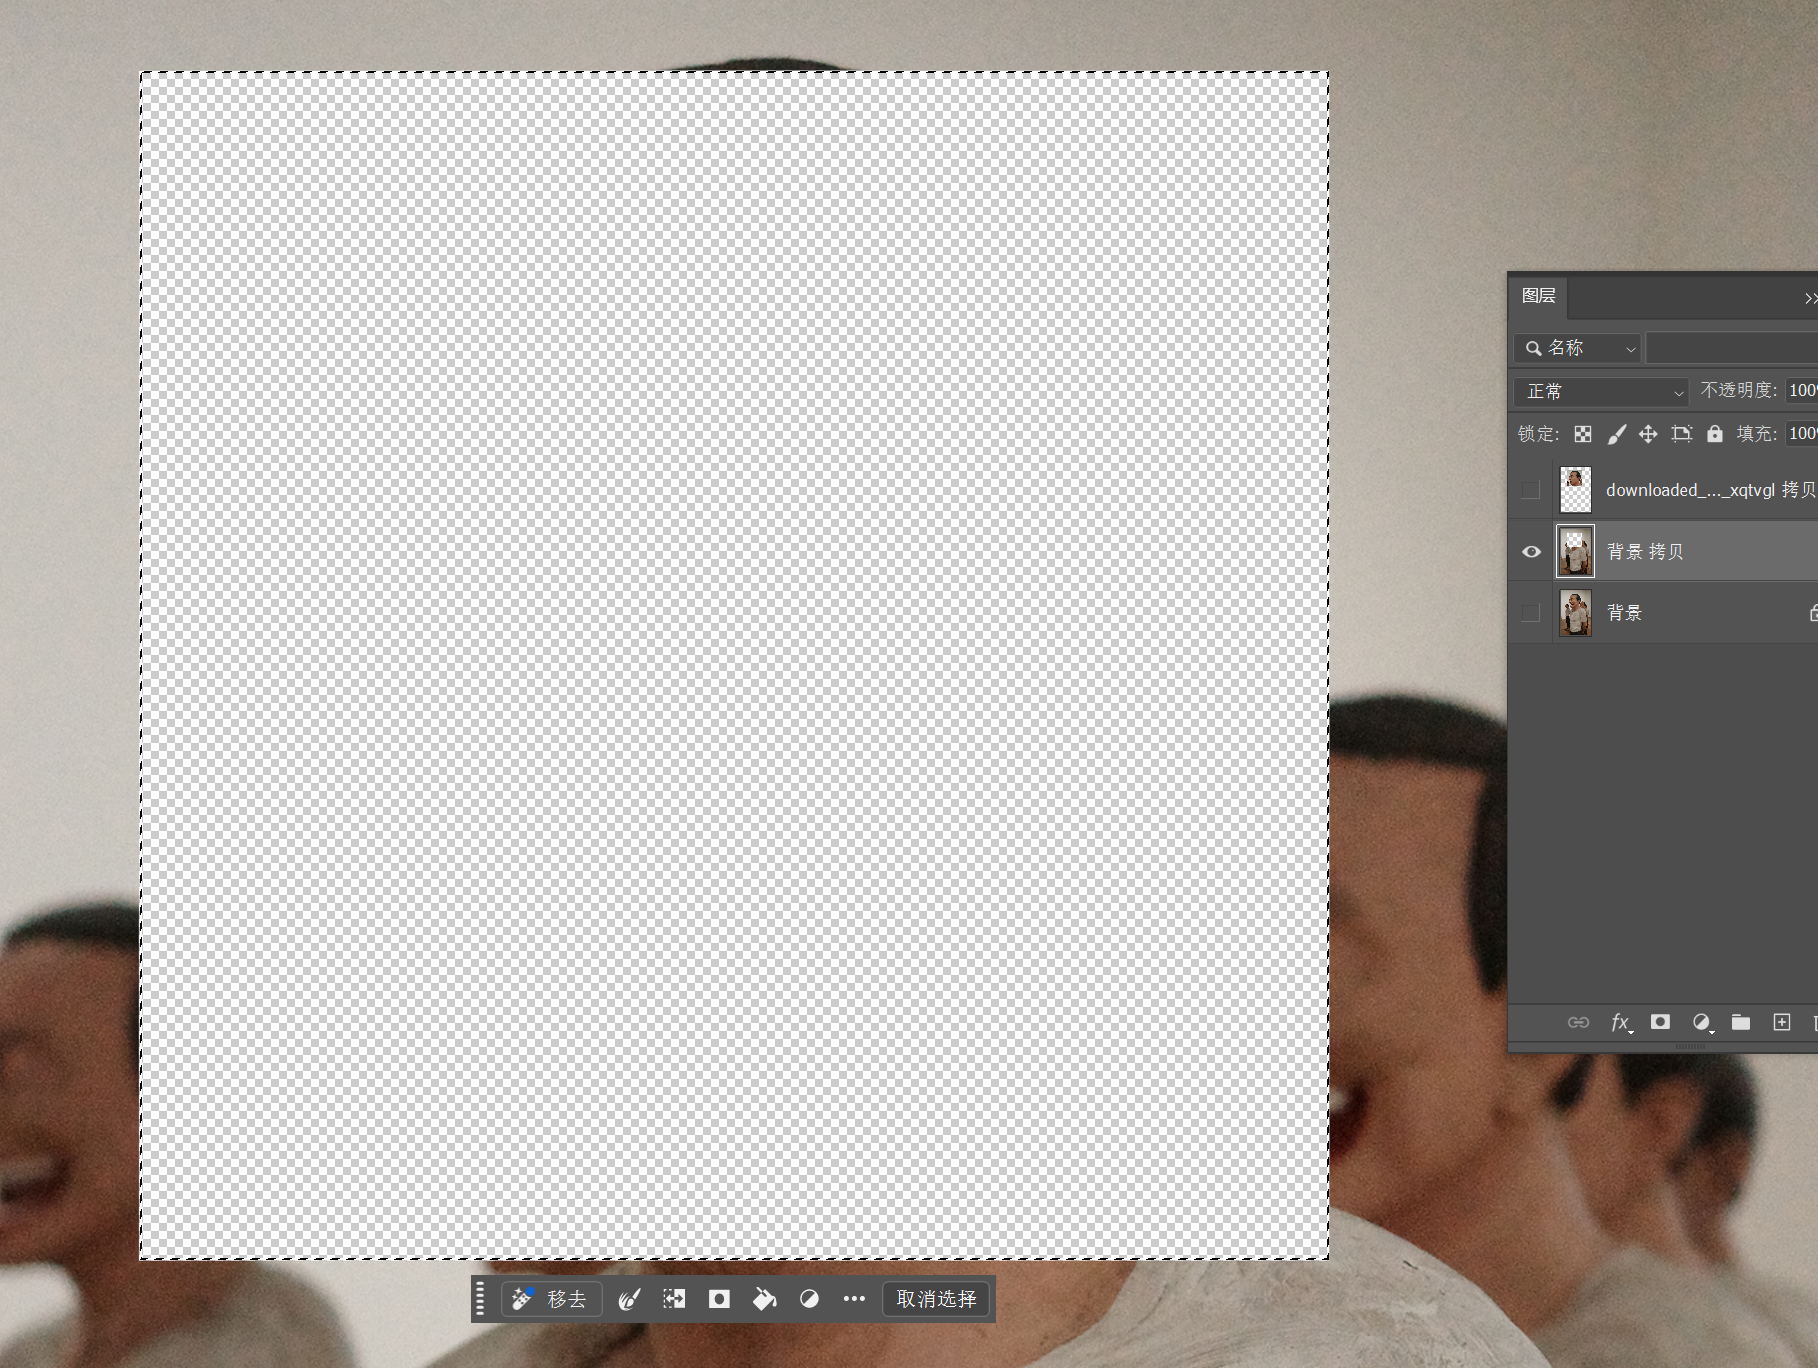
First, duplicate the original image layer, then hold Ctrl and click the thumbnail of the AI-modified layer to create a selection. Then find Select > Modify > Contract in the PS menu, contract the selection boundary by a certain amount, to the scale that after contracting, the selection still frames the part of the image that needs AI modification.

Then, delete the content within this contracted selection.
The reason for deleting this part is that next, we’re performing an operation similar to depth-of-field compositing.
Conventional depth-of-field compositing is used in landscape or macro photography, where, due to reasons like ensuring lens light intake, the aperture cannot be stopped down further, resulting in insufficient depth of field and an inability to make the entire image sharp. Thus, multiple photos are taken with different focus points and then composited to eliminate the blurred parts, obtaining a single sharp image with a large depth of field.
The multiple photos used for depth-of-field compositing only have different areas that are out of focus and blurred; the objects being photographed remain unchanged. But in our case, we’re directly using AI to modify the object before compositing them together. The original and modified content would conflict, so we need to delete the unnecessary parts from the original image in advance.
Next, select both layers simultaneously, and find Edit > Auto-Blend Layers in the menu.
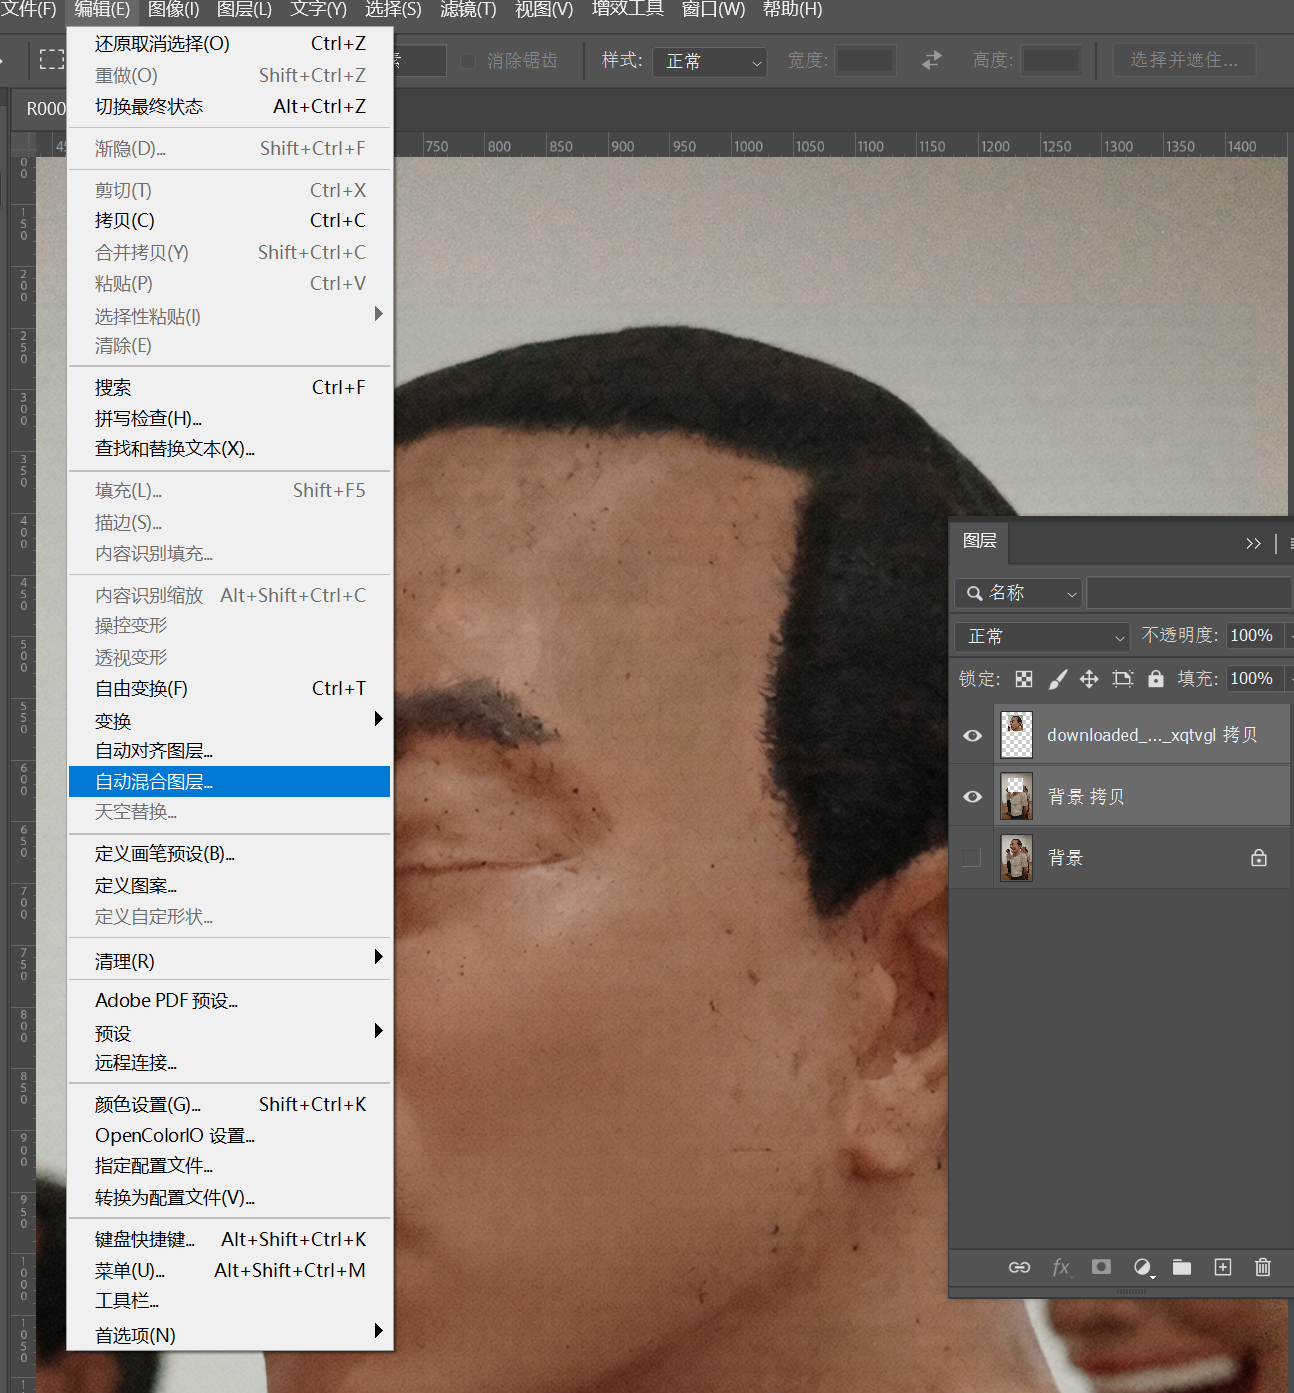
Select “Stack Images”. The “Seamless Tones and Colors” below is essentially the function we’re actually using.
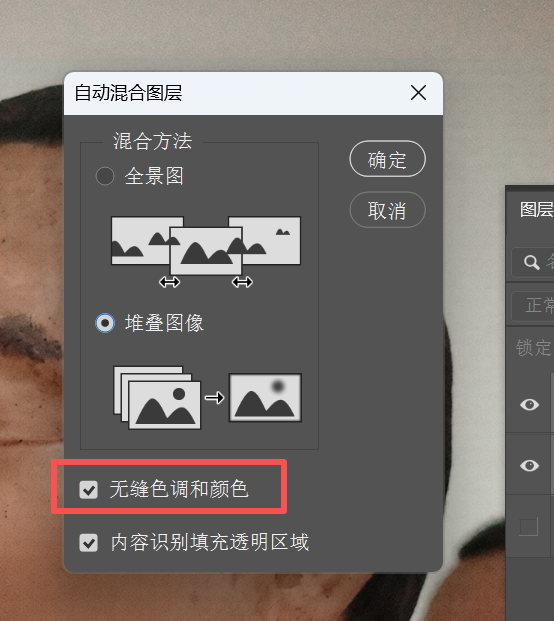
Click OK, and the color difference is automatically blended.
Returning to the beauty photo from earlier.
The AI-modified part of this image itself doesn’t have an obvious color cast, so this step might not be necessary. If we were to look for issues, it’s that the AI-generated face lacks some detail.
Don’t panic; we can still make slight adjustments in PS. We can reference the high-low frequency skin smoothing operation. High-low frequency skin smoothing is a pure PS editing method; there are many tutorials online, so I won’t screenshot and paste them again.
It’s not actually about smoothing skin; just extract the high-frequency part of the original image, place it above the AI-modified layer, set the blending mode to Linear Light, and the high-frequency details are overlaid back onto the model’s face.
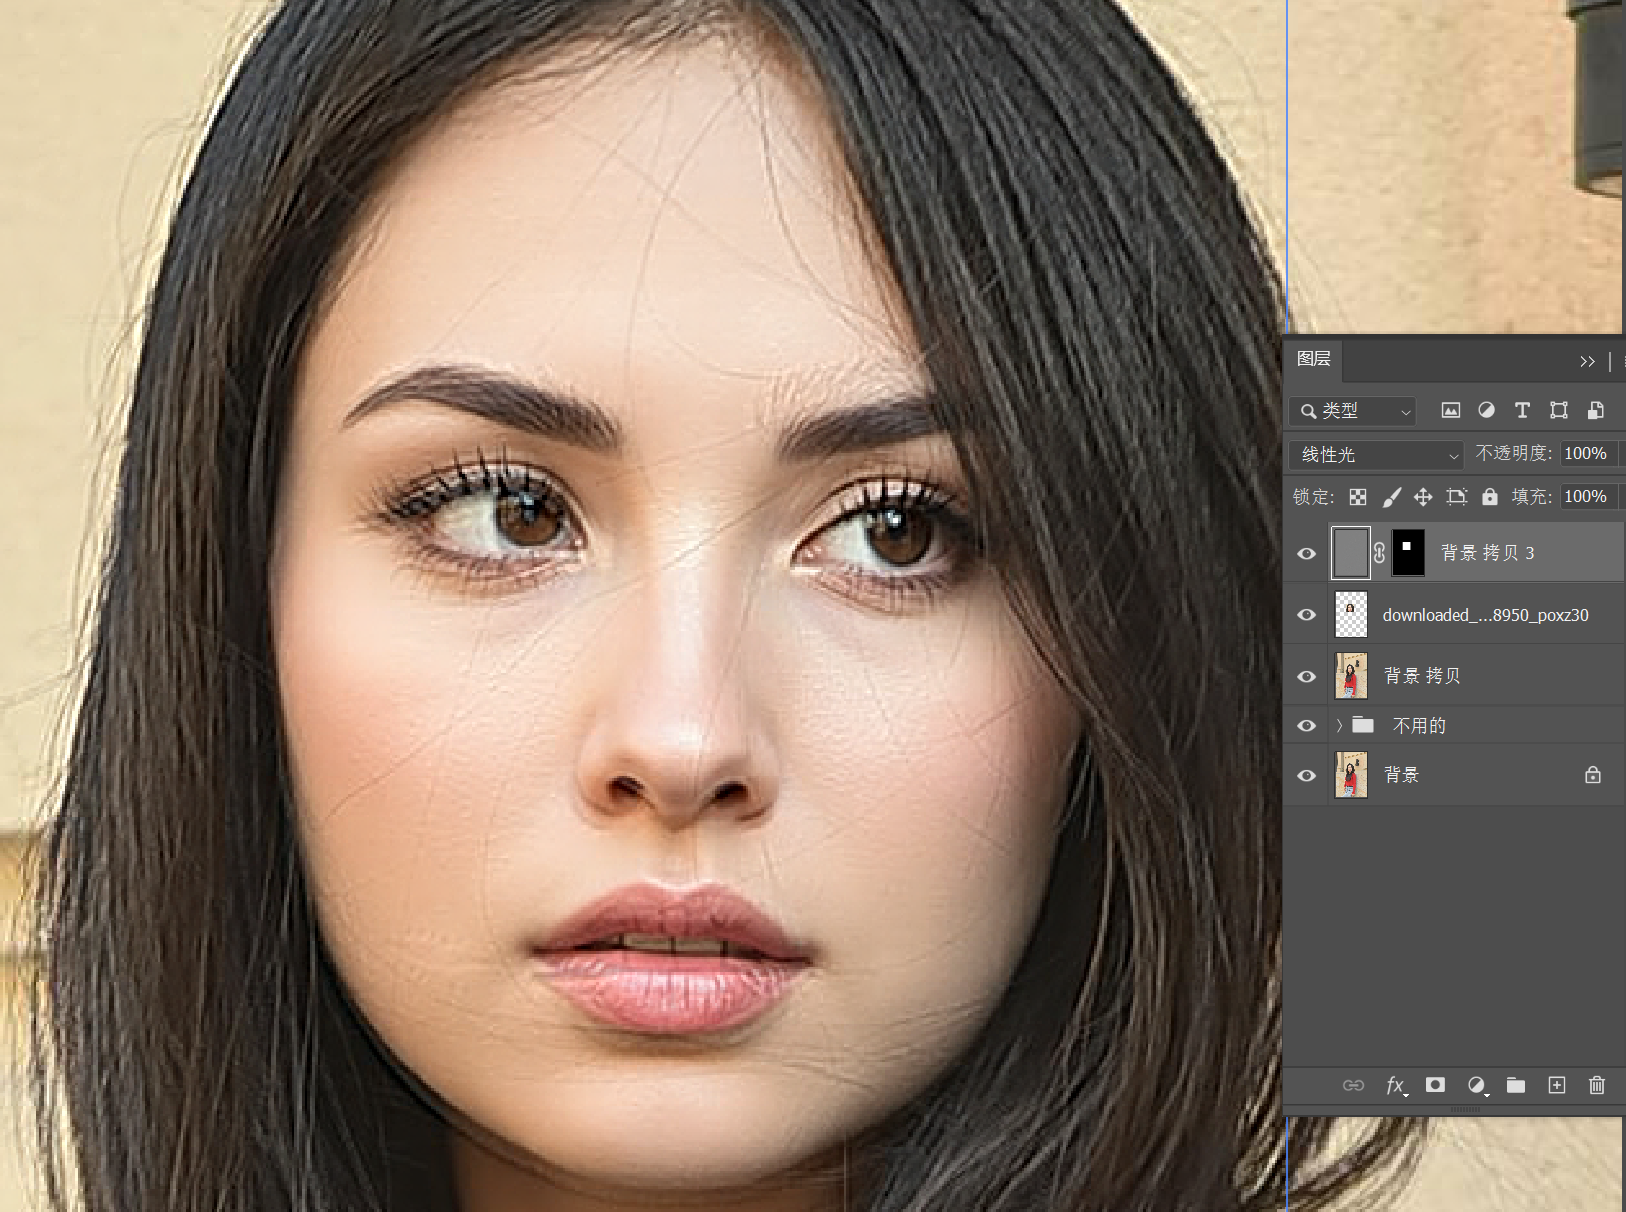
Because the entire facial features were changed by AI, it’s normal for the high frequencies not to align perfectly. But you can see that details on the skin, where there’s minimal change from the original, are recovered.
Then, on the mask, paint and erase to remove the areas with significant changes, overlaying the high-frequency details onto the skin parts.

Now we have completed the photo modification, while maintaining the original image’s resolution.
The above cases are just demonstrations using single-function node workflows. In practice, you can certainly, as I mentioned in a previous article ComfyUI Basics (II): How to Build Your Own Workflow for More Efficient AI Image Generation/Editing?, use your imagination between existing workflow nodes, integrating more interesting nodes to implement a wider variety of functions.
For example, preprocessing images, or simultaneously incorporating text-to-image generated images; for example, connecting an LLM after text input to provide a powerful brain for your prompt writing that only consumes electricity, not food; for example, adding step-by-step secondary and tertiary processing after a single image edit to make the entire workflow more detailed and efficient; for example, creating different sub-workflows to implement different filter functions, then designing a filter selector at the front; for example, combining with Photoshop scripts outside of ComfyUI…
It all depends on your own imagination and design.