Just got back from a week-long business trip, and writing about Flux.1 Kontext[dev] now feels a bit late. So why not just dive into ComfyUI instead.
This article will be about ComfyUI, and the next one can still cover Kontext.
Hehe.

When I mention ComfyUI to most friends, the most common feedback I get is “it’s hard,” followed by “my graphics card isn’t good enough.” For these reasons, they choose to reject ComfyUI outright without even trying to understand it.
But, is it possible that ComfyUI isn’t as difficult as they imagine? Is it possible that you can use ComfyUI without a high-end graphics card?
The highest threshold in the world is often “you think it has a threshold,” and the hardest thing in the world is often “you think it’s hard.”
No matter what you think, I believe that after reading this article, you should be able to get started with ComfyUI and build an image generation workflow in the ComfyUI environment yourself.
Don’t rush, just follow me step by step.
First, go to the comments section of the video below to download the Qiuye ComfyUI integration package:
https://www.bilibili.com/video/BV1Ew411776J/
Unzip and run the ArtWorld launcher, then upgrade ComfyUI to the latest version in the version manager.
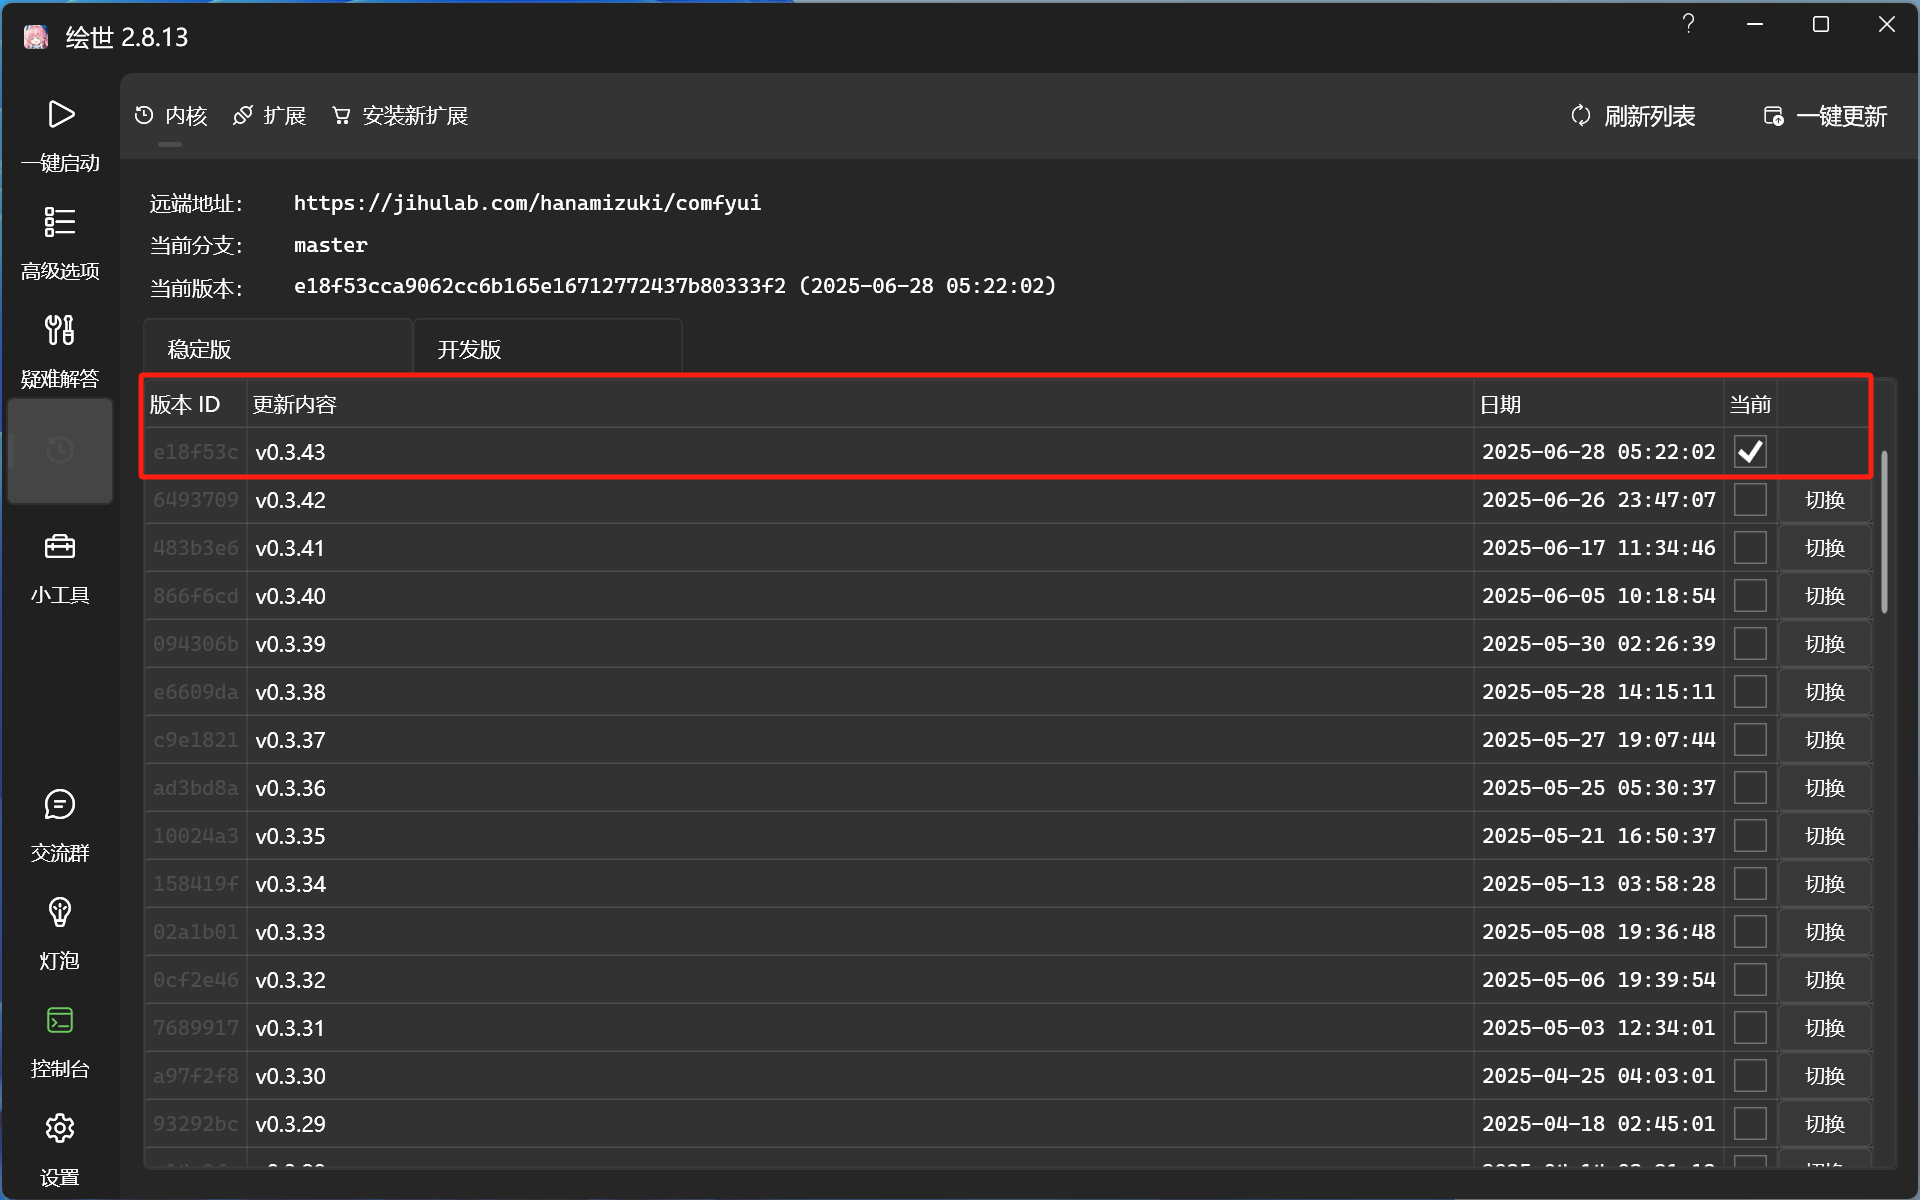
No command lines or code needed at all, just visual click operations throughout. After the update is complete, click one button to start, and the system will automatically open the ComfyUI visual node workflow interface in your browser.
(If you can’t complete the upgrade due to network issues, I won’t go into details here; it’s recommended to brush up on your surfing skills on your own XD)
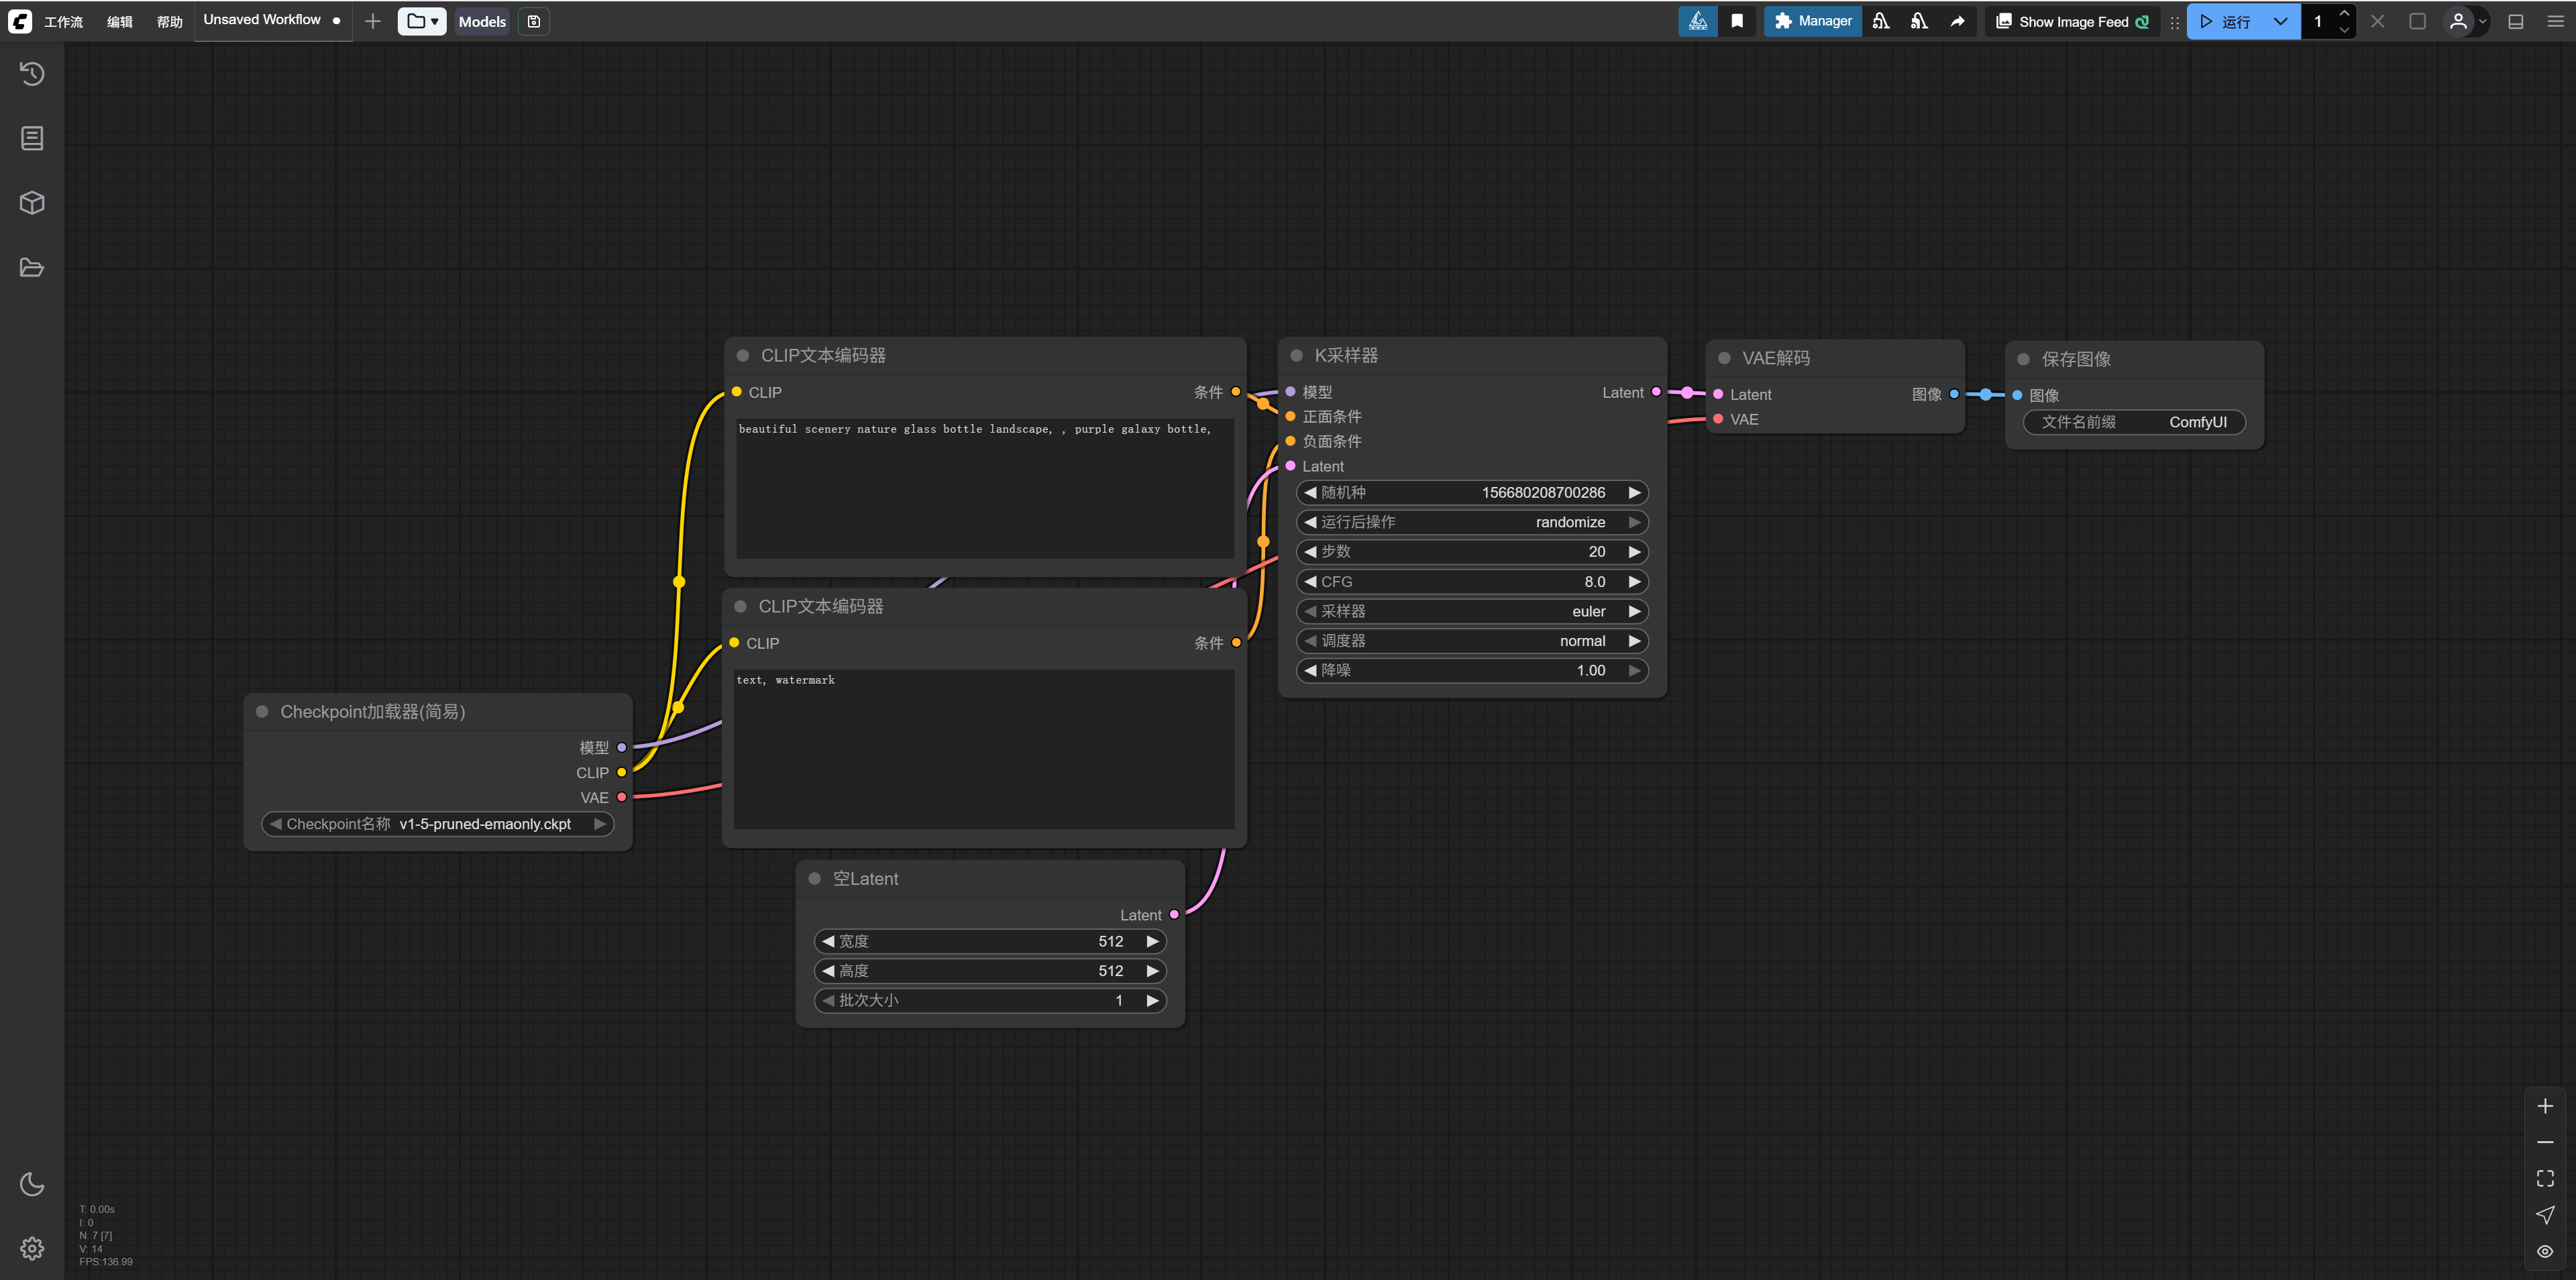
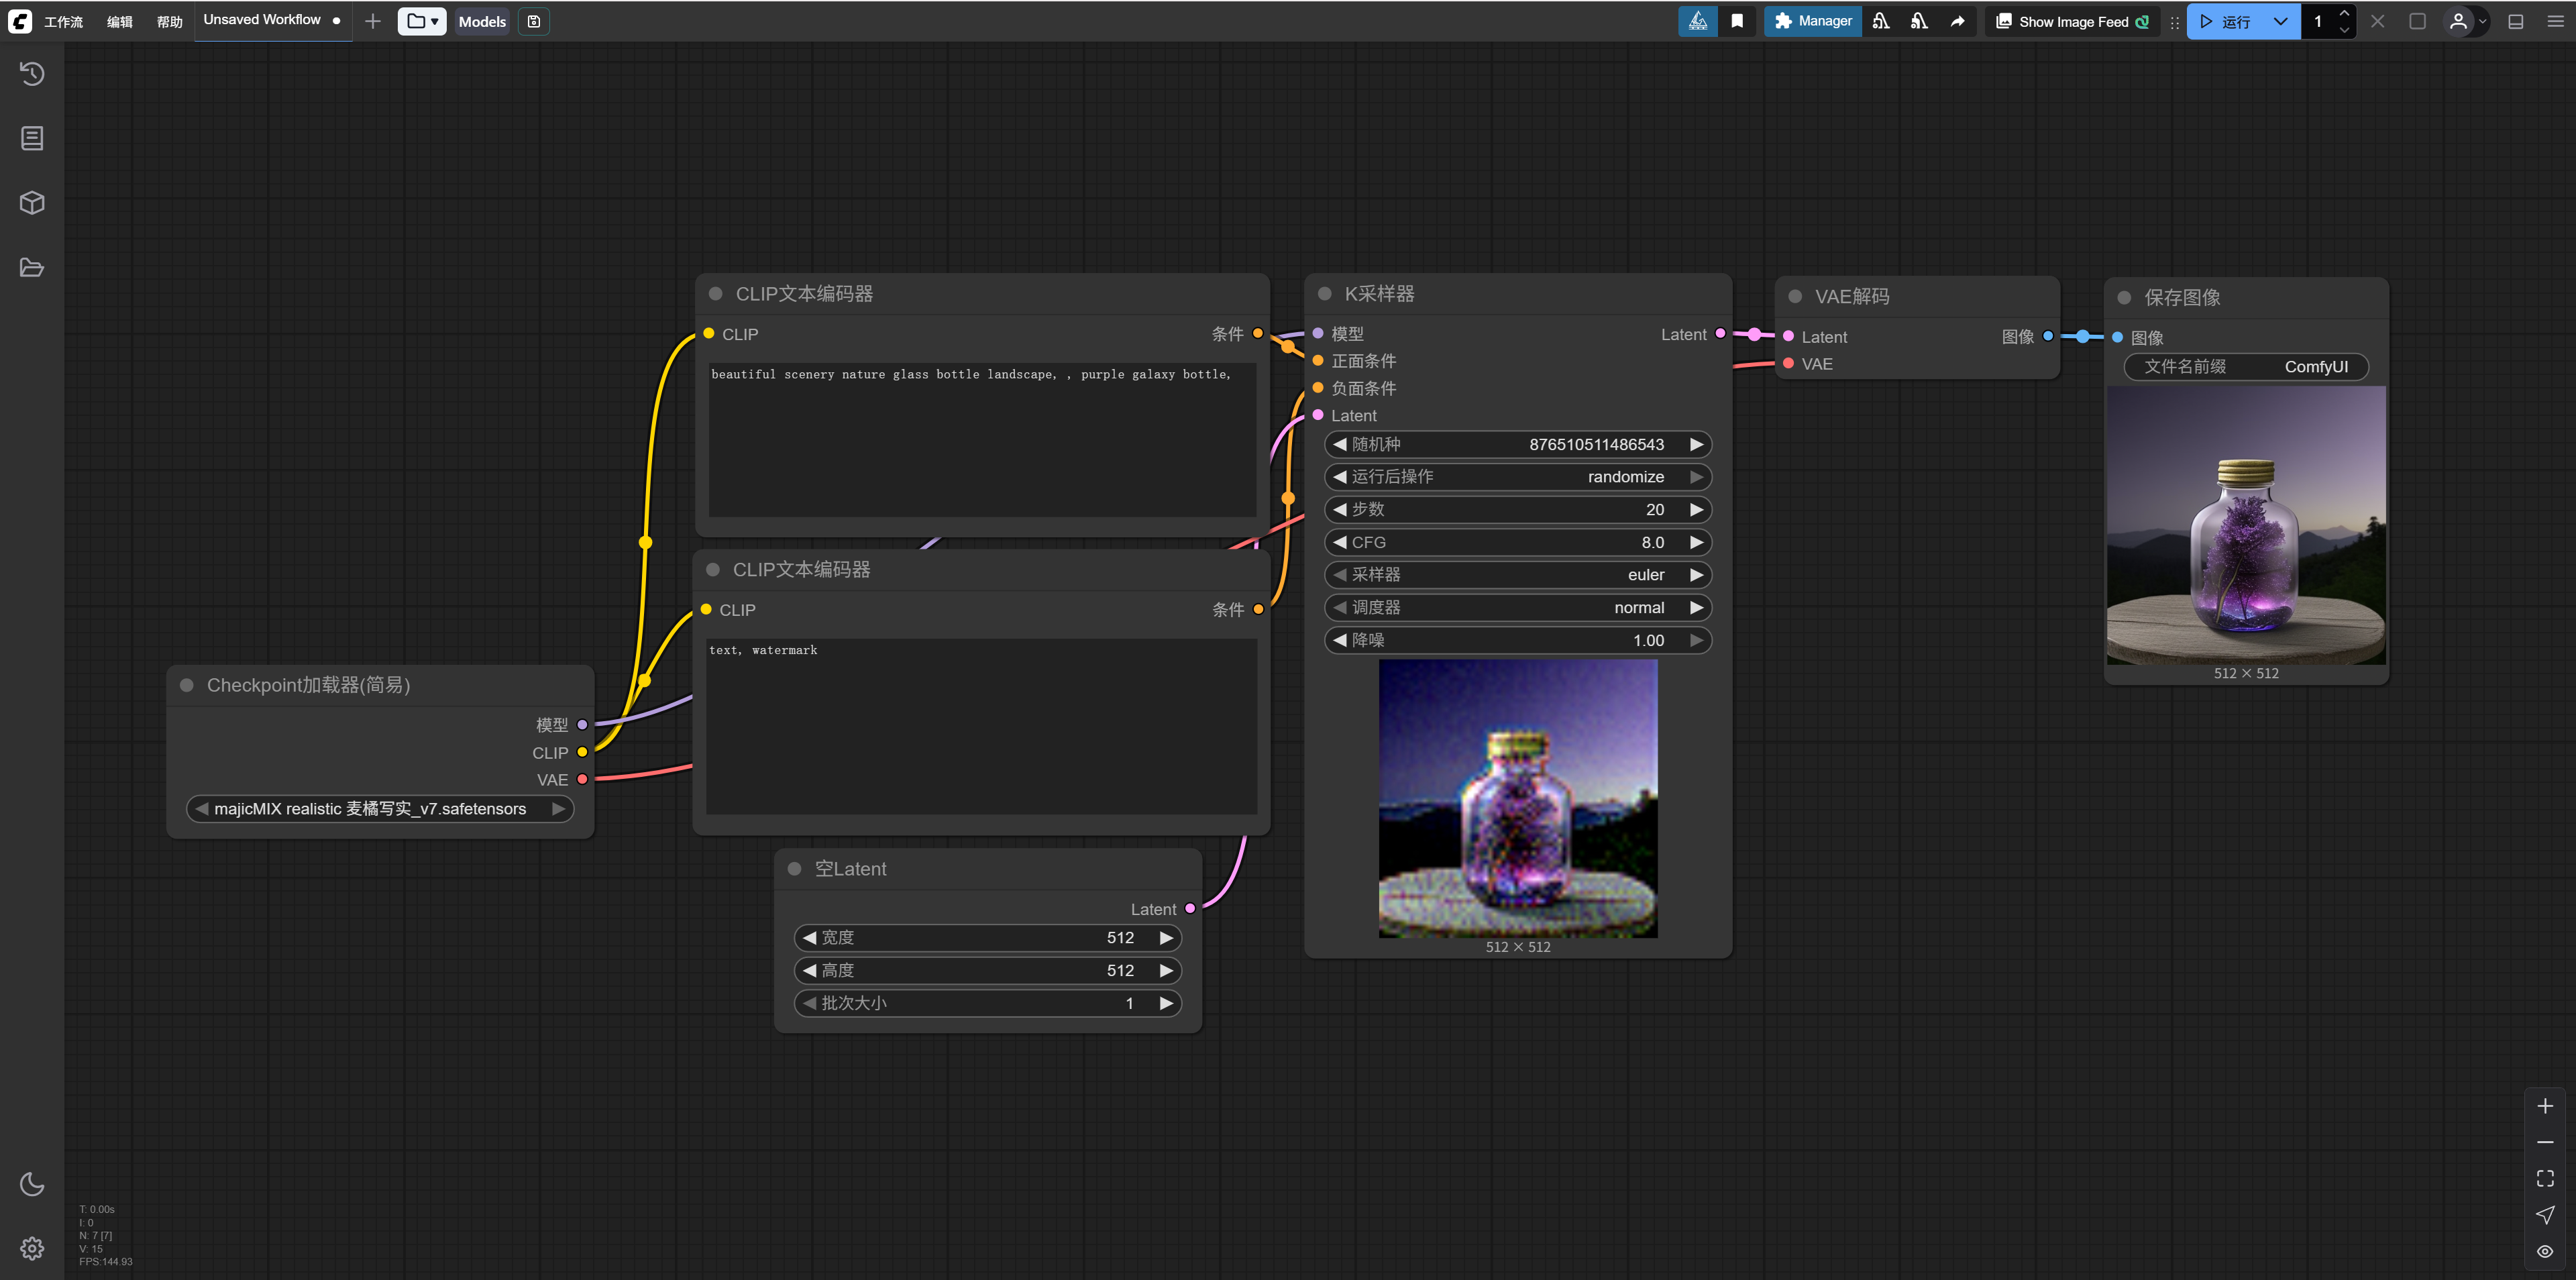
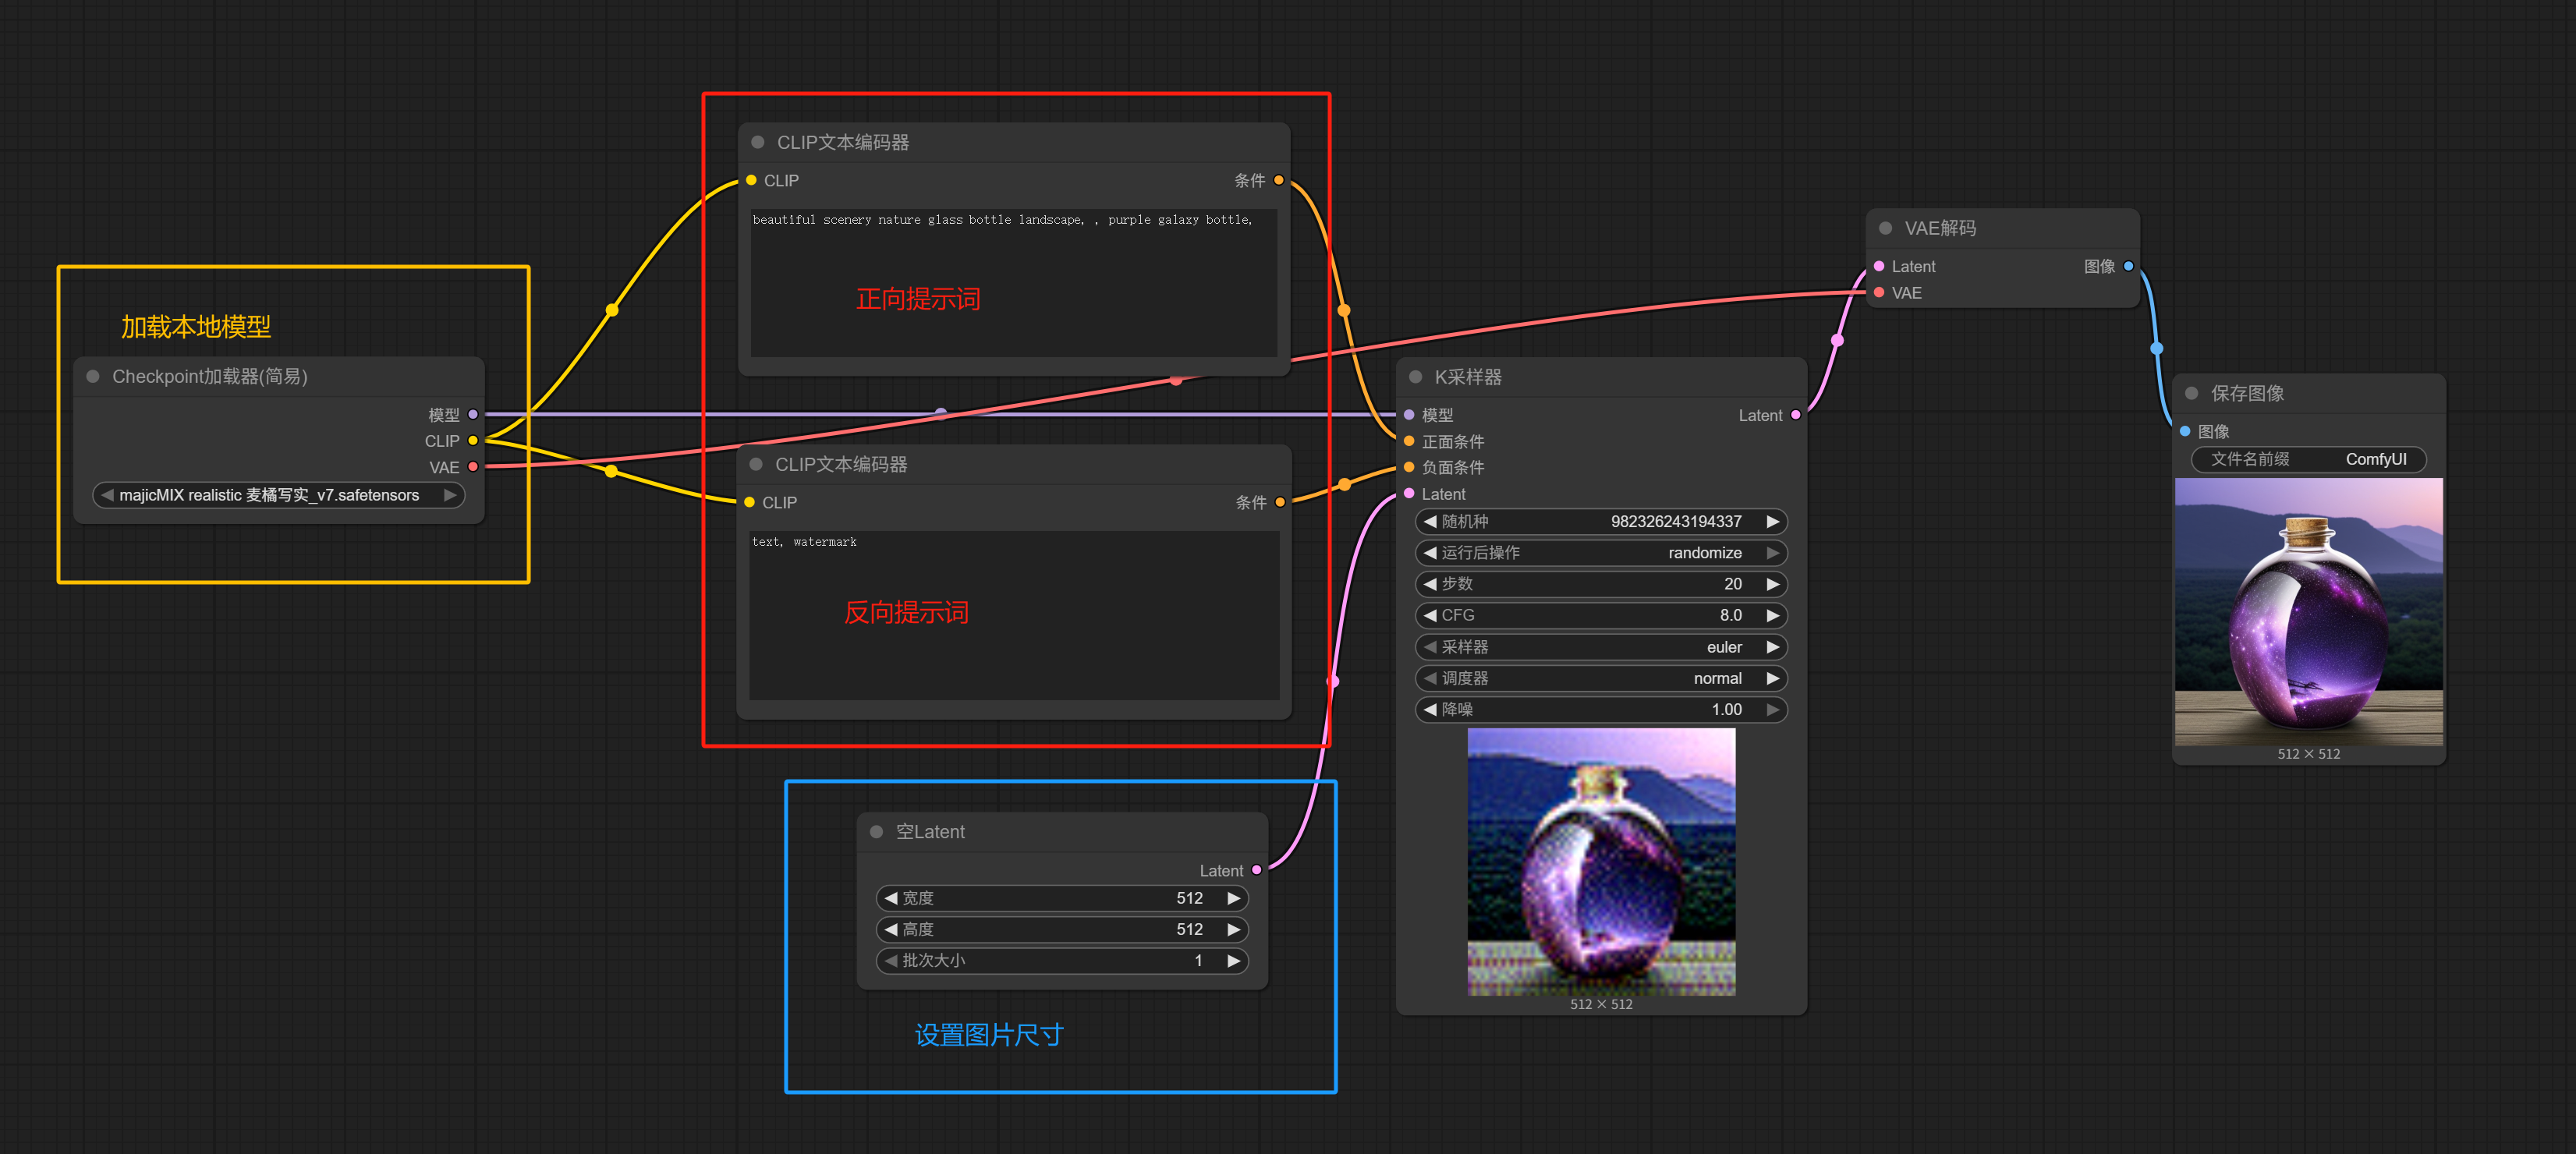
The default workflow loaded is as shown above—a classic workflow for using an SD model to draw a bottle, with the result looking like this:
But today, we won’t follow the usual path of learning AI painting. You don’t need to understand what the above workflow means right now. We’ll ignore things like Checkpoints, positive/negative prompts, K-samplers, etc. for now.
However, since we’re here, there’s a typical misconception about ComfyUI that I’d like to briefly expand on.
Many people, especially some marketing accounts, like to equate SD (Stable Diffusion) with ComfyUI, with typical phrases like “Should you learn SD or ComfyUI?” If you think this statement is fine, let me ask you: In the workflow above, I just used the SD1.5 model (MaiJu Realistic v7) in ComfyUI to draw a bottle—what does that count as?
ComfyUI and Stable Diffusion are not the same kind of thing.
You can roughly understand it this way: Before the Black Forest Studio and FLUX.1 existed, ComfyUI was essentially a node-based workflow GUI (Graphical User Interface) for Stable Diffusion. At that time, the counterpart was another GUI for Stable Diffusion called AUTOMATIC1111 (also abbreviated as A1111) WebUI, which is what marketing accounts now refer to as SD (currently, besides A1111, there are other WebUI forks, such as Forge by the ControlNet author, Mingshen).
Later, with FLUX.1, both ComfyUI and WebUI also support invoking FLUX.1 models.
So, you should now understand that ComfyUI is not an image generation model like SD or FLUX.1; it’s a graphical user interface. You can use Stable Diffusion through ComfyUI, use FLUX.1[dev] through ComfyUI, use FLUX.1 Kontext through ComfyUI, invoke image generation APIs through ComfyUI… and even, with the right nodes, you can use ChatGPT in ComfyUI.
Now, let’s first install a node for using LLMs in ComfyUI.
Open the node manager:
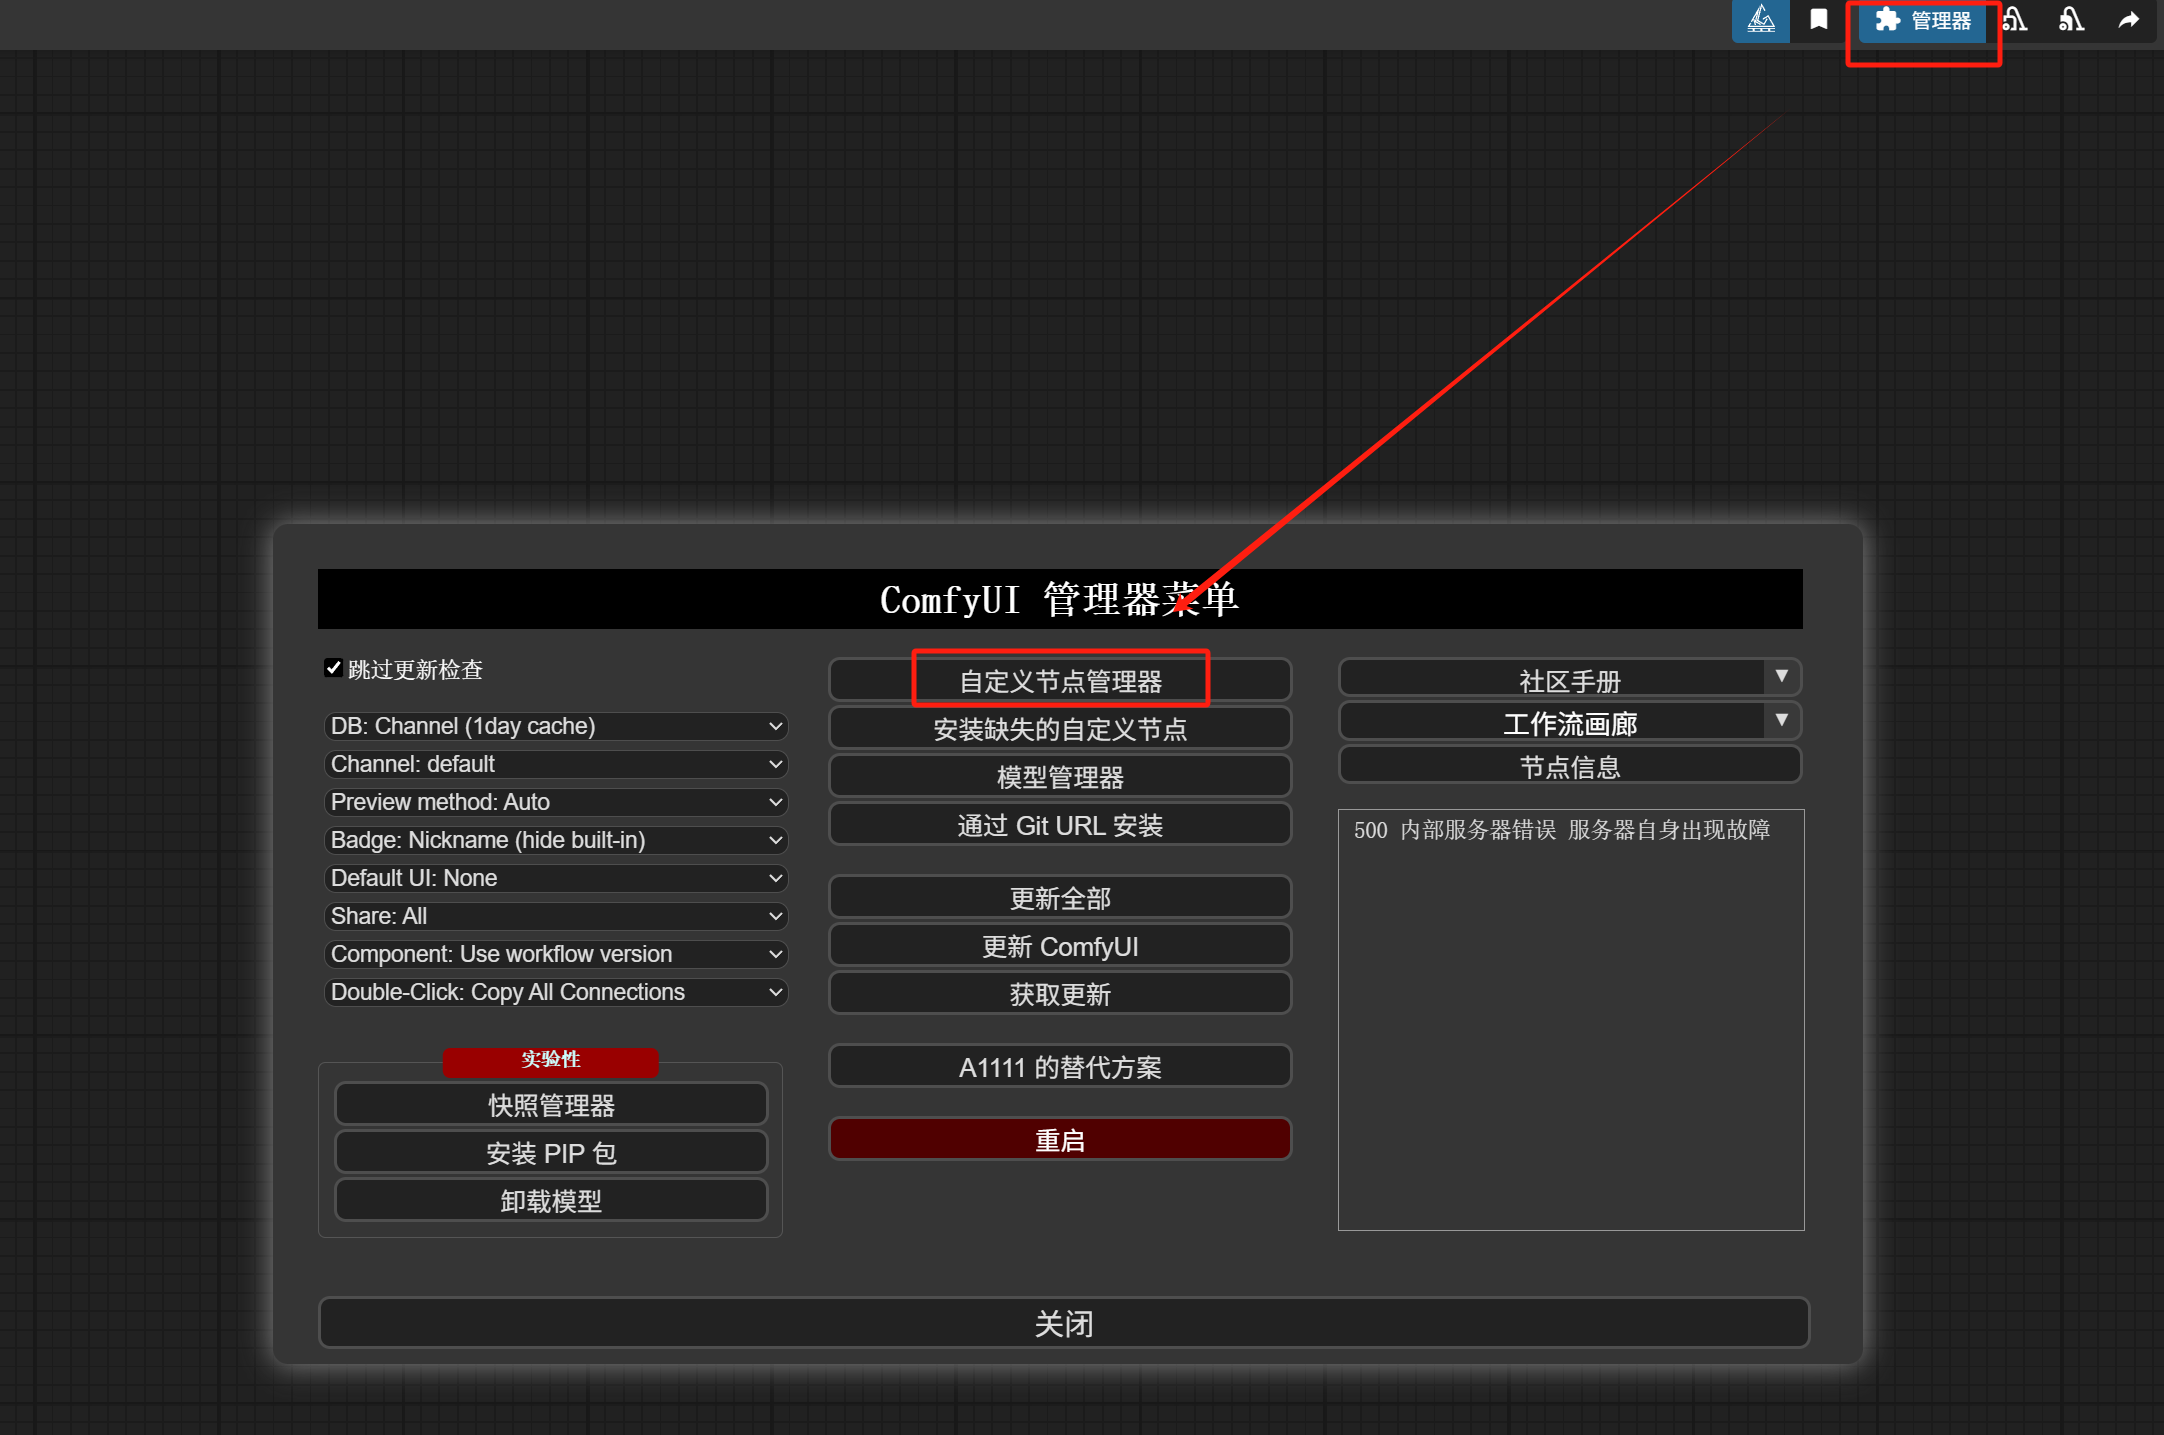
Search for LLM_party and install this extension.
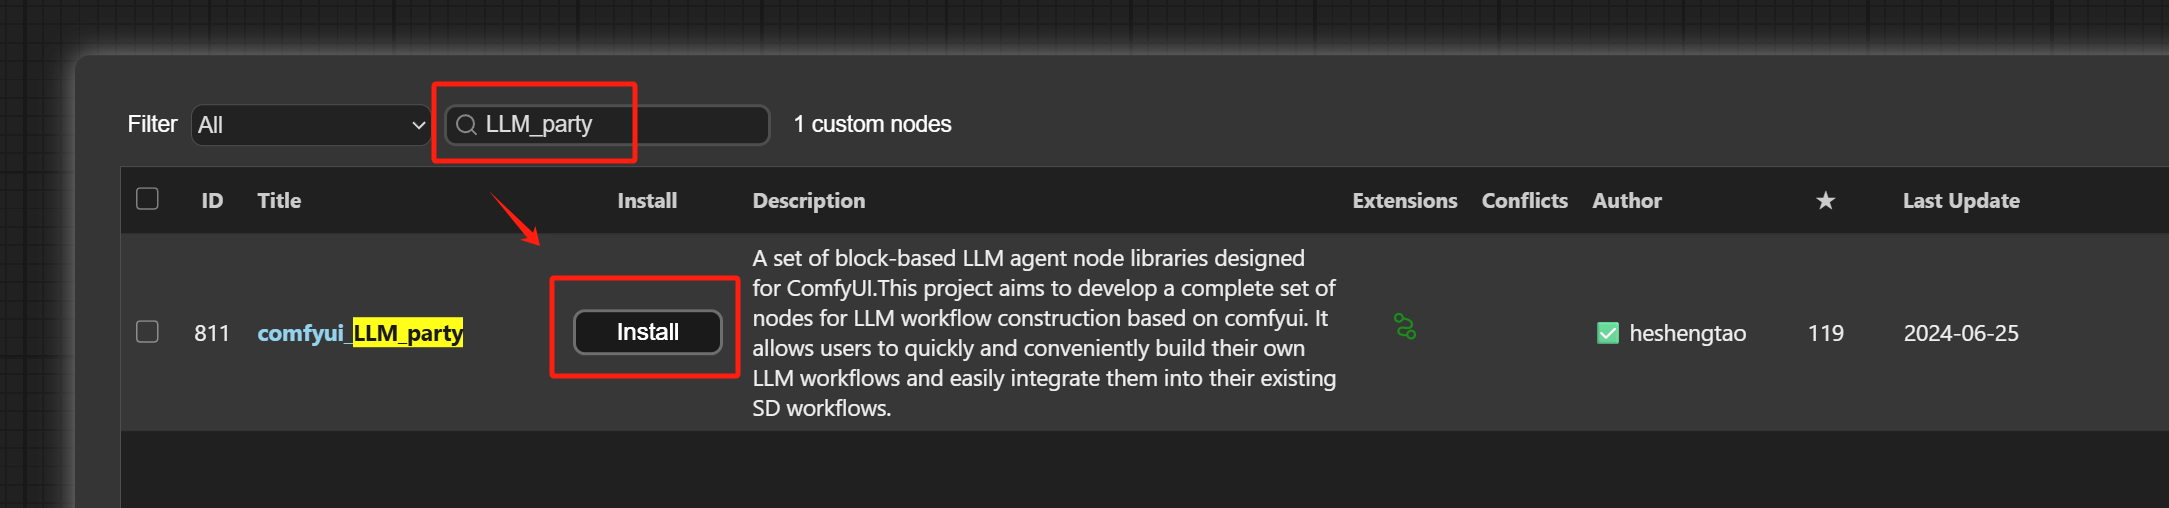
After installation, it looks like this:

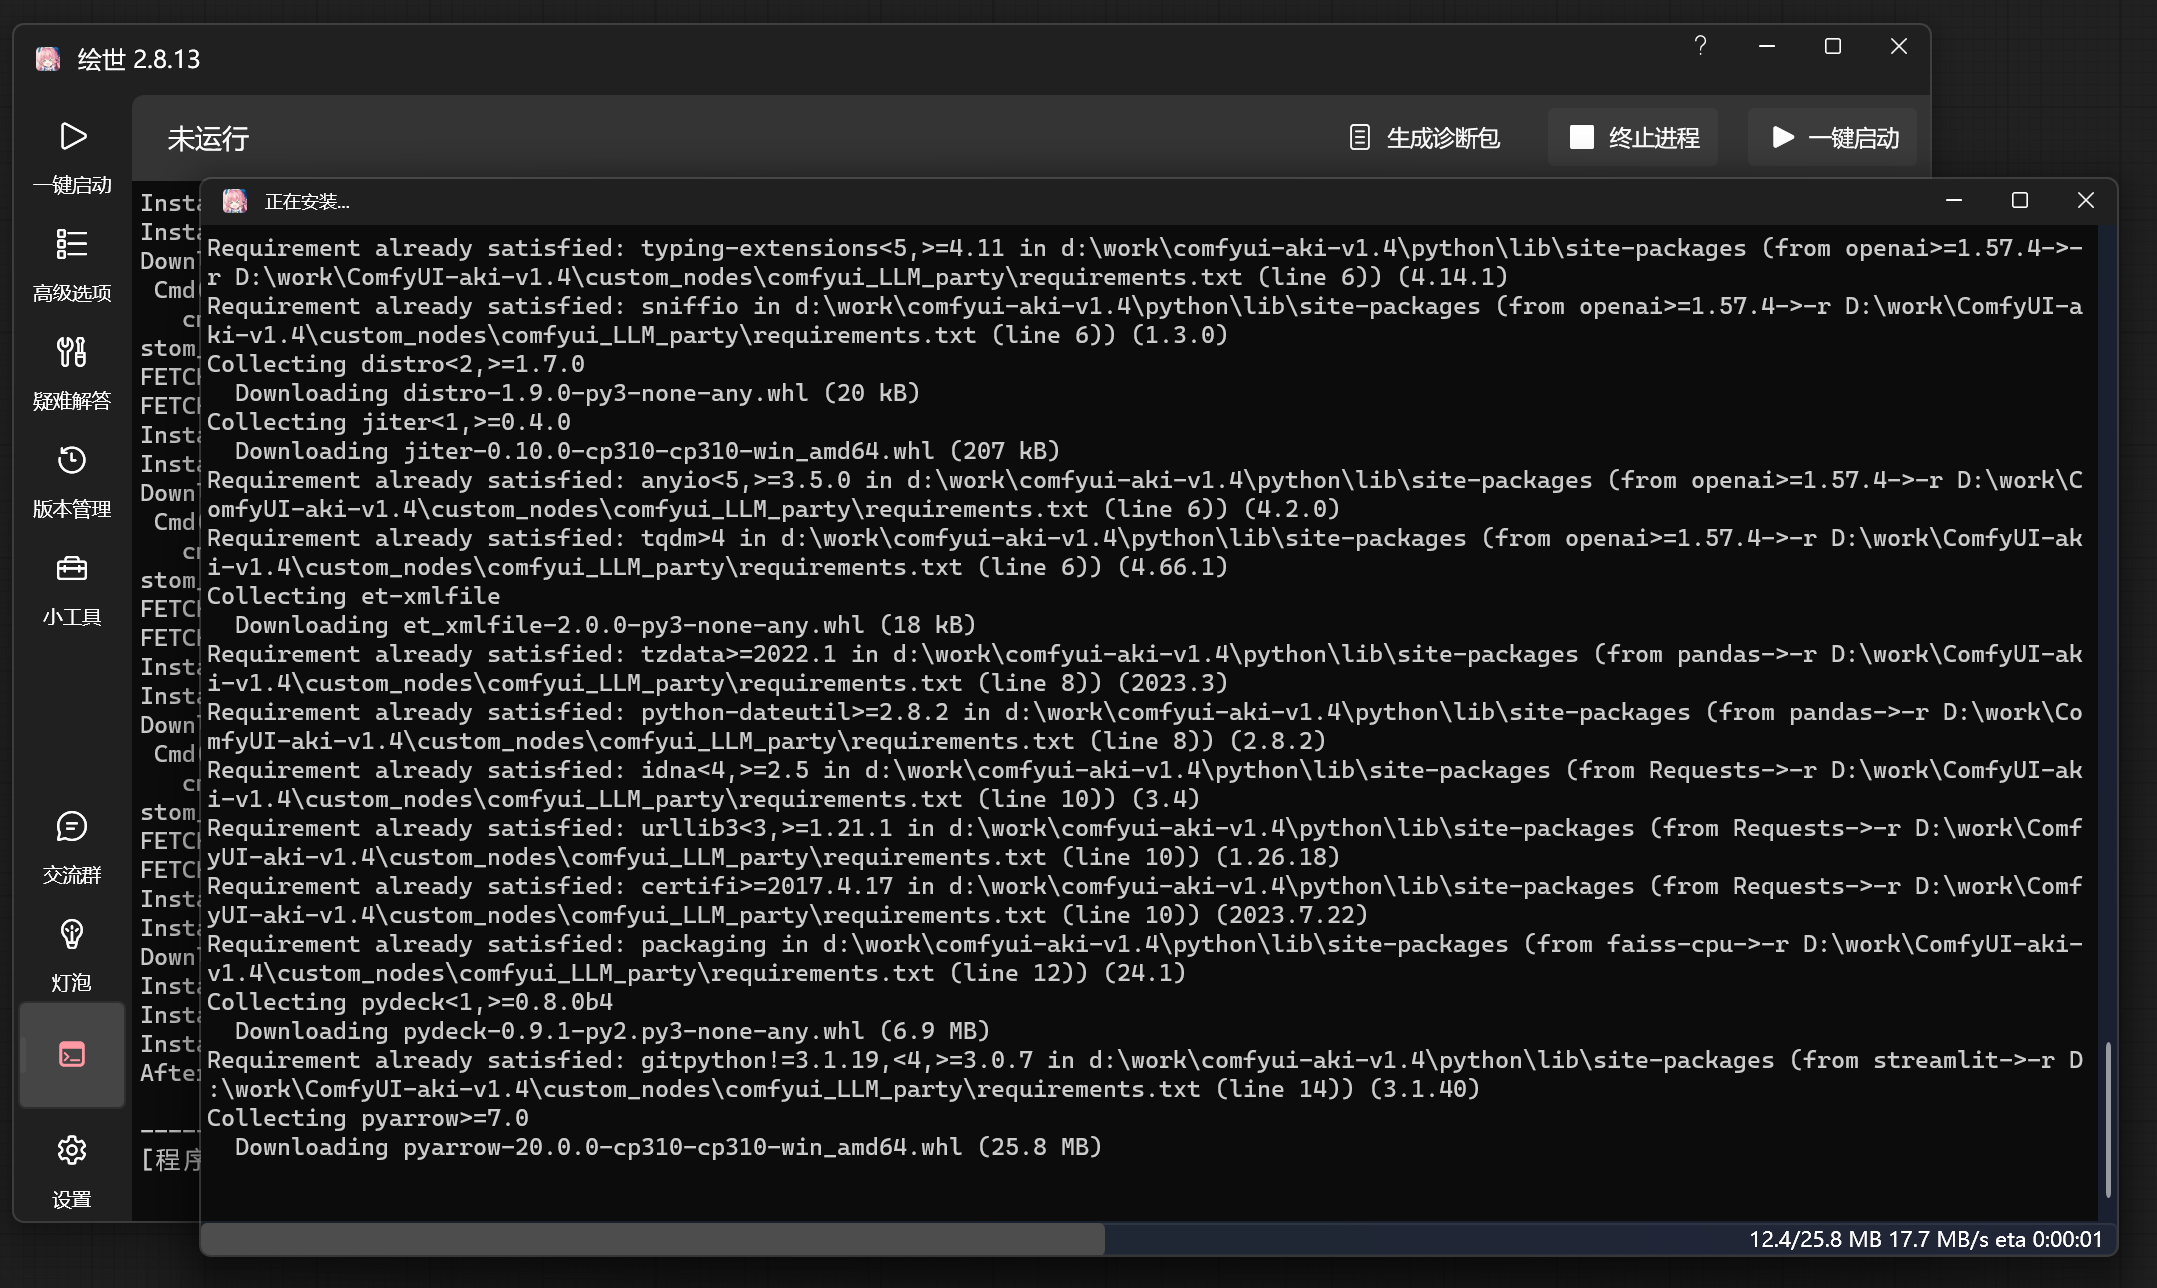
Restart as required, and after a series of installations:
Return to the browser’s node workflow interface, delete the bottle-drawing workflow entirely, and from the left node library, add an “llm_party” “API LLM Generic Chain” node and an “API LLM Loader” node:
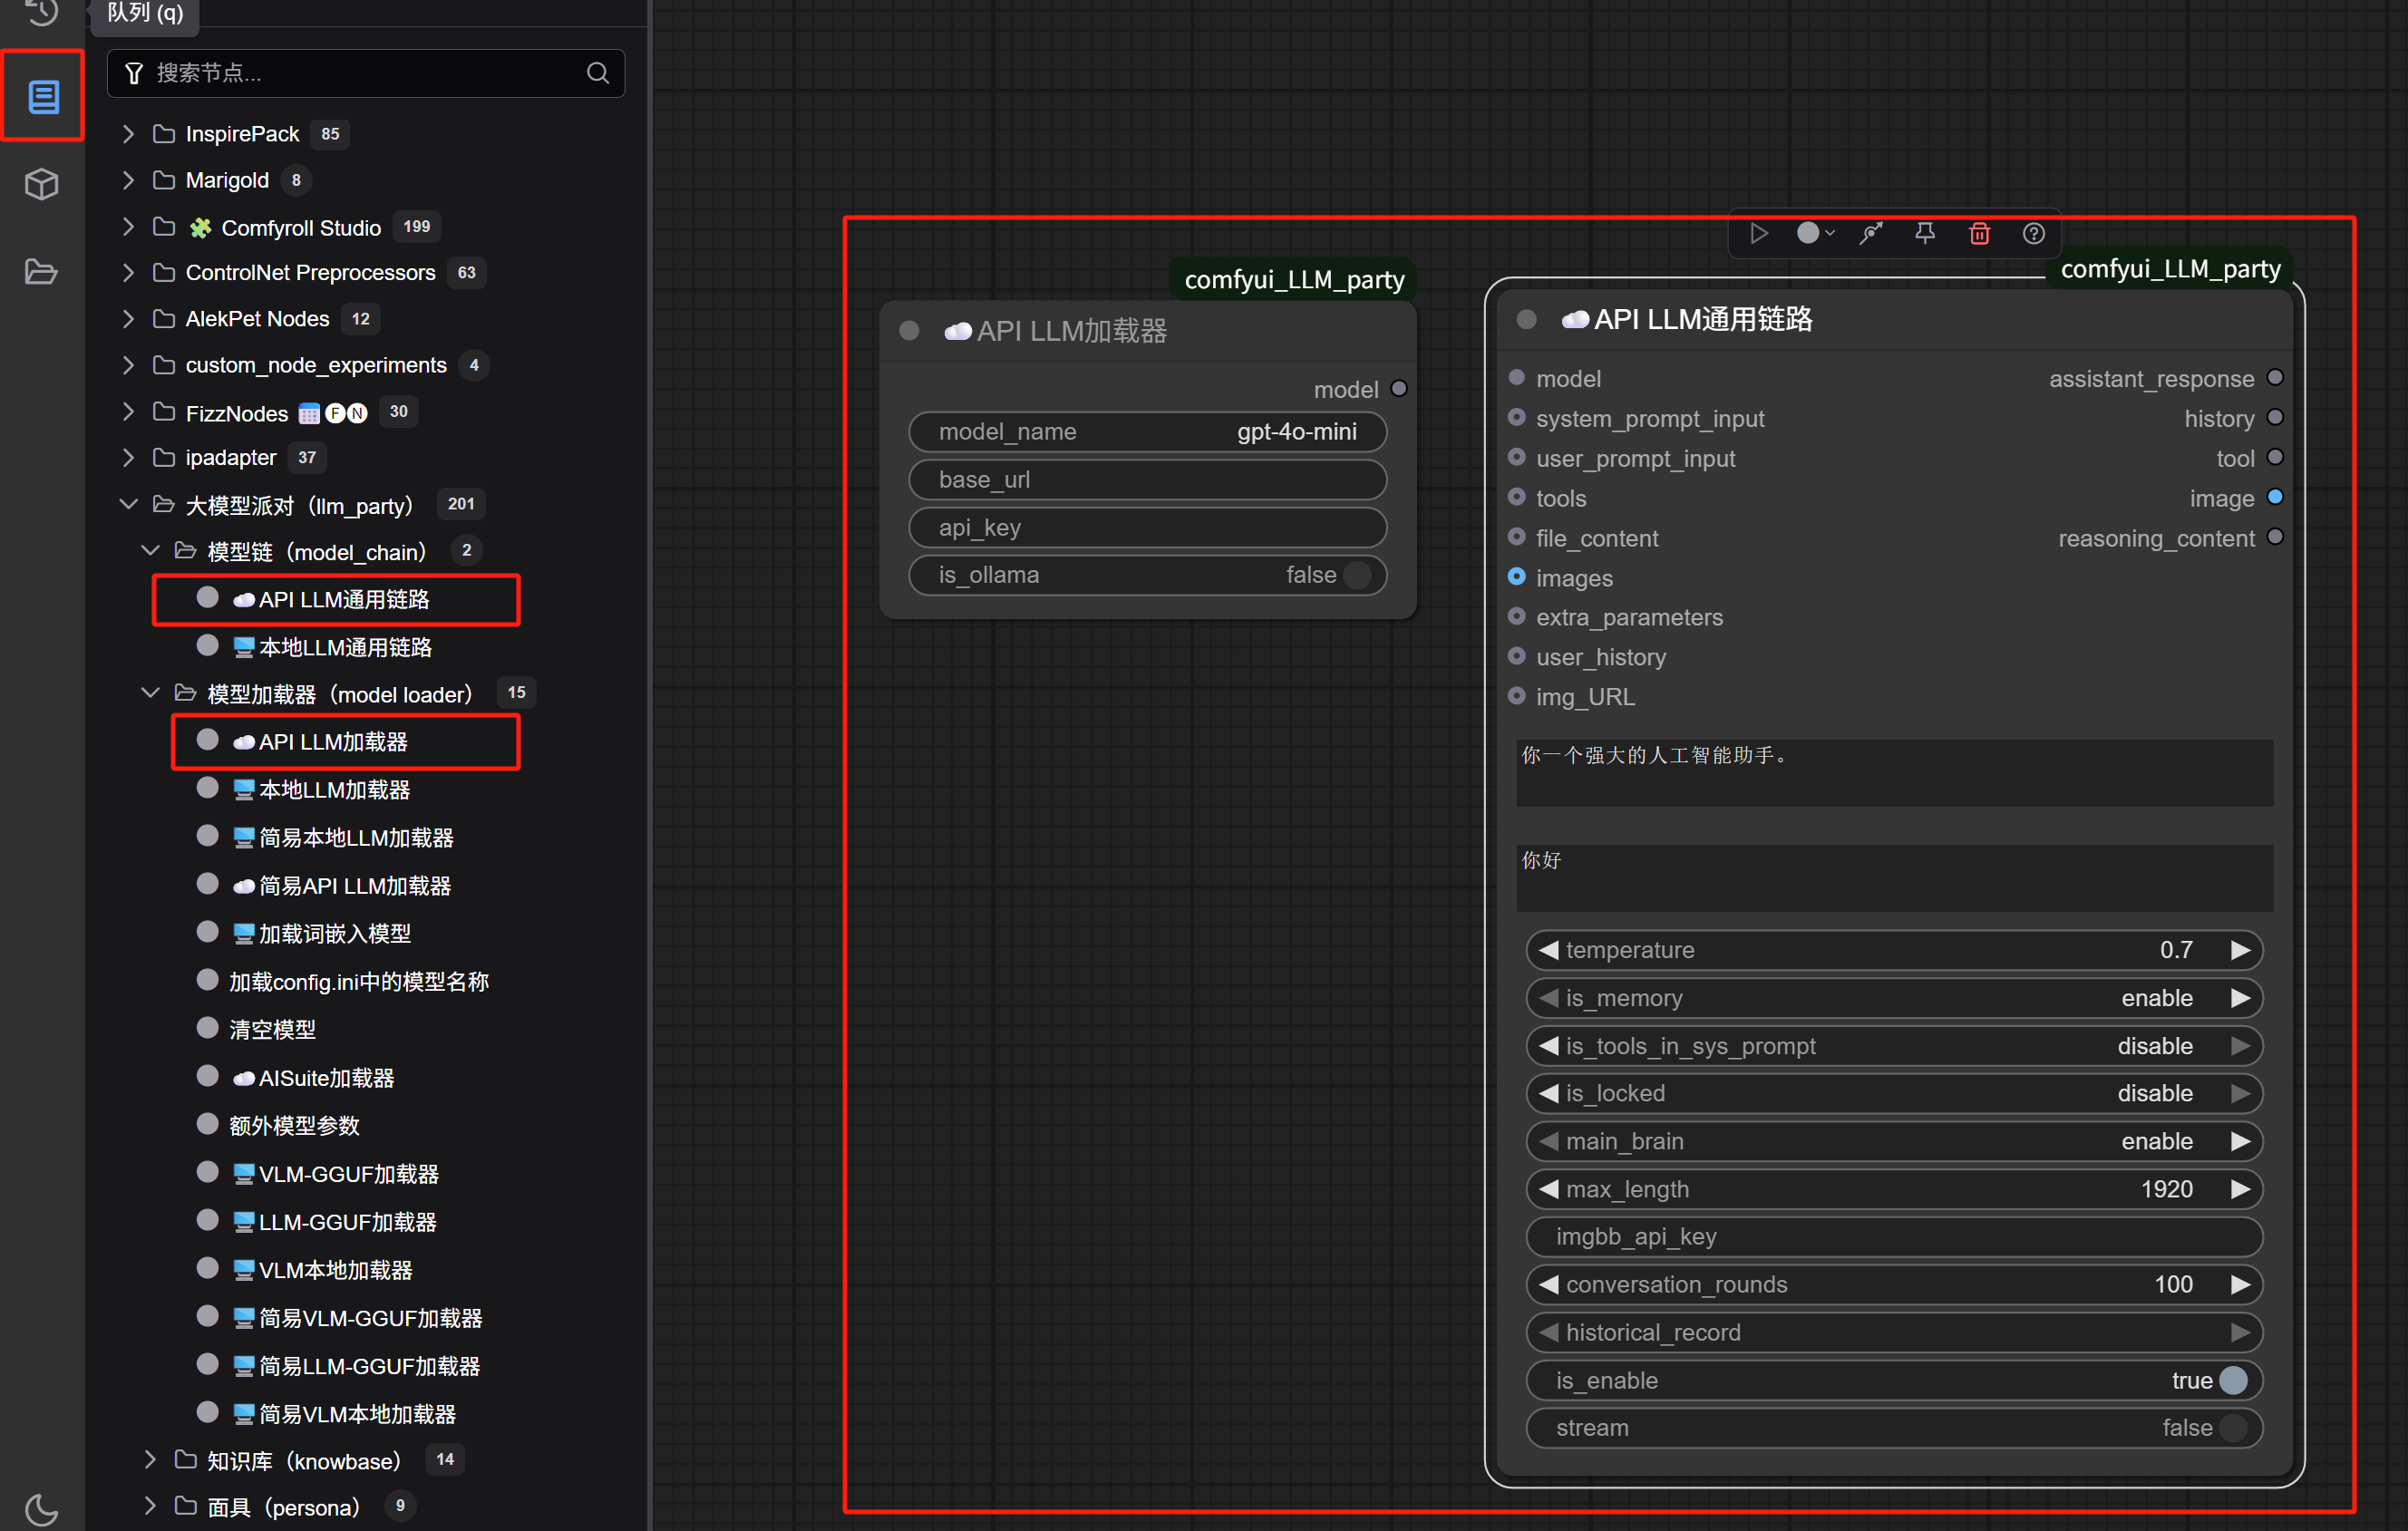
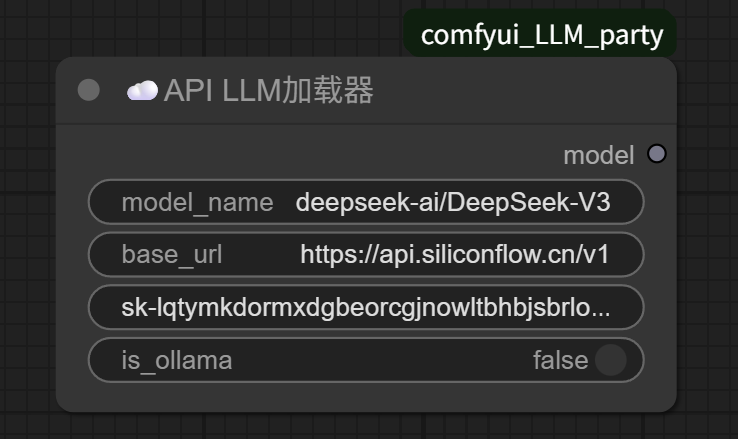
Seeing the fields that need to be filled in for the “API LLM Loader,” does it feel like you’re back in your comfort zone? Those who have done LLM API calls before should be very familiar with this—just fill in the model name, endpoint URL, and API KEY respectively:
(If you’re not familiar, refer to this article:What to do when DeepSeek servers are always busy? Instead of waiting, try using the API to keep your chat alive))

For example, if we’re calling SiliconFlow’s DeepSeek-V3, fill it in like this:
If you’ve used Coze, you should understand the execution logic of a node workflow—it’s about following the nodes in the workflow, executing A first, then B, then C.
The execution logic of ComfyUI is almost identical to Coze’s, just that the input/output parameters of each node in Coze are represented in ComfyUI as more visual and intuitive connectable endpoints.
As long as the endpoint on the right side of one node and the left side of the next node are the same (same color), they can be connected. For example, the two nodes below:
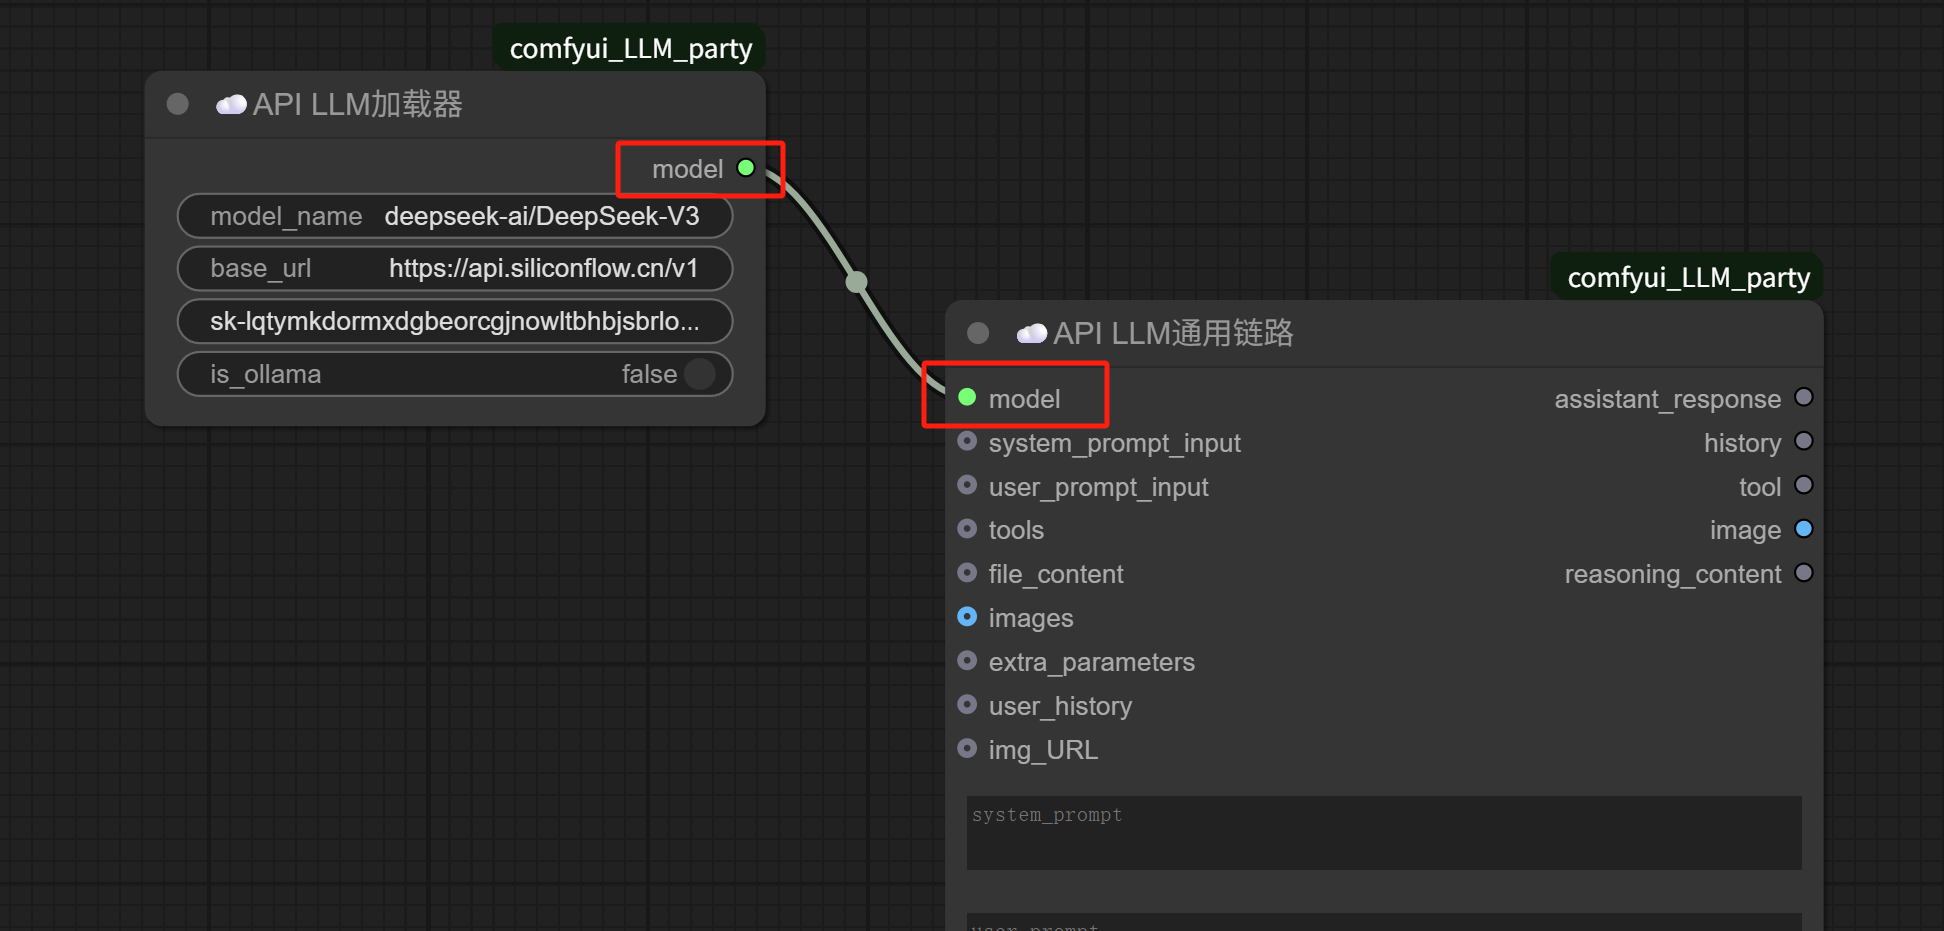
The “model” on the right side of the “API LLM Loader” is connected to the “model” on the left side of the “API LLM Generic Chain,” meaning that the SiliconFlow DeepSeek-V3 model is loaded via the “API LLM Loader” and fed into the “API LLM Generic Chain” node.
Then, for the “API LLM Generic Chain” node, we’re still missing the prompt input and the output of the large model’s execution result.
For the prompt, we can add two string input nodes before the “API LLM Generic Chain” node; for the result output, we can directly connect a “Show Text” node to display the assistant response output.
Connect them like this:
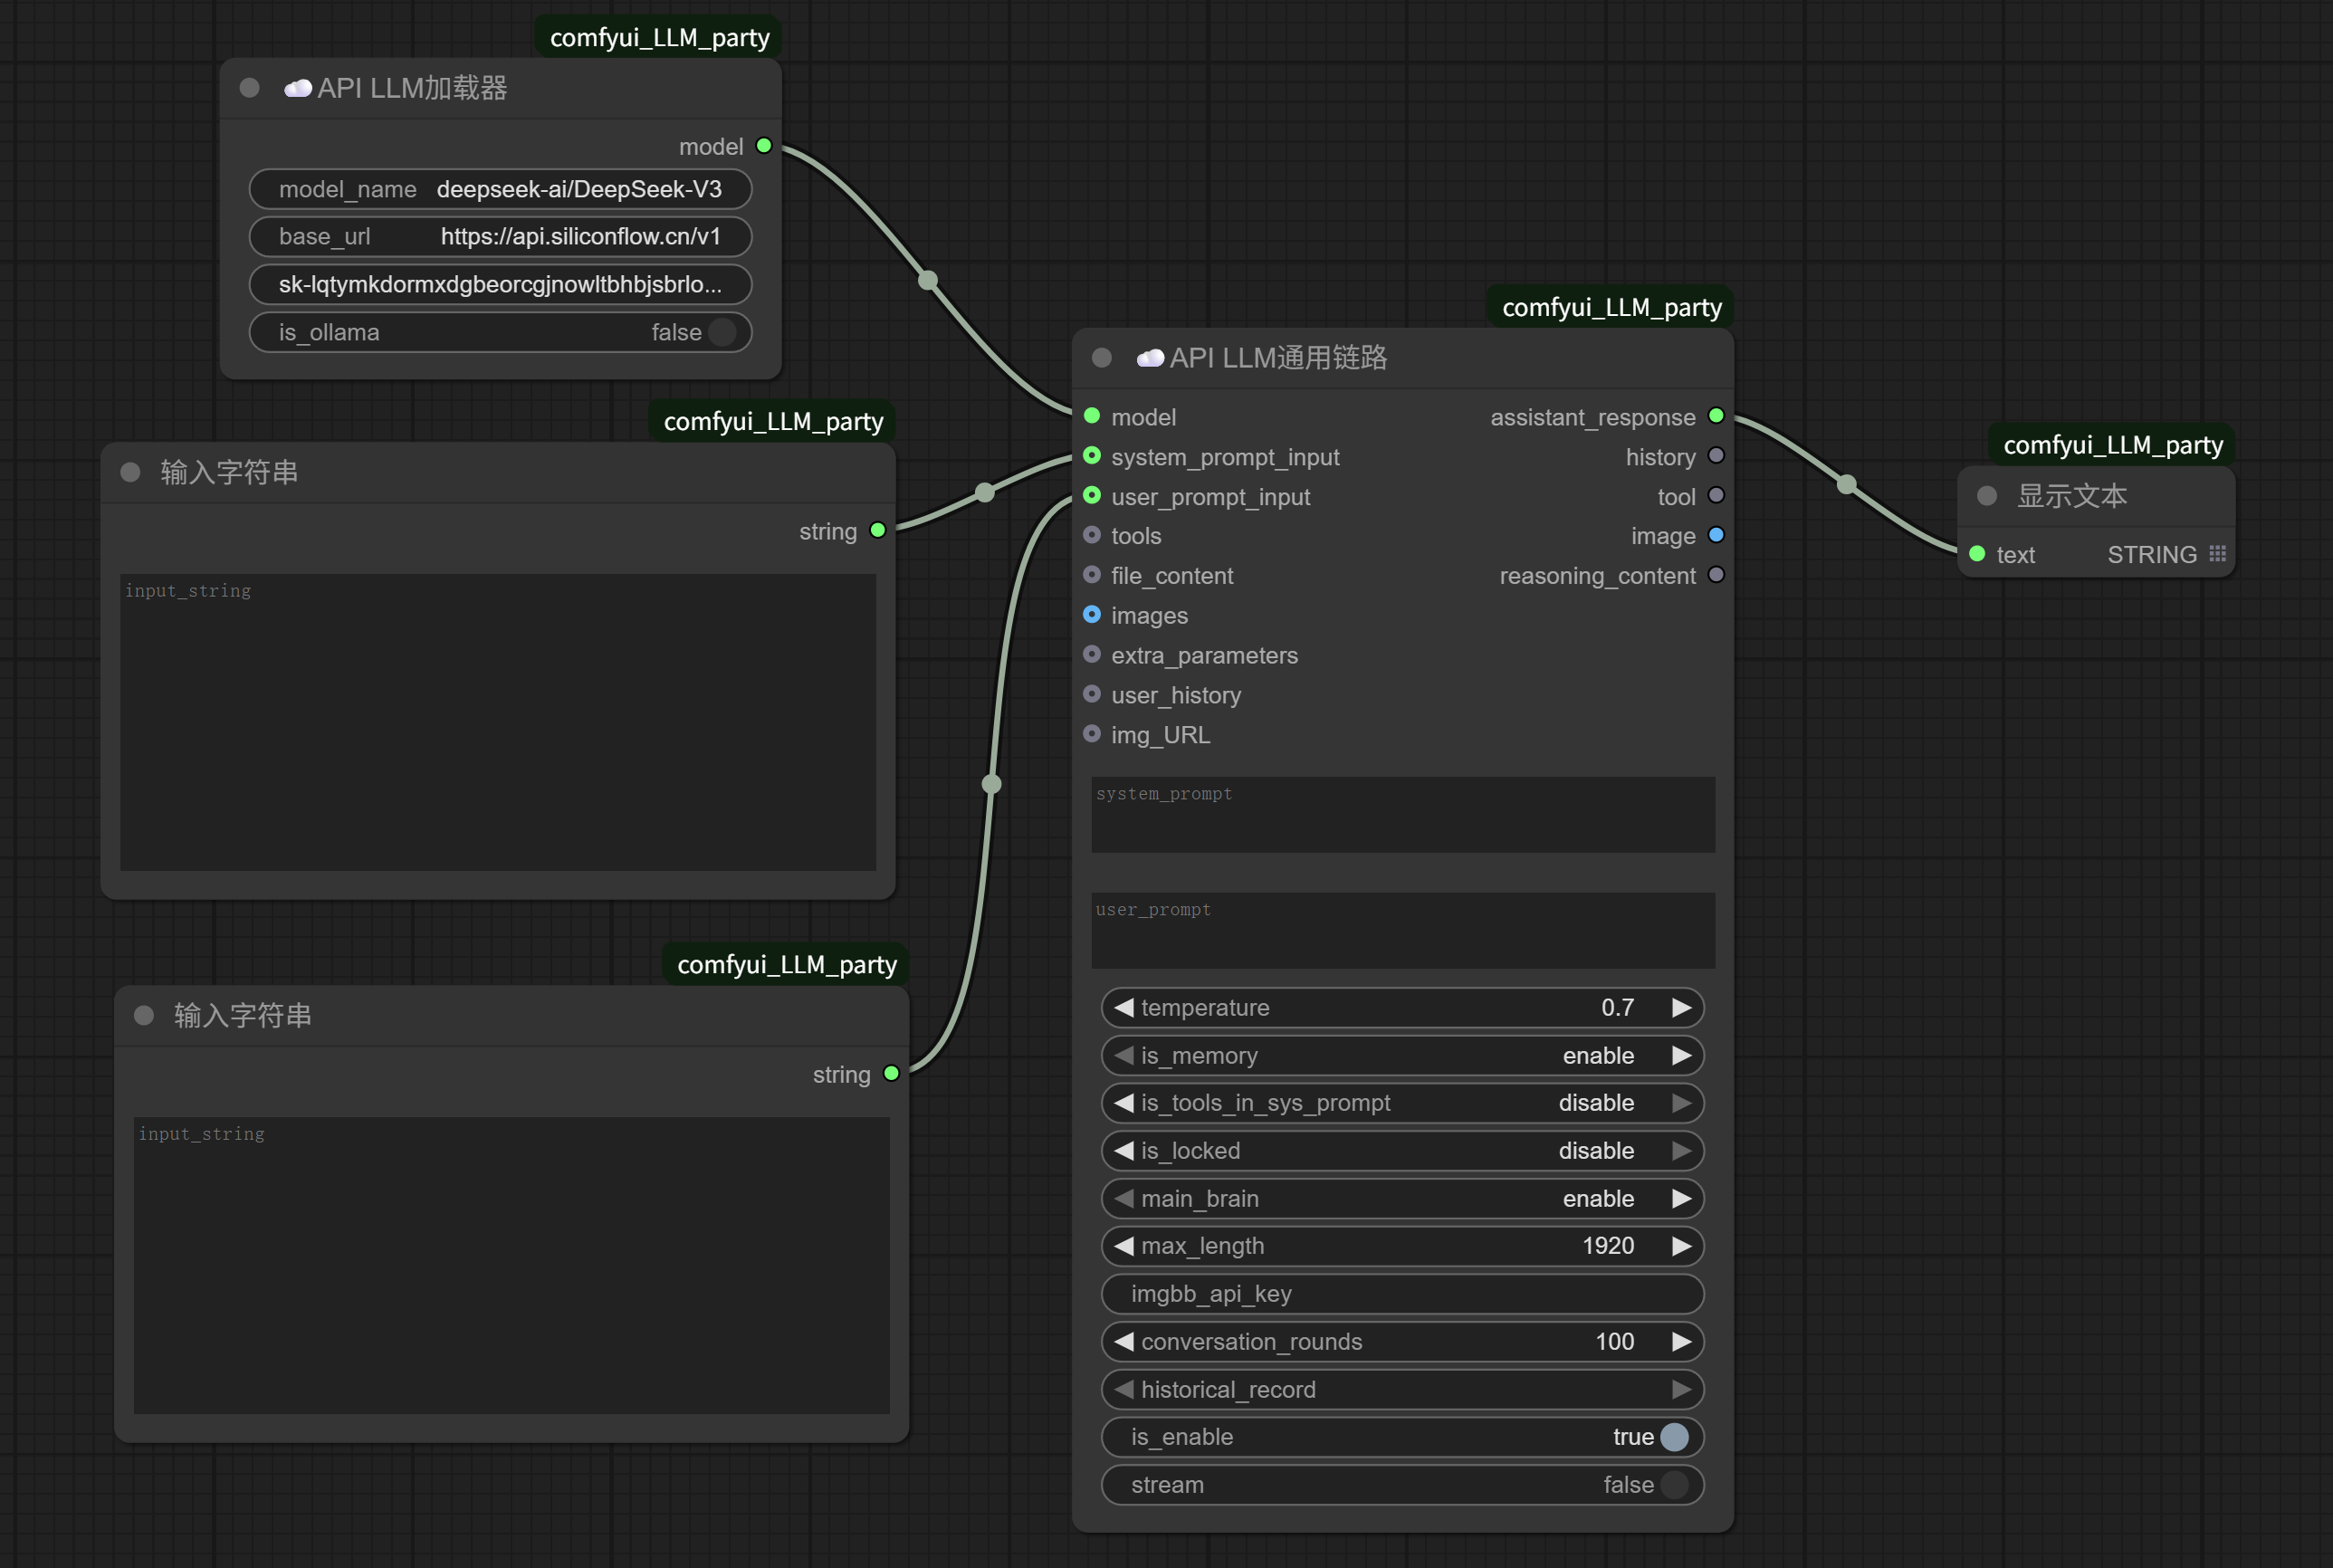
We fill in the “Input String” connected to the system prompt input with:
You are a poet. No matter what keywords someone gives you, you can always compose a poem based on them.
In the “Input String” connected to the user prompt input, fill in:
Kitten
Click to run.
A poem about “kitten” appears in the “Show Text” node on the right.
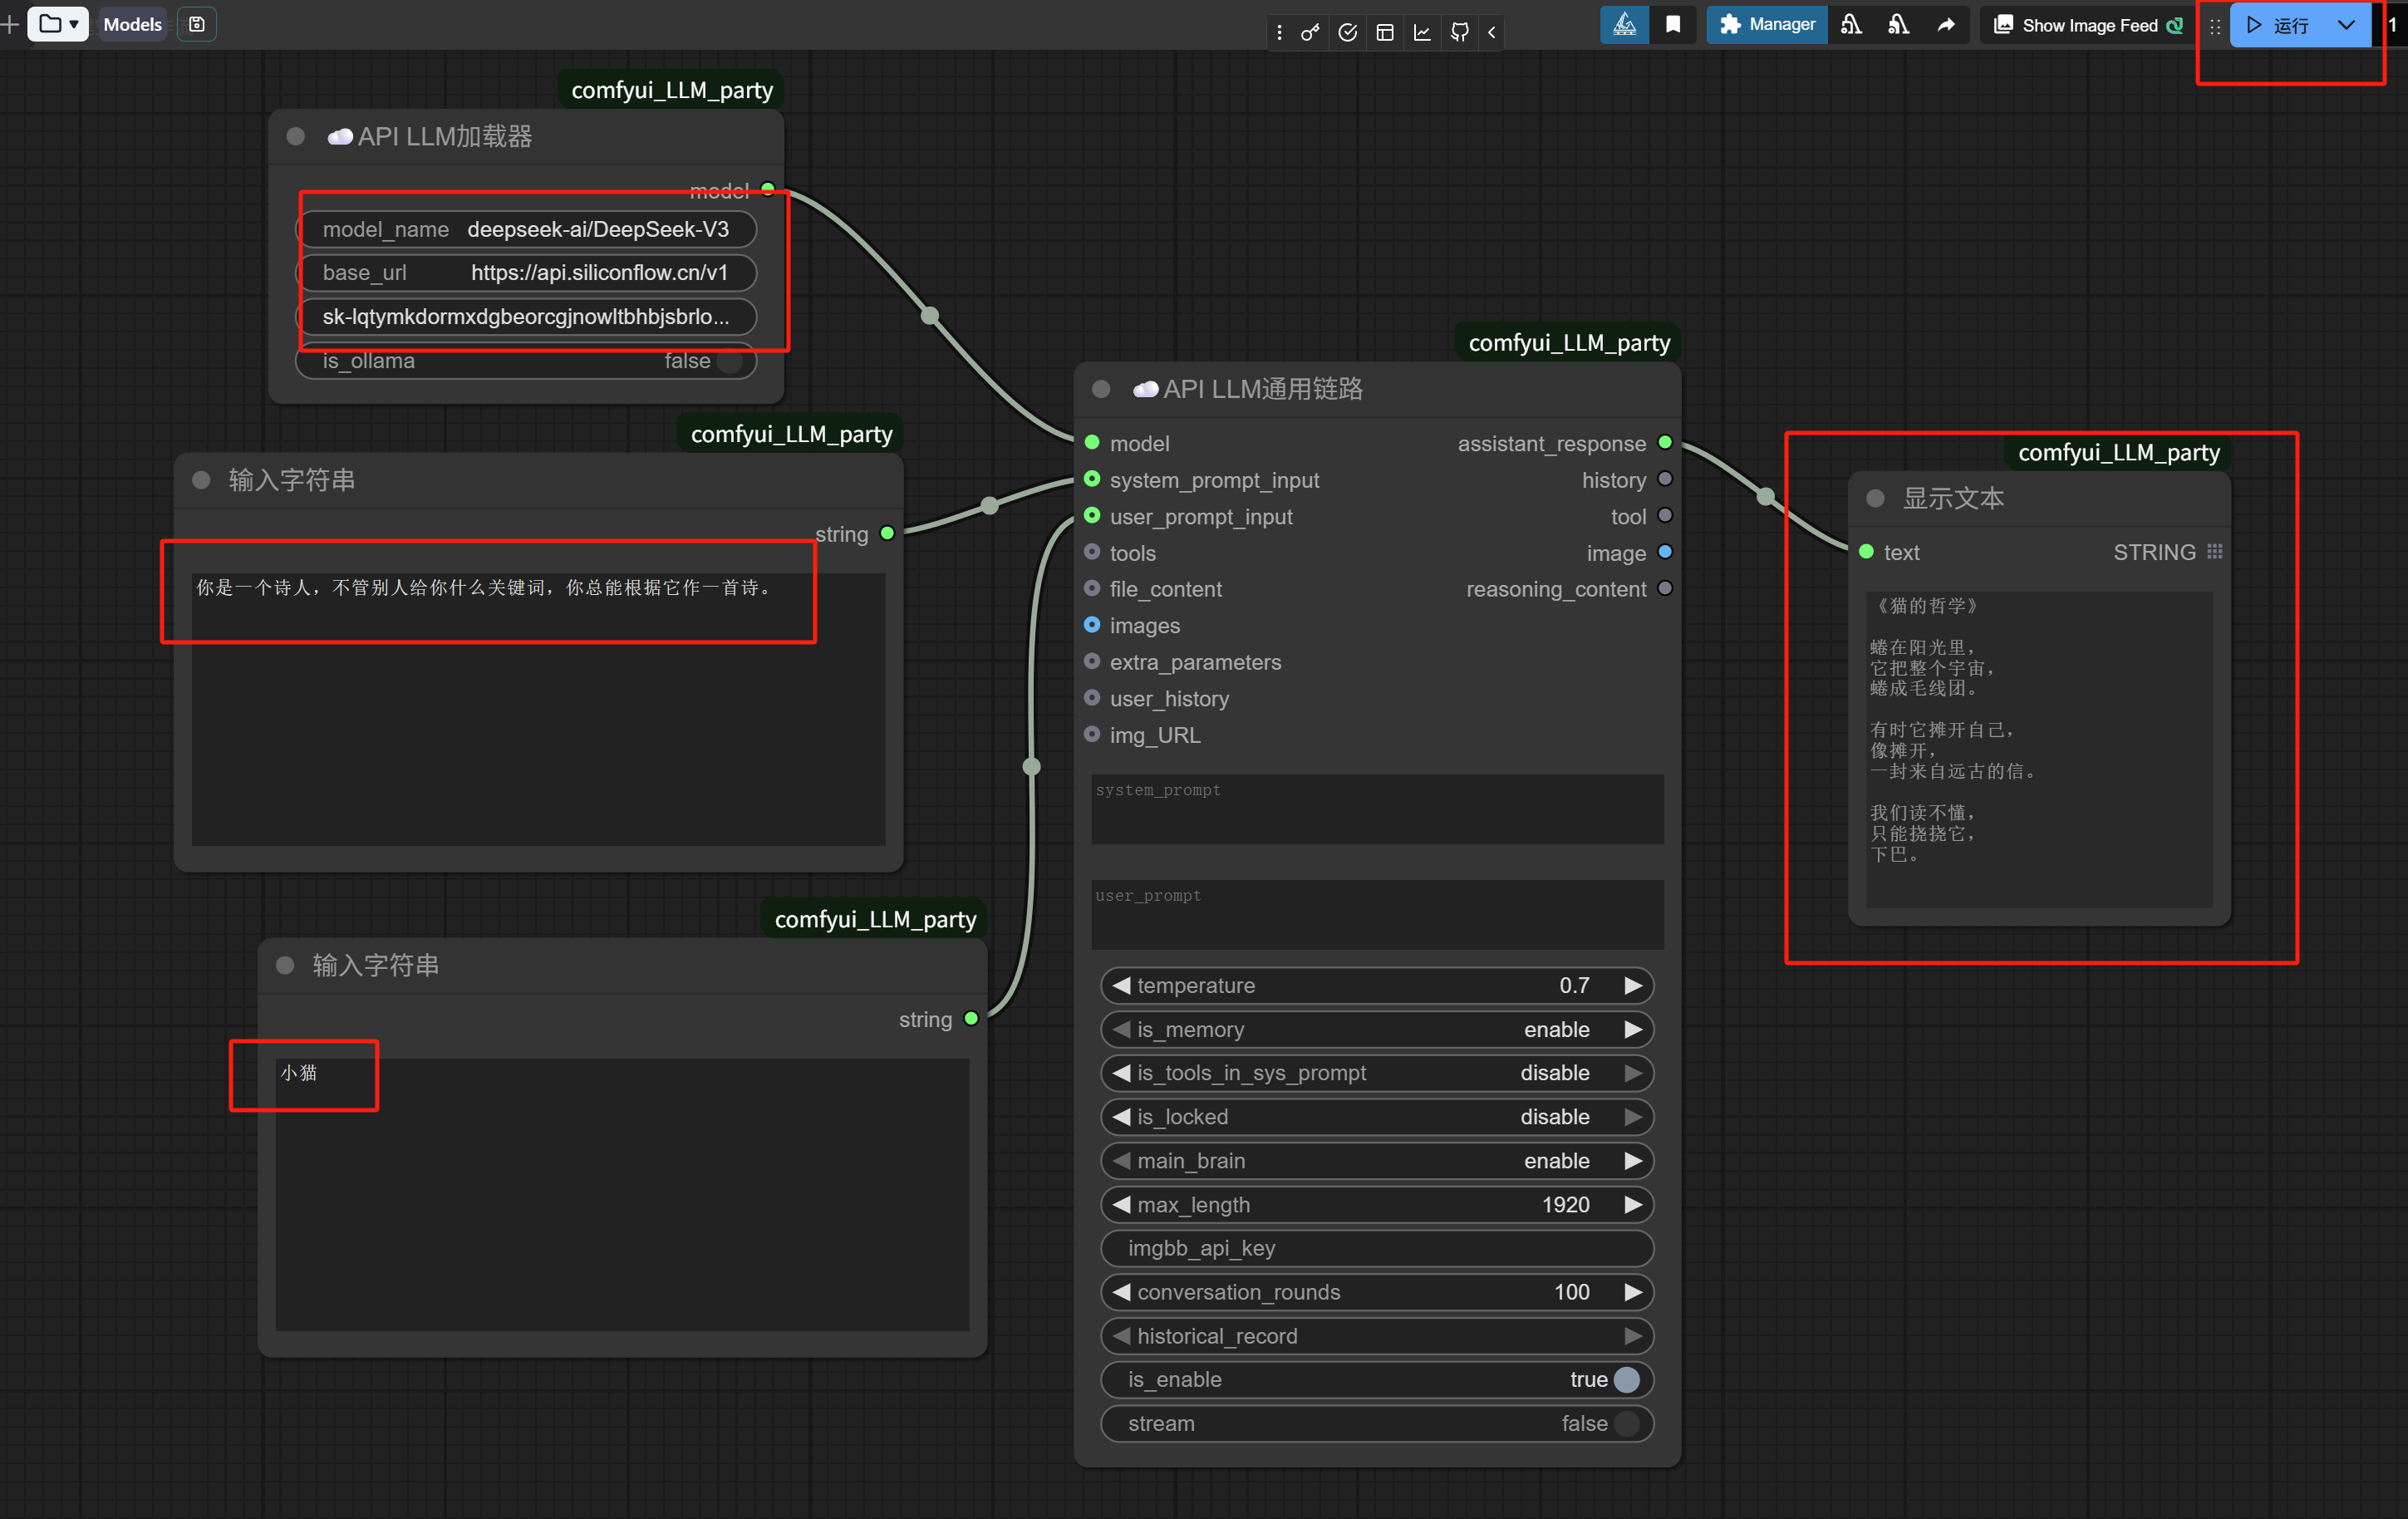
Let’s review the short workflow we just executed:
1. Through the “API LLM Loader” node, we loaded the DeepSeek-V3 model from SiliconFlow.
2. Through the “Input String” node, we set the system prompt: You are a poet. No matter what keywords someone gives you, you can always compose a poem based on them.
3. Also through the “Input String” node, we input the user prompt: kitten.
4. The “API LLM Generic Chain” node received the inputs from steps 1, 2, and 3 above and executed.
5. Through a “Show Text” node, we displayed the execution result of the “API LLM Generic Chain”—an AI-generated little poem titled “The Philosophy of a Cat”.
This is the basic operational logic of ComfyUI.
Now that we understand the basic operational logic, let’s continue to fine-tune this poem-generating workflow to make it more aligned with our practical scenarios.
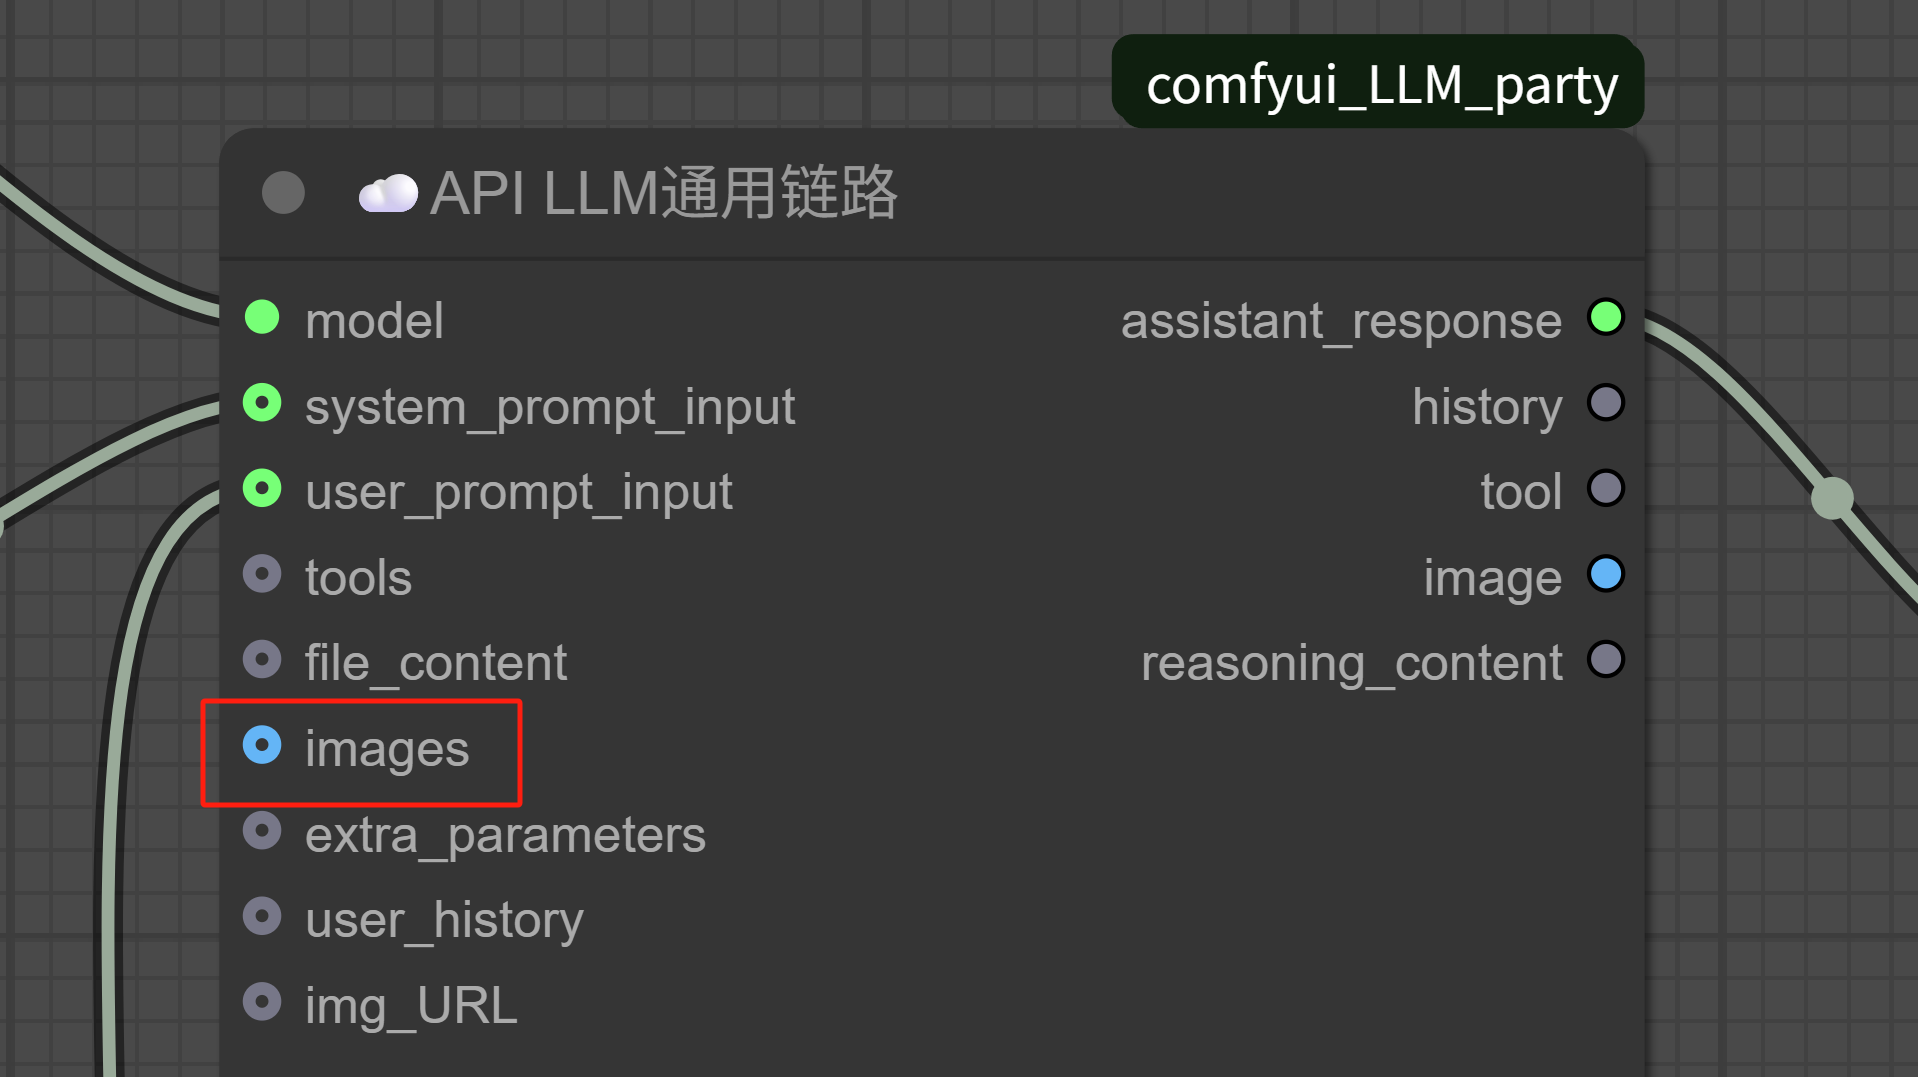
Looking at the endpoints of the “API LLM Generic Chain” node, you’ll notice that besides text prompt input, we can also input images.
Perfect, we can use this to create an image reverse-engineering function.
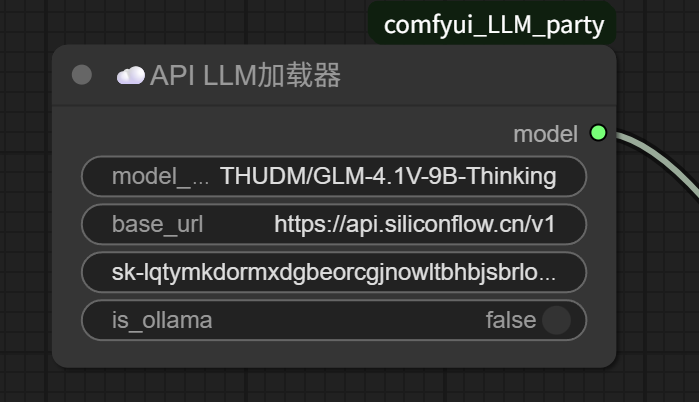
SiliconFlow has just launched Zhipu’s newly released vision model, so let’s use that:
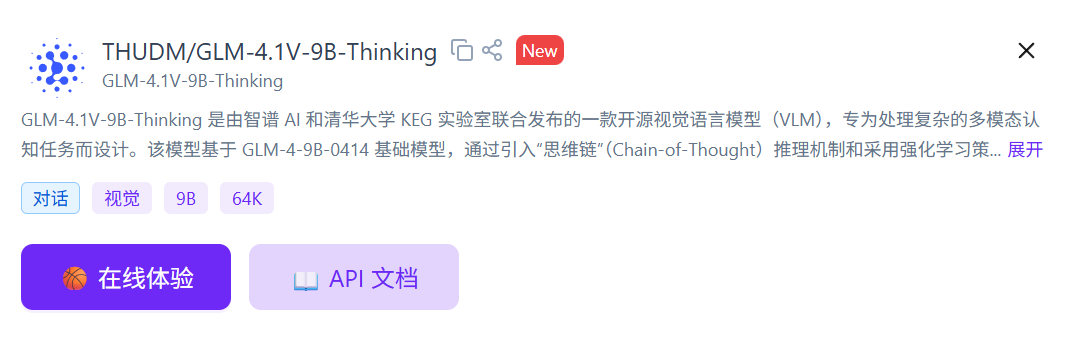
Directly modify the model name in the API LLM Loader.
To upload an image, we also need to add a “Load Image” node:
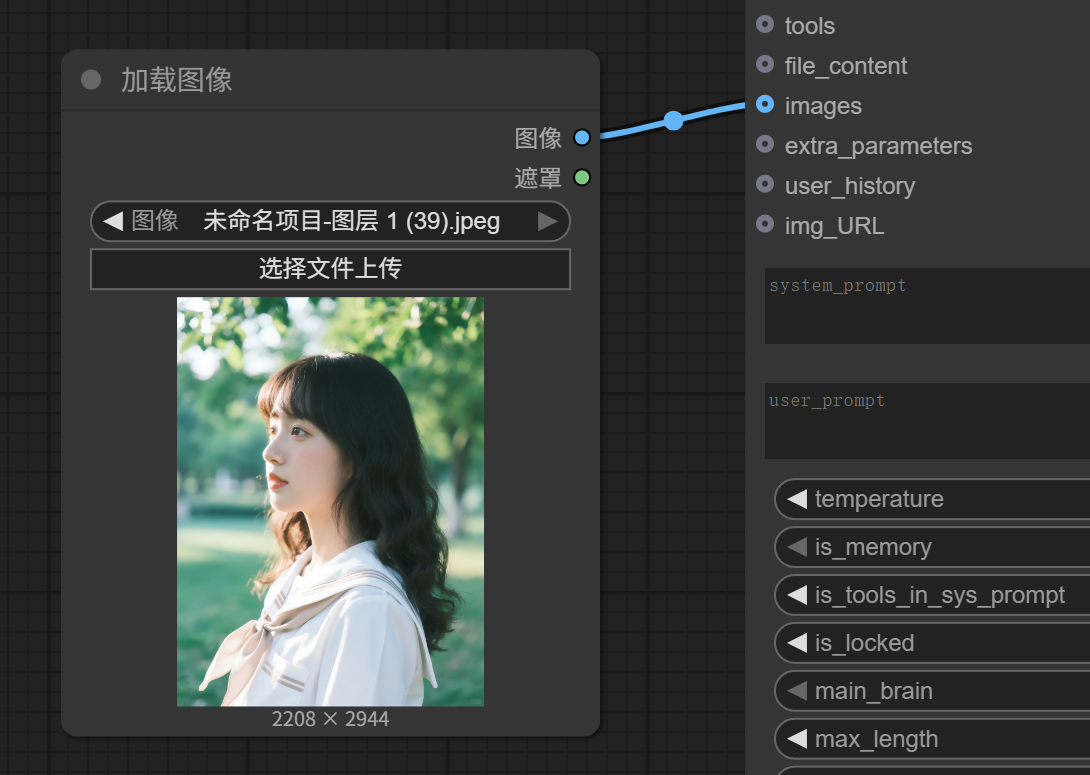
The user prompt can be removed, and the system prompt changed to:
Please analyze the image:
Then, execute.
We get the reverse-engineering result of this image from the GLM-4.1V-9B-Thinking model:
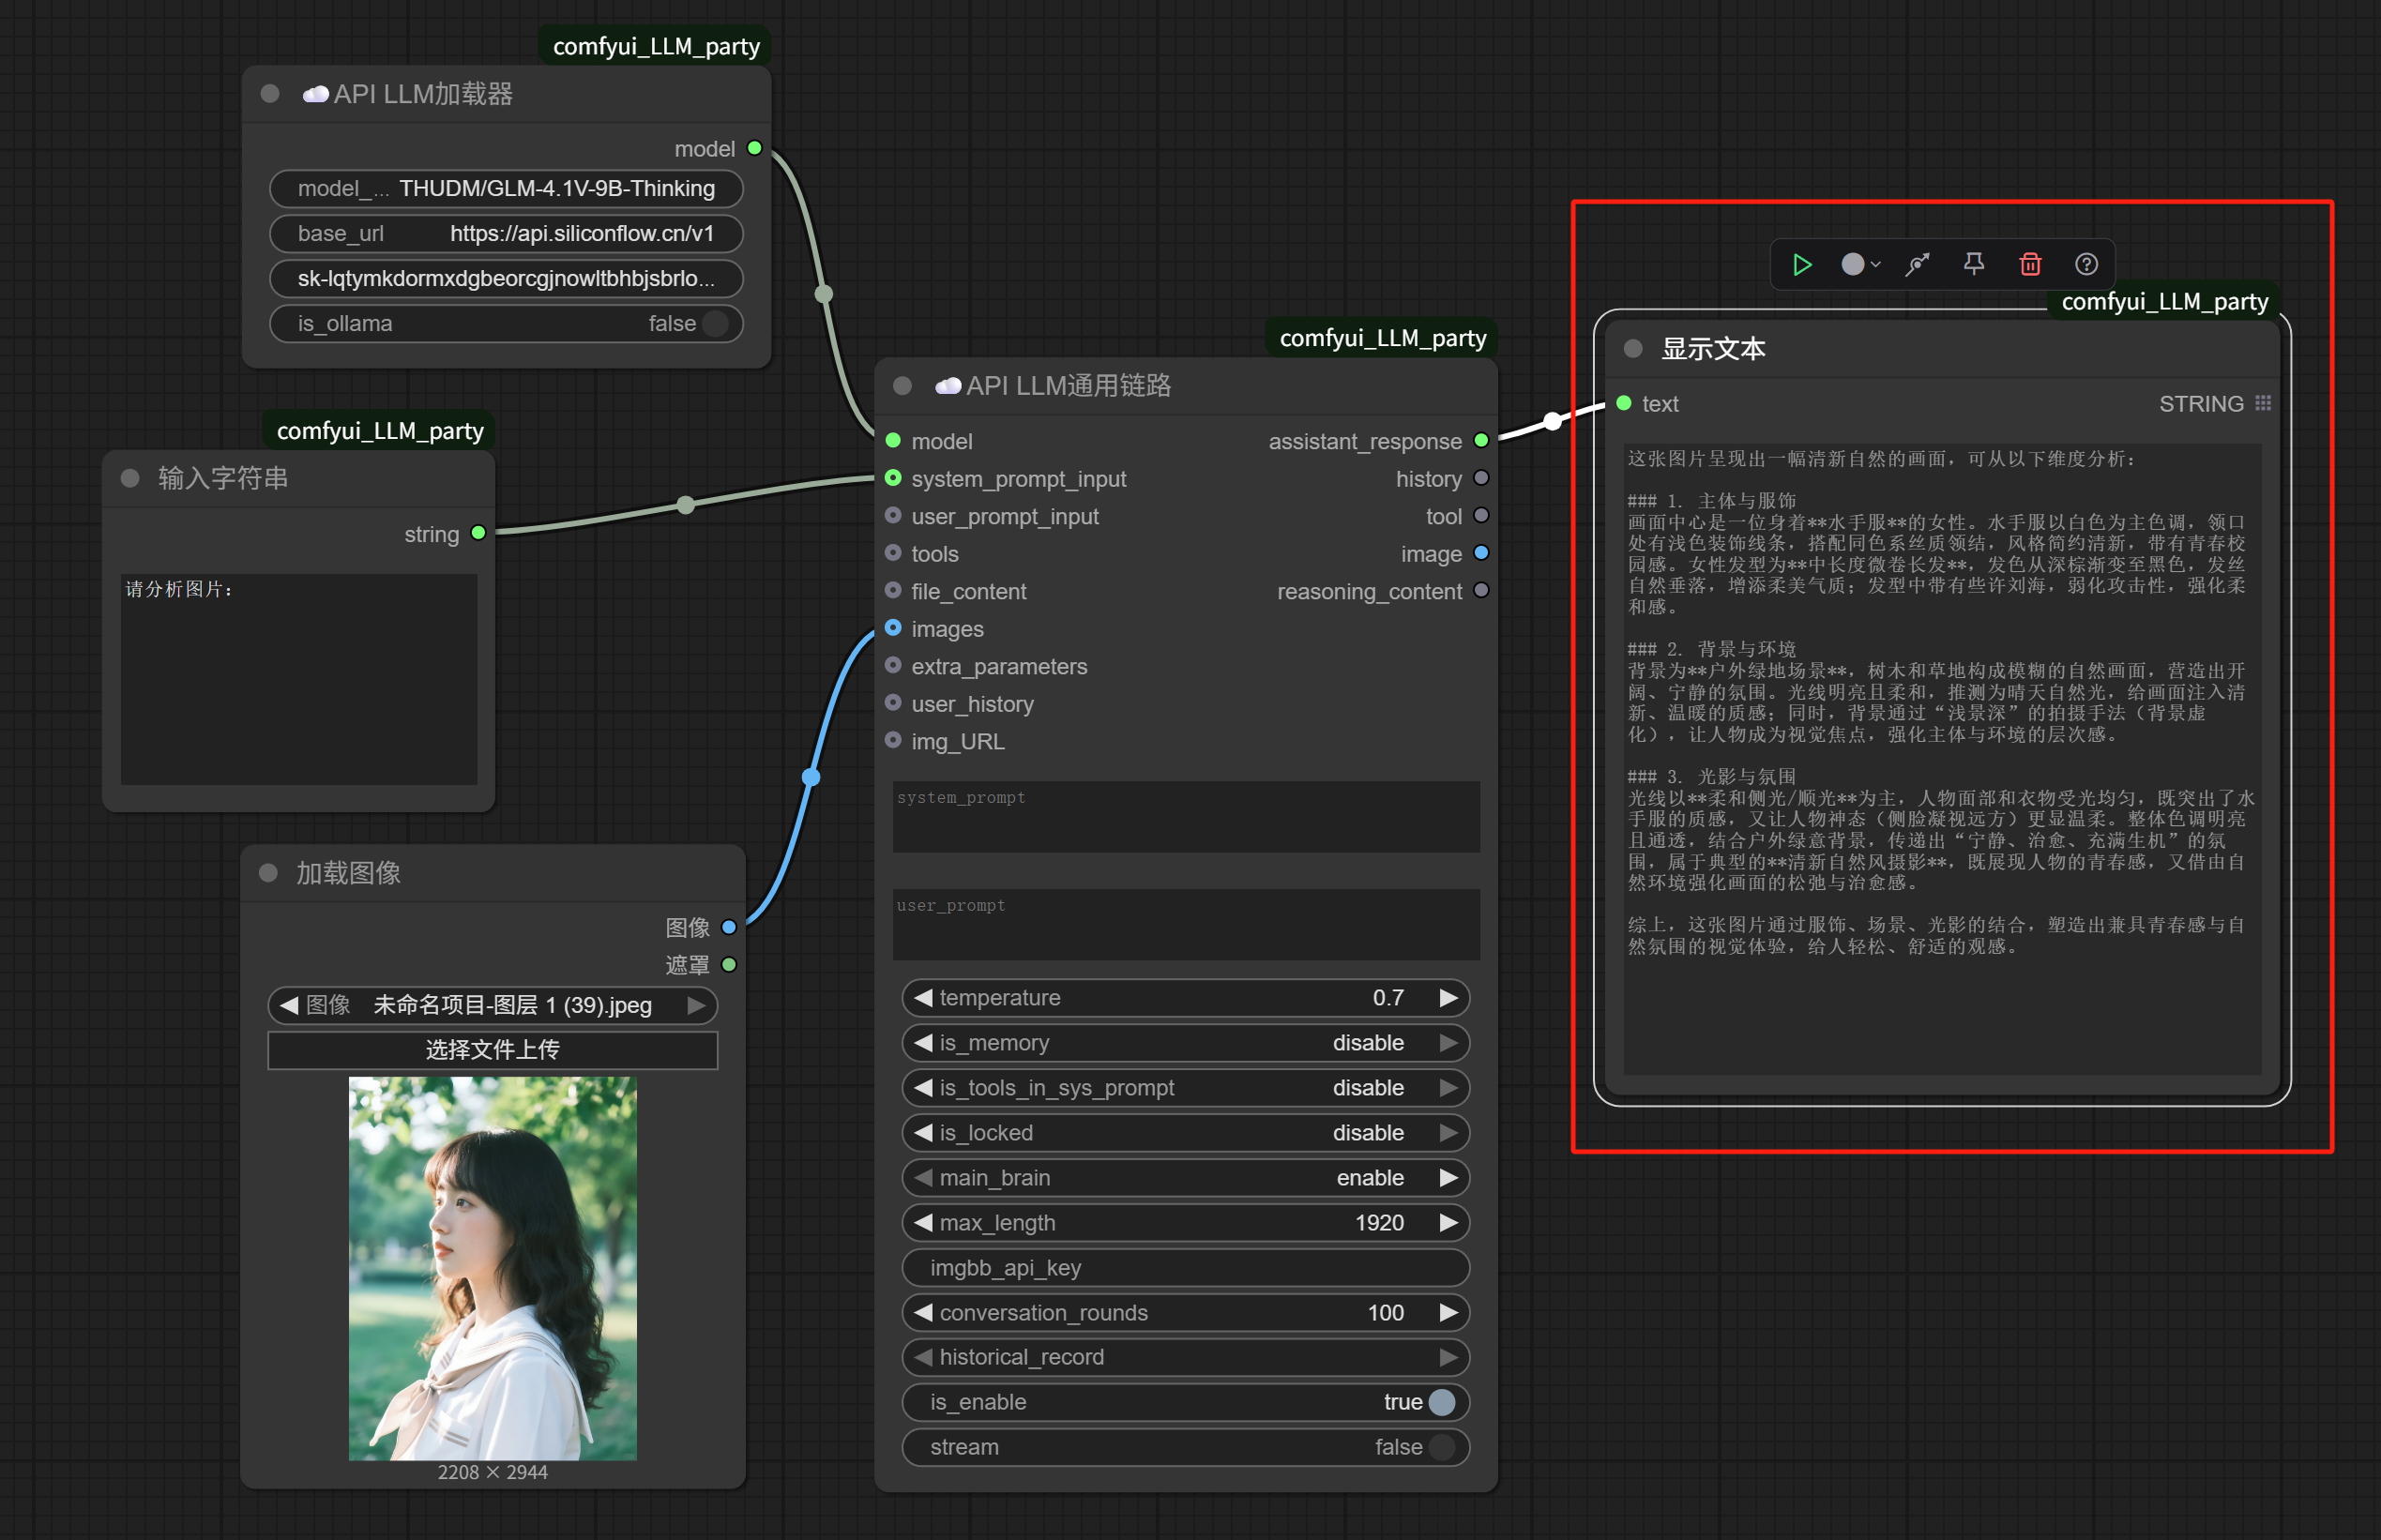
Not hard, right.
In just a few minutes, we’ve already developed two small workflows based on the “API LLM Generic Chain” node.
At this point, we need to address another common misconception for beginners: “I can’t build a complex workflow like that.”
After learning to build this kind of small workflow with just a few nodes, some will say: “Even though I’ve learned what you’ve taught me, what’s the use of only knowing simple workflows?”
But, friends.
The truth you need to know is: While building complex workflows is related to technical ability, that might only account for 20%; the other 80% is related to requirements.
For example, I now have an image, but I also want to use AI to generate a batch of similar images.
Let’s break down how to accomplish this task:
1. First, I need to be able to describe the existing image.
2. Then I can write prompts for generating similar images.
3. Finally, I need to input the prompts to a large model capable of generating images to create new ones.
This might also involve a series of language translation and conversion issues.
It’s not hard to see that step 1, the starting point of this task, is exactly the image reverse-engineering workflow we just did.
After executing the reverse-engineering workflow, we get a description of the image.
Then we need to execute step 2: writing prompts.
This step can be done with AI. We can directly connect another “API LLM Generic Chain” node after the previous result to generate image prompts.
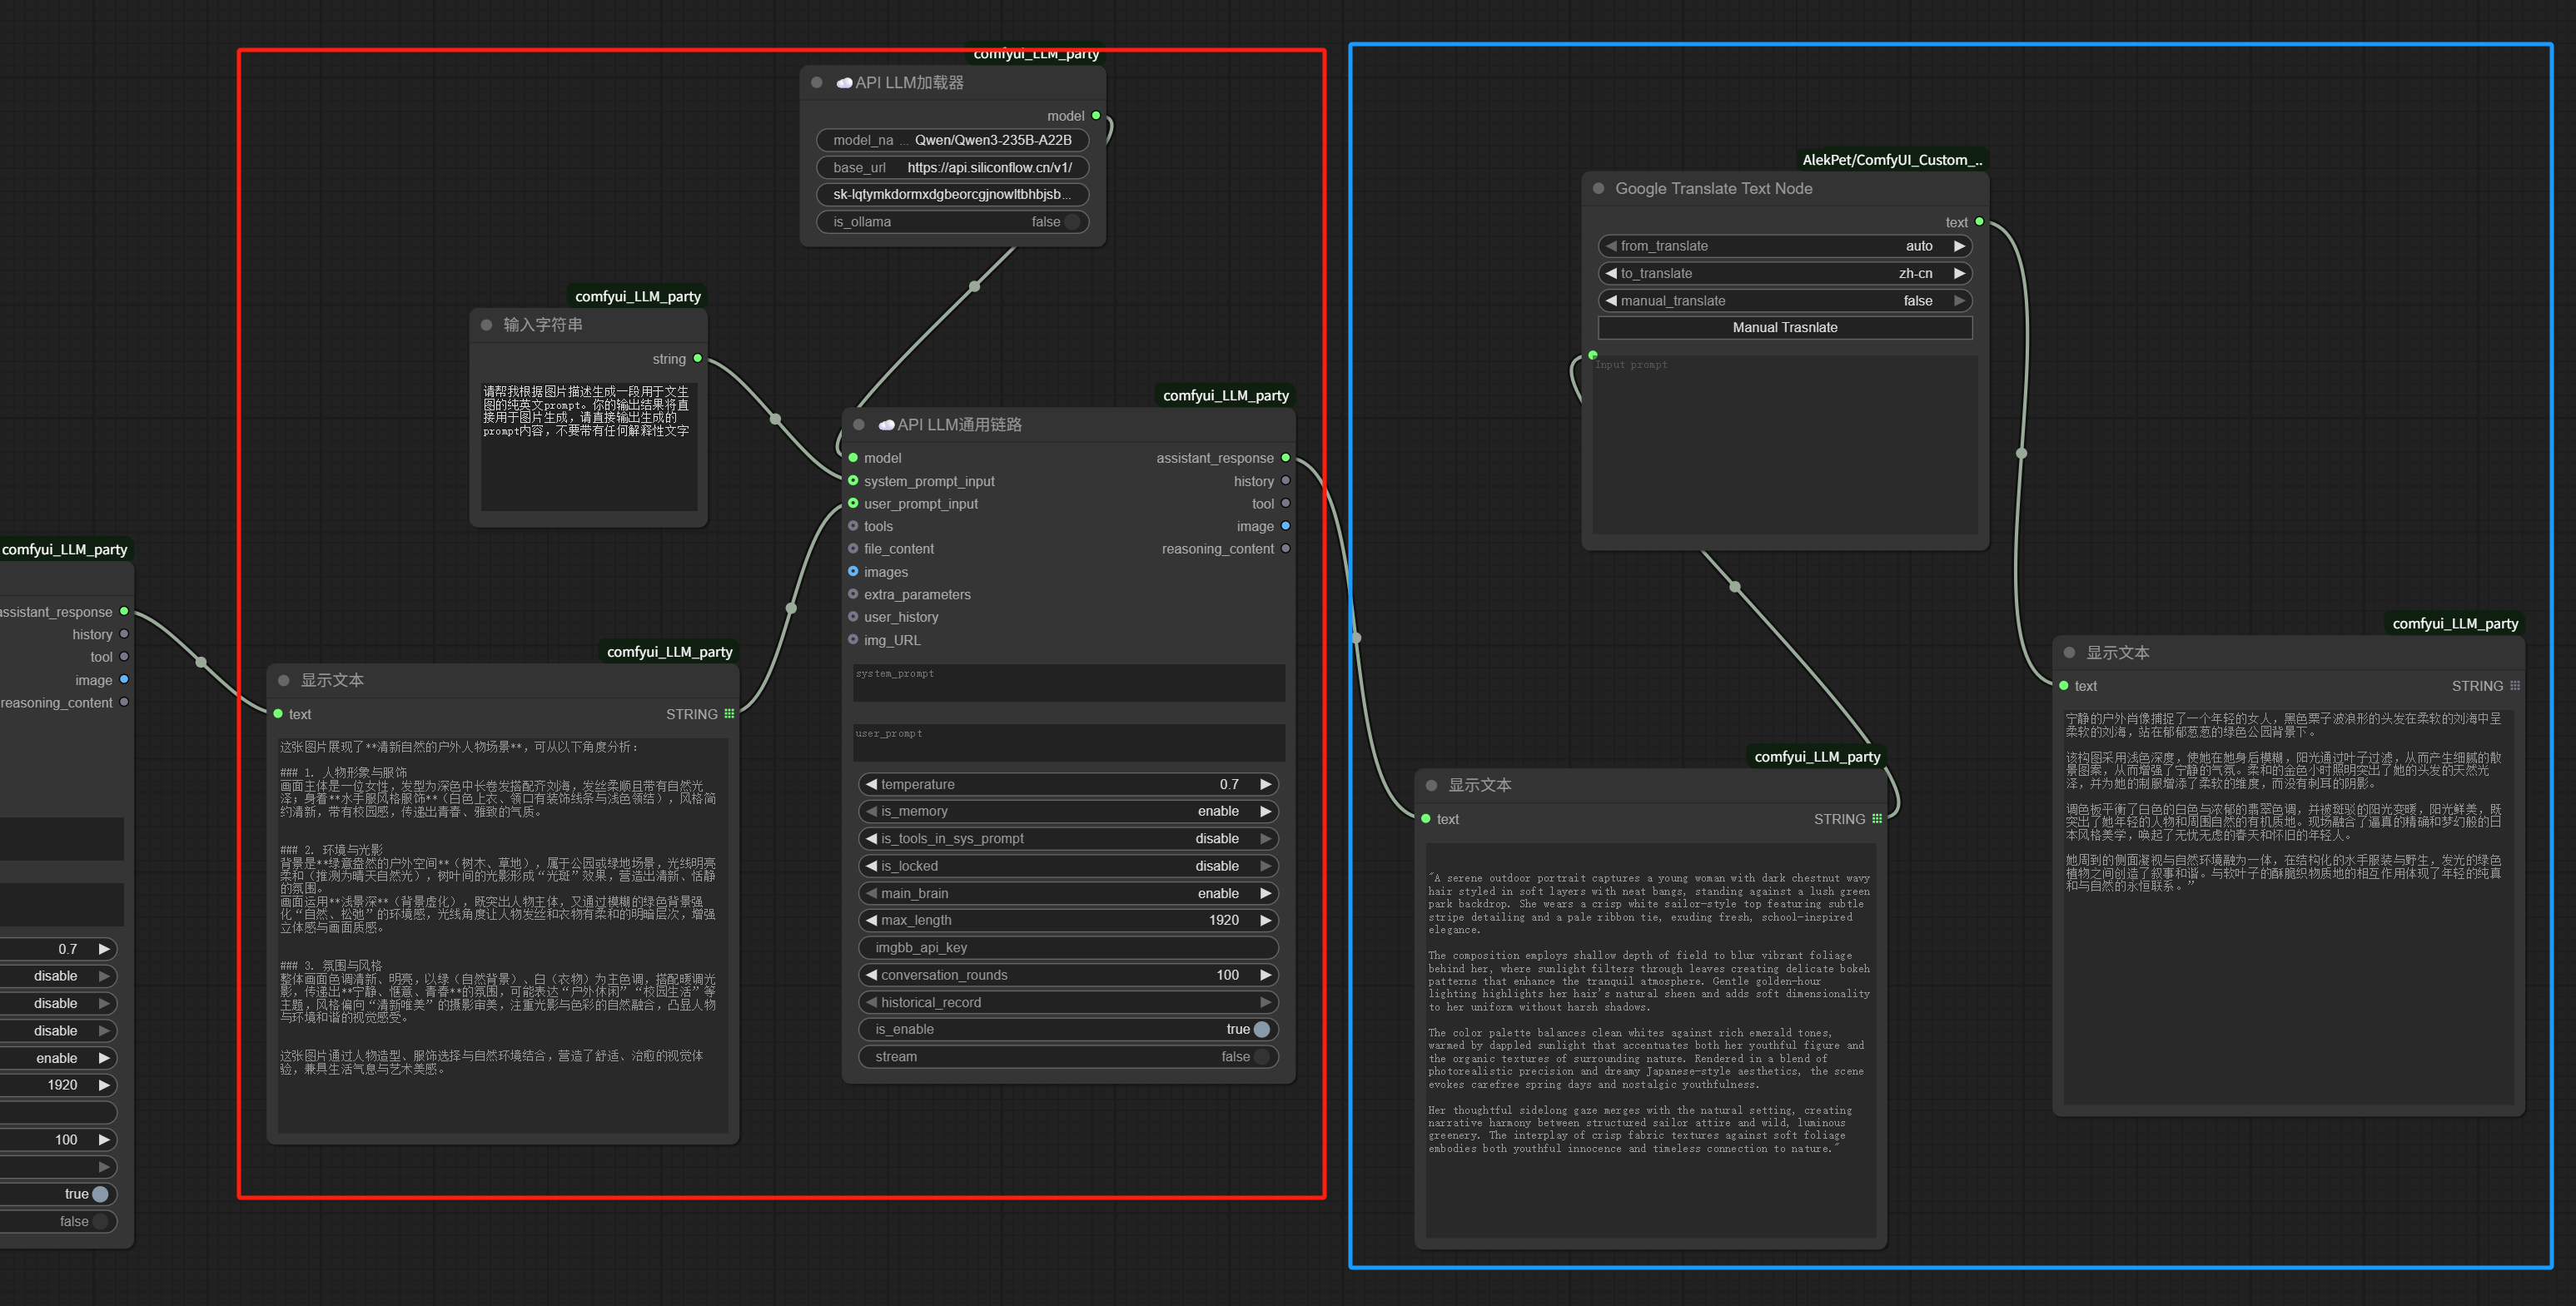
Load a large language model, such as Qwen/Qwen3-235B-A22B.
Set the system prompt as follows:
Please generate a pure English prompt for text-to-image generation based on the image description. Your output will be directly used for image generation, so please output only the generated prompt content without any explanatory text.
The image analysis result is used directly as the user prompt.
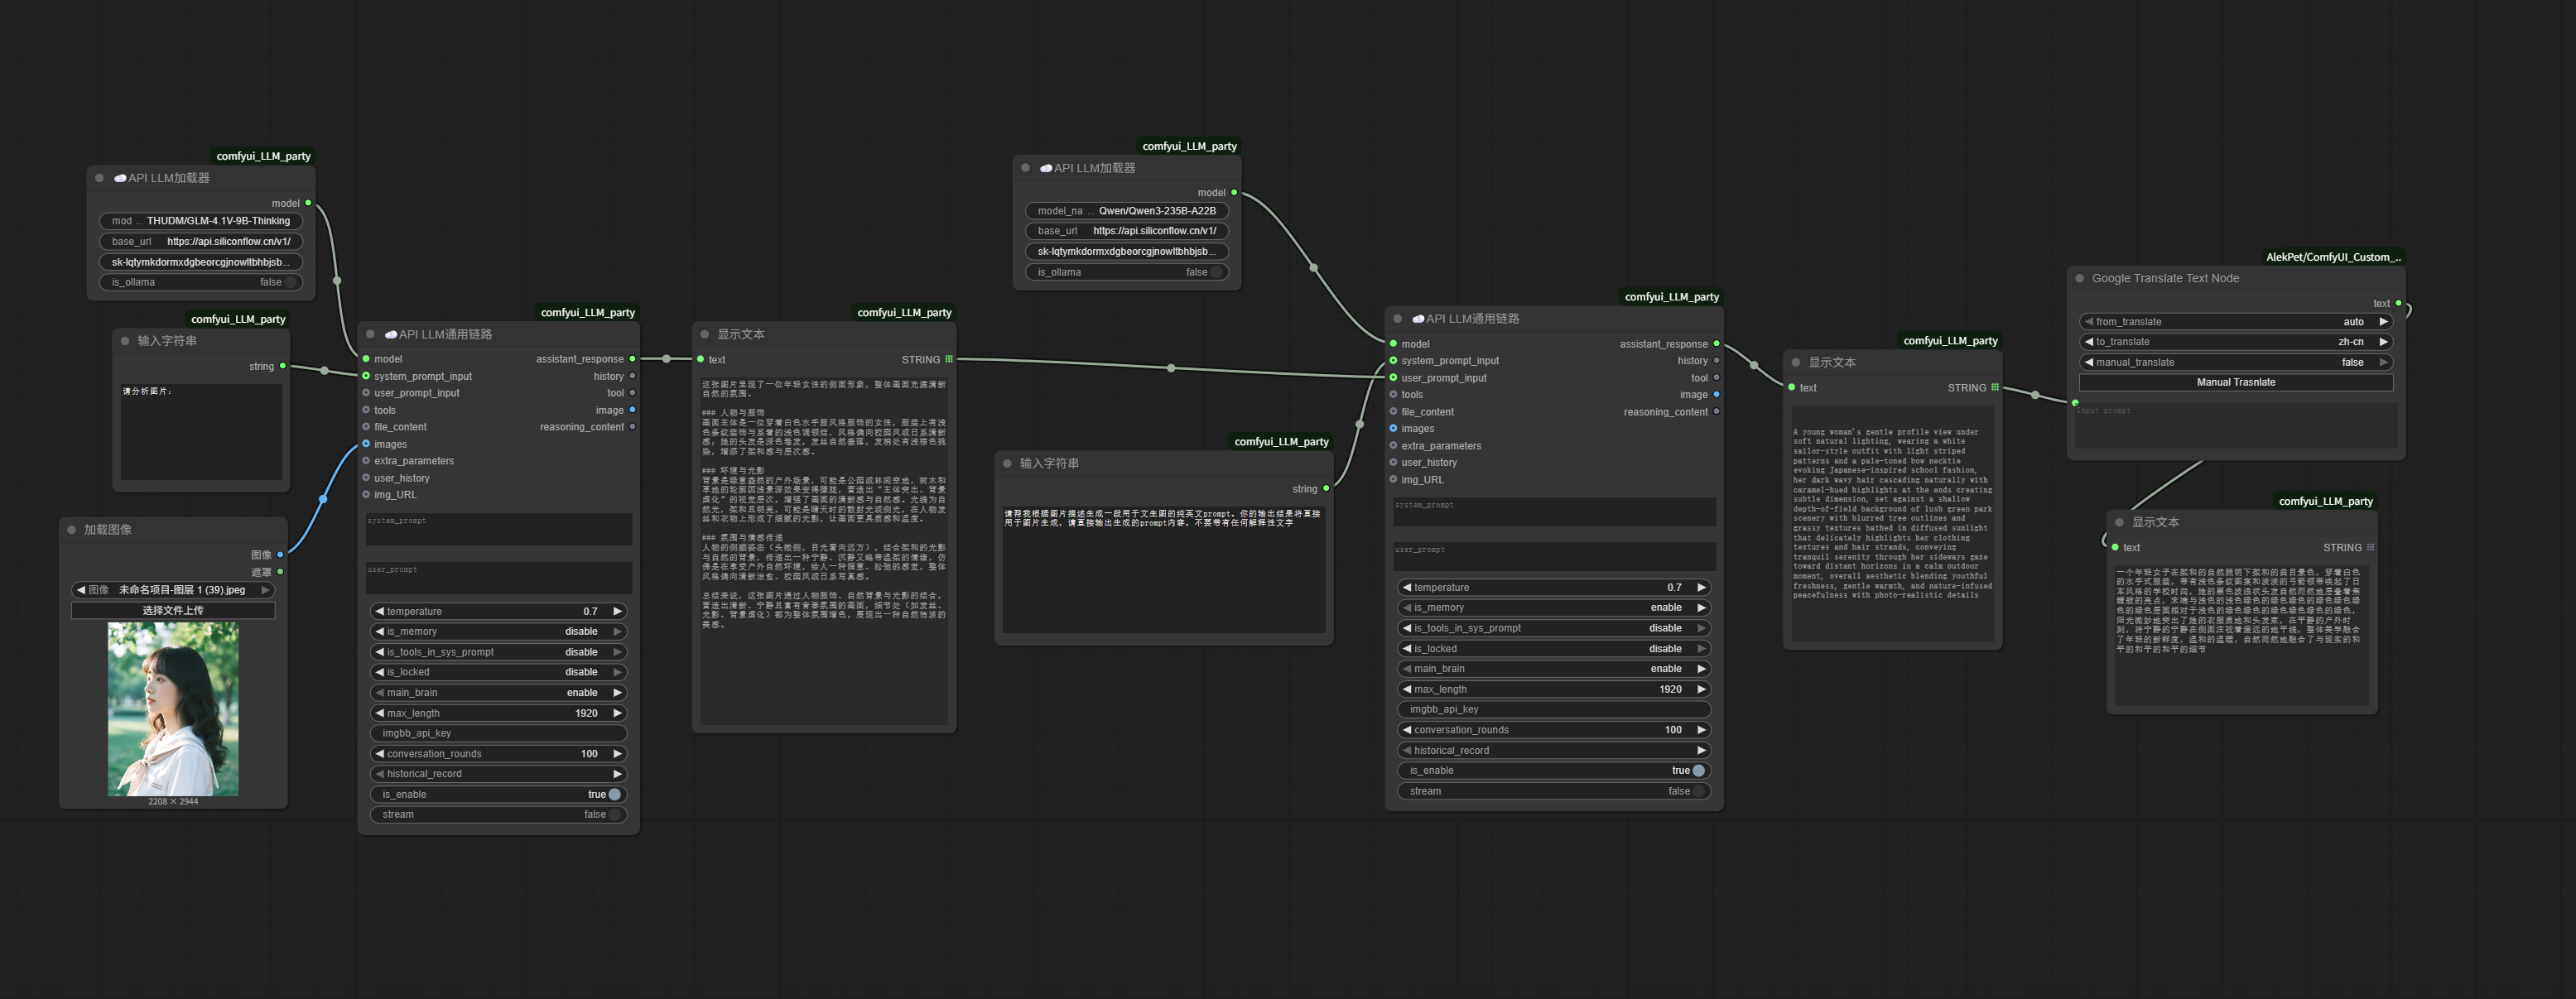
Generate an English prompt directly and display it using “Show Text”.
For easier viewing, you can add a Google Translate node after the “Show Text” to translate the English into Chinese specifically for checking.
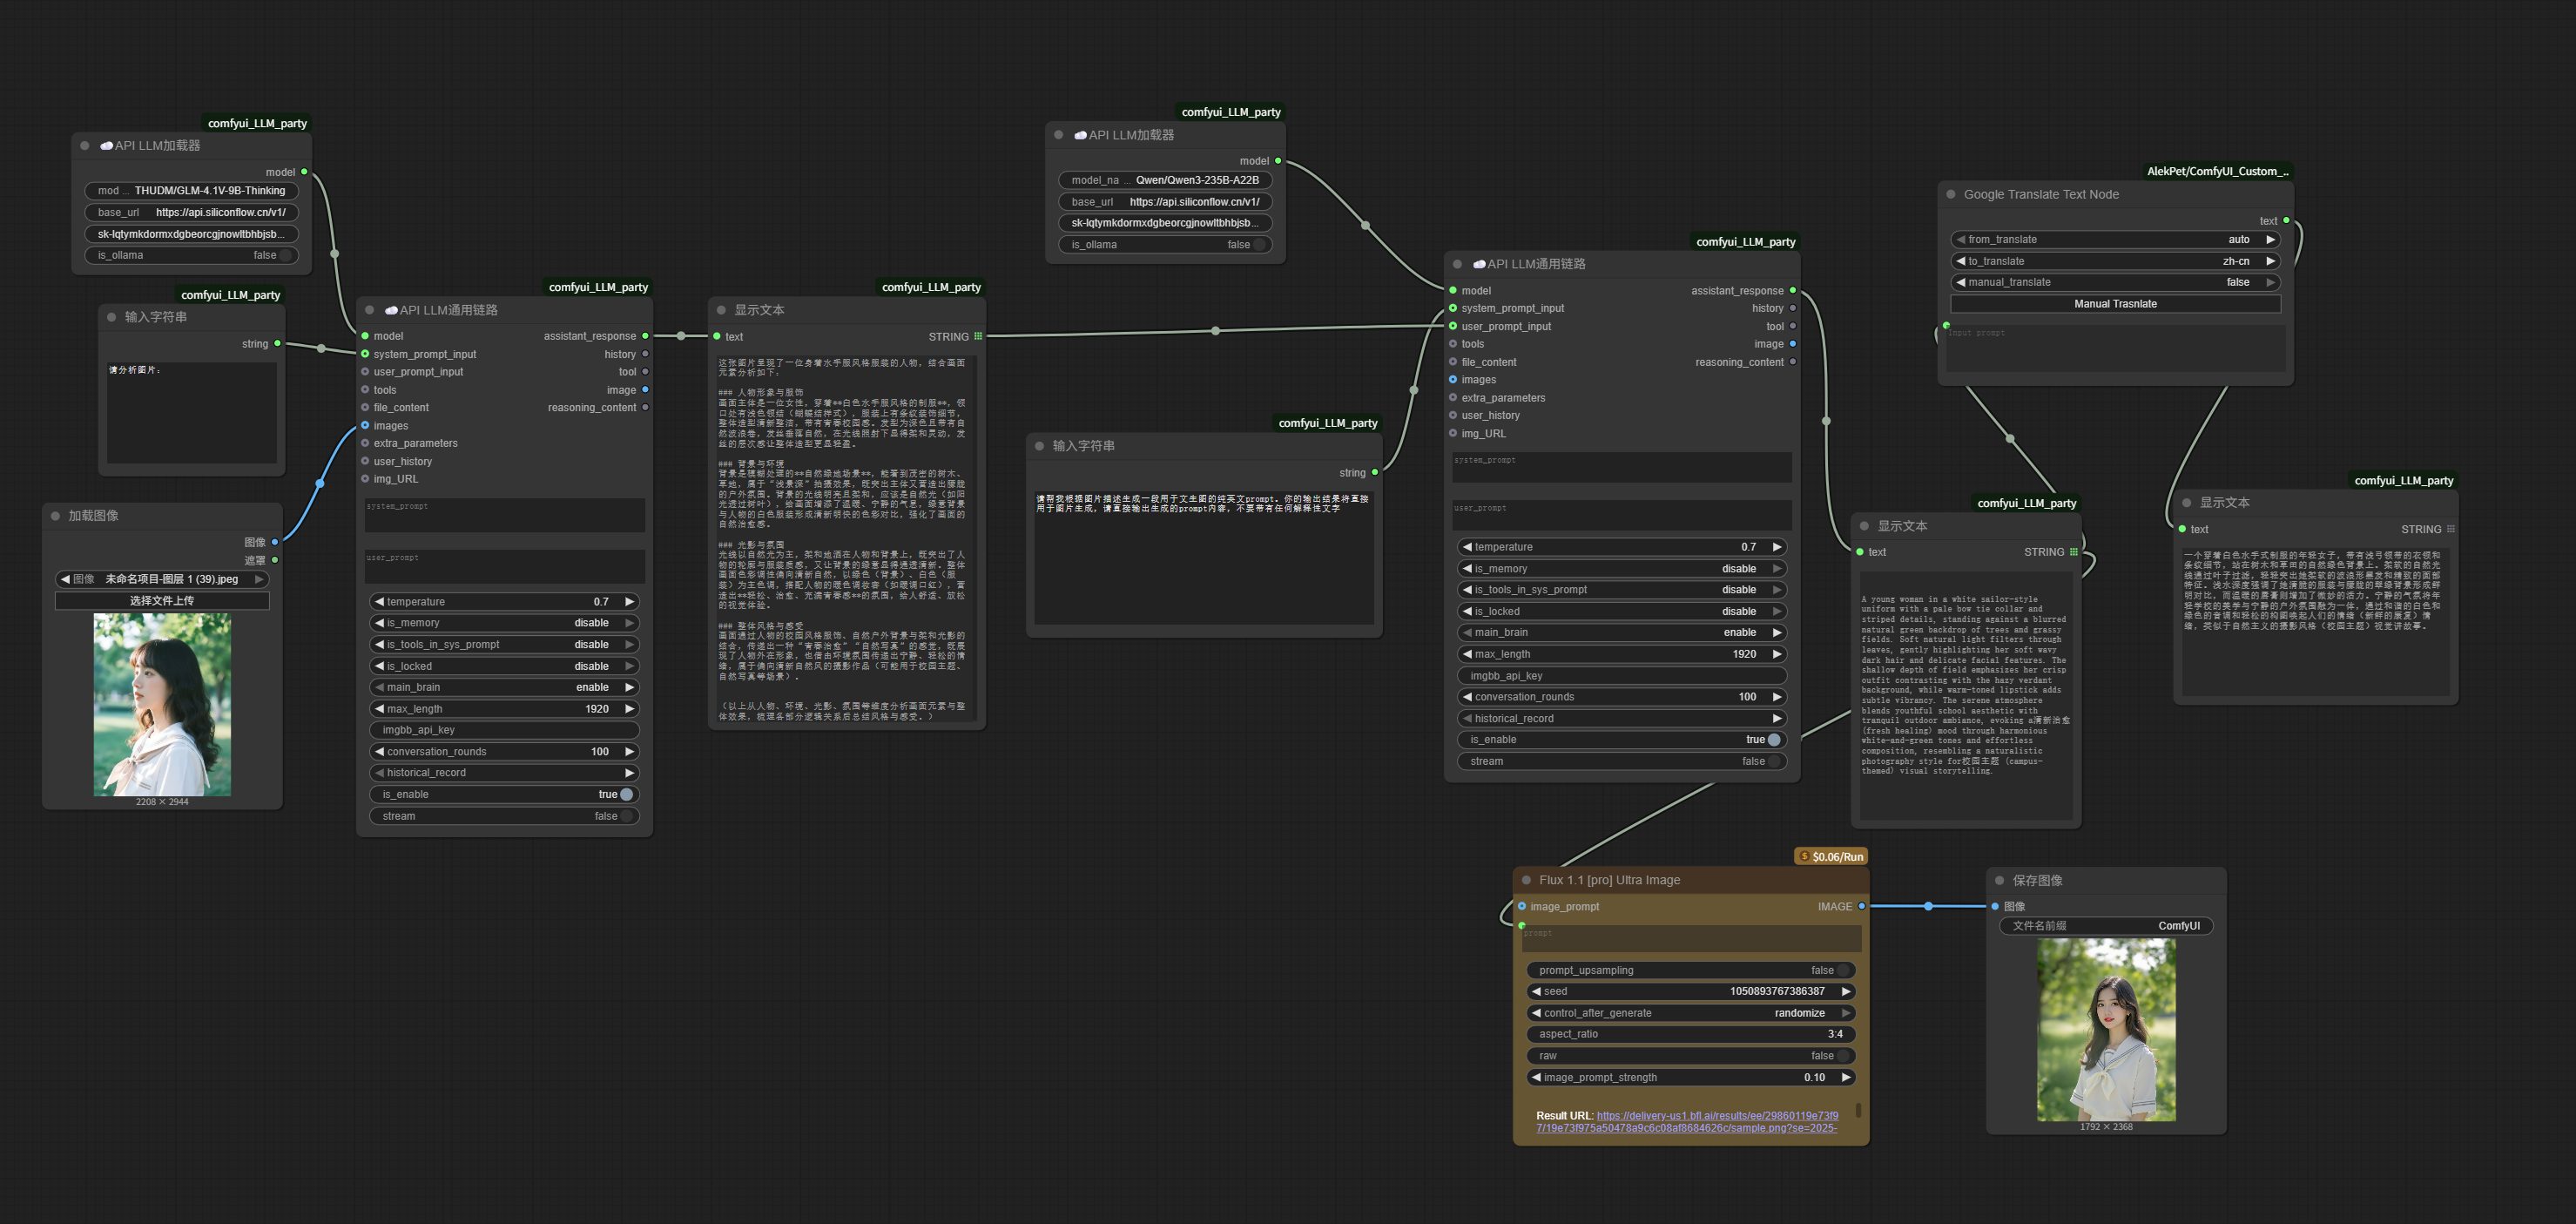
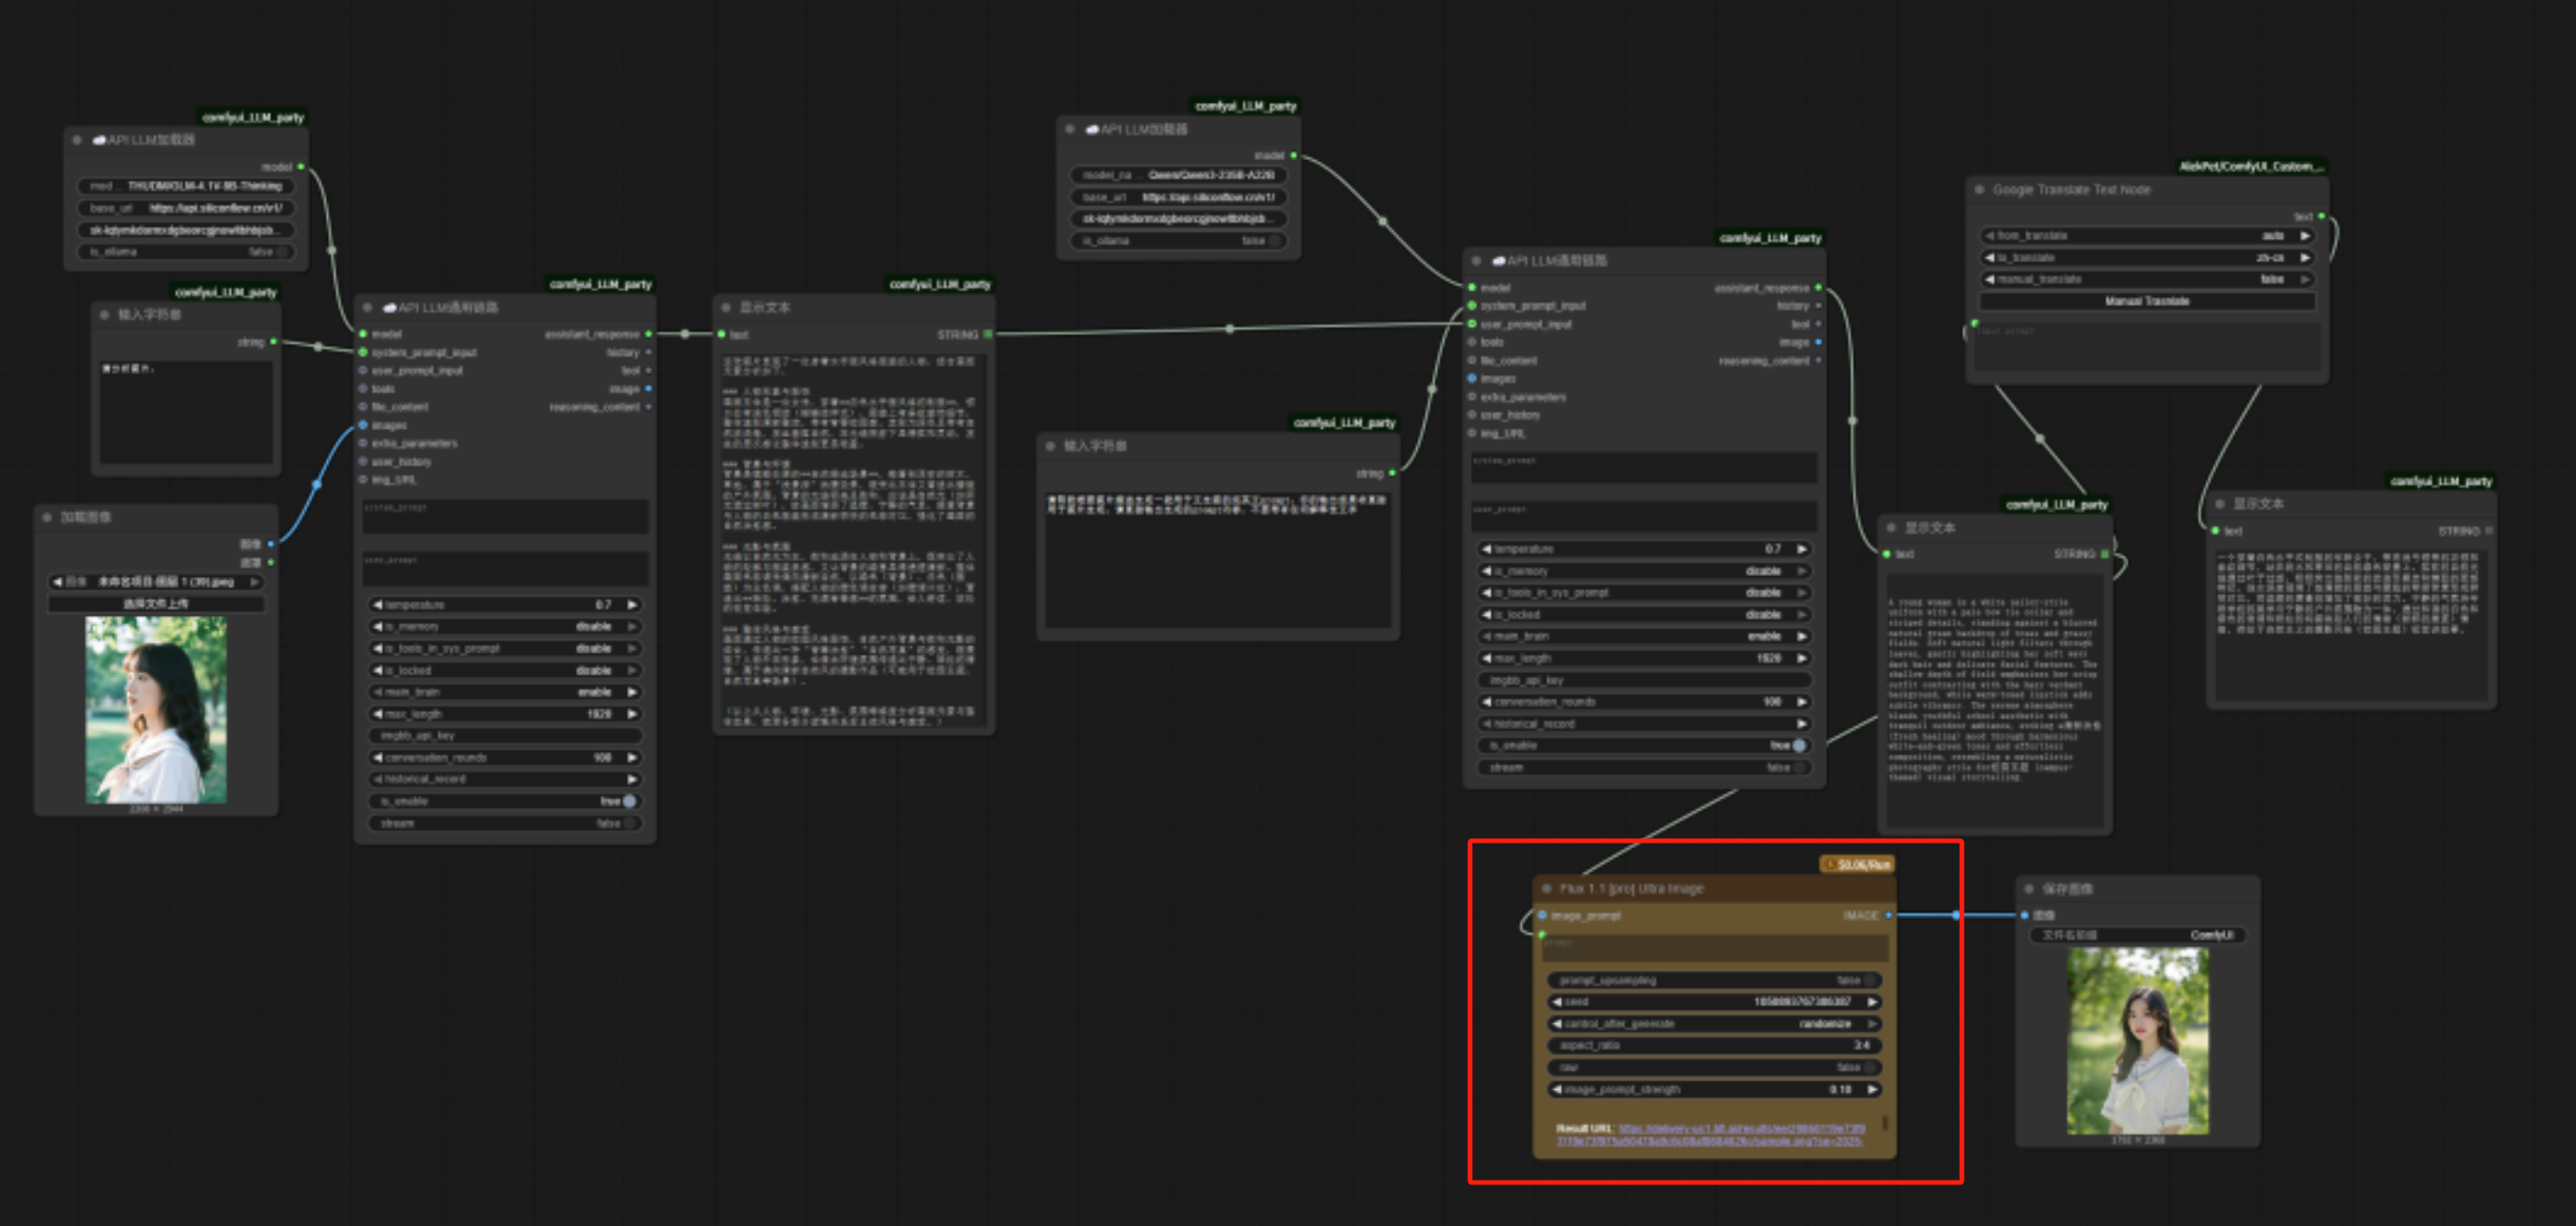
The workflow now looks like this:
Next comes step 3: generating images.
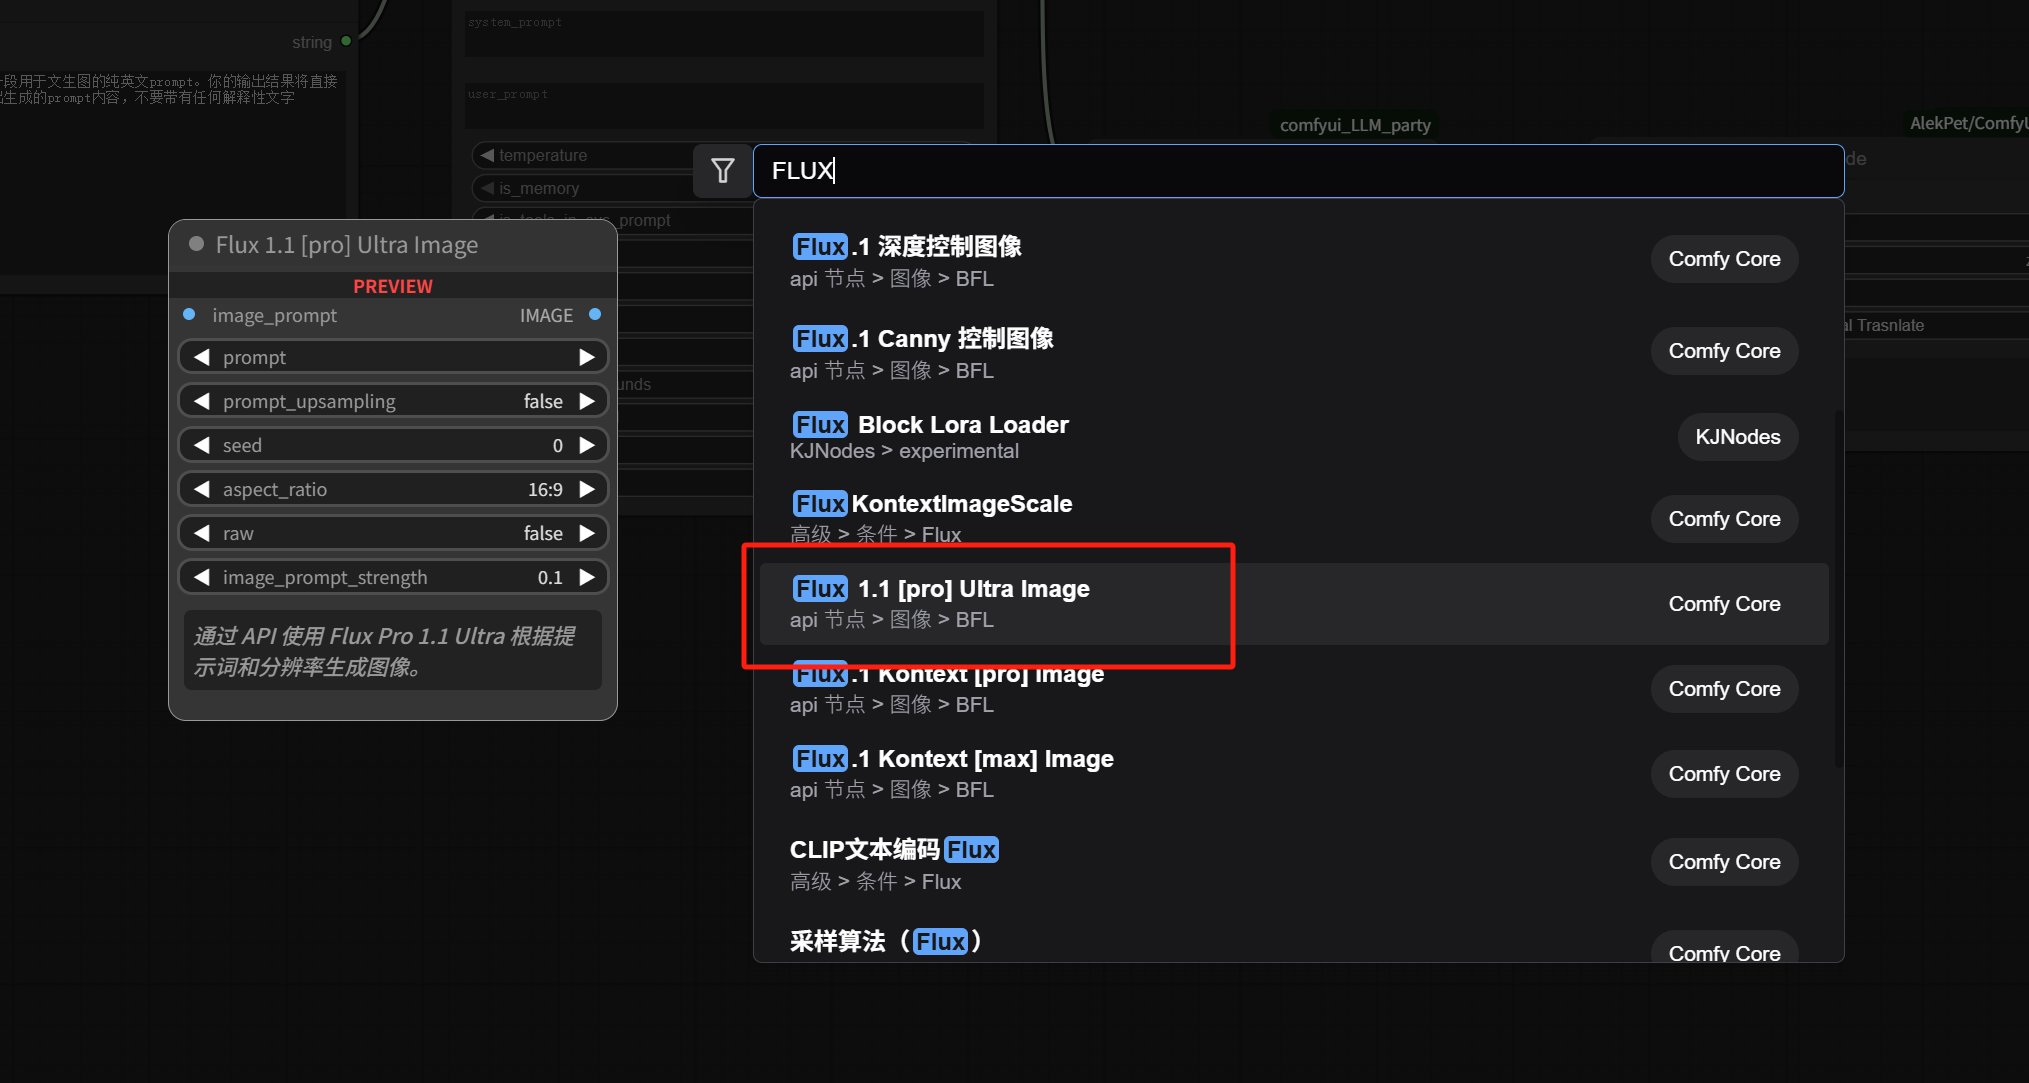
The latest version of ComfyUI includes a built-in FLUX.1 API image generation node (paid). We can directly double-click in an empty space, type “FLUX” in the search box, find “Flux 1.1 [pro] Ultra Image,” and click to add it.
Connect the prompt endpoint on the left side of the image generation node to the image generation prompt generated by Qwen just now, and connect the image endpoint on the right to a “Save Image” node for saving the image.
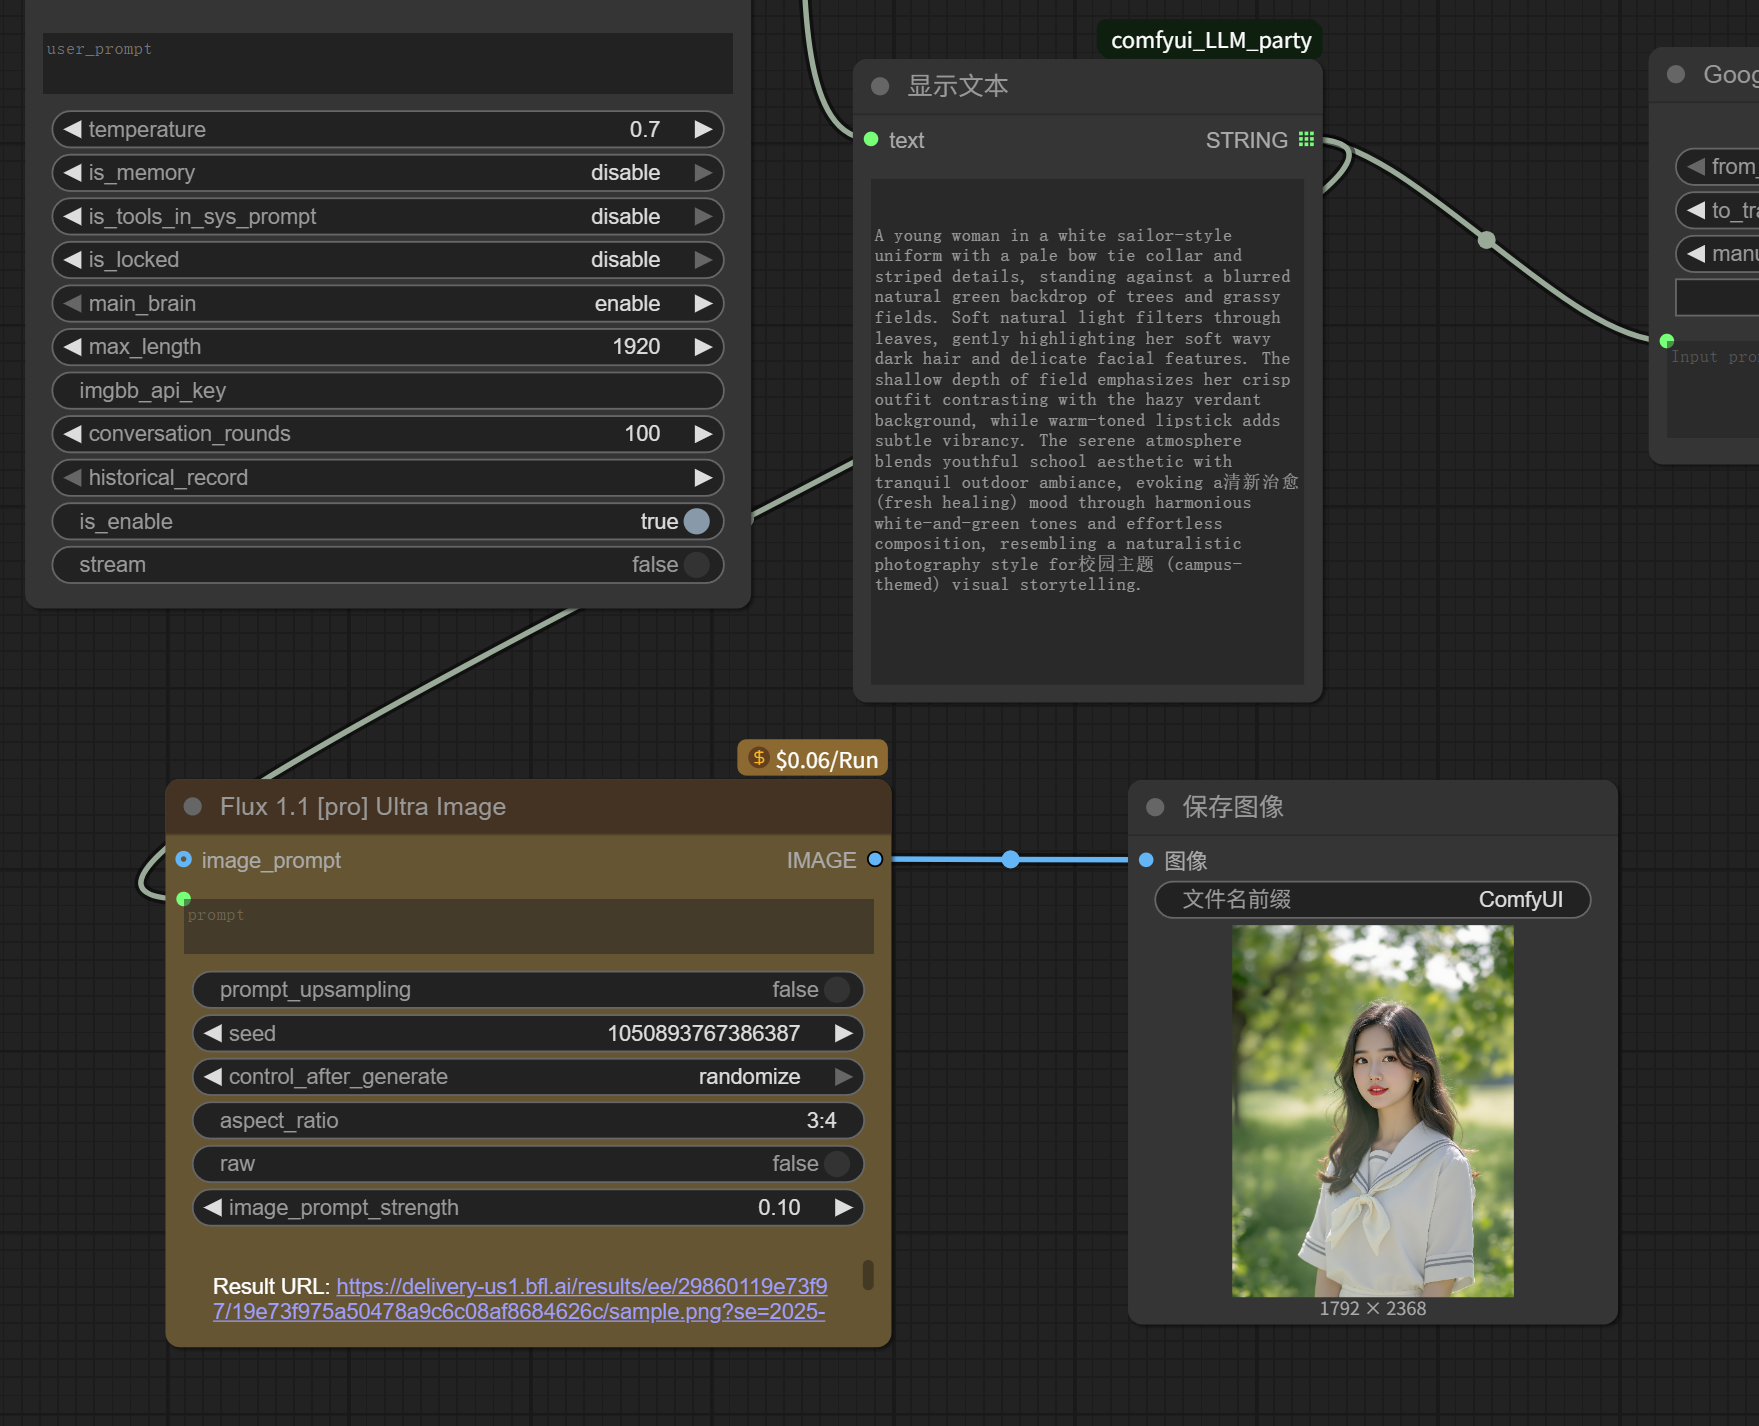
The entire image imitation workflow is now complete.
Although it’s not really complex, this workflow is much more complete than the earlier small workflows made up of three-level nodes.
Did it become harder to build? Not really.
As long as the requirements are clear enough, and you add whatever nodes are needed to fulfill those requirements, the workflow will naturally become richer.
And that’s the basic logic for building complex workflows.
Look, up to now, we haven’t called on the local graphics card at all.
And we’ve built a complete workflow for reverse-engineering images and then regenerating them.
Being able to reach this step, you can already say you’ve started with ComfyUI.
Now, looking back at the earlier SD local model bottle-drawing workflow, it should be much easier to understand:
It’s just about connecting endpoints with the same color, loading models, setting positive/negative prompts, adjusting image dimensions, sampling, decoding, and generating images.
You might want to say again that SD is outdated and you want to use FLUX.
Of course, you can:
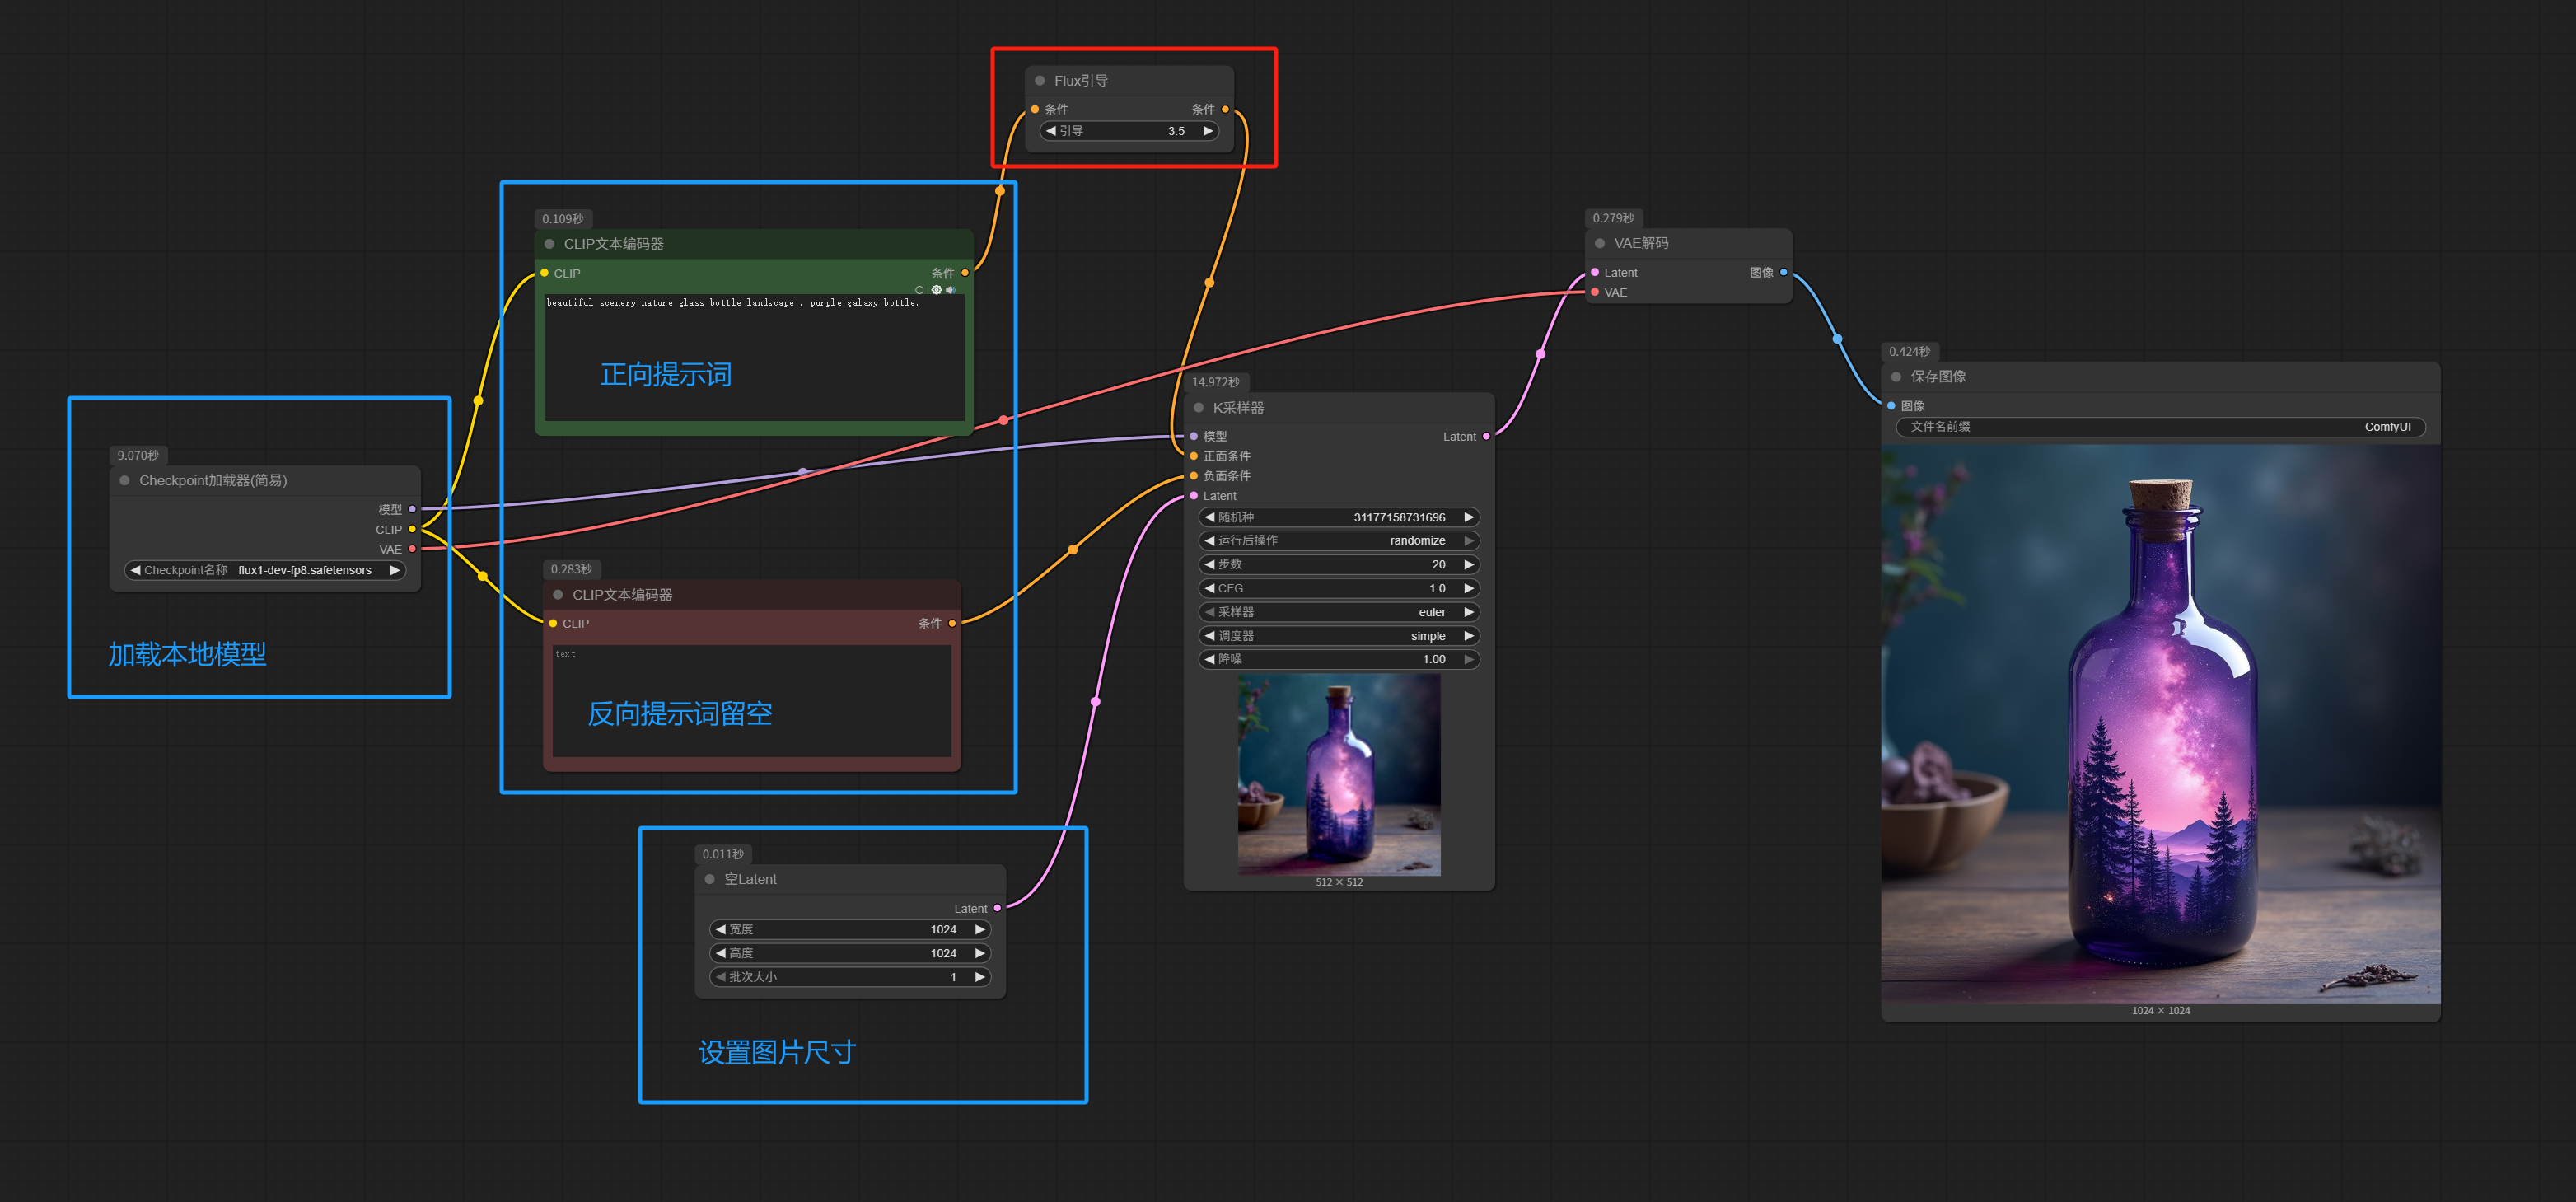
Comparing with the SD workflow above, you’ll notice that the Flux.1[dev] workflow has only two differences:
1. FLUX doesn’t need negative prompts; just leave them empty.
2. Add a guidance node after the positive prompt.
When you break it down like this, you’ll see that all the changes are just minor adjustments.
Some FLUX.1 models aren’t packaged as one-click-load checkpoints, in which case you need to load UNet / CLIP / VAE separately. Compare the workflow below with the one above:
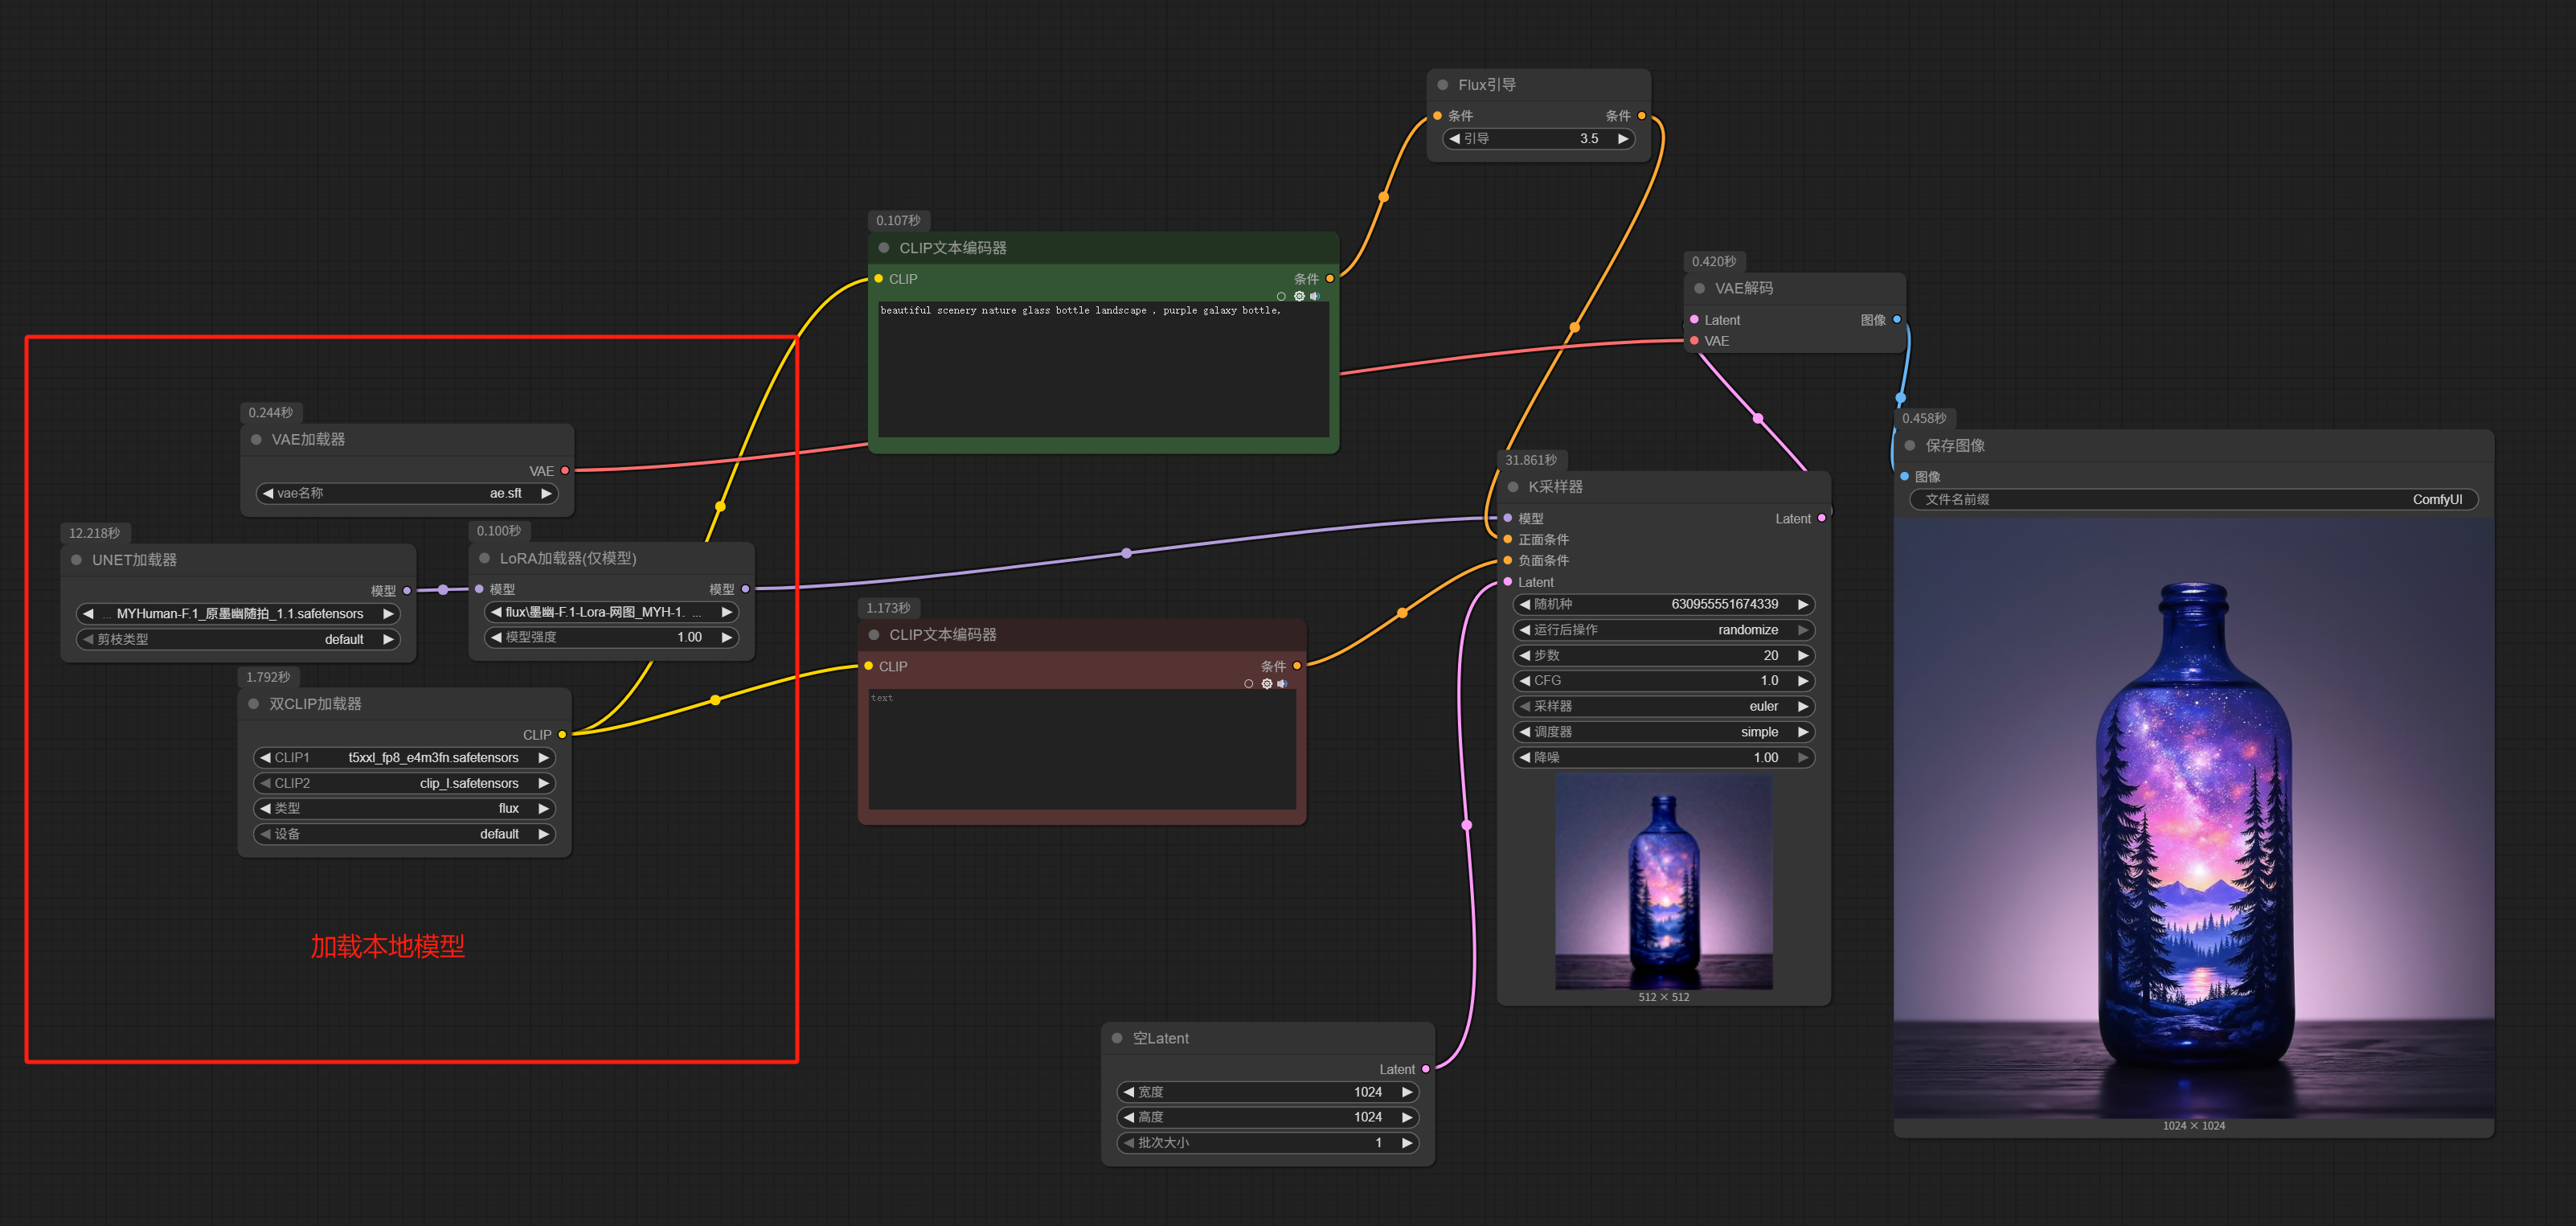
Only the part for loading the local model changes; everything else remains the same.
It’s just that the simplified checkpoint loader is split into separate UNet / CLIP / VAE loaders (I even added a LoRA node after the model).
Now, let’s do some mix-and-match.
Replace the API node in the earlier image imitation workflow with the Flux.1[dev] local image generation workflow from above—specifically, this node:
Now we have an image imitation workflow based on the local Flux.1[dev] model.
Replacing nodes (or groups) in an existing workflow that perform the same function with a new solution is our most common workflow optimization action.
So, how do you get new solutions?
Besides brainstorming on your own, a more effective approach is to learn from (and play with) others’ workflows.
Many AI art enthusiast communities, such as Civitai abroad and Liblib, Tusiai, etc. domestically, have countless experts uploading excellent workflows for various purposes.
The workflows you obtain from others usually come in two forms: one is directly a JSON file, and the other is an image generated by the workflow that contains information similar to a JSON file. Regardless of the form, the usage is the same: simply drag the file into your ComfyUI interface, as shown below:
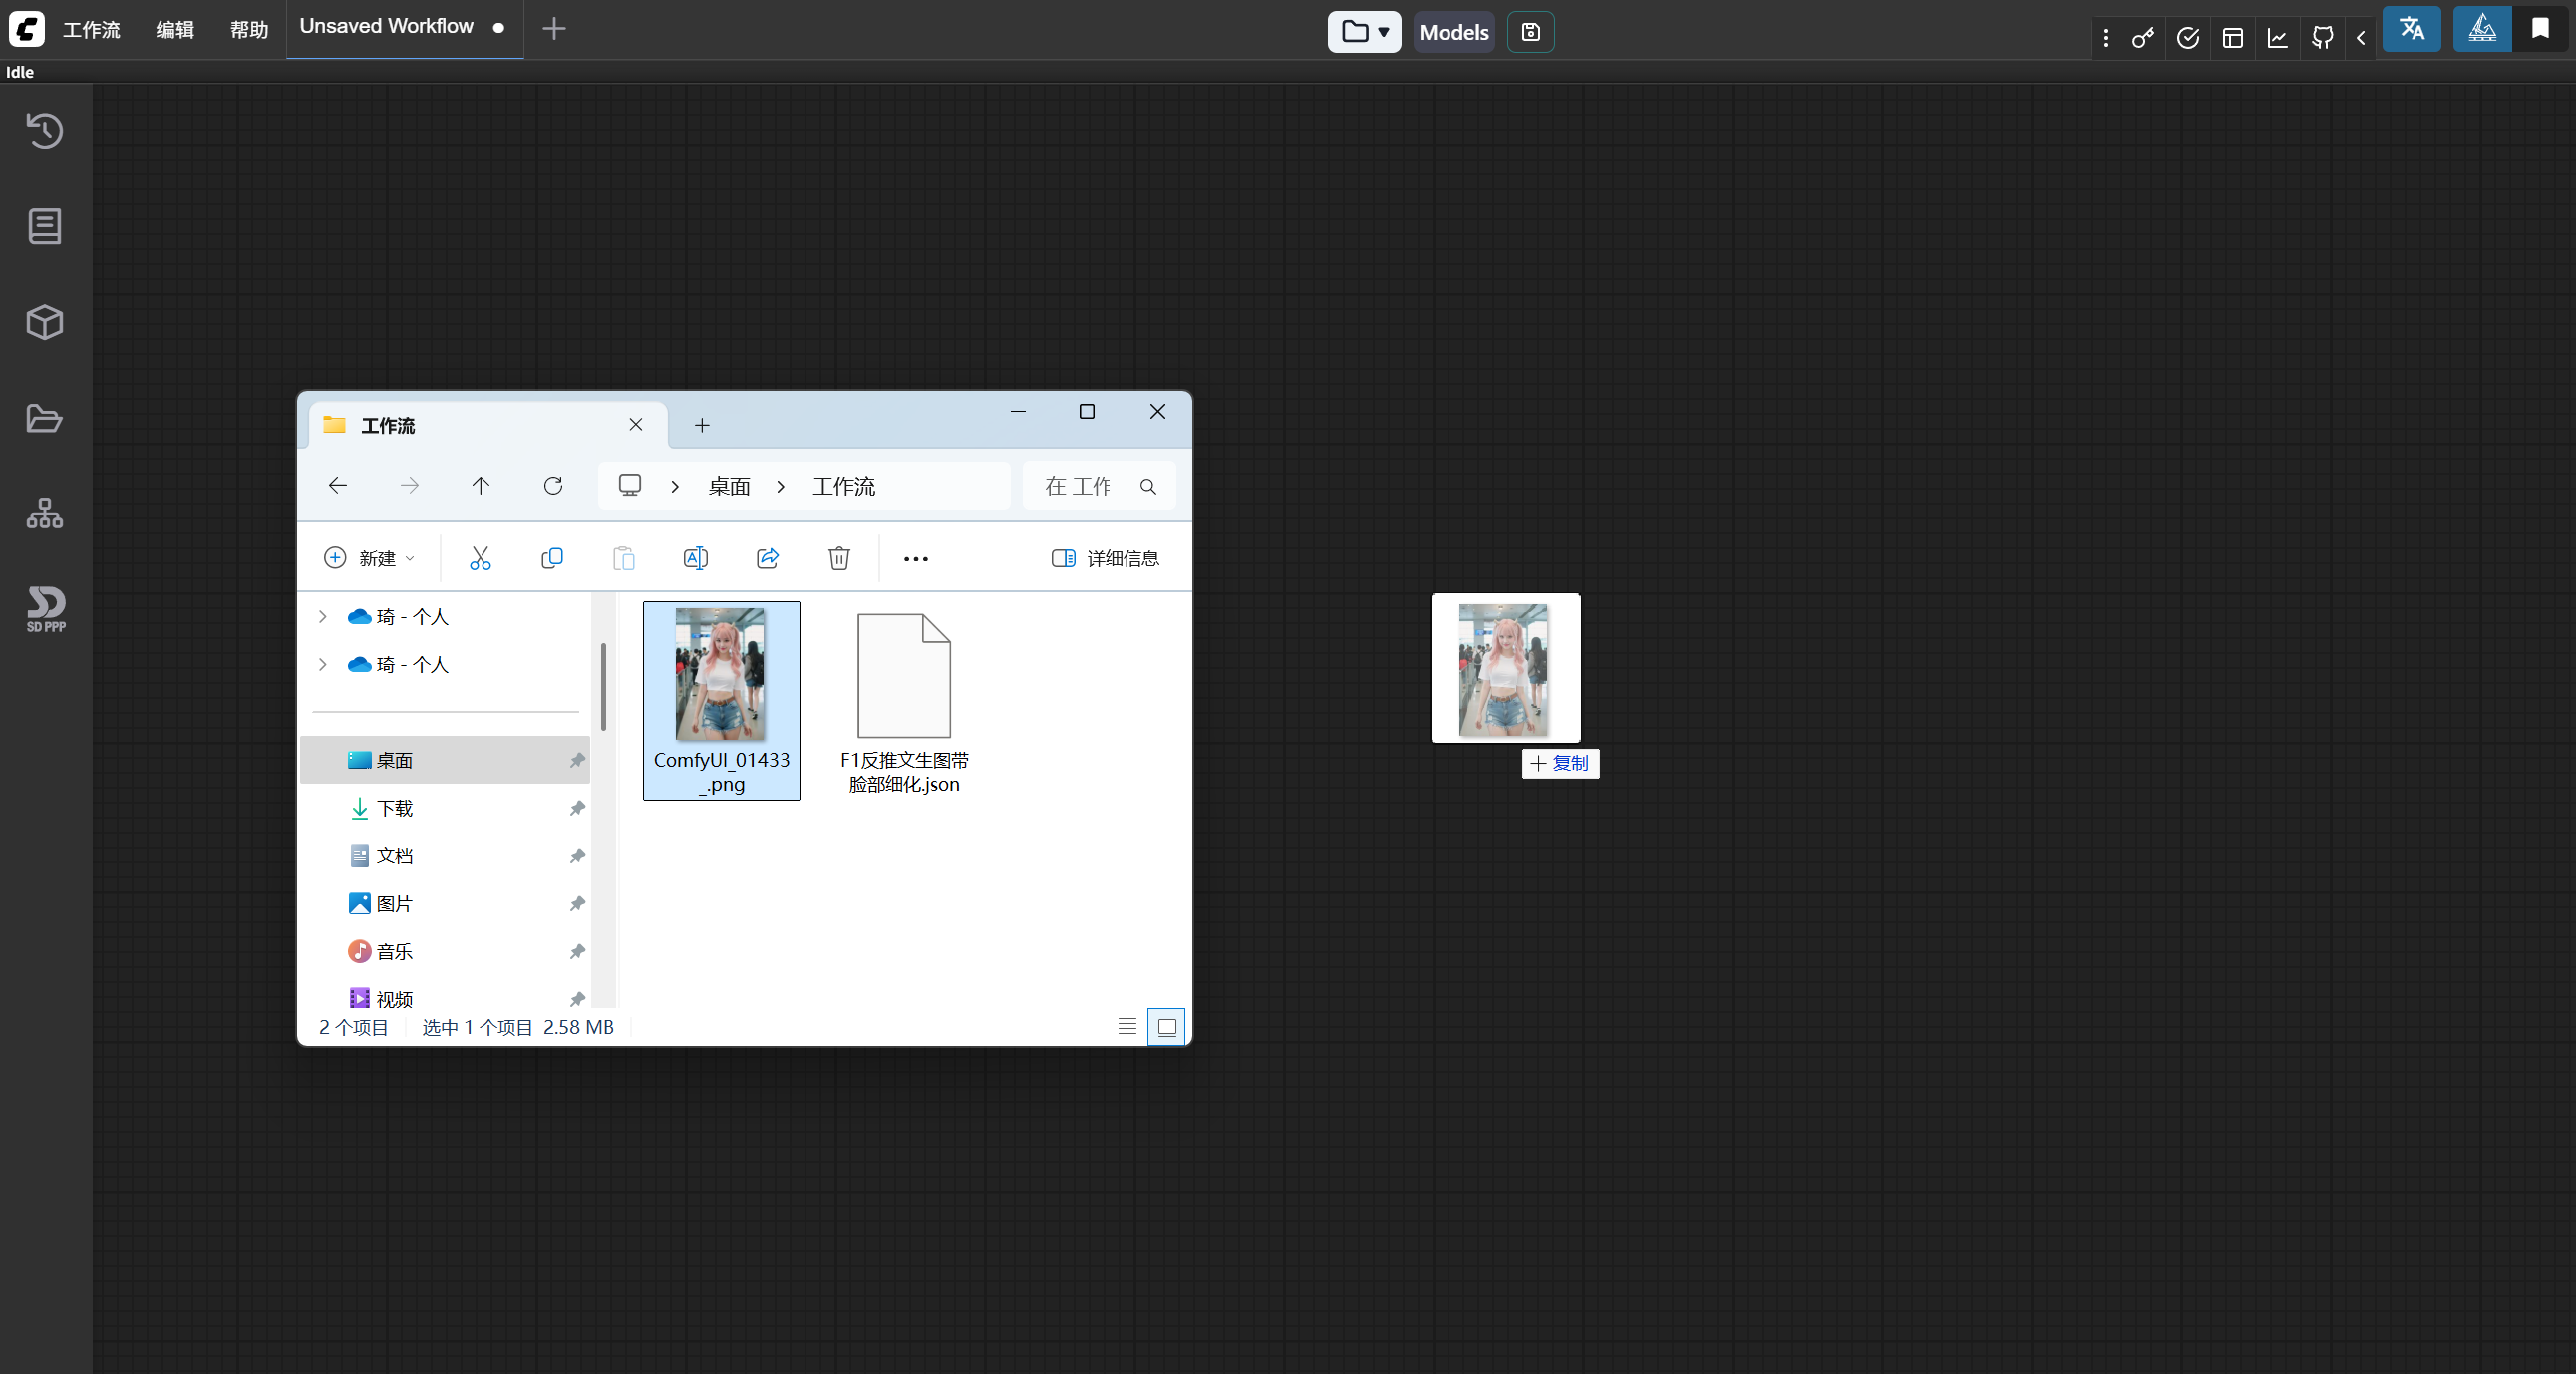
Release the mouse, and the workflow is loaded into your ComfyUI.
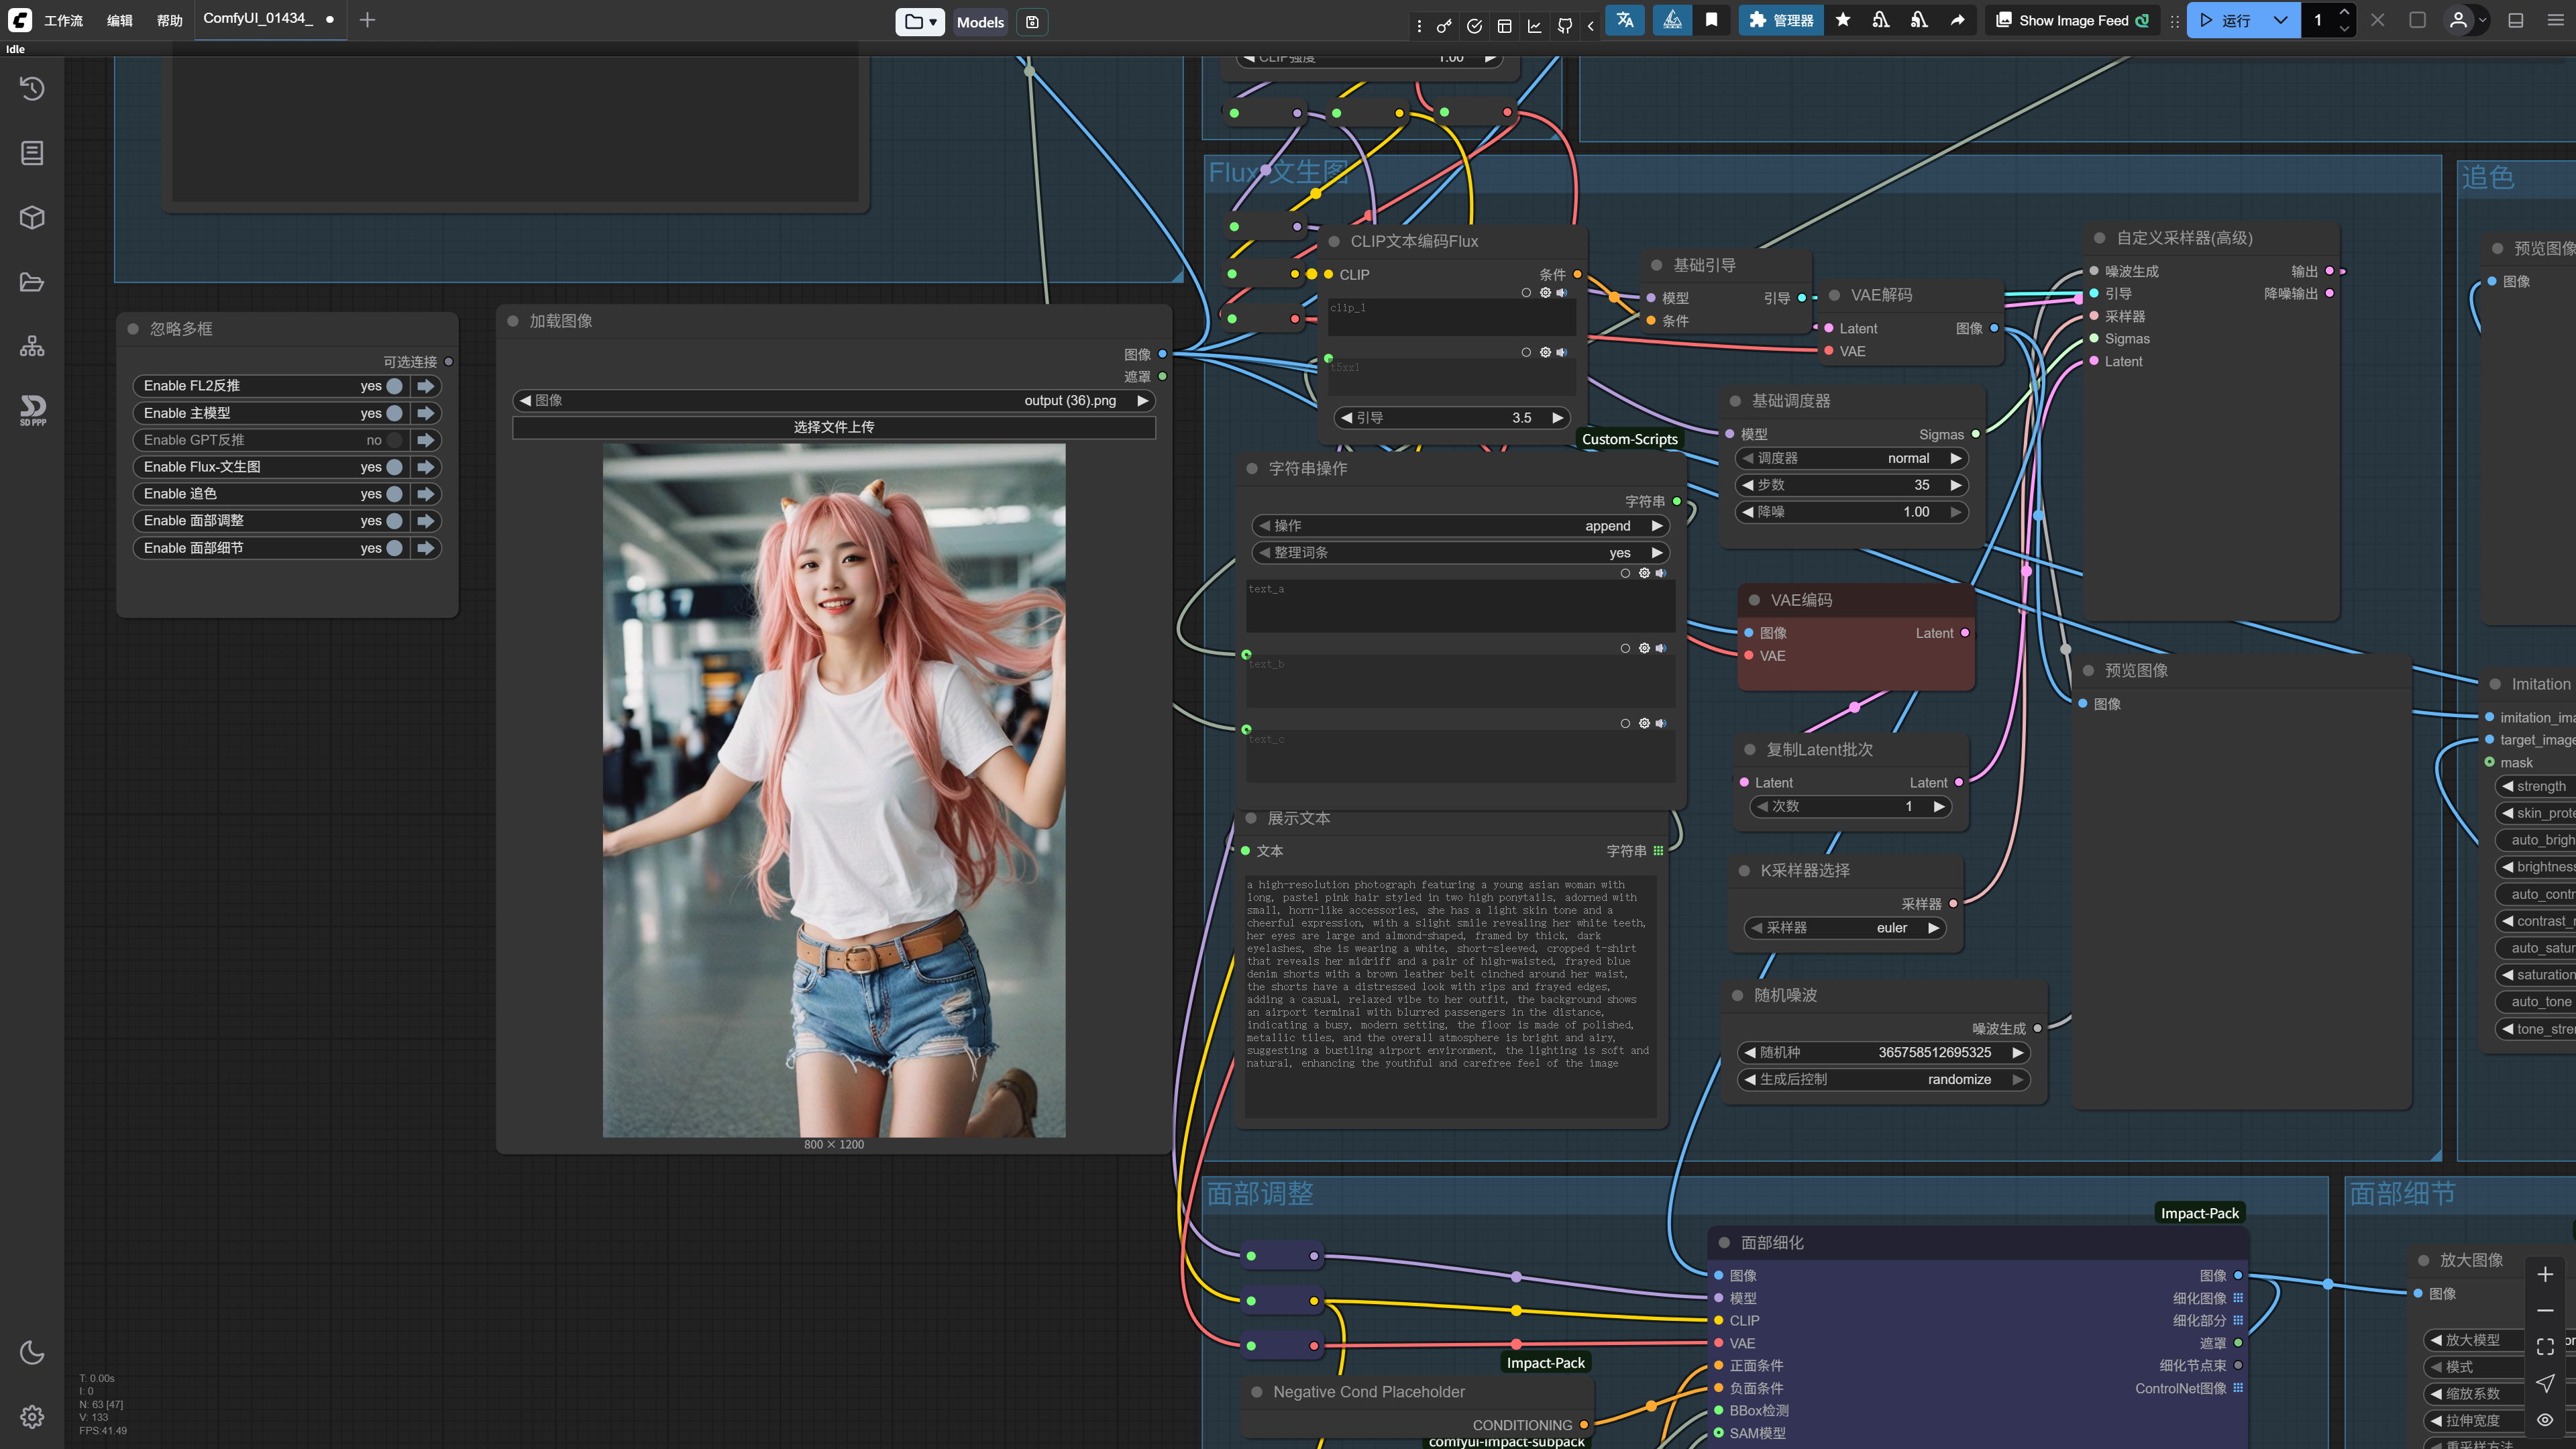
Of course, since I made this workflow myself, it loads very smoothly for me.
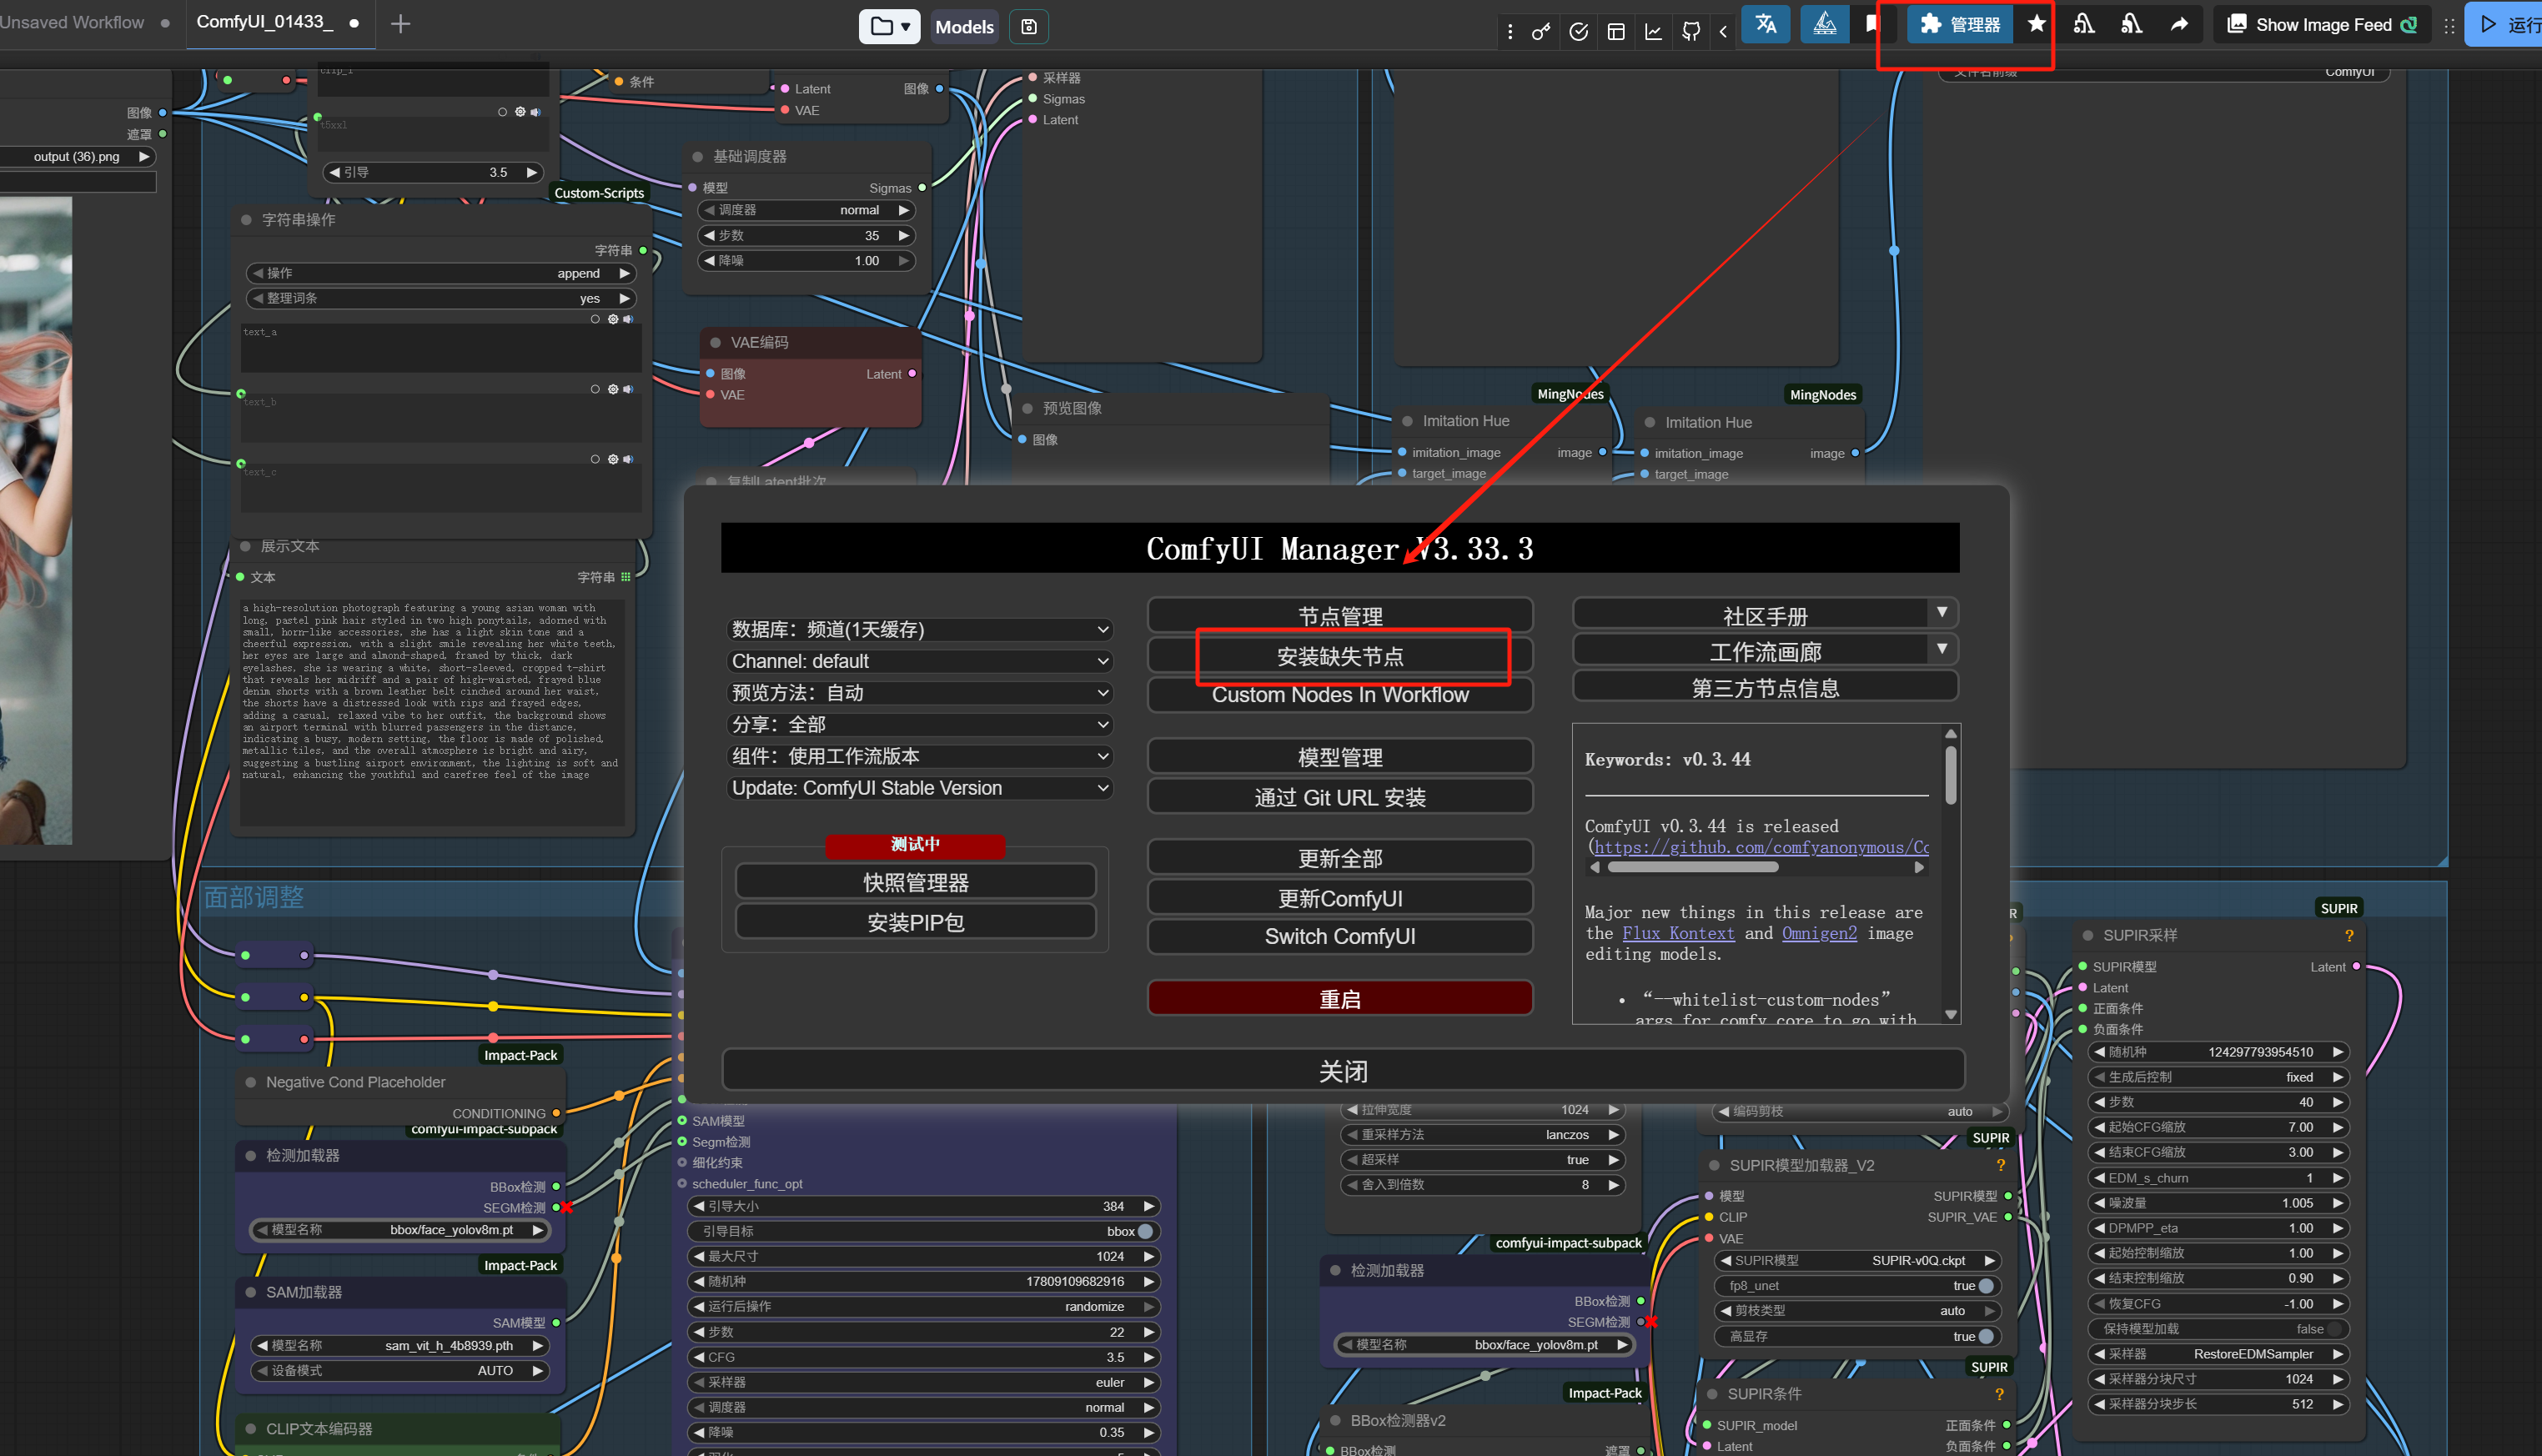
But if you just installed ComfyUI, you’ll likely see red boxes all over the screen, indicating that the nodes highlighted in red are not installed on your machine.
Don’t panic at this point; click the “Manager” in the top right corner (in the latest version, it’s in the top right; older versions have it on the right side), then click “Install Missing Nodes” in the manager to install the missing nodes.
I’ve placed the workflow here for you to practice with:
https://pan.baidu.com/s/1WGNnJKhh5tKYxk9ld2b7CQ?pwd=ebj2
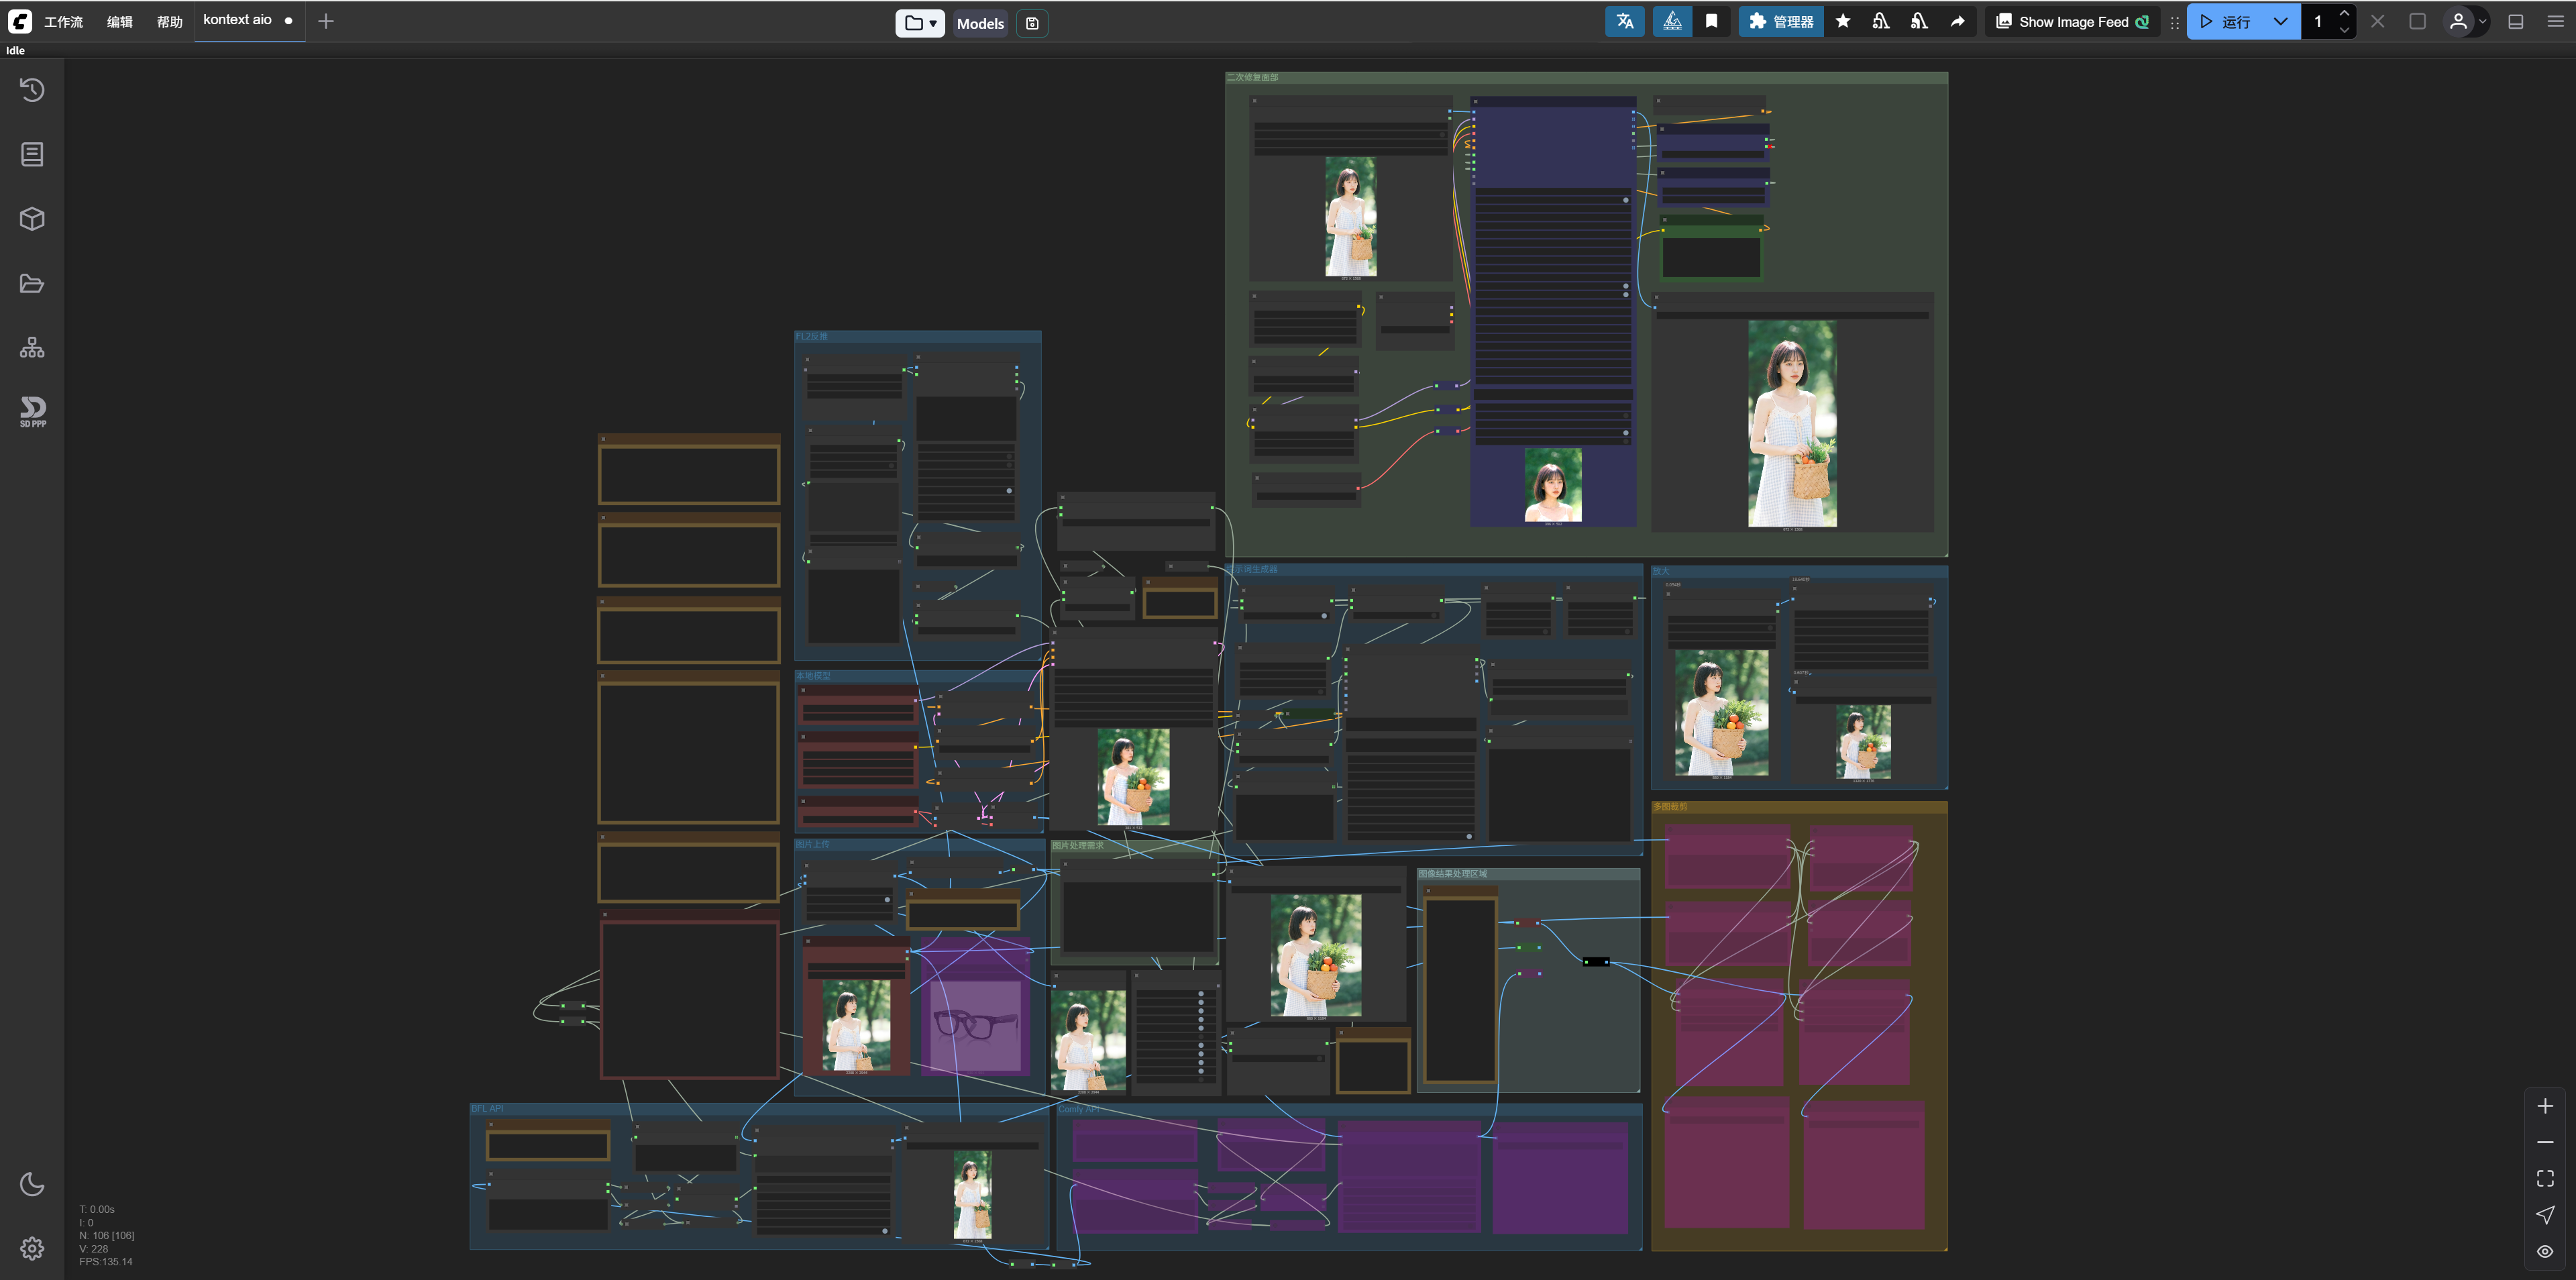
If the other workflow authors you download from have good habits like me, clearly labeling the function of each part, it’s even more convenient.
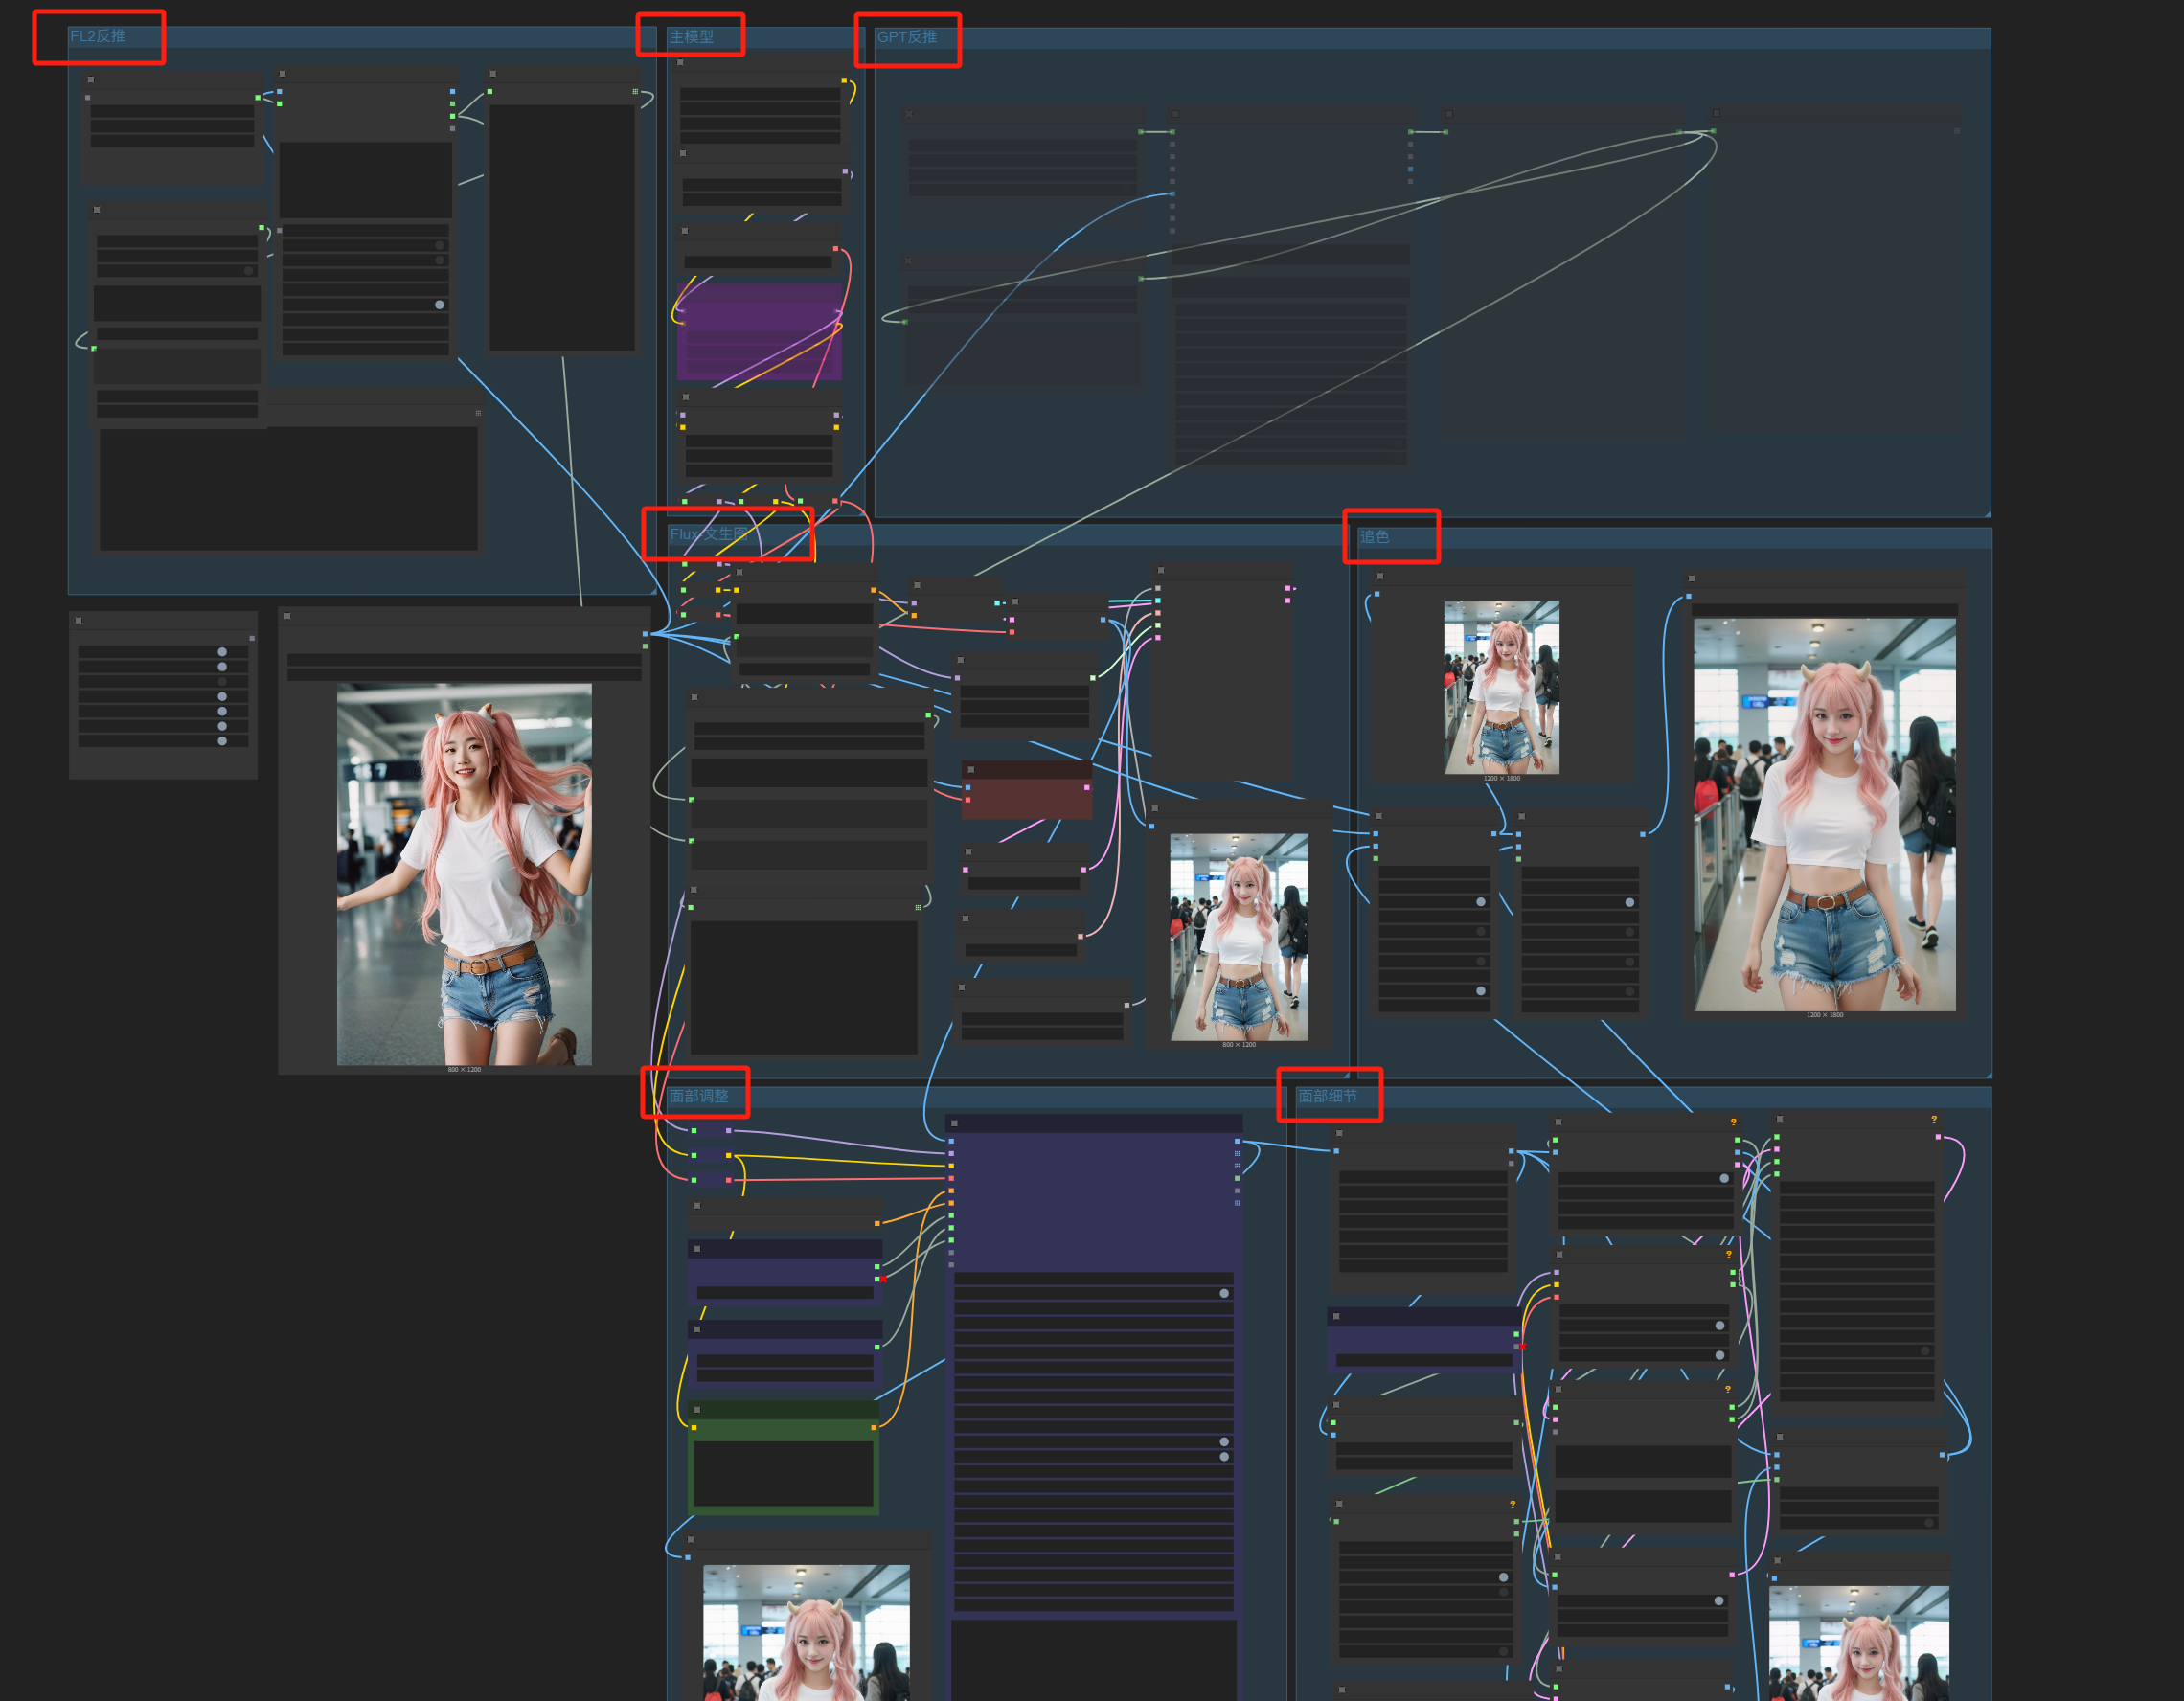
Delete the unnecessary parts from the workflow, keep only the modules you want, and then install the missing nodes.
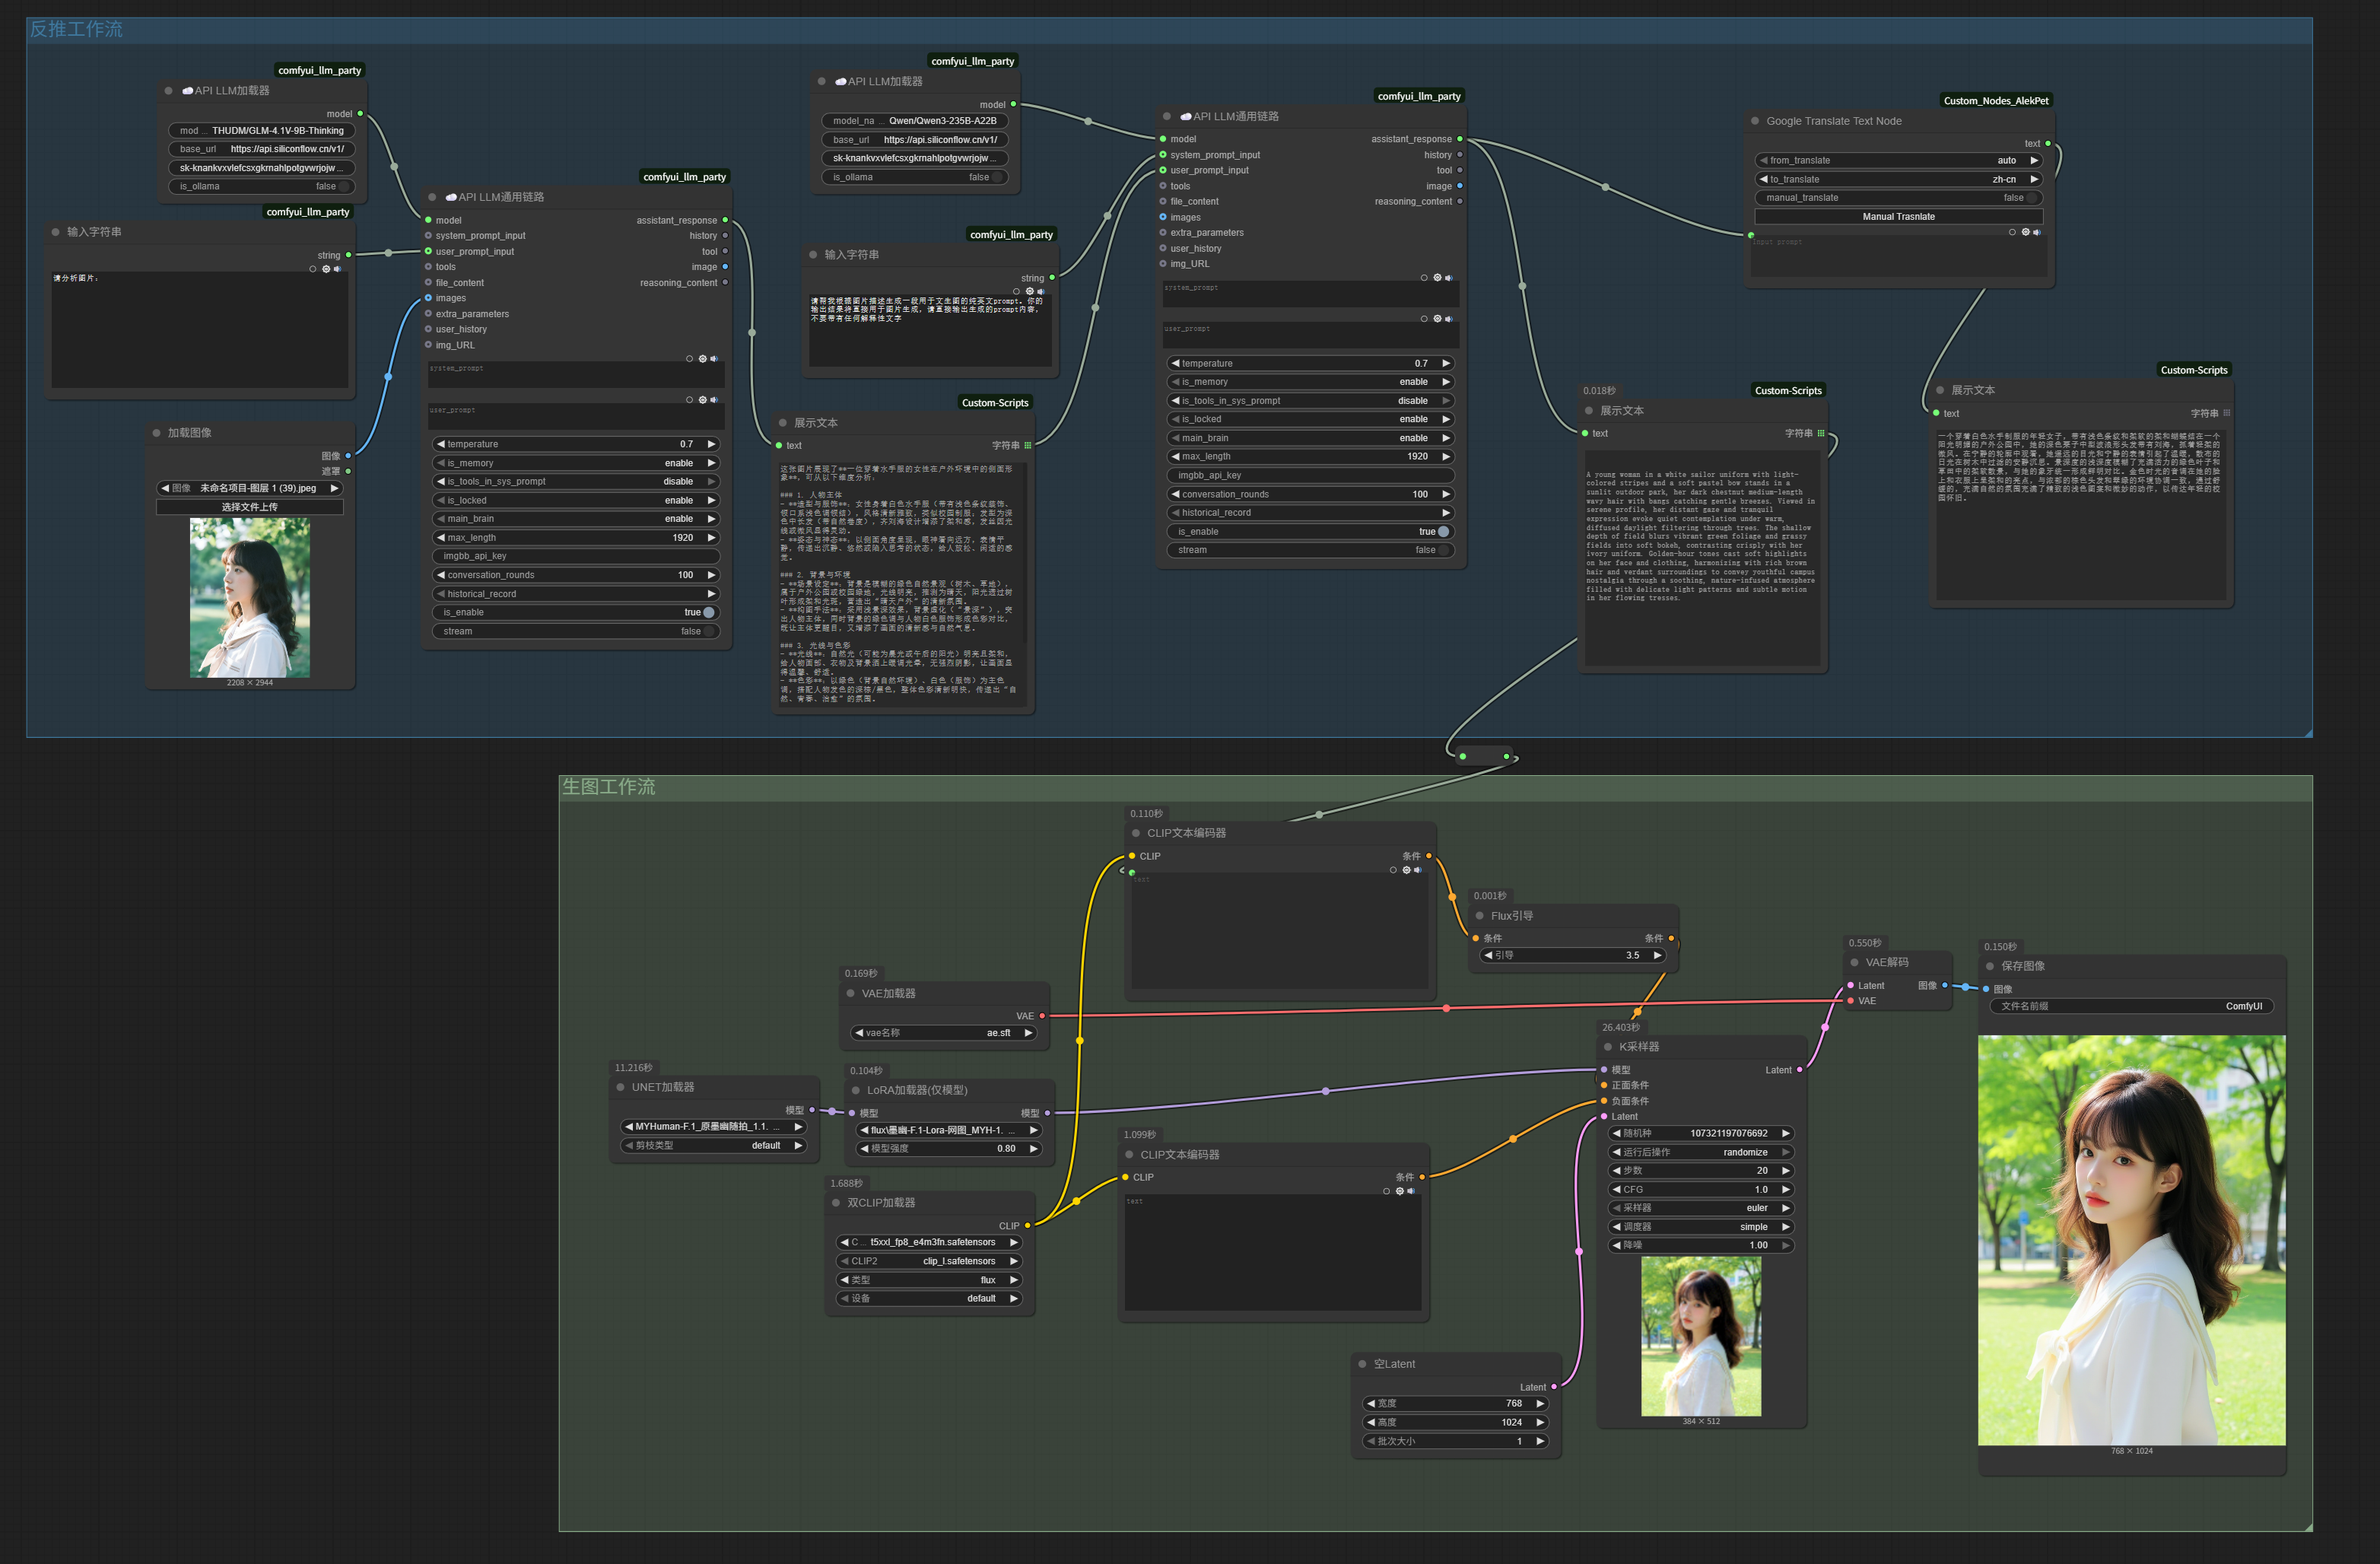
For example, if we only keep this local reverse-engineering:
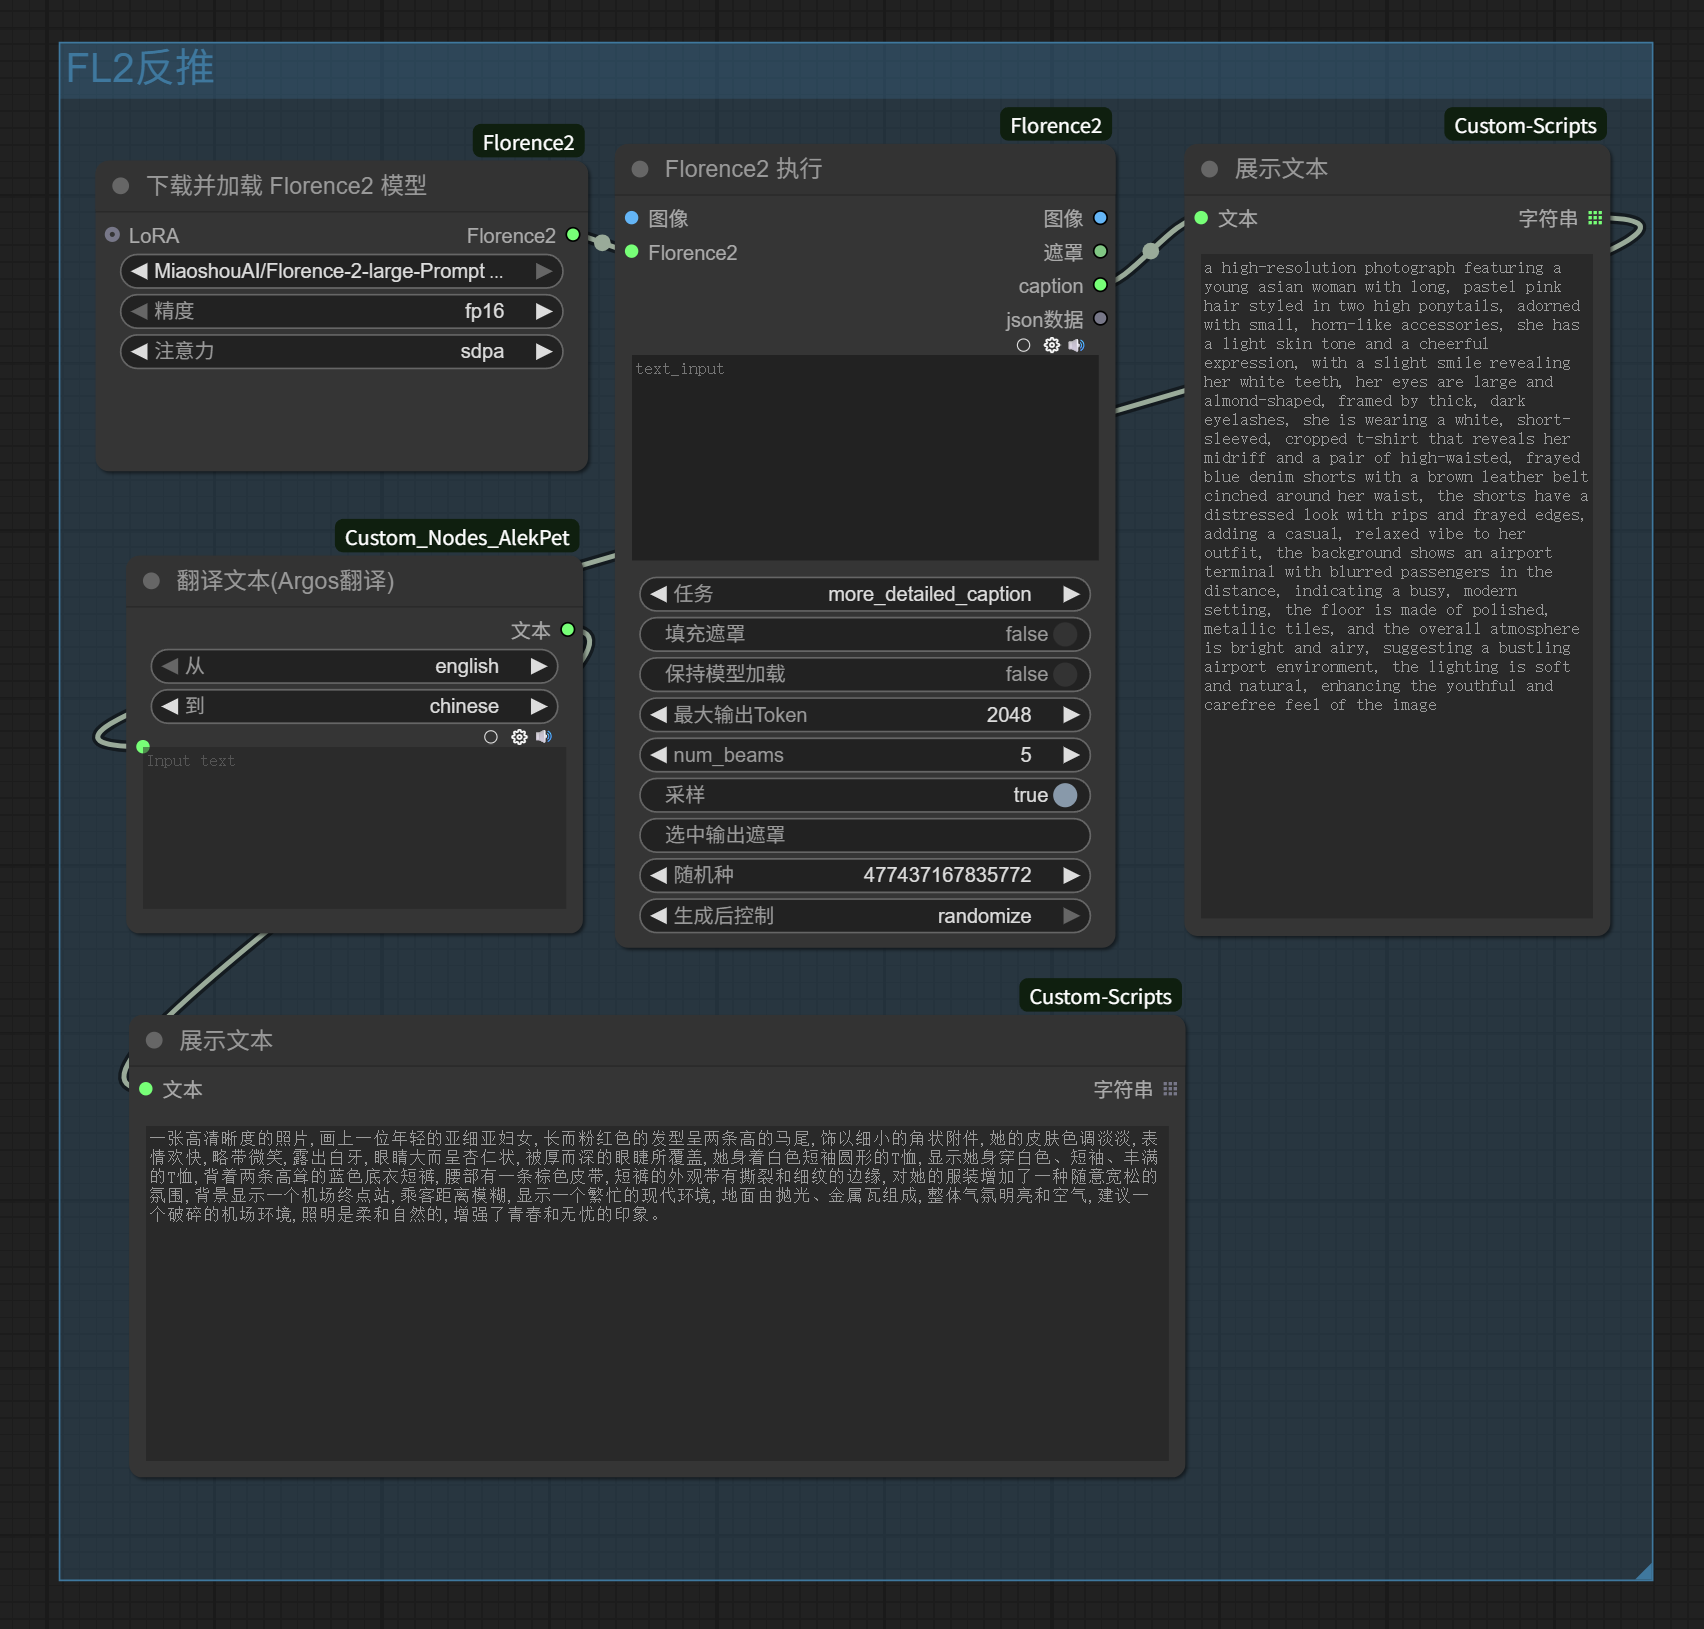
It can exactly replace the reverse-engineering module we built earlier that called SiliconFlow’s Zhipu vision model, and the original workflow becomes as follows. For my graphics card, the local reverse-engineering workflow runs much faster than waiting for SiliconFlow’s API response:
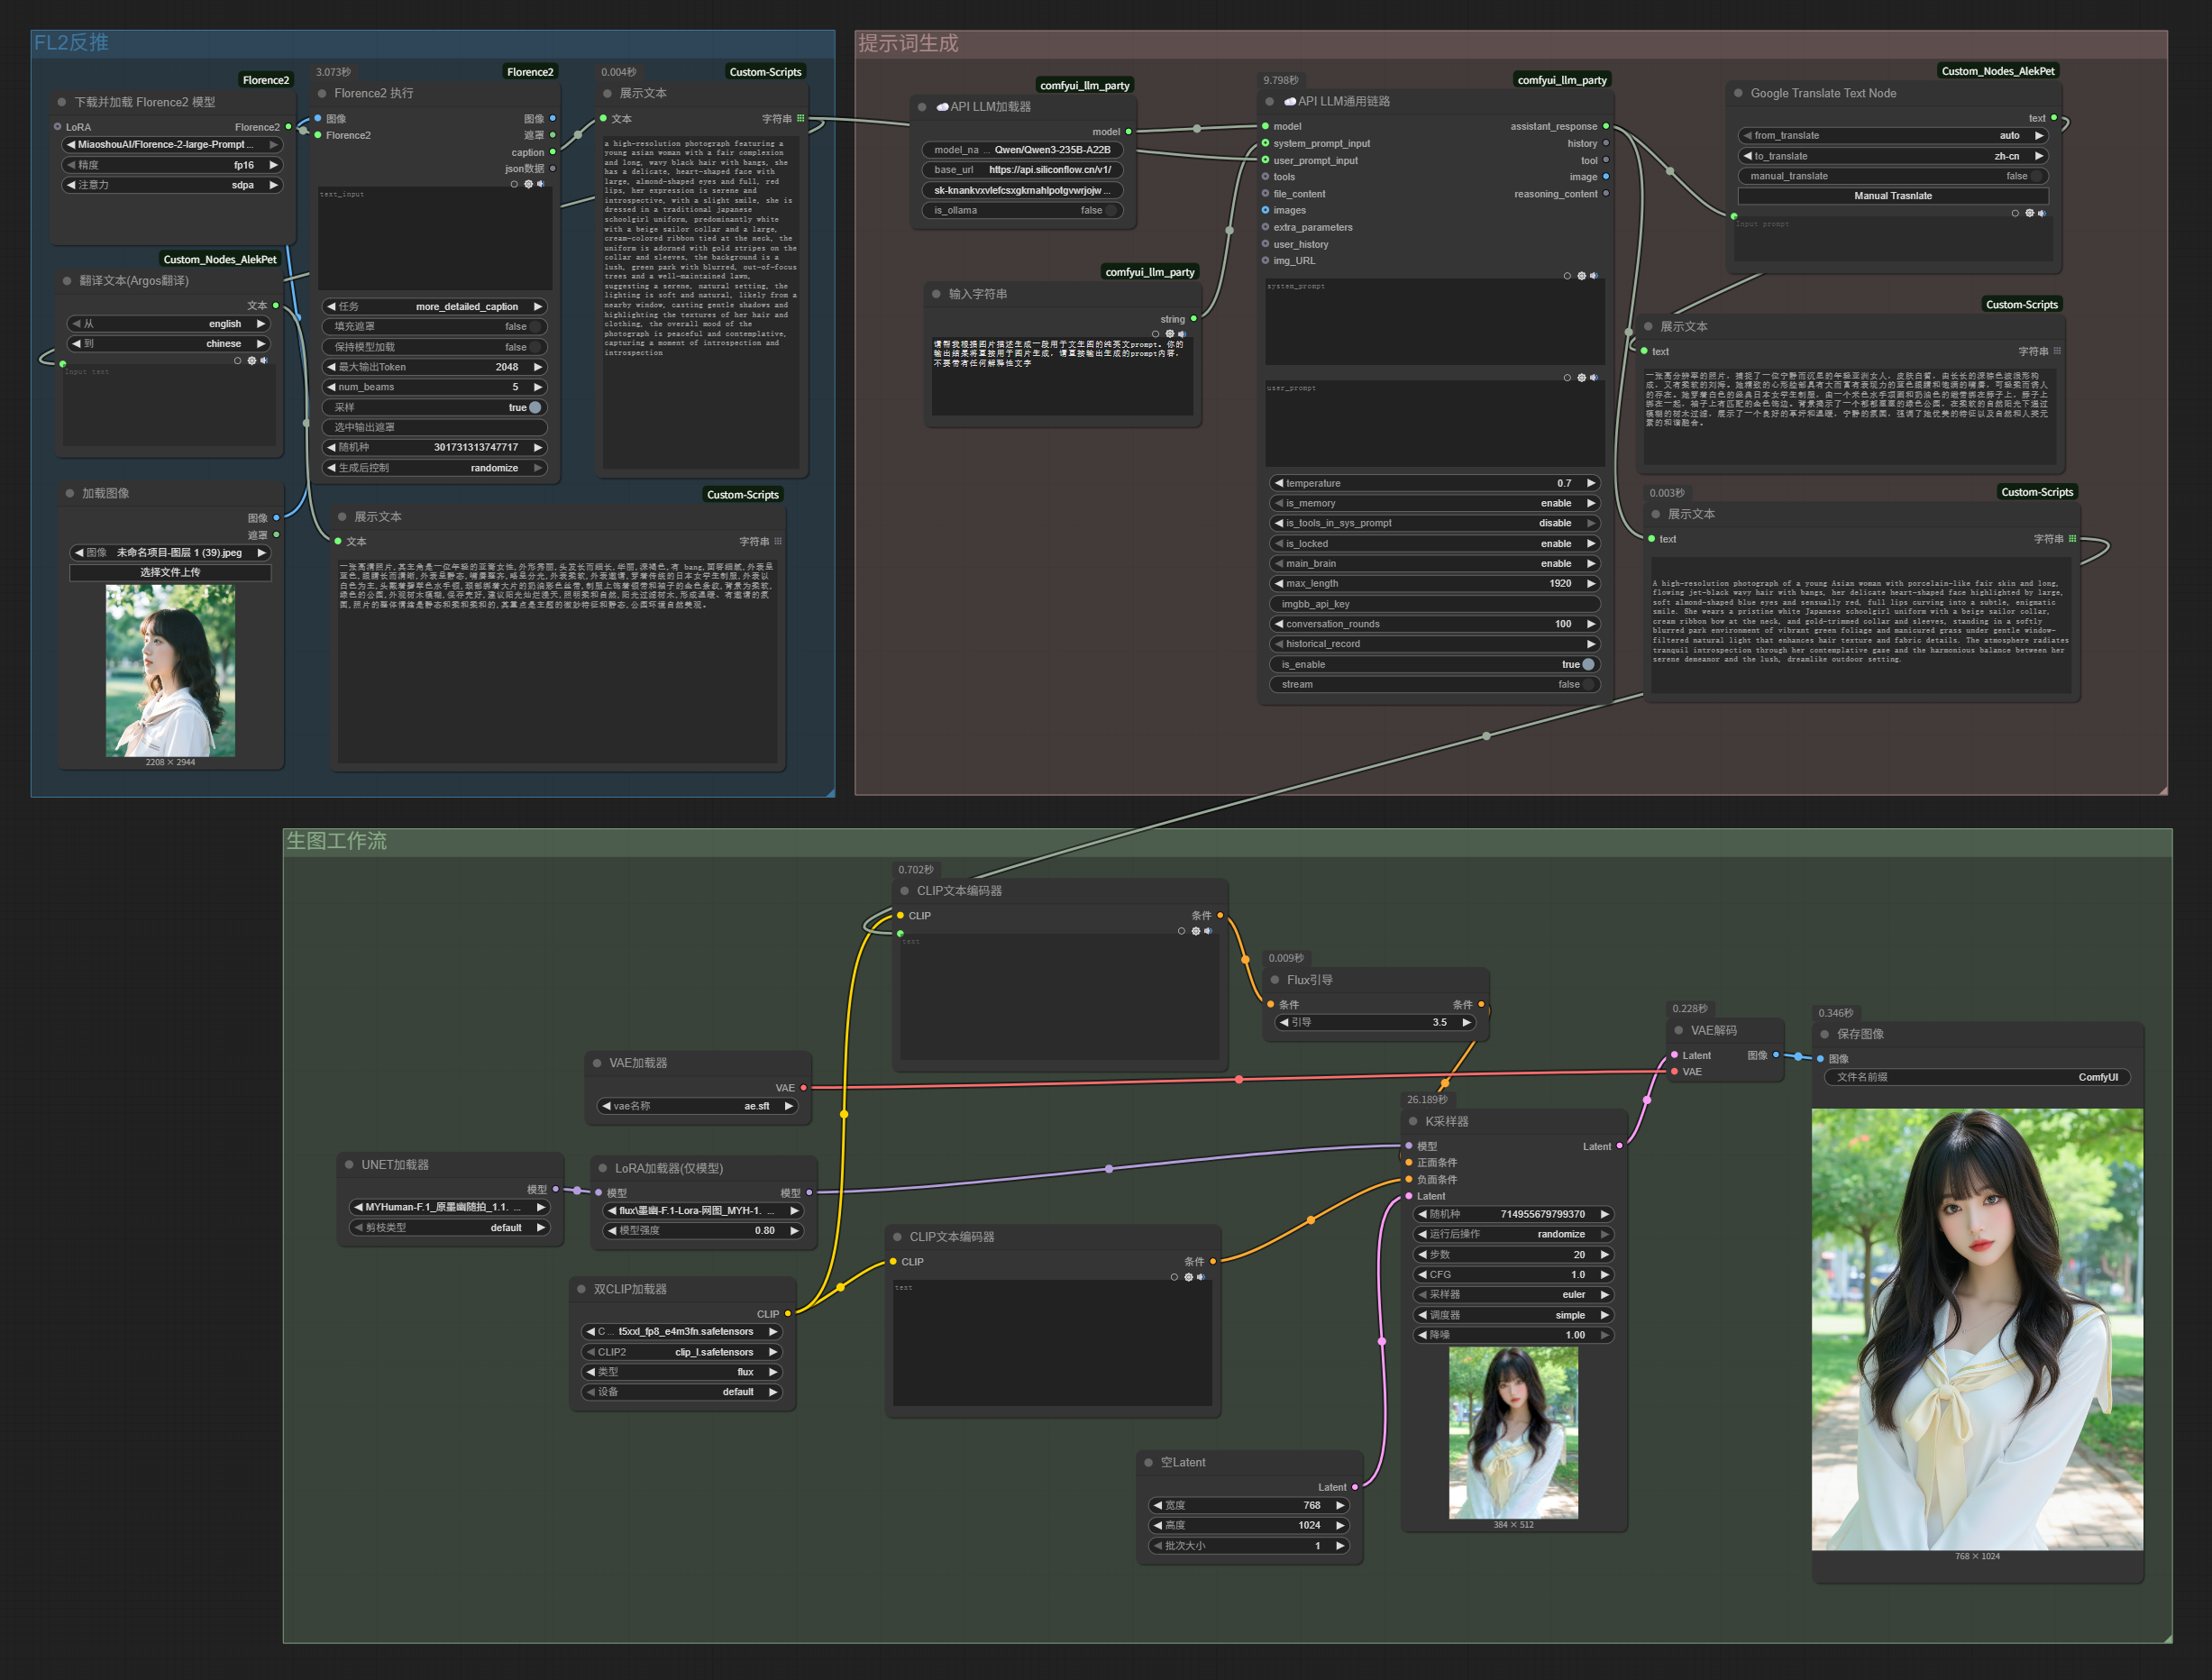
Look, from initially calling DeepSeek to write poems, we’ve now built an image imitation workflow with three functional sections.
ComfyUI isn’t that hard; as long as you understand its operational logic, getting started is quite easy.
Alright, that’s it for today. I hope you’ve successfully gotten started with ComfyUI.
In the next article, we’ll continue discussing using Flux Kontext for image editing in ComfyUI.