1. The core advantage of AI in multidimensional tables lies in batch processing.
2. Most built-in AI field shortcuts can only configure instructions for a single field (except for specialized function shortcuts like summarization), but there is an exception called “Custom AI Auto-fill.” Its instructions can reference multiple fields, including formulas, and even set output formats.
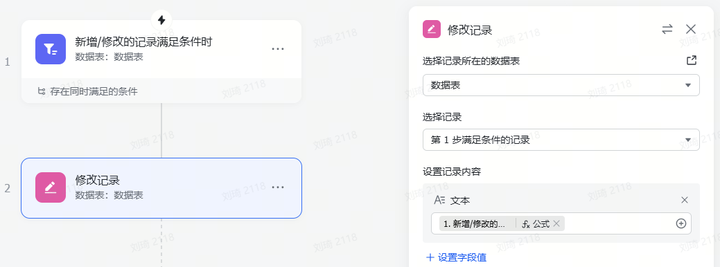
3. A common misunderstanding about single-field instruction shortcuts: The “Instruction Content” selects the object field being operated on, and the “Custom Requirements” field is for the prompt. This is incorrect. The prompt is actually written within the field selected in “Instruction Content,” and “Custom Requirements” should be a specialized supplement to the prompt. For example, in a resume analysis scenario, using a field as the prompt, you can combine it with formulas via the CONCATENATE() function to concatenate multiple field contents and manually entered text, and use the FILTER() function to make the job description change based on the job title in the record, resulting in different analysis prompts for different job positions; if you write the prompt in “Custom Requirements,” you would have to manually rewrite the prompt for each different position.
4. Some AI field shortcuts’ “Instruction Content” can only select text, not formulas. You can use a workflow to automatically write the formula into a new text field, then use that text field as the “Instruction Content.” Afterwards, for aesthetics, you can hide the formula field.
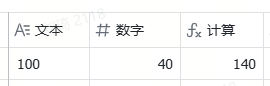
5. Some AI field shortcuts do not support setting output formats. After using AI for numerical extraction, the output field format is text and cannot directly participate in calculations. You don’t need to rush to add helper columns for format conversion; simply add the VALUE() function after the text field in the calculation formula.

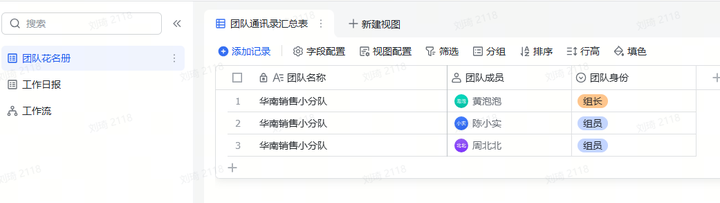
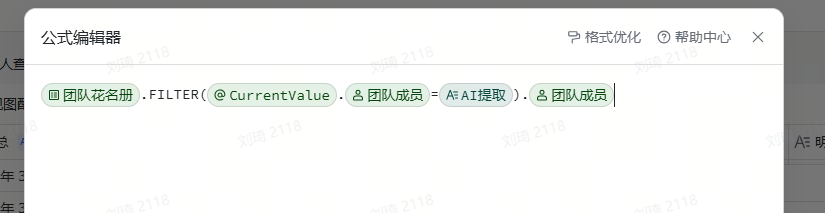
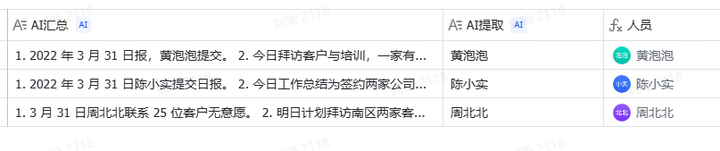
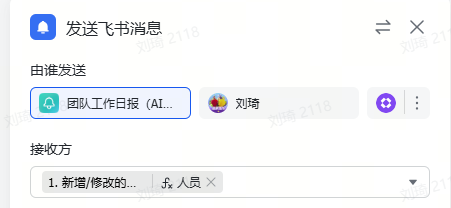
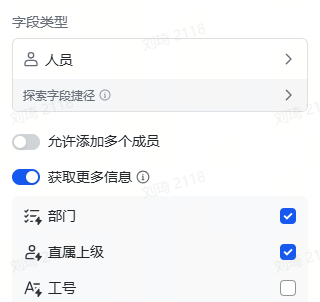
6. If you want to convert AI-extracted person names into a personnel field for message pushing, you can manually add a roster helper table and use the FILTER() formula to pull the personnel field from the roster (essentially a lookup reference). If you need to push to the relevant person’s supervisor, first obtain it in the roster, then pull it over using a formula or lookup reference.
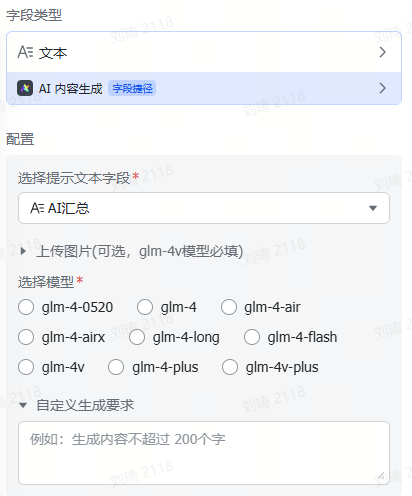
7. In practice, the Zhipu field shortcut has a higher input token limit than other shortcuts. When other AI field shortcuts report an error due to a prompt being too long, you can use the Zhipu AI shortcut. Its name is a bit obscure: “AI Content Generation.” It also supports multiple modalities.
8. Some commonly used field shortcuts for attachment operations:
(Batch upload attachments are in the plugin)
Image recognition: AI Image Understanding (Doubao), AI Image Understanding (Step), AI Content Generation (Zhipu), Intelligent Inspection (Zero One). Among these, Step performs better on blurry images, and Intelligent Inspection is more convenient for labeling fixed elements;
Video recognition: AI Video Understanding (Step);
PDF operations: Kimi Reading Assistant, PDF to Text (Free Version). Kimi is used for AI summarization, while PDF to Text (Free Version) extracts directly;
Web page summarization: AI Read Web Link (Webpilot);
URL conversion to attachment: Link to Attachment. Can be used for automatic conversion of URLs returned by external APIs for generating images or videos into attachments, and can also be used with Yingdao or Bazhuayu;
Extract attachment file name: Attachment Name Extraction. Can extract information from formatted file names. For example, for resumes downloaded from BOSS Zhipin, after obtaining the file name, you can quickly extract the job title, base location, salary range, candidate name, and work experience from the file name.
(The Field Shortcut Center has many interesting field shortcuts; only those I have recently used are listed here. I won’t recommend more individually, but suggest exploring it when you have time.)
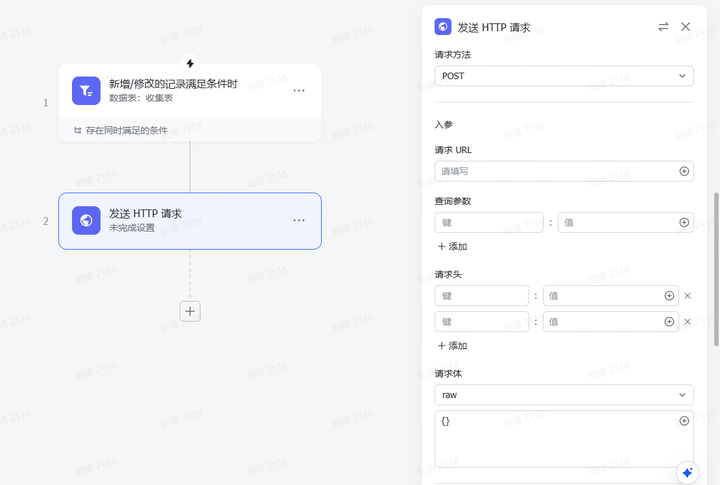
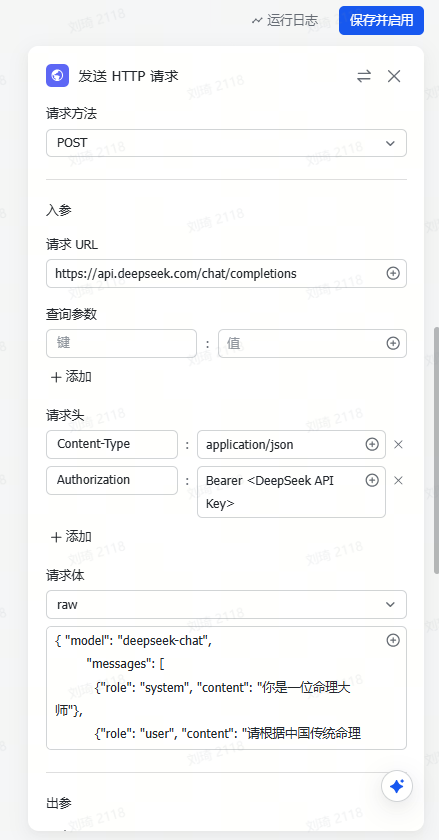
9. Calling external large model APIs via HTTP requests: Can be implemented using workflows or automation. You need to refer to the corresponding large model’s API documentation; the request method is generally POST. Taking DeepSeek as an example, refer to the curl method.
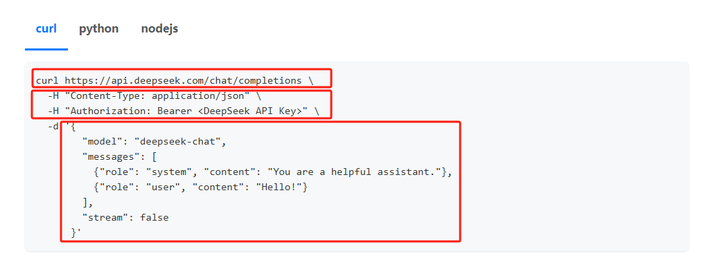
The request URL is: https://api.deepseek.com/chat/completions
The request headers are two key-value pairs:
Content-Type: application/json
Authorization: Bearer <DeepSeek API Key>
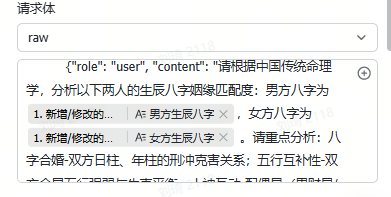
Select the raw format for the request body and enter the JSON code as per the API documentation.
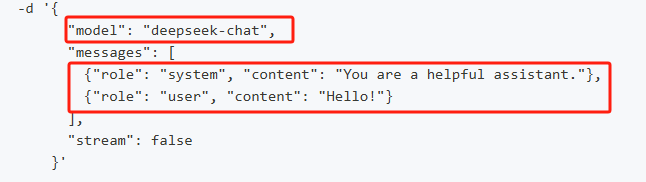
As shown in the image above, “model” is the model parameter (the V3 model is shown), and “messages” contains the system prompt and user prompt. The illustration shows only basic content; parameters like temperature, max_tokens, etc., can also be configured here; refer to the documentation for specifics. After filling it in, it should look like the image, with the fields to be submitted to the AI referenced in the user prompt:
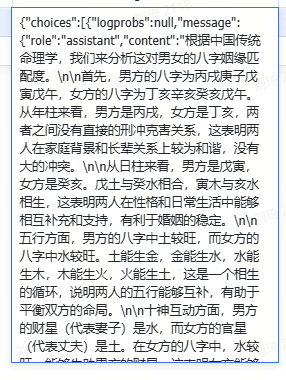
However, configuring only the request body like this results in the AI returning a whole, unstructured result, with parameter information, reasoning process, and output mixed together, making it unusable directly.
Therefore, you also need to configure the response body for the output.
Using Deepseek as an example, documentation: https://api-docs.deepseek.com/zh-cn/api/create-chat-completion
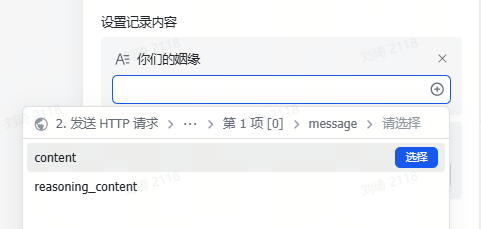
The information we need is in the red-boxed section in the image below: “content” is the output result, and “reasoning_content” is the reasoning process.
The format is JSON.
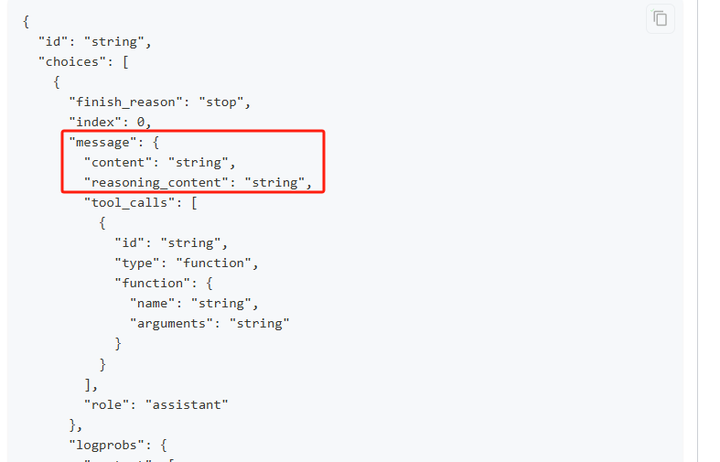
Hence, the response body, referencing the image above, is written as:
{
        "choices": [
            {
                "message": {
                    "content": "{content}",
                    "reasoning_content": "{reasoning_content}"
                }
            }
        ]
}
As shown in the image:

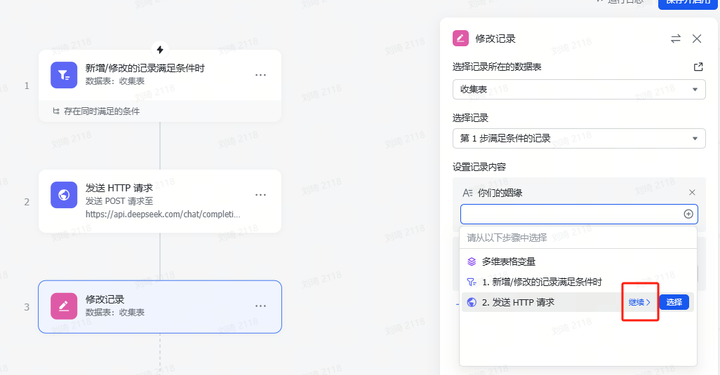
Next, use the “Update Record” action to write the output result and reasoning process into the corresponding fields. Select the previous “Send HTTP Request” step, click Continue, find and select “content” and “reasoning_content”.
For details, refer to the workflow sections of these two templates:
https://ilovezhiwai.feishu.cn/wiki/Bv1ZwJ5tcimQkYkU4OPcUczNnQG?table=ldxmb17UU0j3gXoV
10. To develop your own field shortcuts, refer to the development guide:
https://feishu.feishu.cn/docx/SZFpd9v6EoHMI7xEhWhckLLfnBh
Use the AI programming tool Trae for development. Although Claude’s context window is long enough, Trae limits the input length in the input box, preventing long documents from being sent via copy-paste. However, you can download the document (preferably convert it to .md format) and reference it in the AI dialogue.