On Sunday, while browsing Bilibili, I stumbled upon an interesting card-style AI writing assistant project. The original video had 20,000+ plays and 2,000+ favorites, with a favorites rate close to 10%. The YouTuber ‘Liang Wo Jiao Shen Me’ developed this project using Cursor, and it has over 200 Stars on GitHub.
Here are the links to the original video and the project’s GitHub repository first:
https://www.bilibili.com/video/BV1QYKWeFE16
https://github.com/ErSanSan233/prose-polish

Alright, I know you don’t want to watch the video. So, let me bring out the Bilibili video analysis website I built earlier—I let AI develop a website that automatically analyzes Bilibili bullet comments—and let AI summarize it:
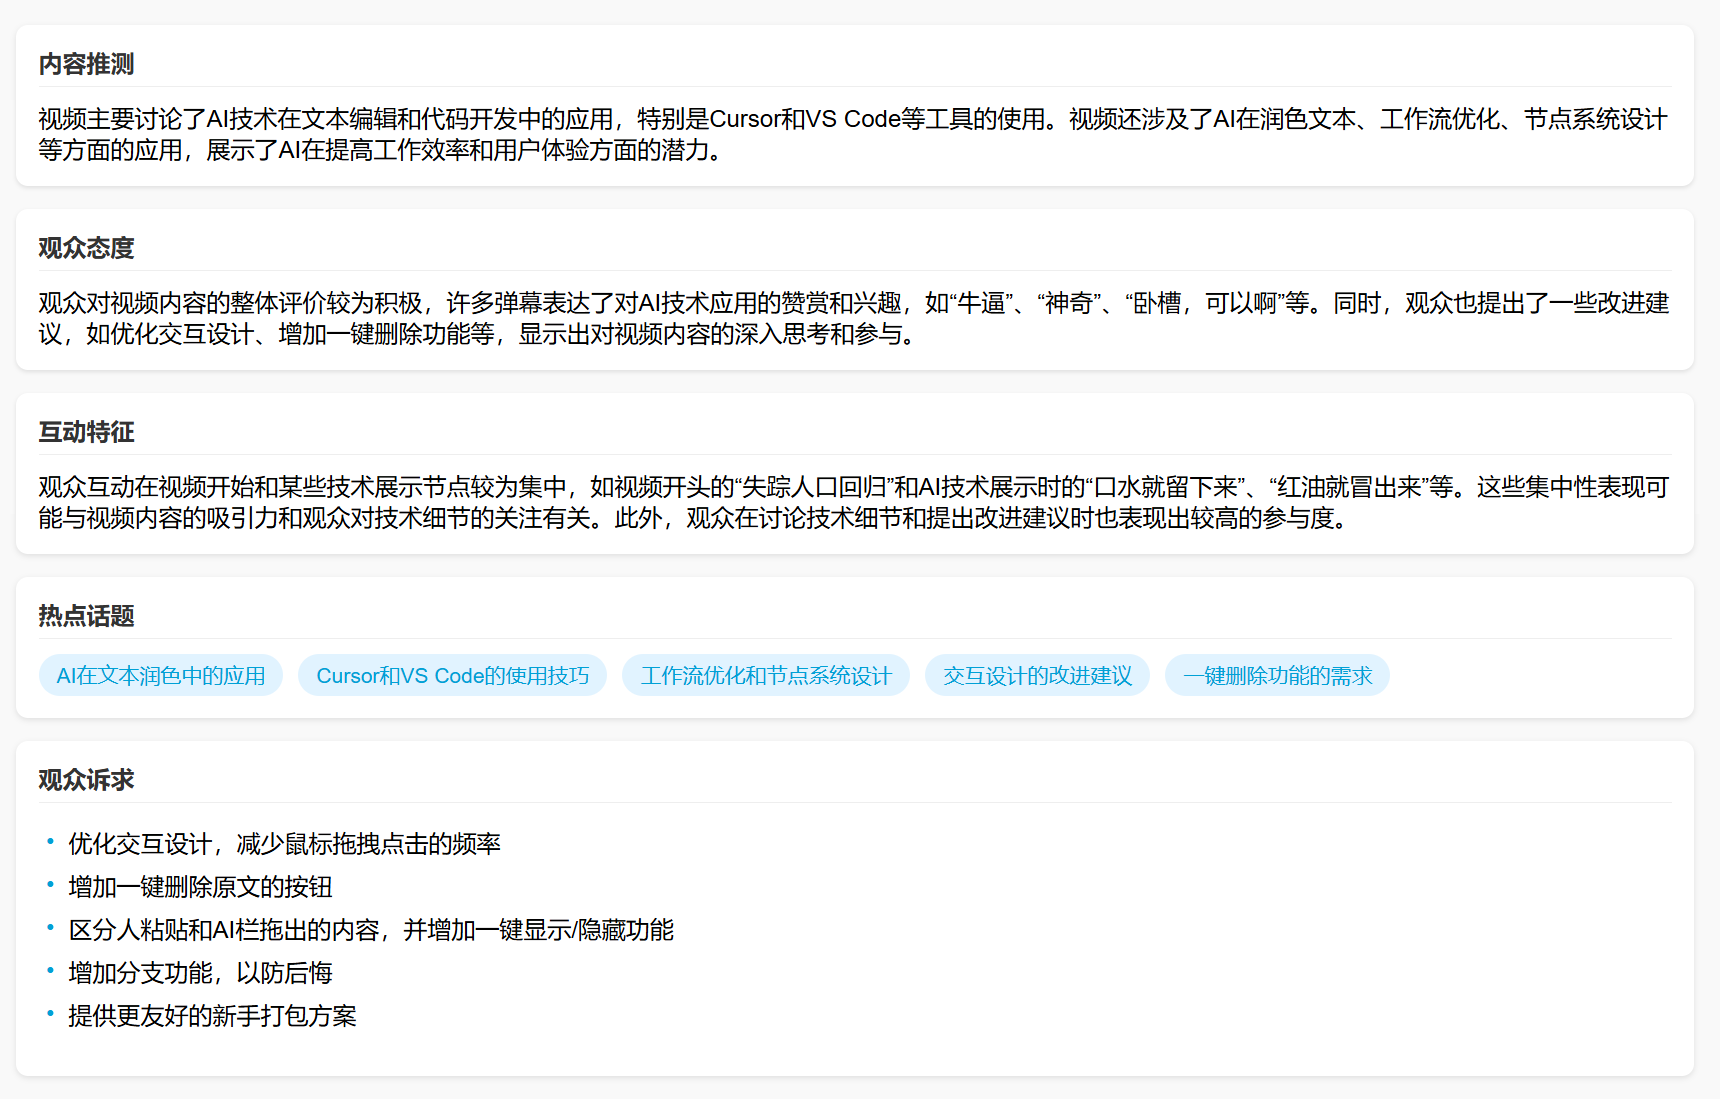
A quick aside: Speaking of this website, I recently switched the AI back to DeepSeek. I’m now using the Volcano Engine API, which is noticeably faster than others. However, since making it public, token consumption has been quite high; it has already burned through several 500,000 free trial tokens from Doubao, and I’ve even topped up some credits.
How to use the Volcano Engine API was covered before, so I won’t repeat it here. You can check the middle section of this article:
What to do when DeepSeek servers are always busy? Rather than wait, try reviving your chat via API
Now, back to this ‘Card-Style AI Writing Assistant’ project.
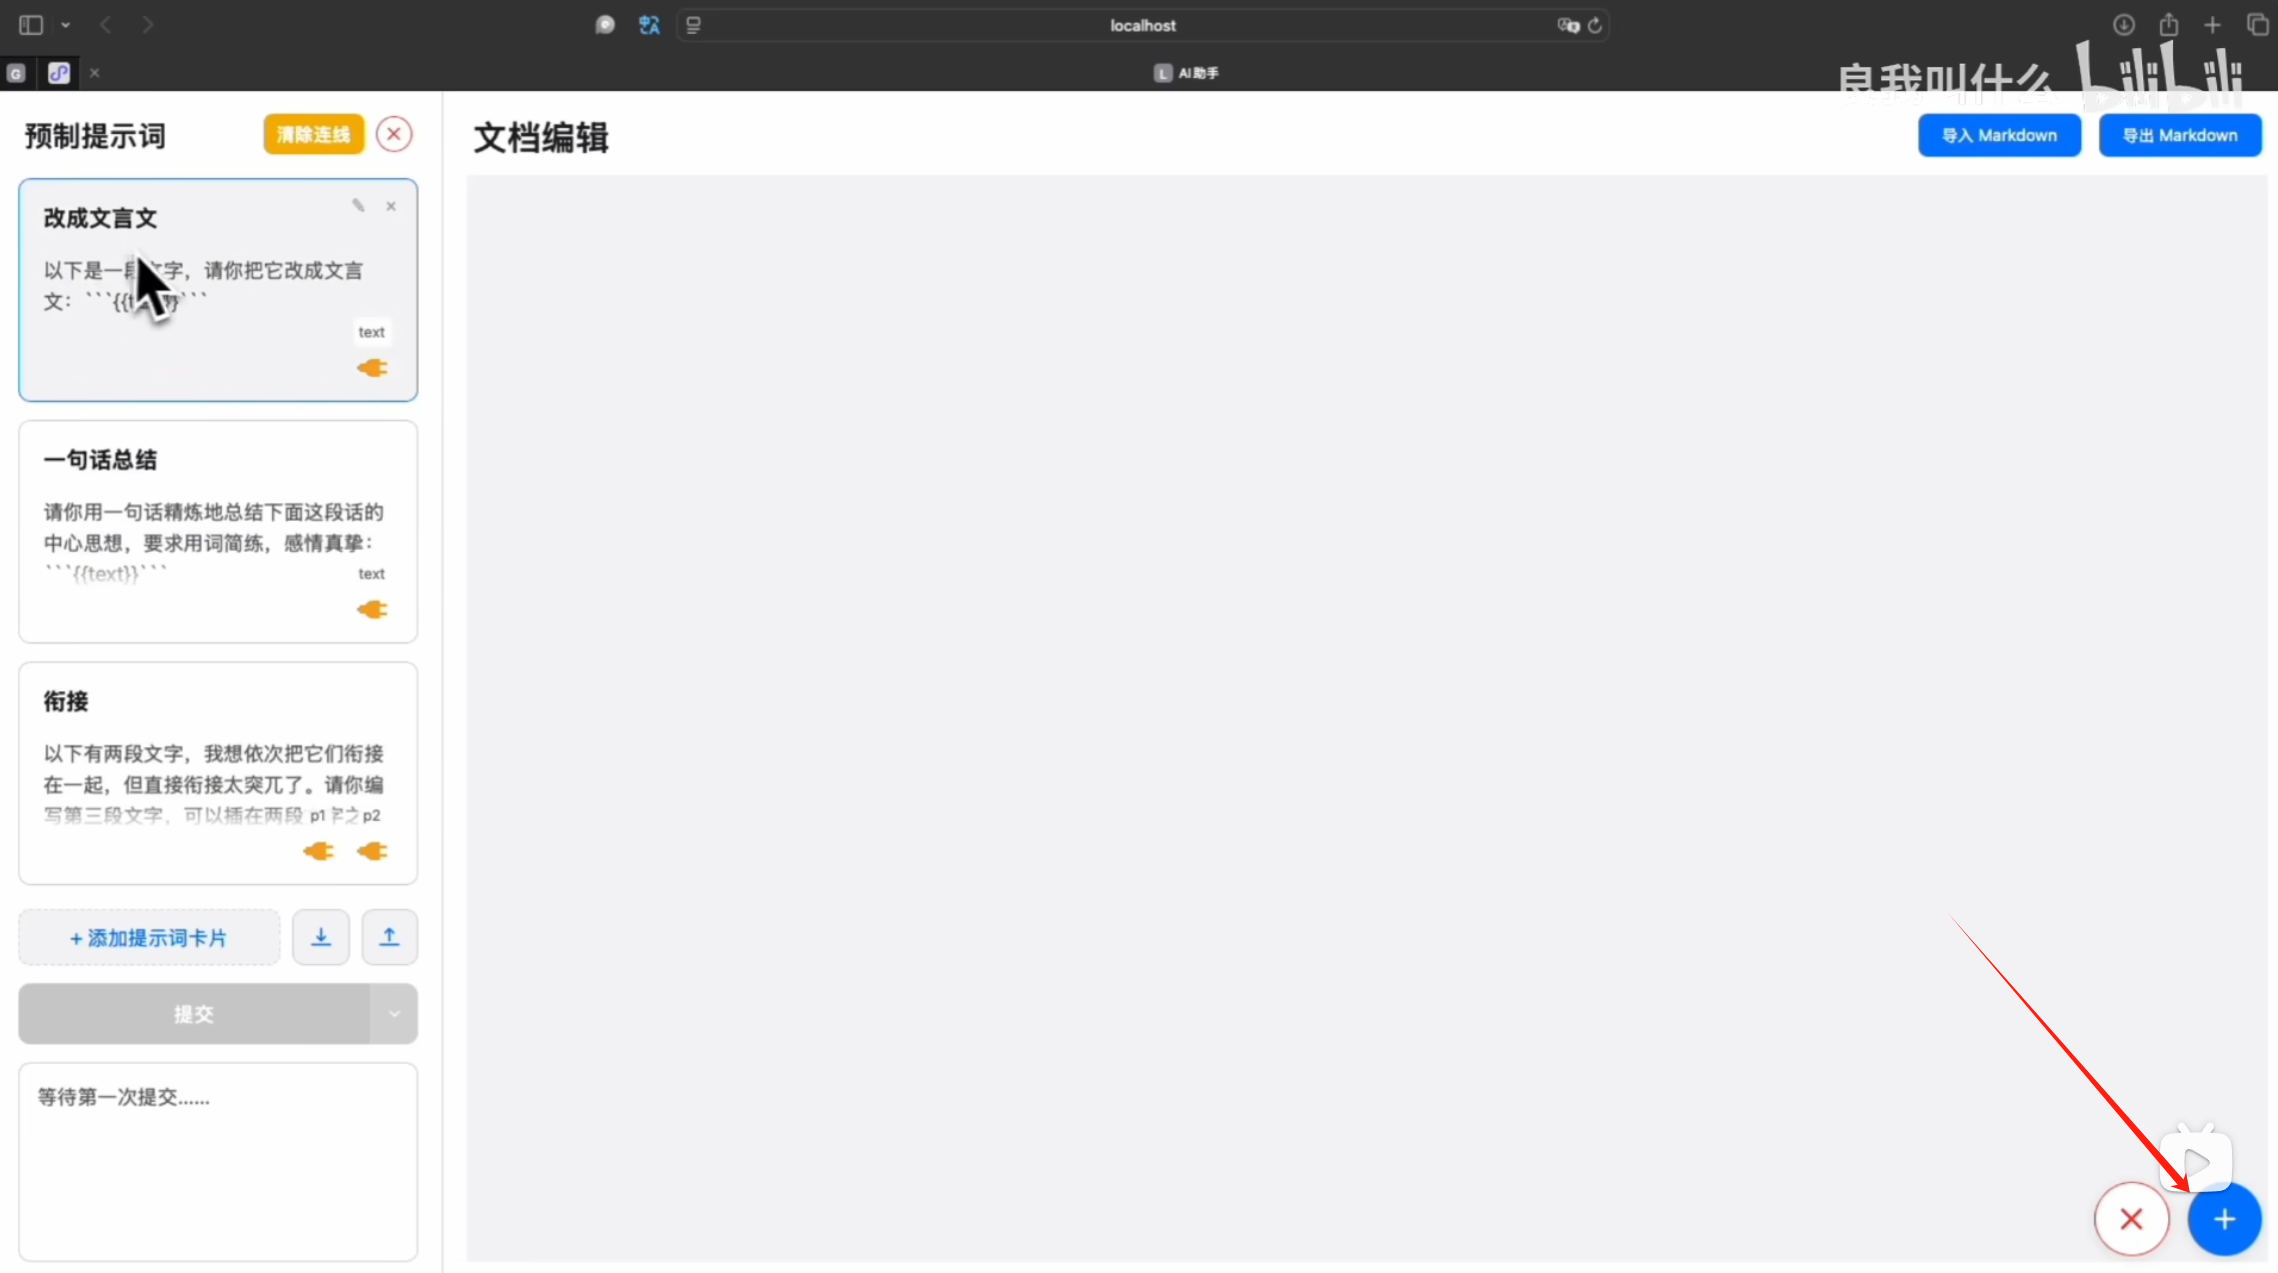
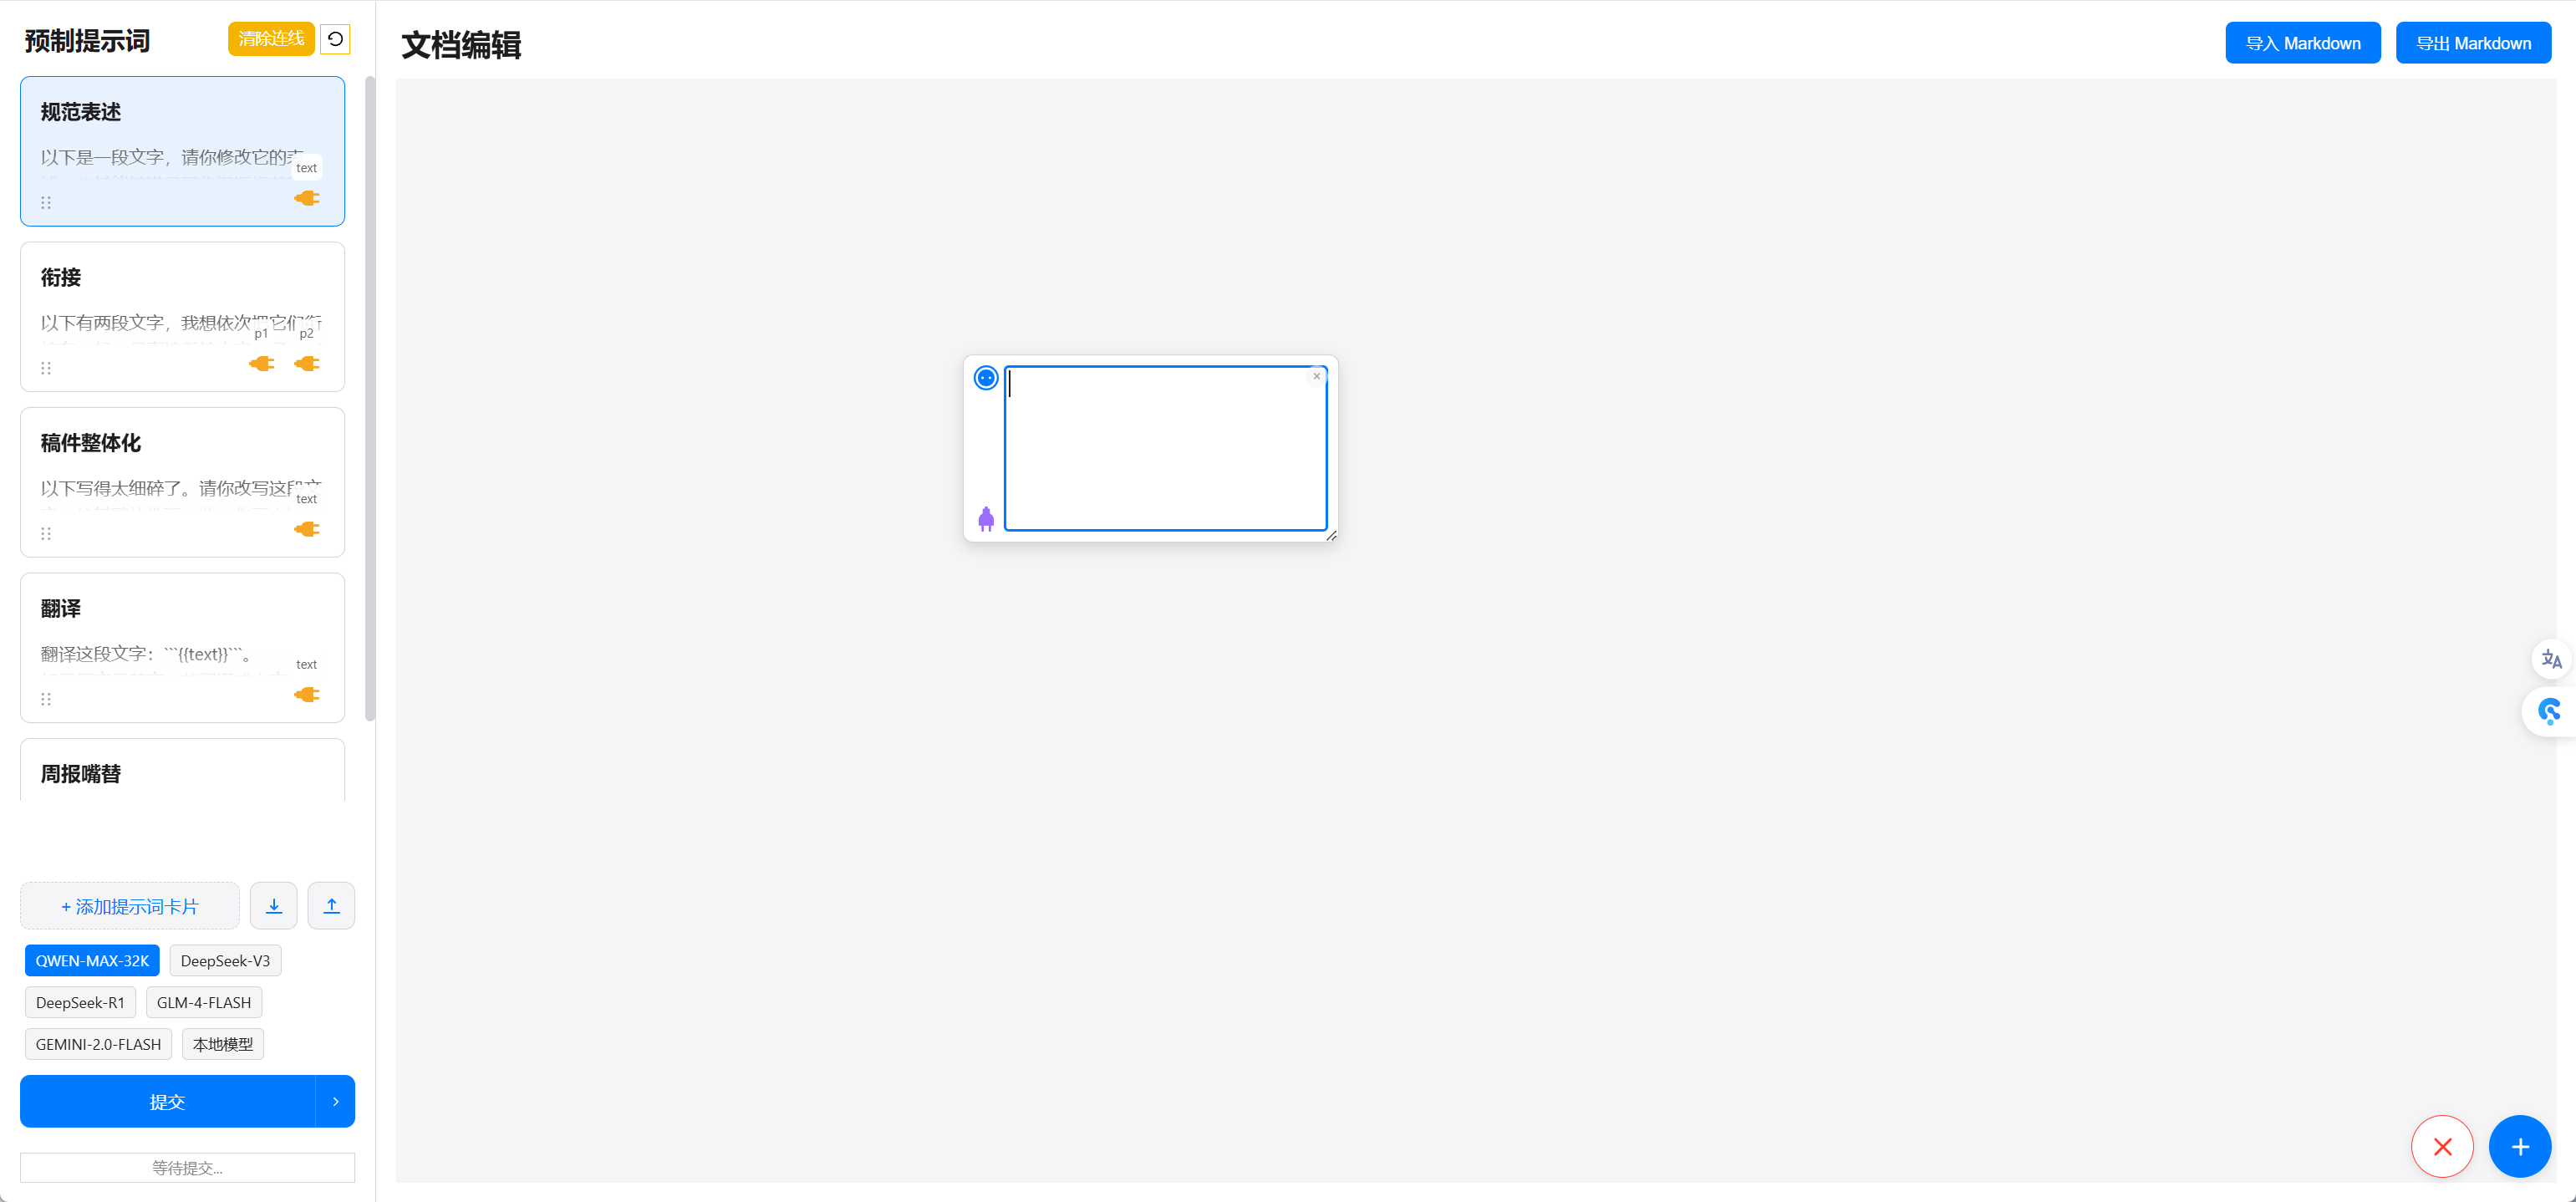
It’s somewhat like a workflow, but specifically designed for text work. It has no functional nodes, only text nodes that can be chained.
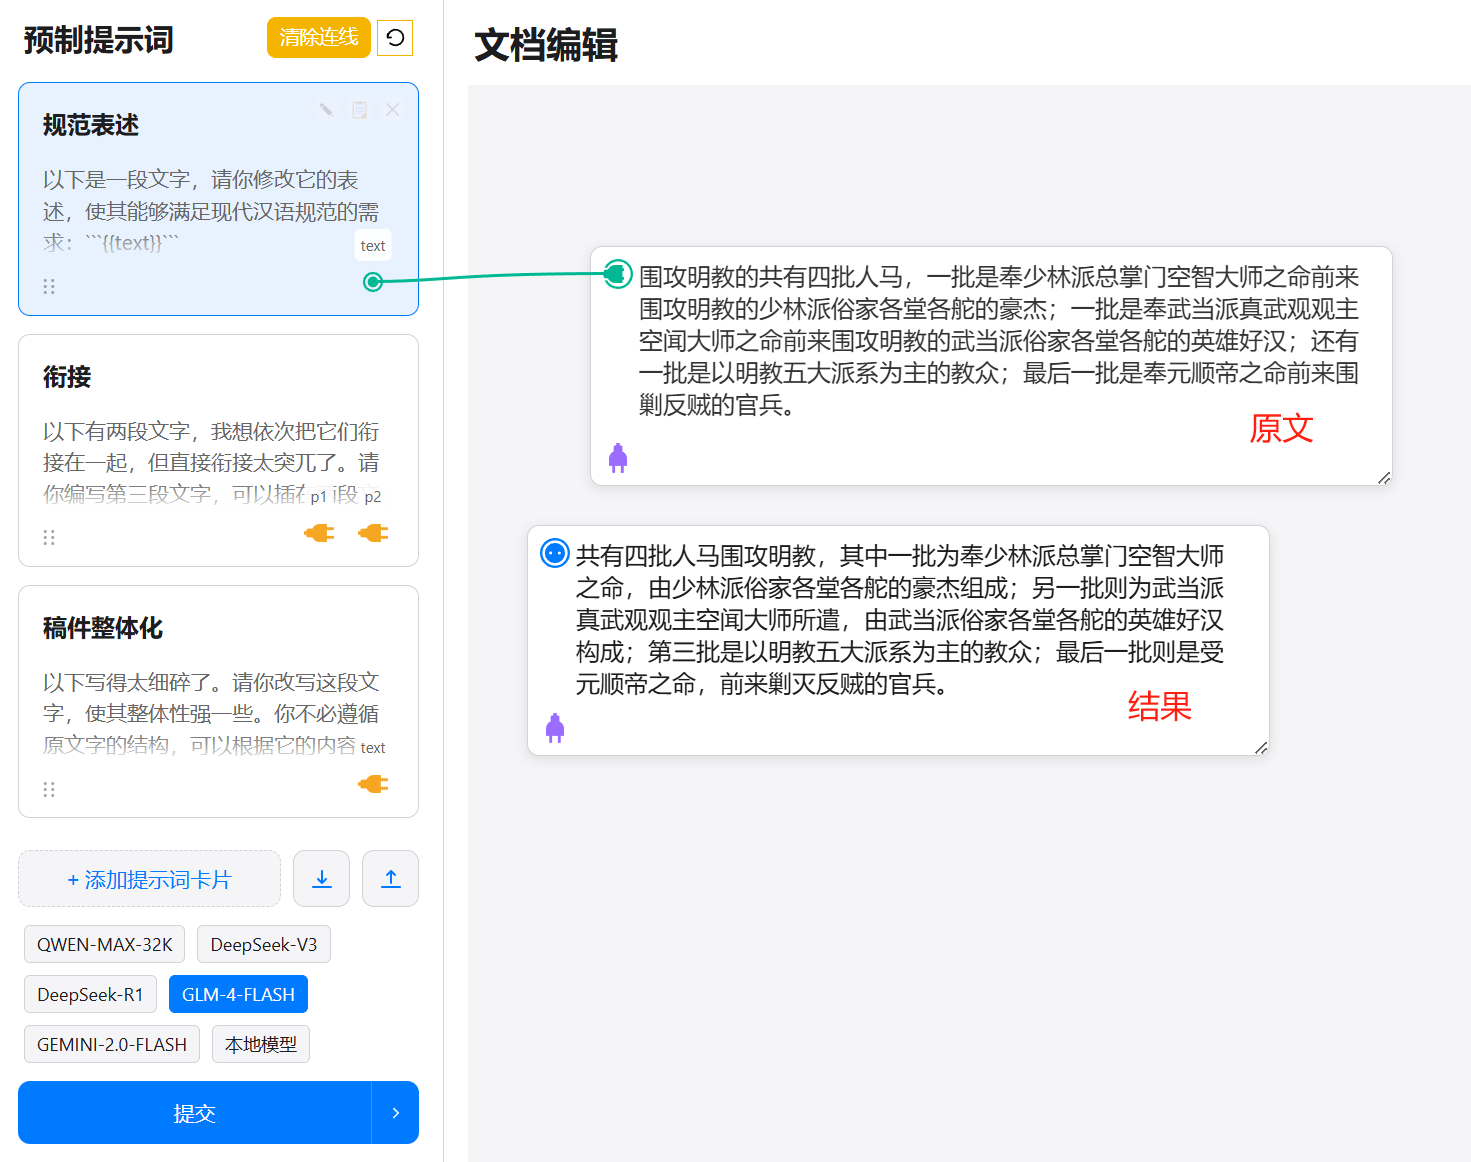
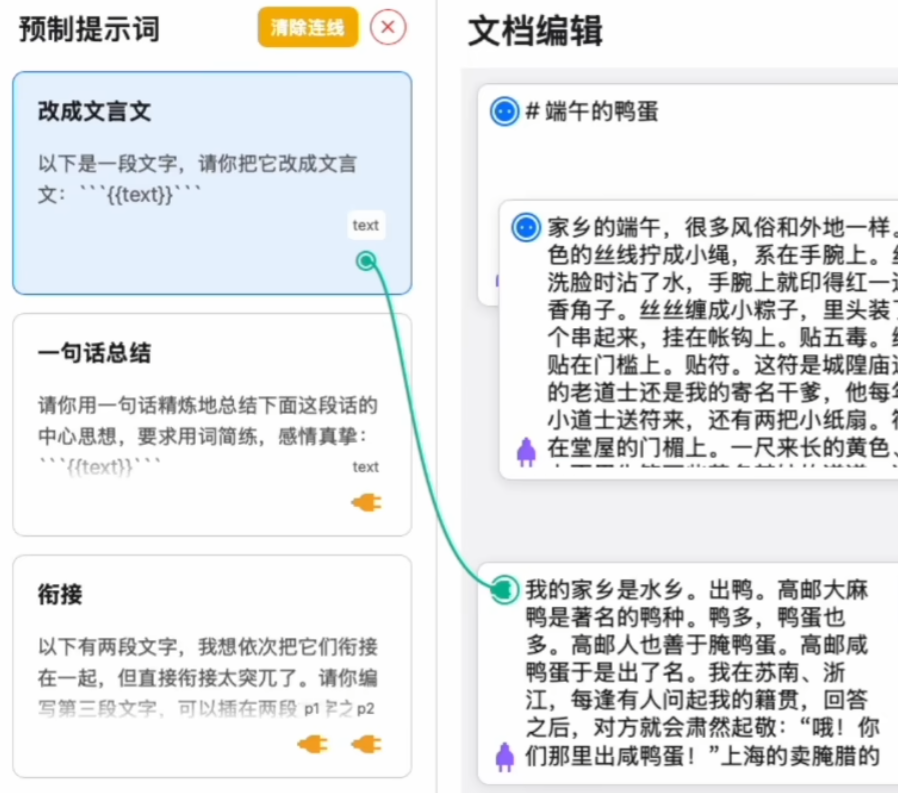
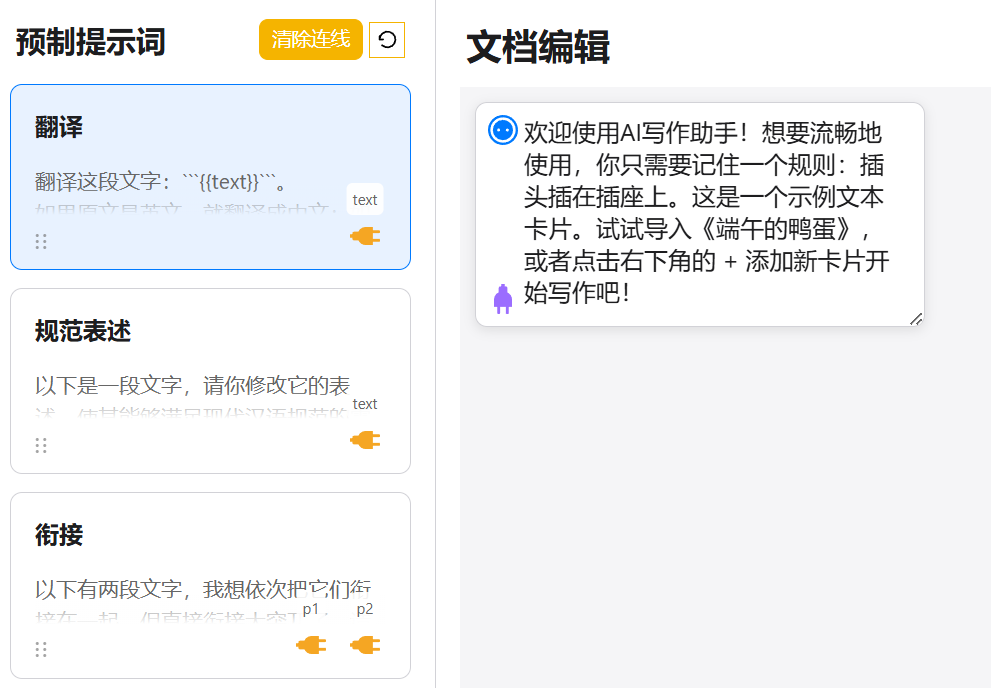
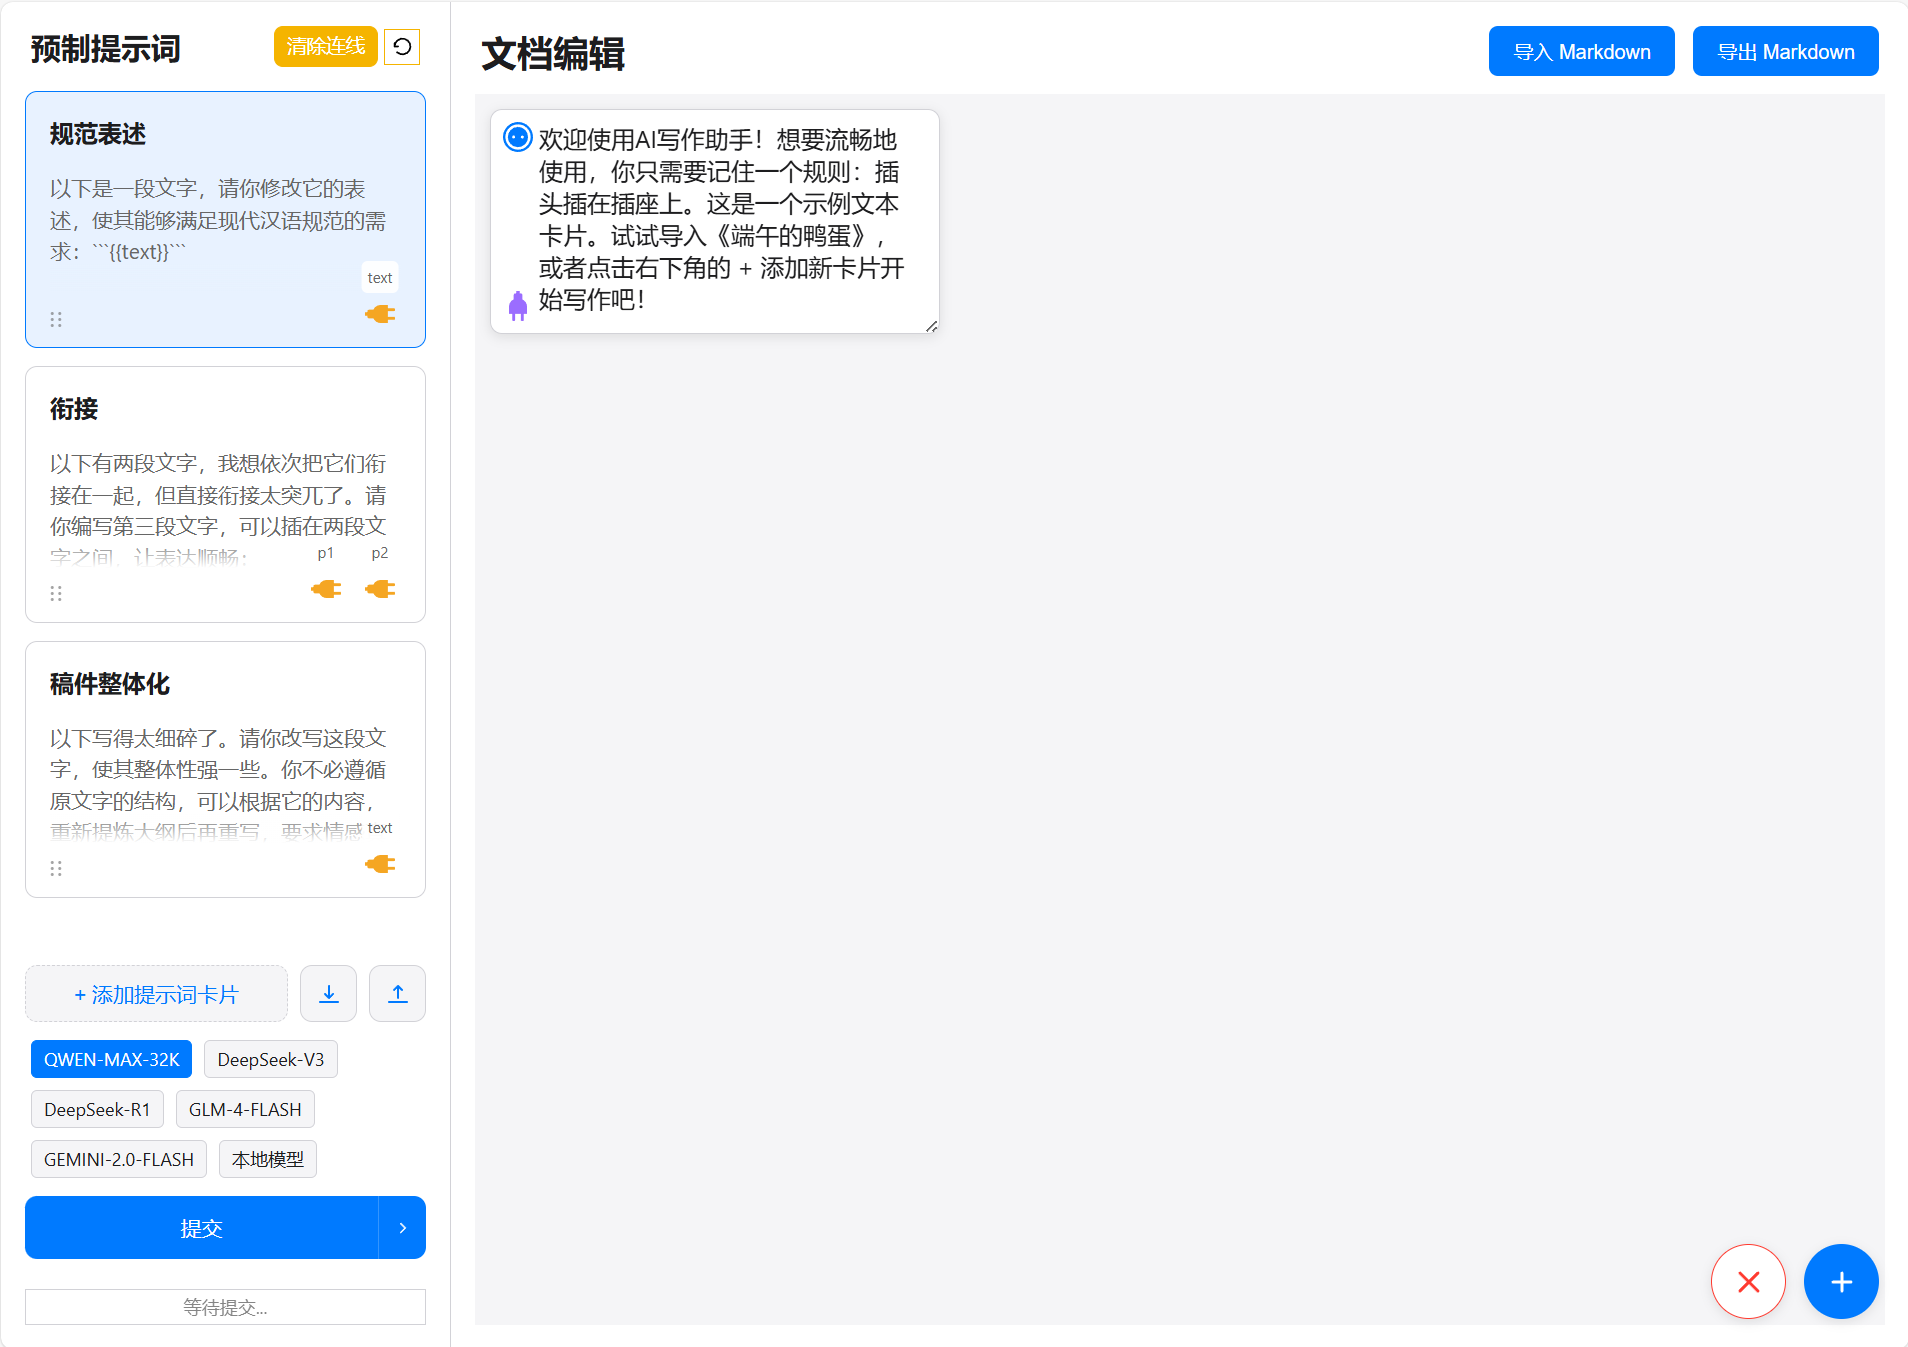
The basic workflow is as follows: the left column contains prompt cards, and the right column has text content cards. In the prompt cards, the placeholder {{text}} represents the text to be processed (for paragraphs, it’s {{p1}}; you’ll understand this by looking at the content of the preset cards).
When we connect a prompt card to a text card using the connector line and click submit, this operation means applying that prompt to the connected text. As shown in the image below, this takes the text in the original text card, processes it for standardized expression, and produces the text in the result card.
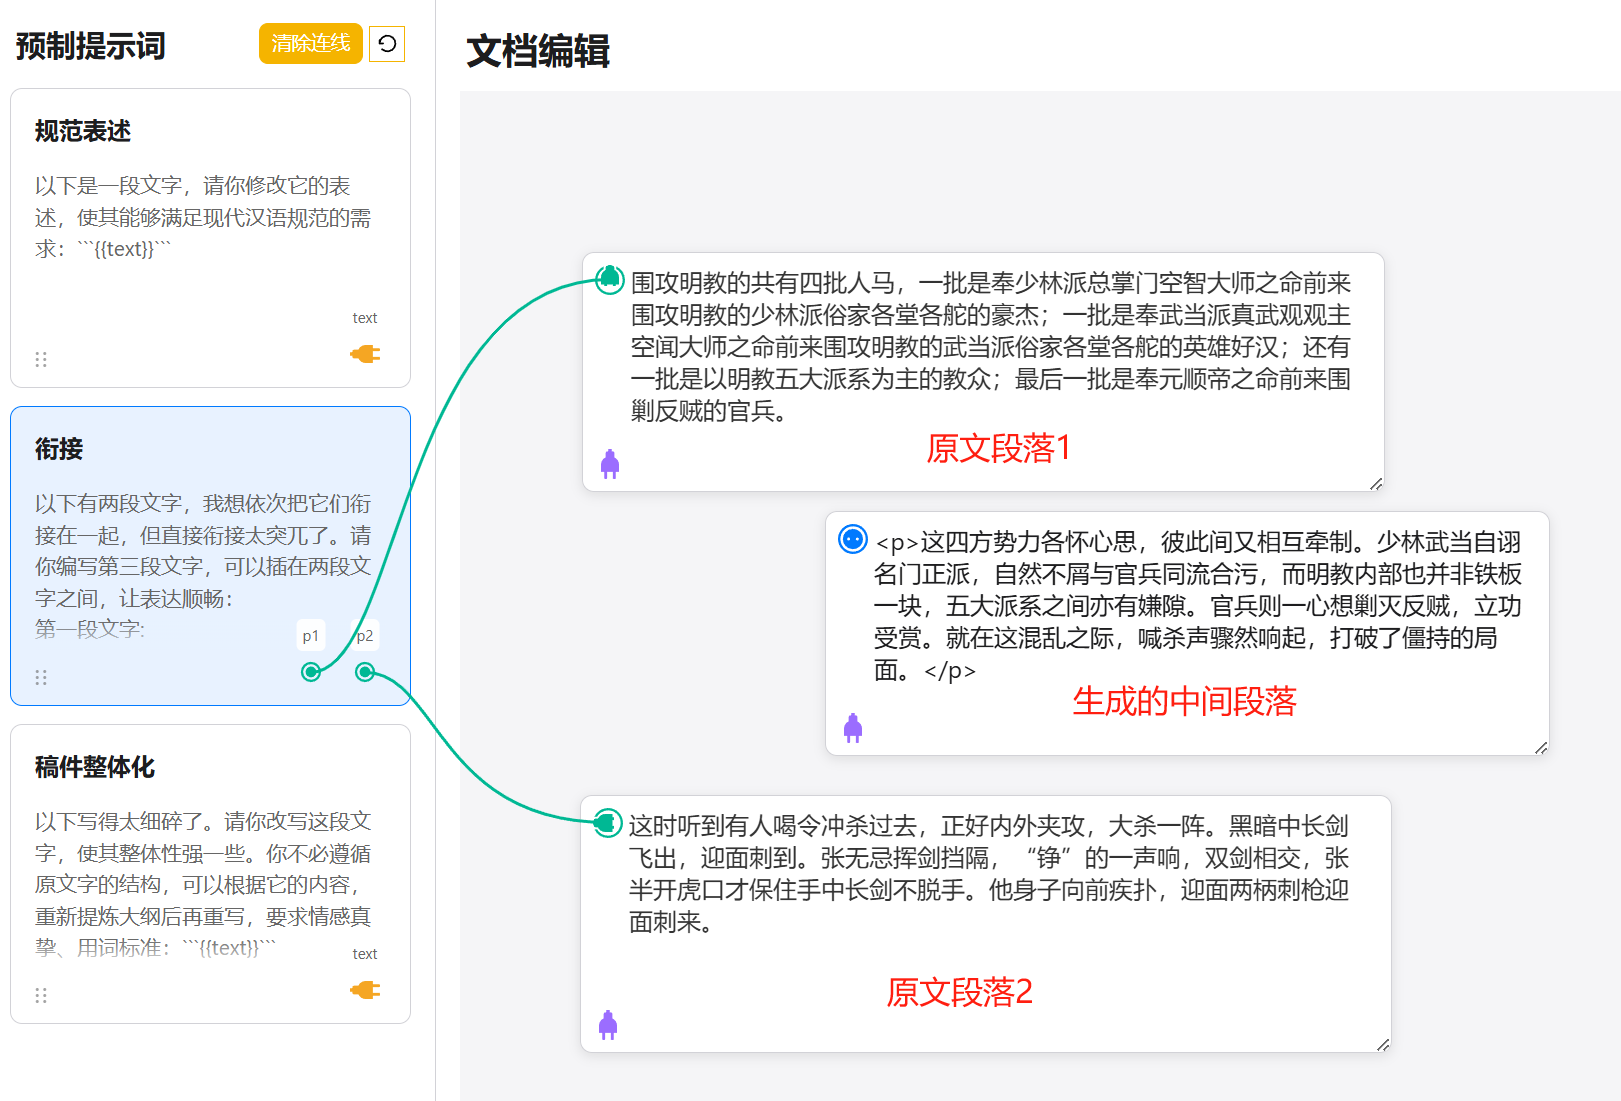
Another example below illustrates generating a transitional paragraph between original paragraph 1 and paragraph 2, making the connection between the two texts less abrupt.
If you have already processed multiple sub-paragraphs separately and want to process the entire large paragraph, what should you do? No need for extra copy-pasting; see the purple plug in the bottom-left corner of the text card? Just connect it to the next card.
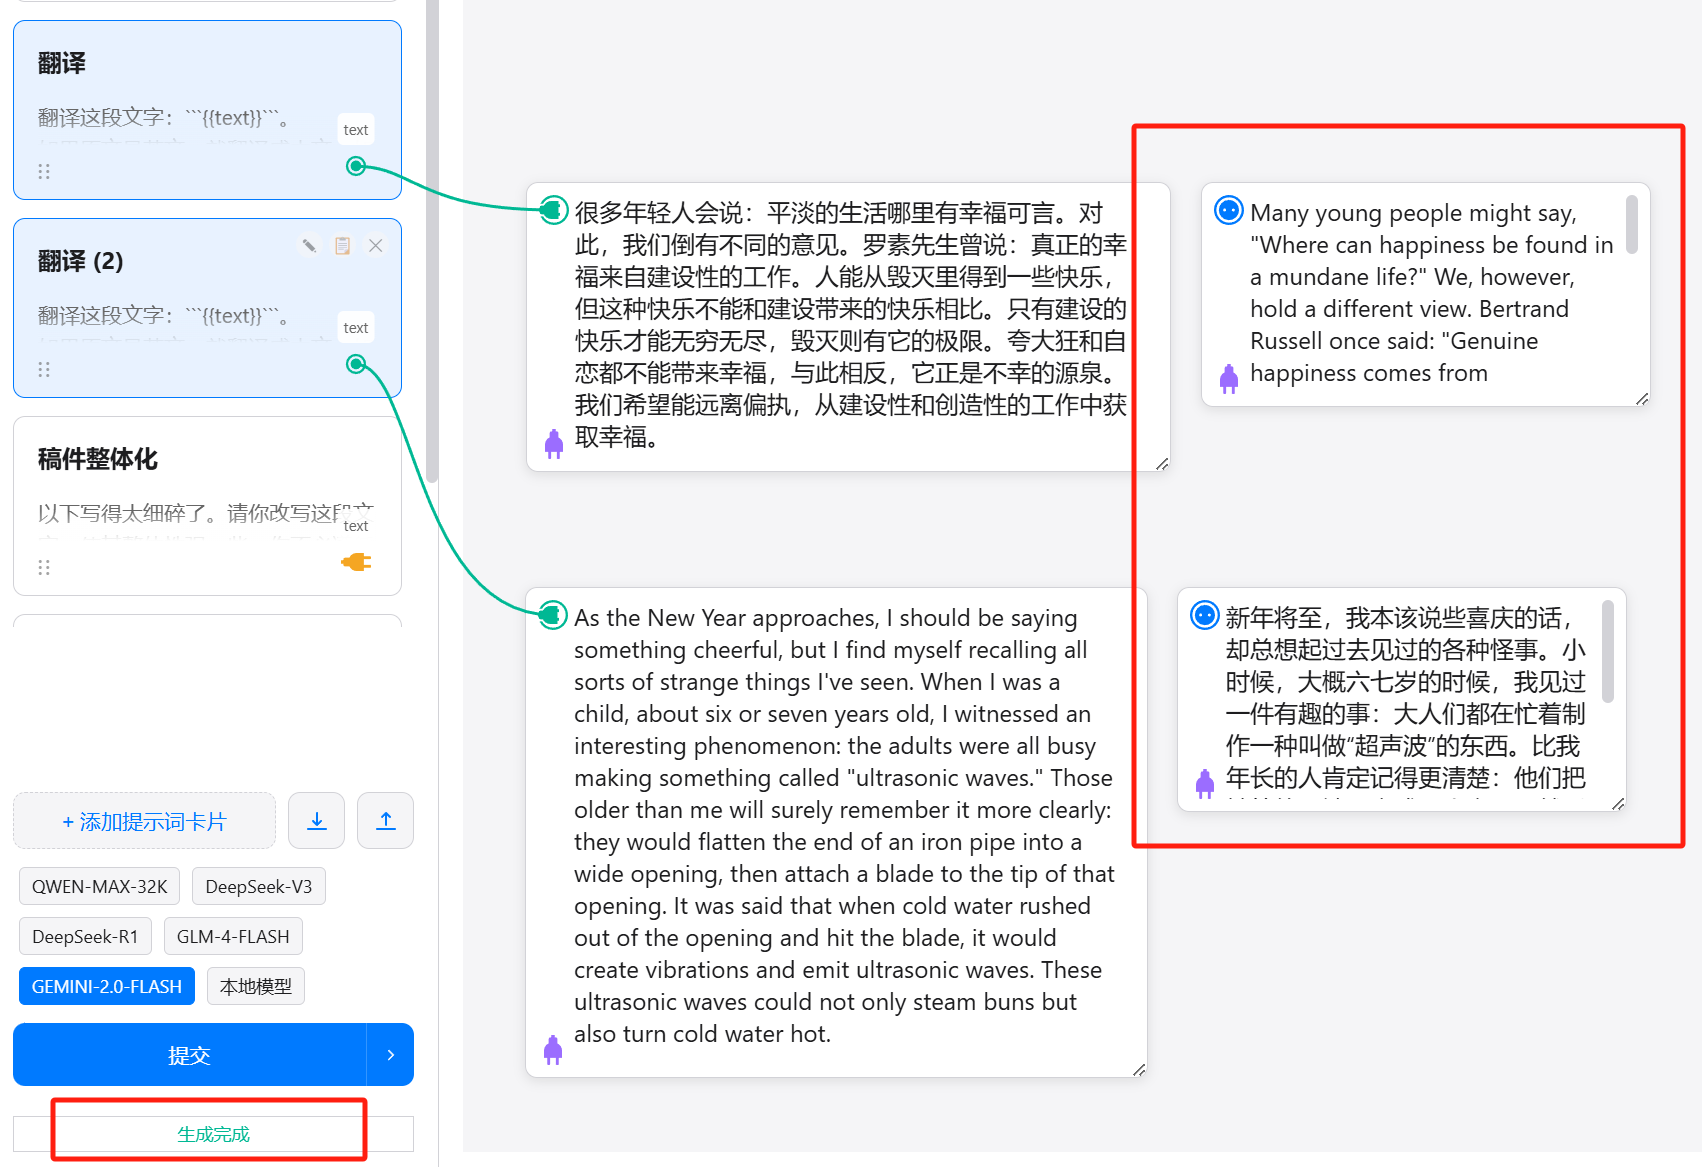
Like this, to perform a translation:
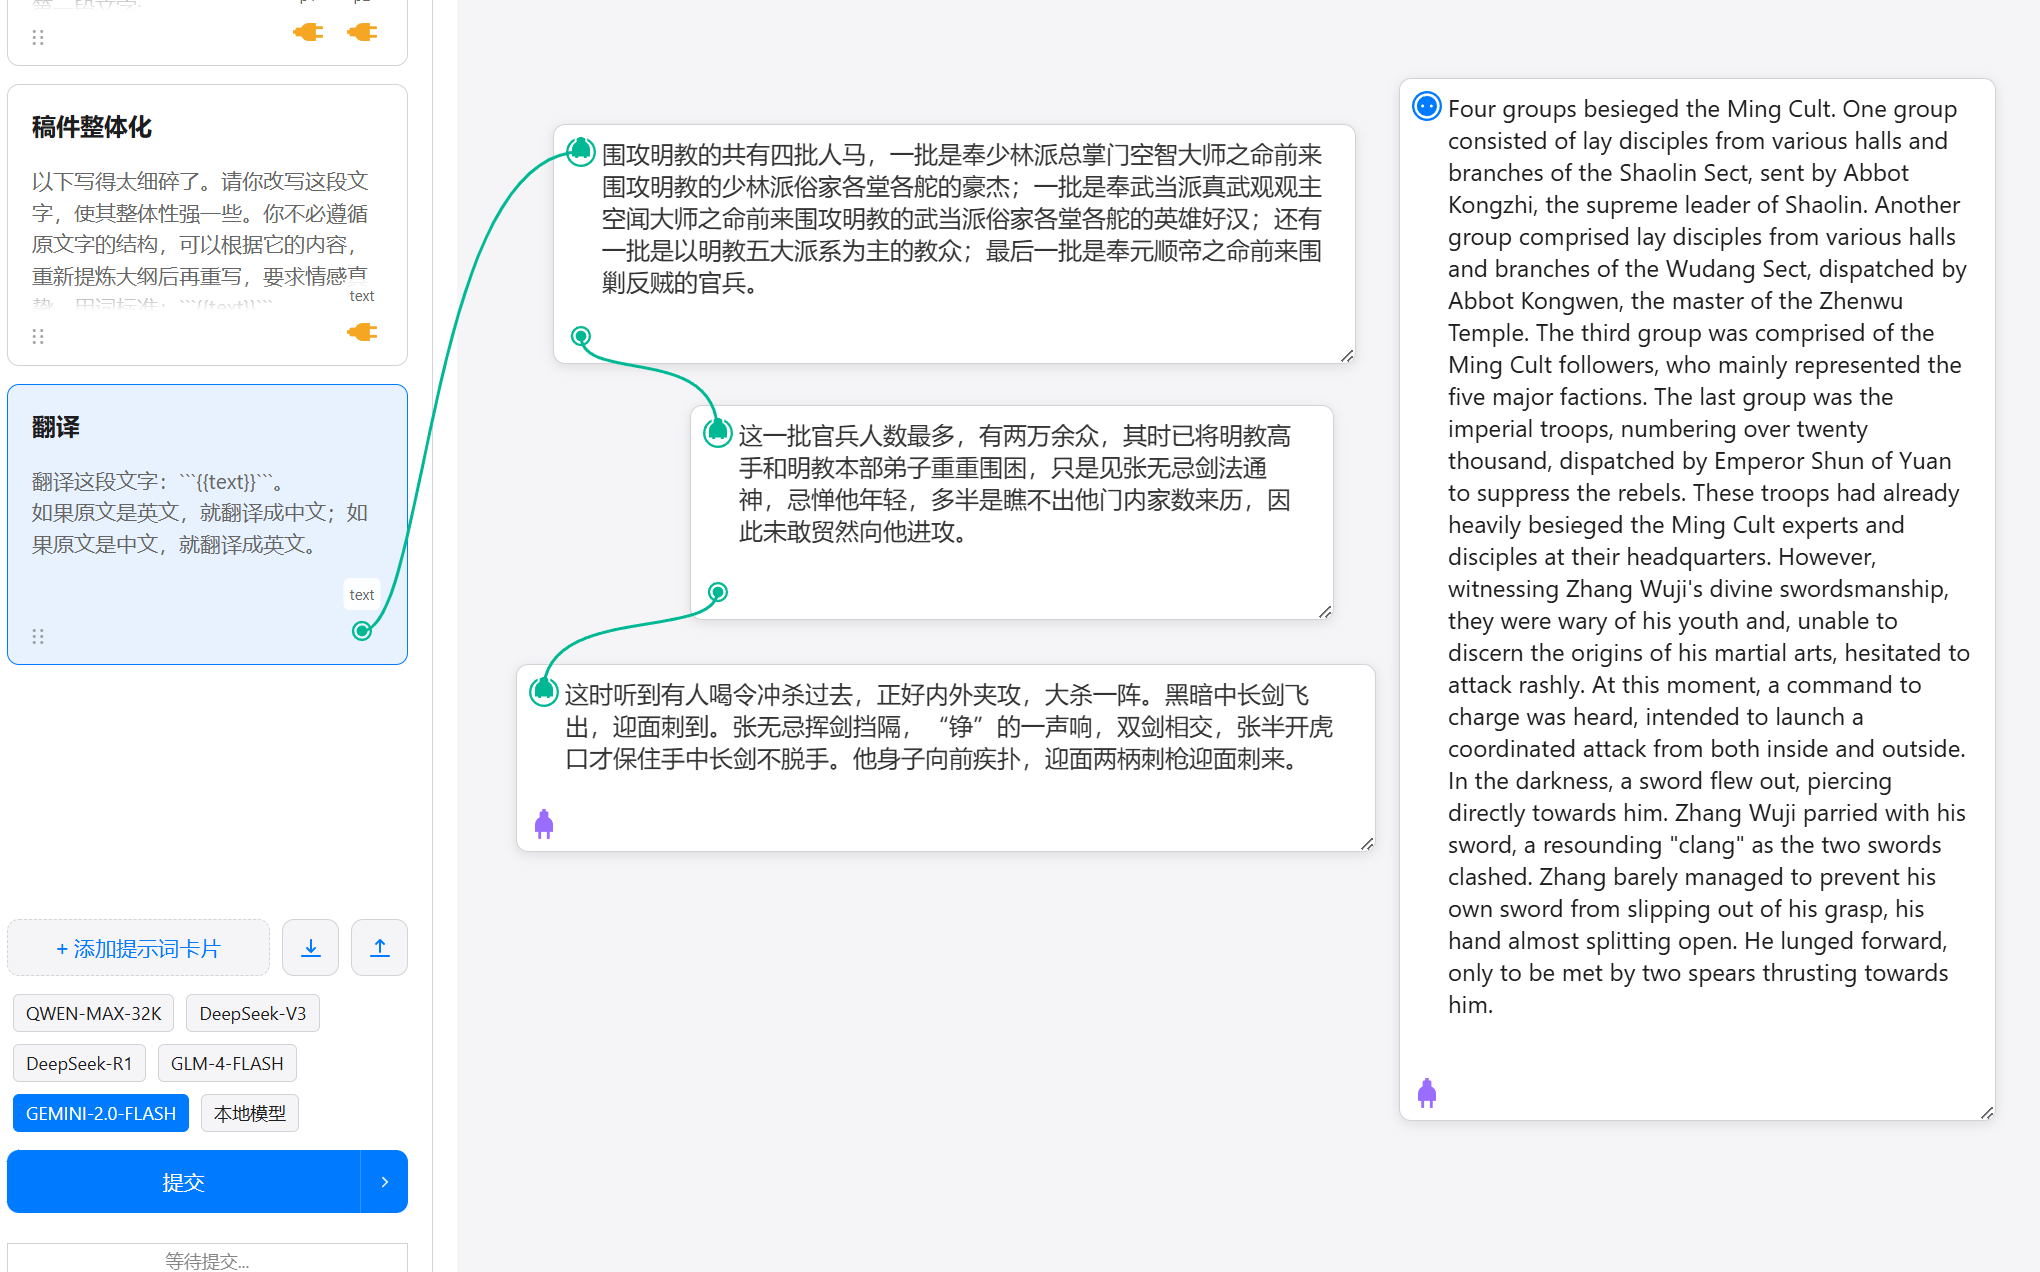
The content being translated is the large paragraph formed by connecting these three small segments.
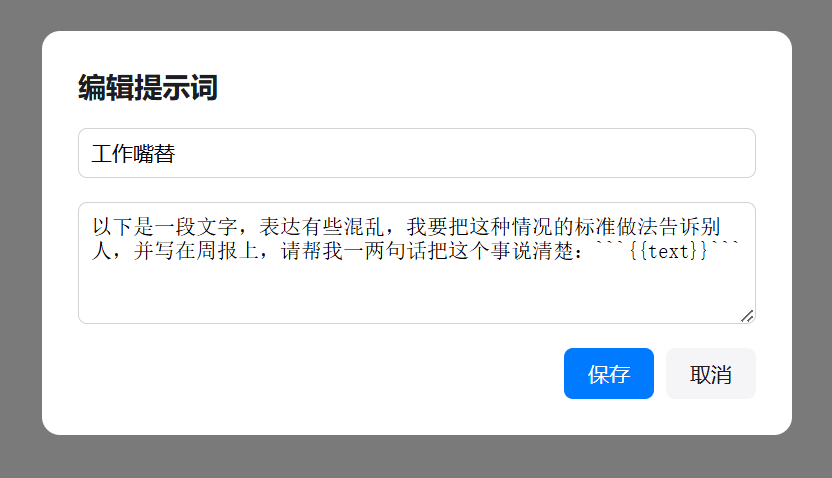
Of course, this is just the beginning; you can infinitely add prompts tailored to your needs. Put it this way: any prompt you can write in a chat window can be written here. For example, yesterday morning, I wrote a prompt called ‘Work Ghostwriter’ and added it here.
Yesterday morning, I was quite busy, handling tasks without much time to think, so my notes consisted of fragmented first impressions, poorly worded, like this:
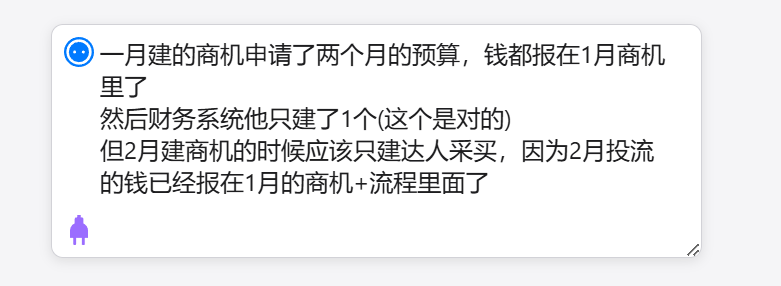
It’s hard to read, right? What is it even saying…
Then I connected this ‘Ghostwriter’ card with my messy text, selected the DeepSeek-R1 model, and submitted.
The result:
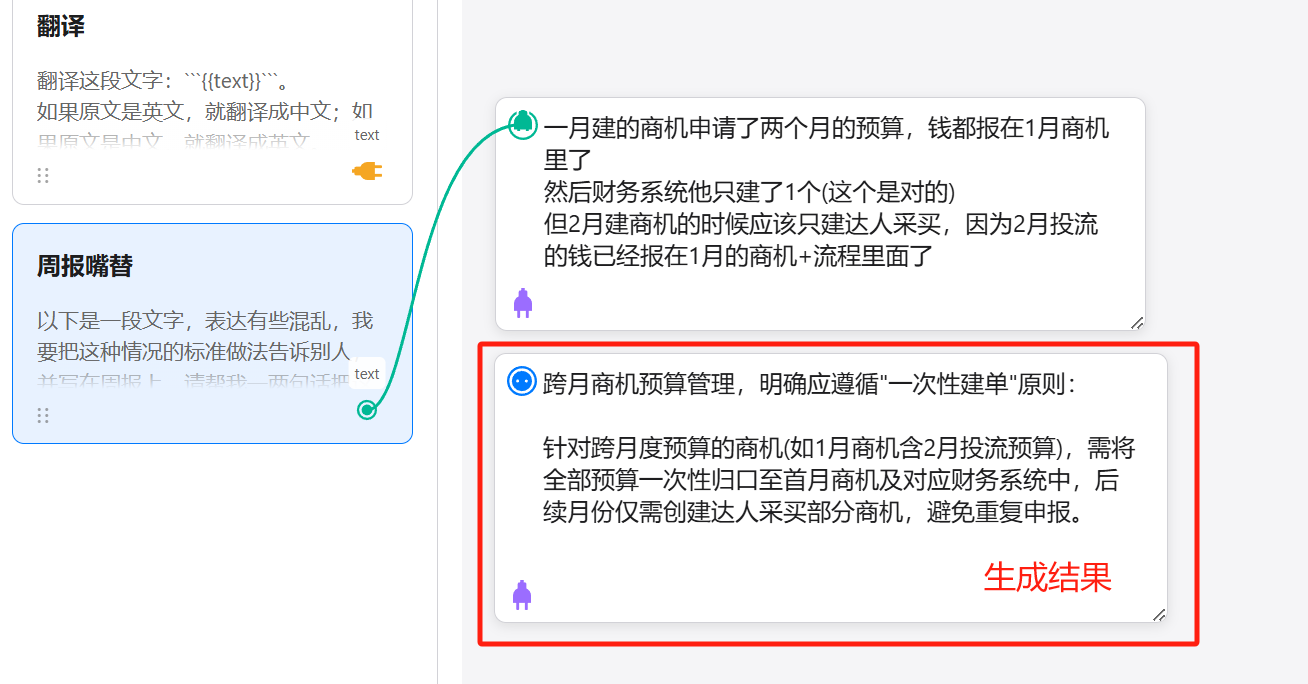
How about that? Much clearer now.
This is the basic operational mechanism of this card-style AI system.
So, how do you deploy and use it on your own computer?
I recommend watching the original author ‘Liang Wo Jiao Shen Me’s video, which covers methods for both Windows and Mac:
https://www.bilibili.com/video/BV1QYKWeFE16
It’s not that I’m too lazy to write; the video really explains it clearly.
Next, let’s talk about the parts I modified.
Similarly, here’s the GitHub page:
https://github.com/Liu-Bot24/prose-polish-fork
If you’ve watched the original video, you might notice my screenshots above are slightly different from the original.
That’s because I also used Cursor to make some small usability optimizations to the original author’s project:
1. Double-click to add and quickly duplicate cards
In the original project, to add a new text card, you had to click the add button in the bottom-right corner, and the newly added card required a double-click to enter edit mode (to paste text).
In this modified version, you can add a card by double-clicking on any blank space where you want to place a text card. Additionally, newly added cards default to edit mode, making it convenient to paste text directly. The new card button in the bottom-right corner is retained, and newly added cards also default to edit mode.
It also supports holding the Ctrl key and dragging a card to duplicate it.
2. Quick model selection options
In the original project, switching between different large models required expanding a menu to the right of the submit button, which was cumbersome for frequent switching.
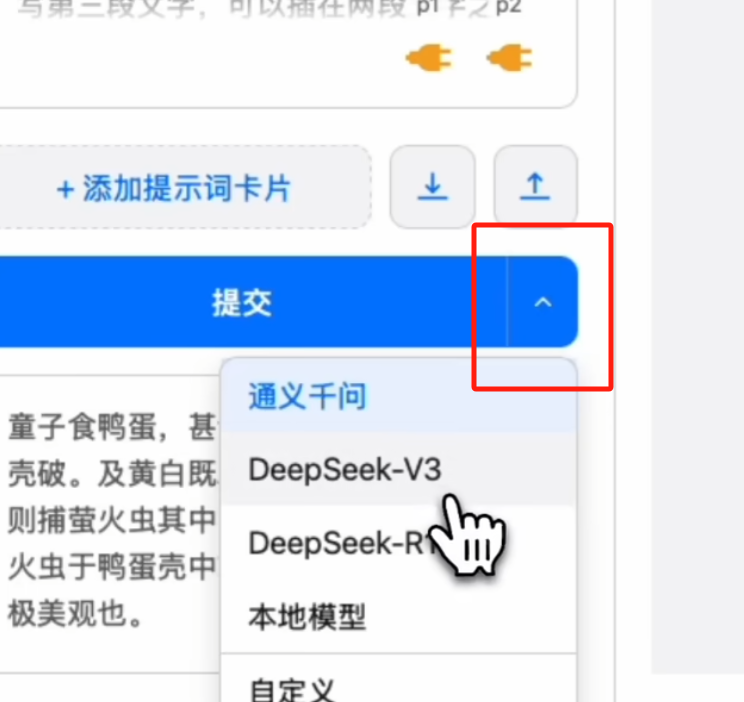
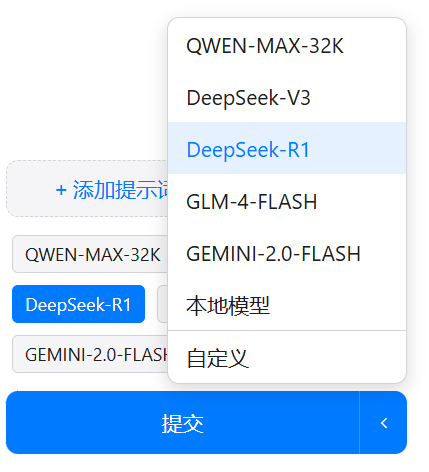
Here, while retaining the dropdown menu, I added quick selection options.
For example, if your previous task used GLM-4-FLASH, this task requires an inference model like DeepSeek-R1, and the next task might need GEMINI, frequent menu operations become very tedious. Now, you can also directly click and select above the submit button; whichever you click, that’s the one used—extremely convenient.
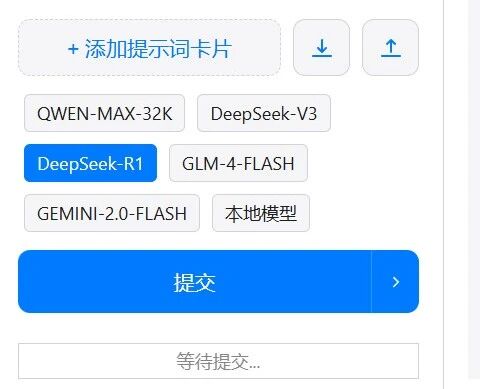
Furthermore, the selections here are linked and synchronized with those in the menu. The only difference is that I did not include the ‘Custom’ model in the quick selection options. If you select and configure a custom model in the menu, that custom model will be used, but no model will appear selected in the quick selection options.
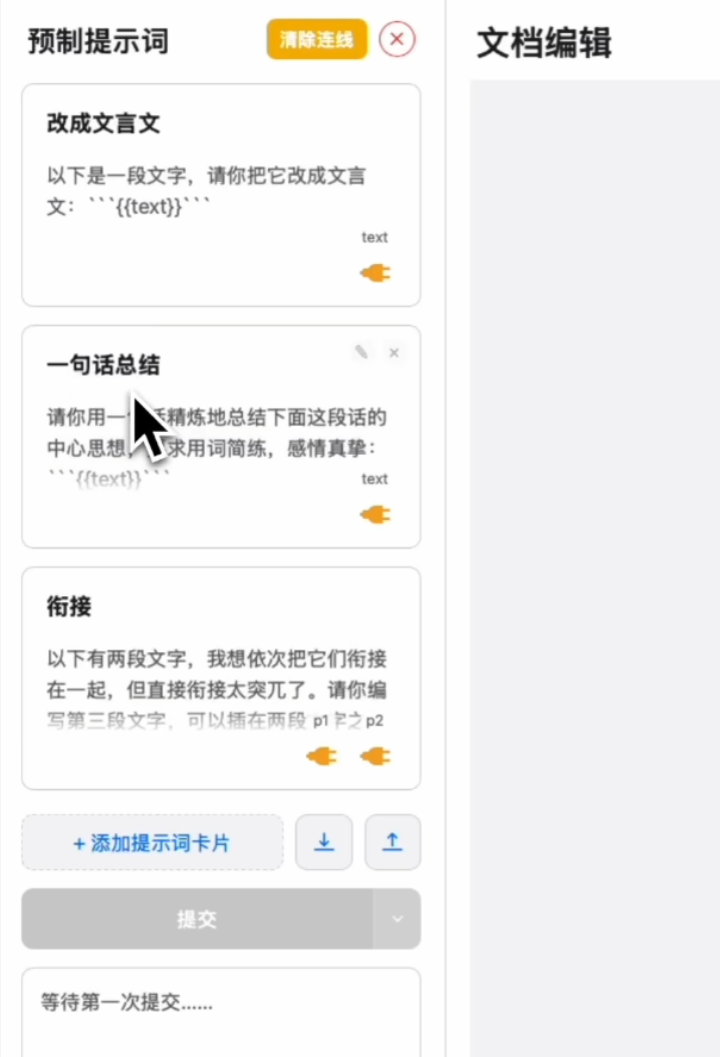
3. Duplication and sorting of preset prompt cards
While the original project allowed creating new preset prompt cards, it did not support sorting or duplication.
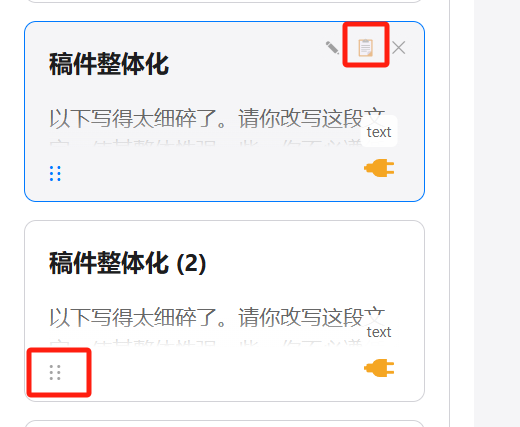
I added a card duplication function to the original project. Clicking the copy button in the top-right corner automatically duplicates the same card below the original, but appends a sequence number to the title for distinction. You can modify the template on the original card to create new prompt cards.
I also added a drag handle in the bottom-left corner; dragging the handle allows you to sort these cards.
4. Parallel execution of multiple preset prompts
The original version only supported activating one prompt card at a time. To execute the next card, you had to wait for the current process to finish.
After my modifications, it now supports selecting and activating multiple prompt cards simultaneously.
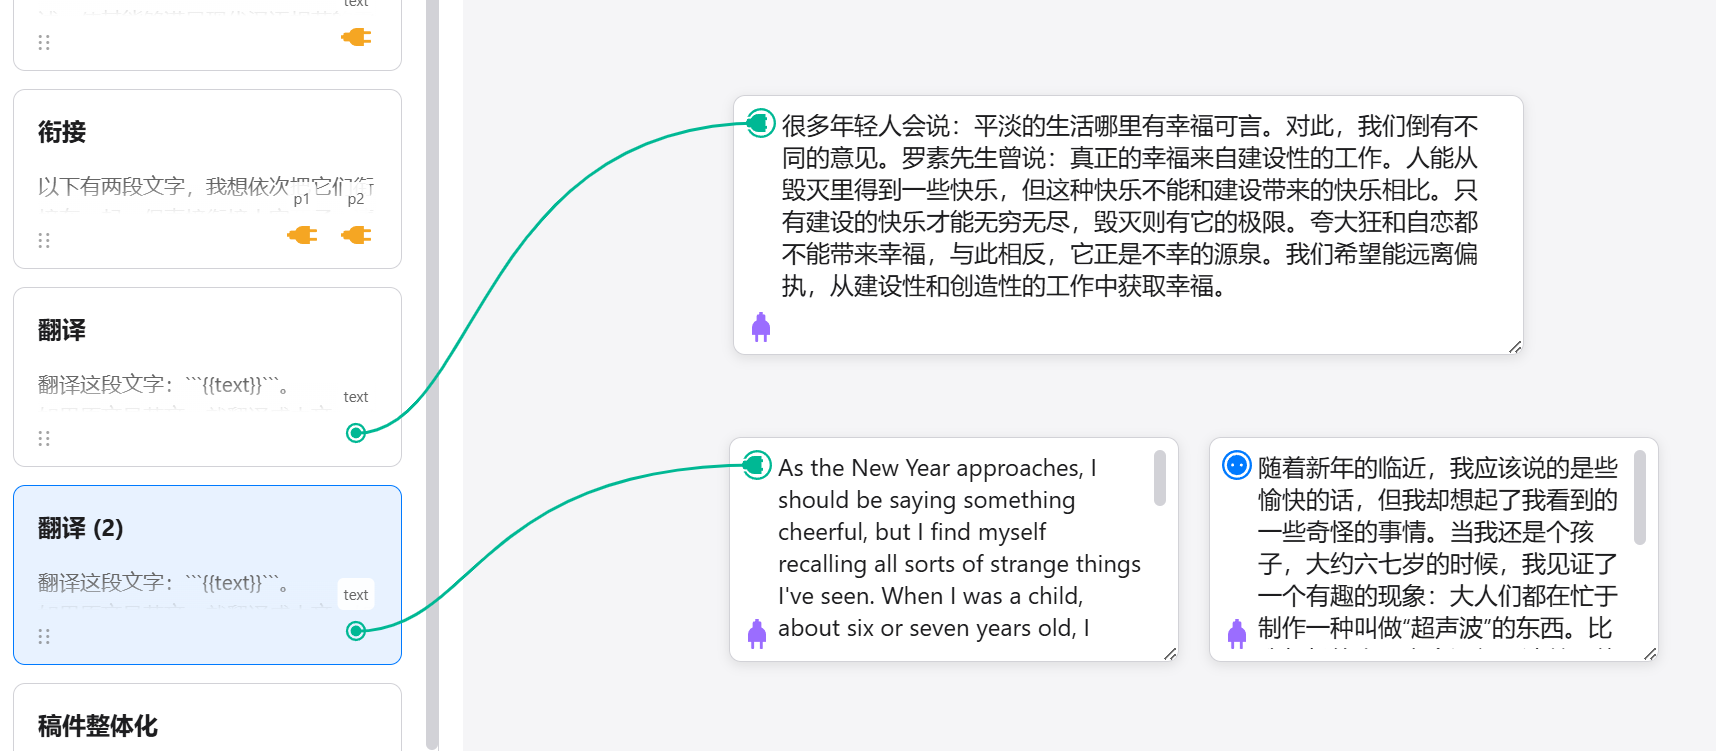
For example, if I want to translate two passages at the same time.
I can duplicate the translation card to ‘Translation 2’, select both to enable them, and then click submit.

Then it will execute in a dual-threaded manner, translating both cards simultaneously.
If you temporarily only want to translate one, you can keep the connection, deselect the prompt card you don’t want to activate, and then click submit; it will execute the selected prompt workflow.
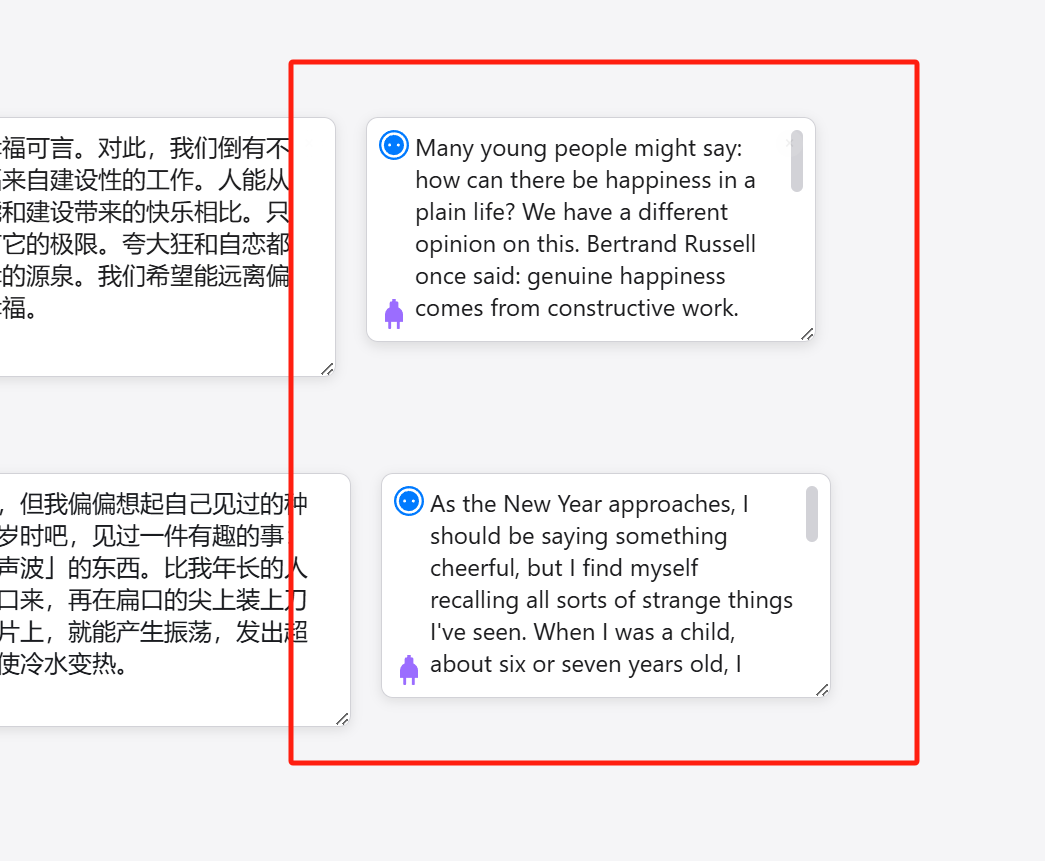
During multi-threaded execution, the single output position in the bottom-left corner of the original version is naturally insufficient.
So I changed the result output to generate cards directly, appearing next to the last text card in that prompt flow. The original result output location was changed to a generation status indicator.
5. Automatic saving of preset prompt cards to local browser cache
The original project’s prompt cards supported creation but did not auto-save. You needed to manually export and import them each time; otherwise, refreshing the page would reset to the default three cards.
I added browser cache functionality here. As long as you don’t clear your browser cache, refreshing the page will retain all custom prompt cards; they won’t disappear like before, requiring you to manually re-import them.
The arrangement order of the cards is also automatically saved. You can place your most frequently used card at the top. Each time you refresh, the prompt card at the top of the order will be selected by default, and you can directly connect it and submit for processing. Unlike the original version, where you had to manually click the prompt card to activate it each time.
Of course, if you switch browsers or devices, or clear your browser cache, you will still need to perform manual prompt export and import operations.
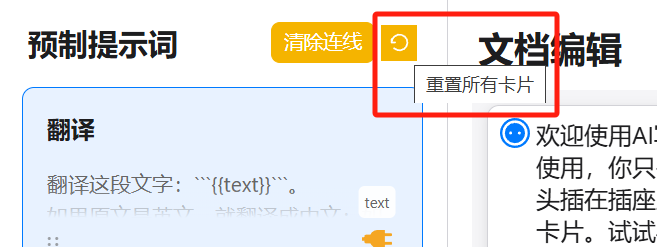
Caching can occasionally have bugs, so I also added a browser cache clearing function specifically for this site, called ‘Reset All Cards’. Clicking this button will clear the cache corresponding to this application, and the prompt cards will revert to the default three-card state.
It’s worth noting that the original had a ‘Delete All Cards’ function, which I removed because its effect overlaps with ‘Reset Cards’. If you use reset but want to achieve the effect of deleting all cards, you still need to manually delete the three initial cards. But this is probably a rare scenario; there doesn’t seem to be much motivation to delete everything…
However, one thing: the original project’s API key was written in the JavaScript file, exposing it to the front end. So if published on the internet, attentive users could obtain your API key and use it elsewhere.
A better practice is like in the brainstorming project below: placing sensitive information in an environment variable .env file to prevent front-end leaks.
I only discovered this issue after finishing the modifications mentioned above. I was too tired to continue fixing it. Unfortunately, I can’t directly publish the website as a result.
If any true coding experts see this, please help fix it.
A reminder to everyone: if you deploy this writing assistant on a server, avoid distributing it widely to strangers.
Usage methods after local download can still refer to the original YouTuber’s video; it’s very detailed, so I won’t type it out again here.
Let me explain how to deploy this entire setup on your own server, allowing you to use it anywhere without space limitations and even share it with others.
My entire deployment plan is based on the BaoTa panel, involving minimal command line or code operations, making it easy to understand.
(If you don’t know how to install the BaoTa panel, wait until I finish this section at the end, and I’ll guide you through it completely.)
When I wrote this AI brainstorming project <《Open-source an AI-generated AI brainstorming project》, someone asked how to use it. This time, I’ll cover both together. You can combine the deployment guides for both projects for better understanding.
Let’s start with the brainstorming project.
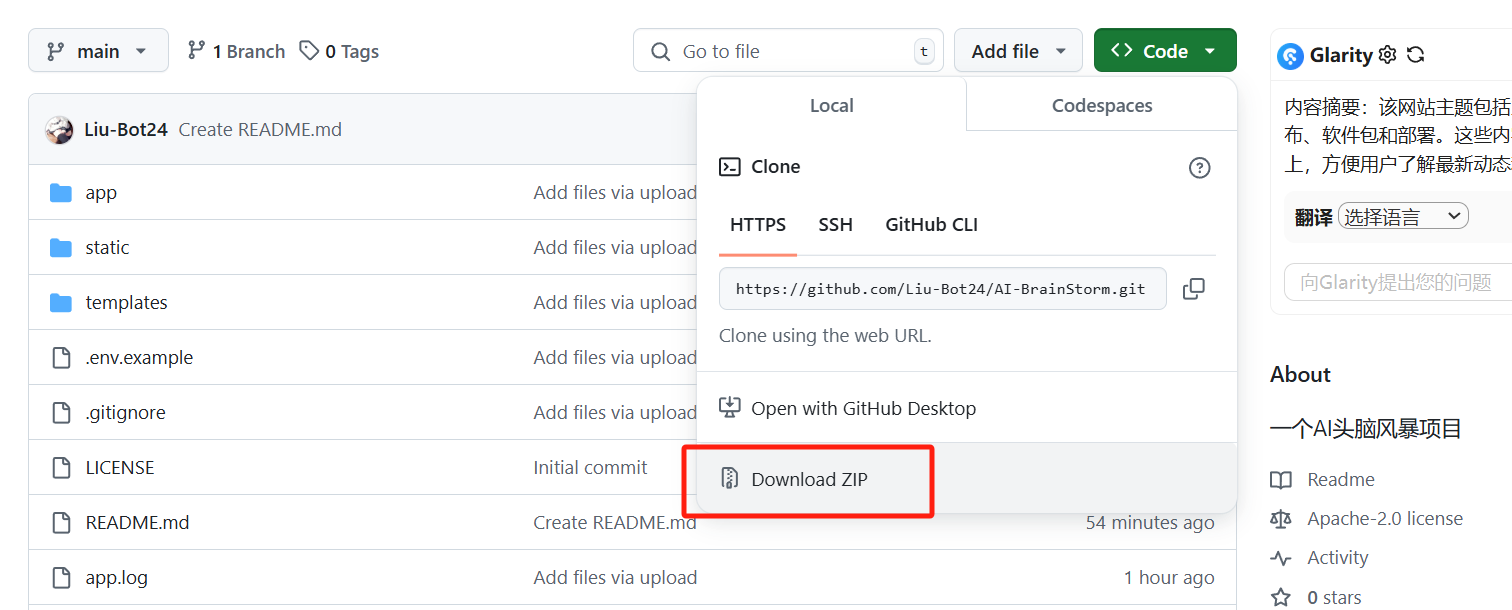
Go to the GitHub page:
https://github.com/Liu-Bot24/AI-BrainStorm
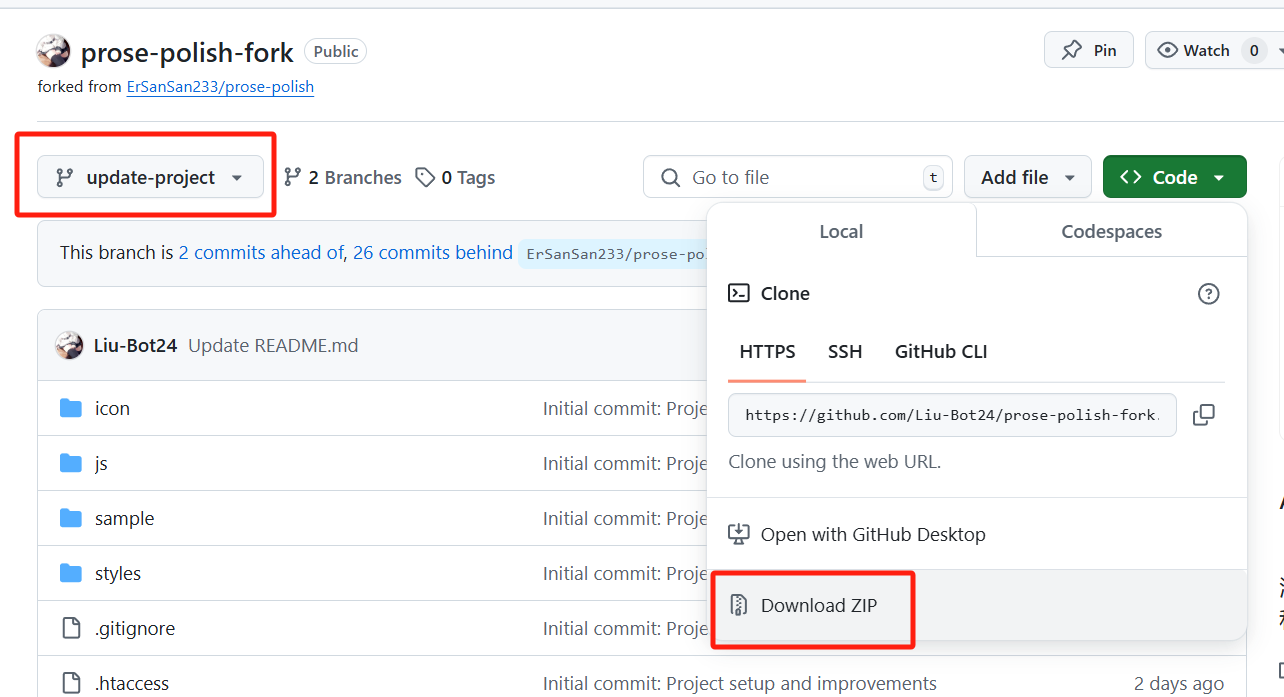
To avoid command line operations, we’ll skip git clone and directly download the ZIP package.
Then, on the left menu of the BaoTa panel, click ‘Files’ to open the file manager, and navigate to this directory: /www/wwwroot/.
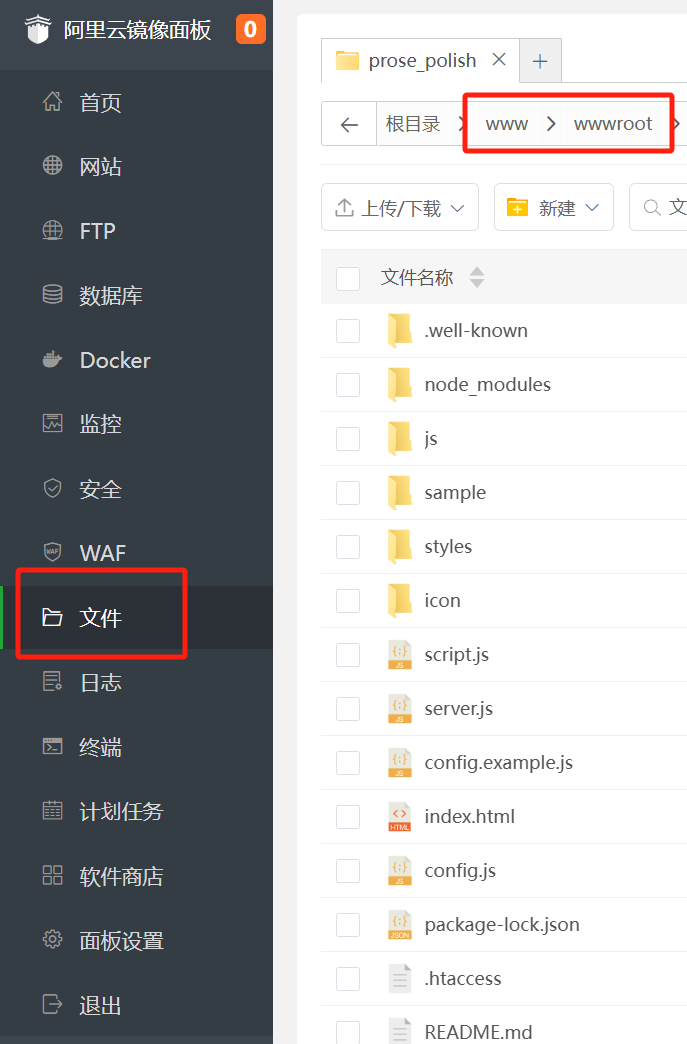
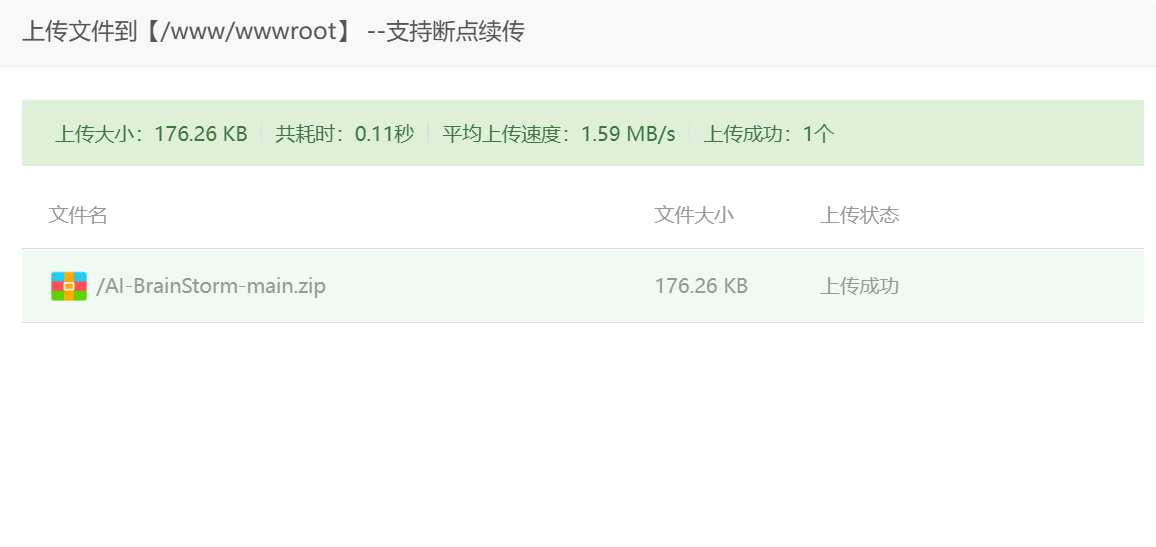
Upload and extract the downloaded archive here.
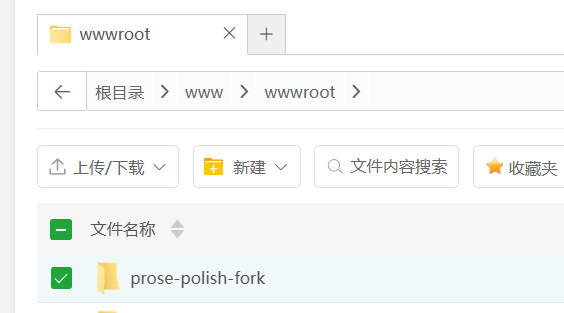
If downloaded from GitHub, the folder should look like this:
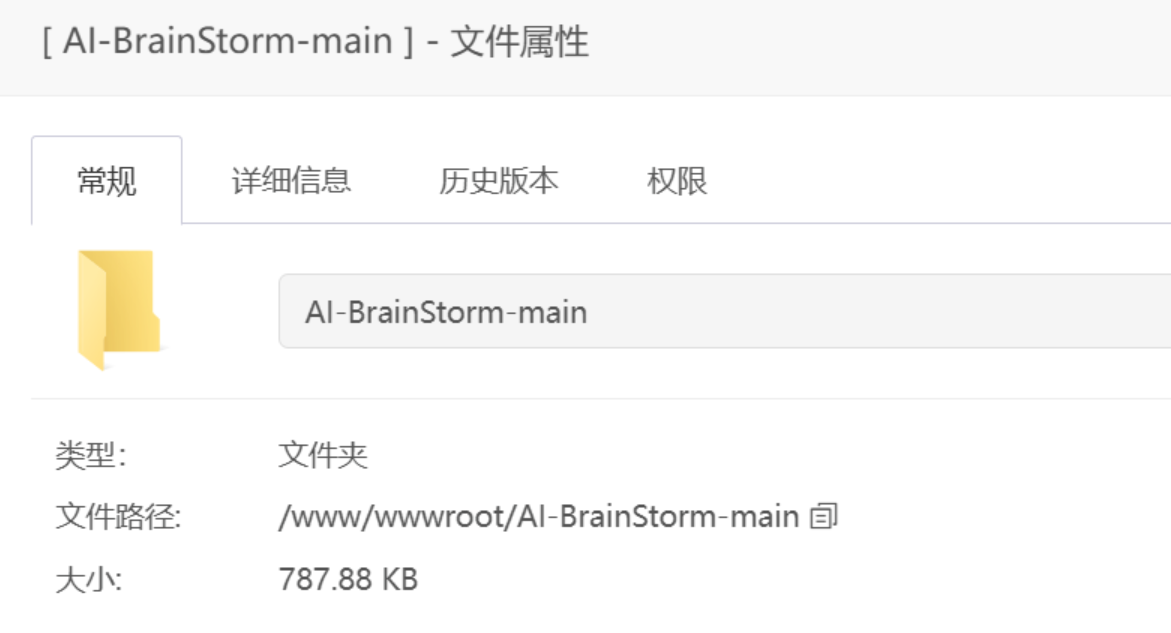
Open this folder in the file manager, modify the .env.example file with your own AI model ID, API KEY, and endpoint URL. (Platforms like Doubao, Zhipu, Tongyi, iFlytek Spark, and DeepSeek offer free credits.) Then rename the .env.example file to .env.

If you change the model, remember to also update the beginning of the main.js file in the /static/js/ folder:
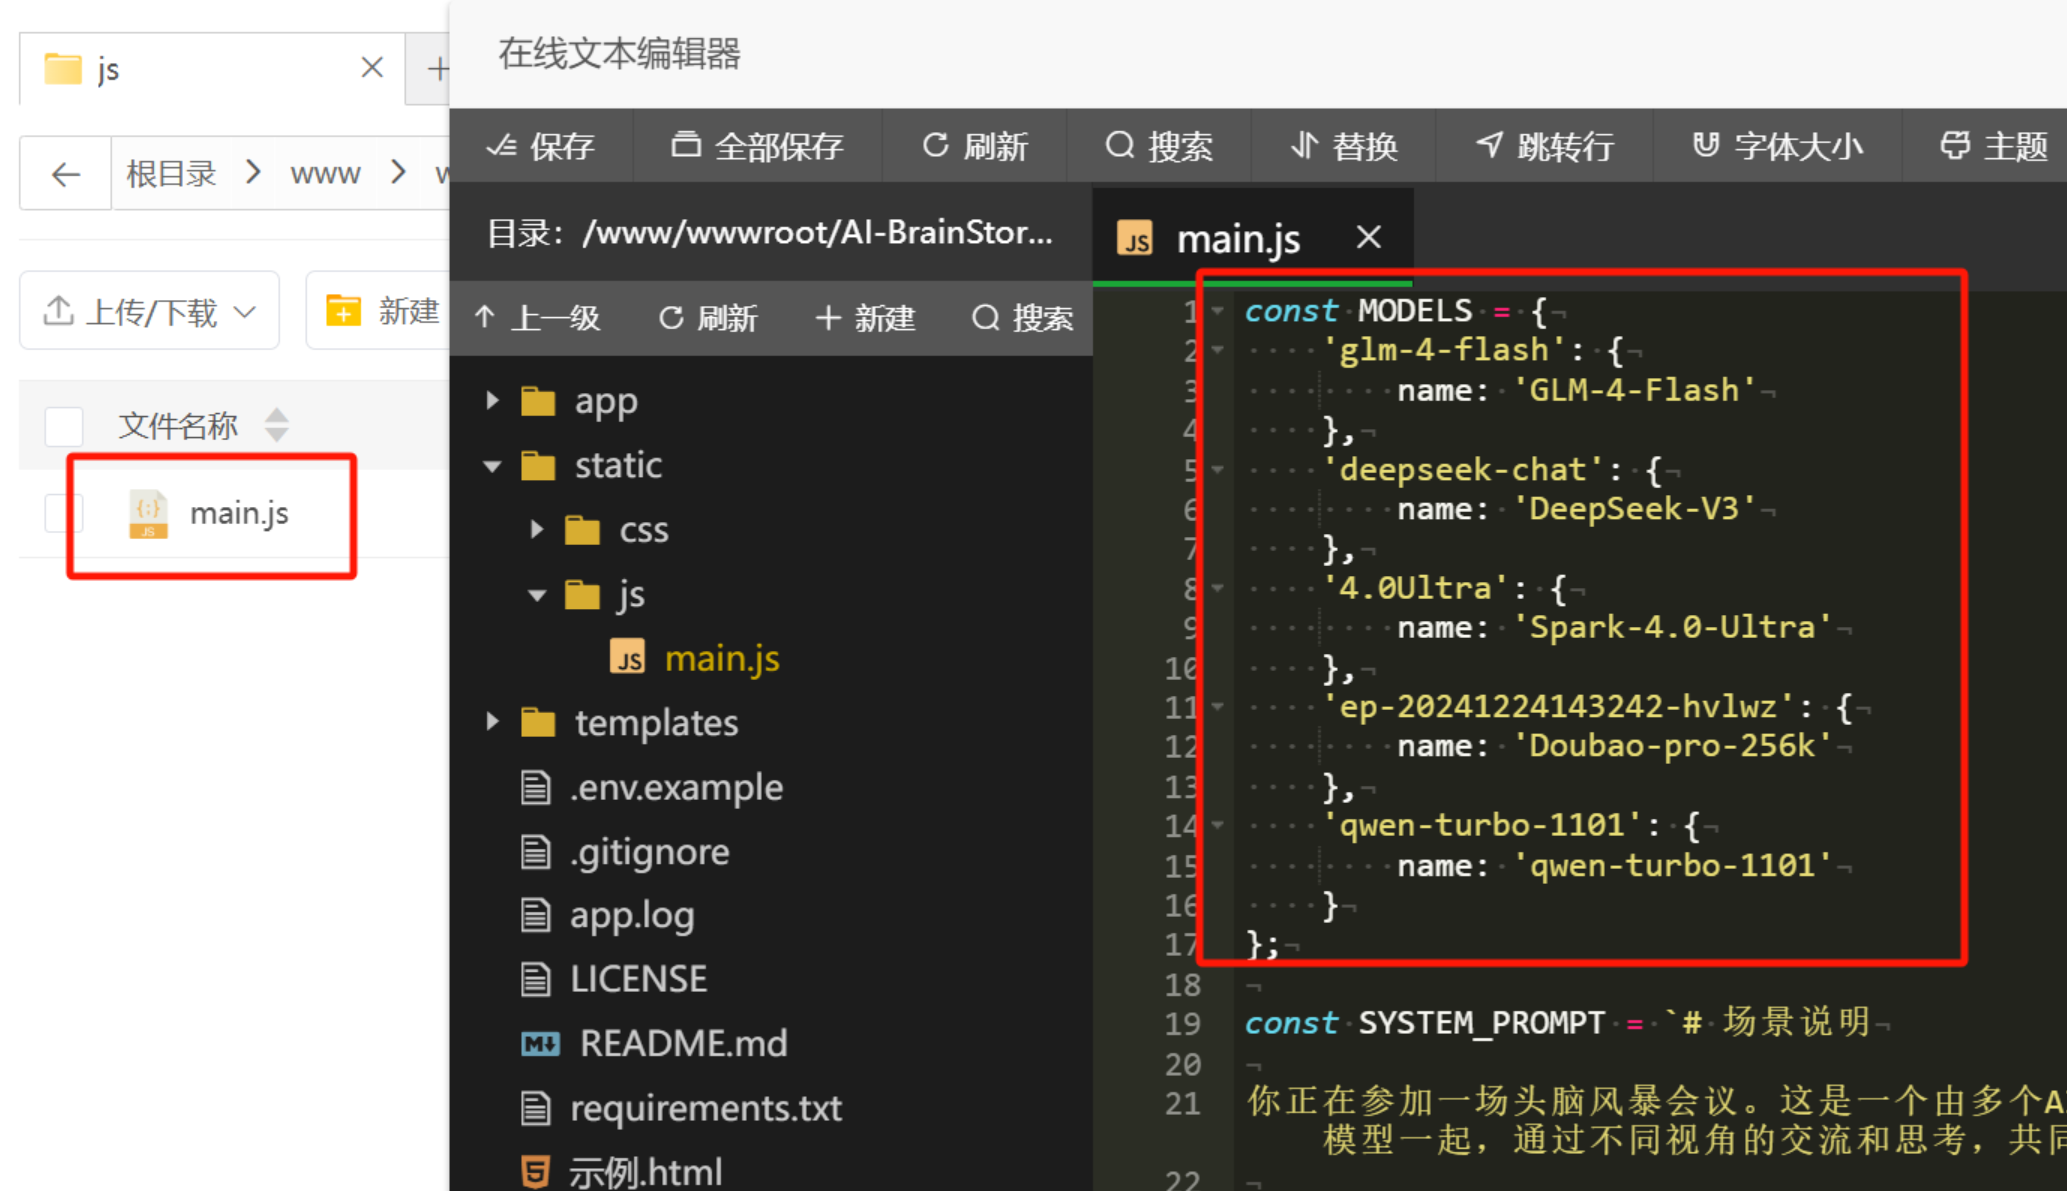
(This looks like code editing, but it’s just renaming files and copy-pasting keys.)
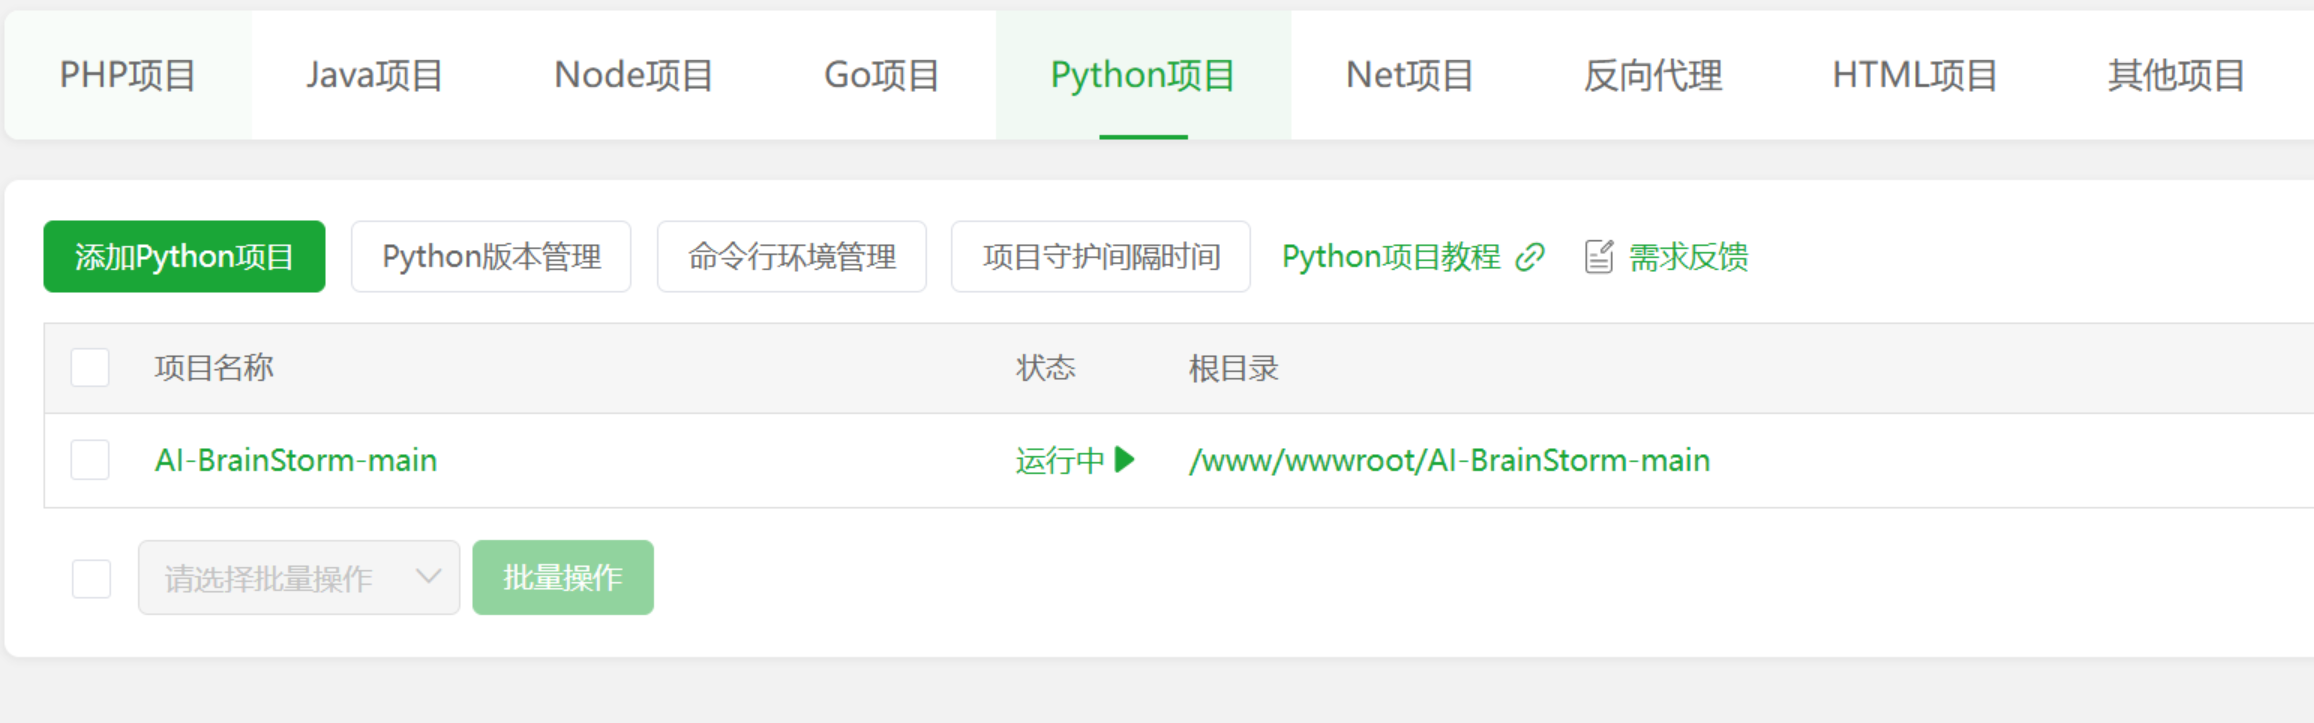
Then, find ‘Website’ in the left menu — ‘Python Project’ — ‘Add Python Project’.
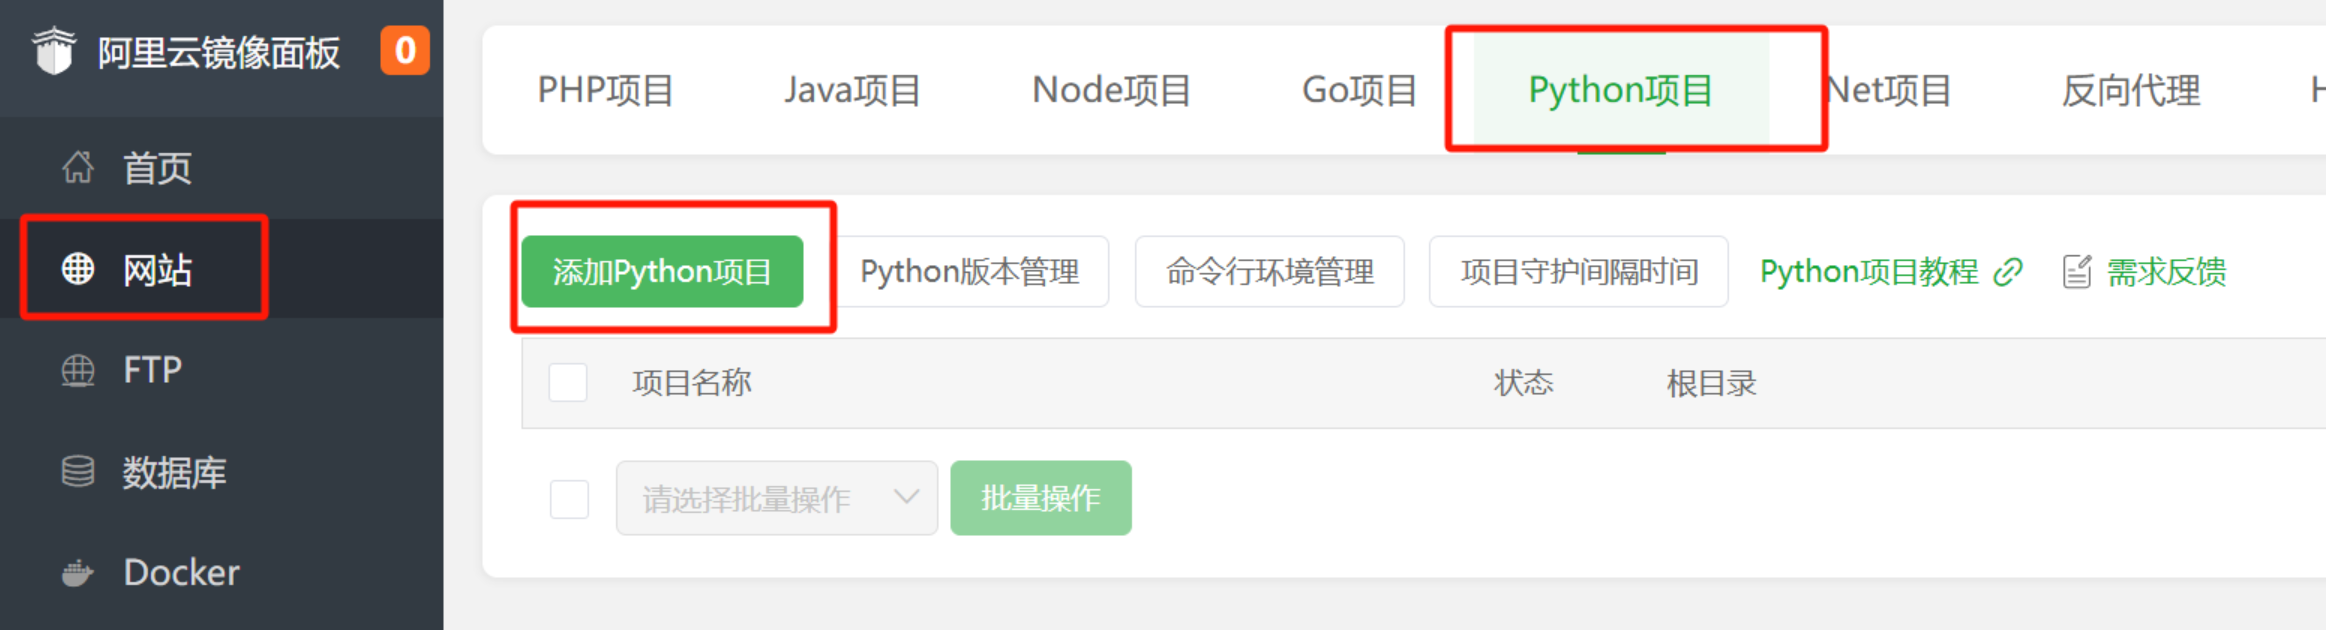
Select the folder of the uploaded files as the project path. The project name will auto-fill. Choose Python version 3.8, select ‘Command line start’ as the start method, and enter the start command:
/www/server/pyporject_evn/AI-BrainStorm-main_venv/bin/python3 -m uvicorn app.main:app --host 0.0.0.0 --port 8000
(Remember to open port 8000 in the firewall.)
Leave environment variables blank, set run user to www, and install dependency packages.
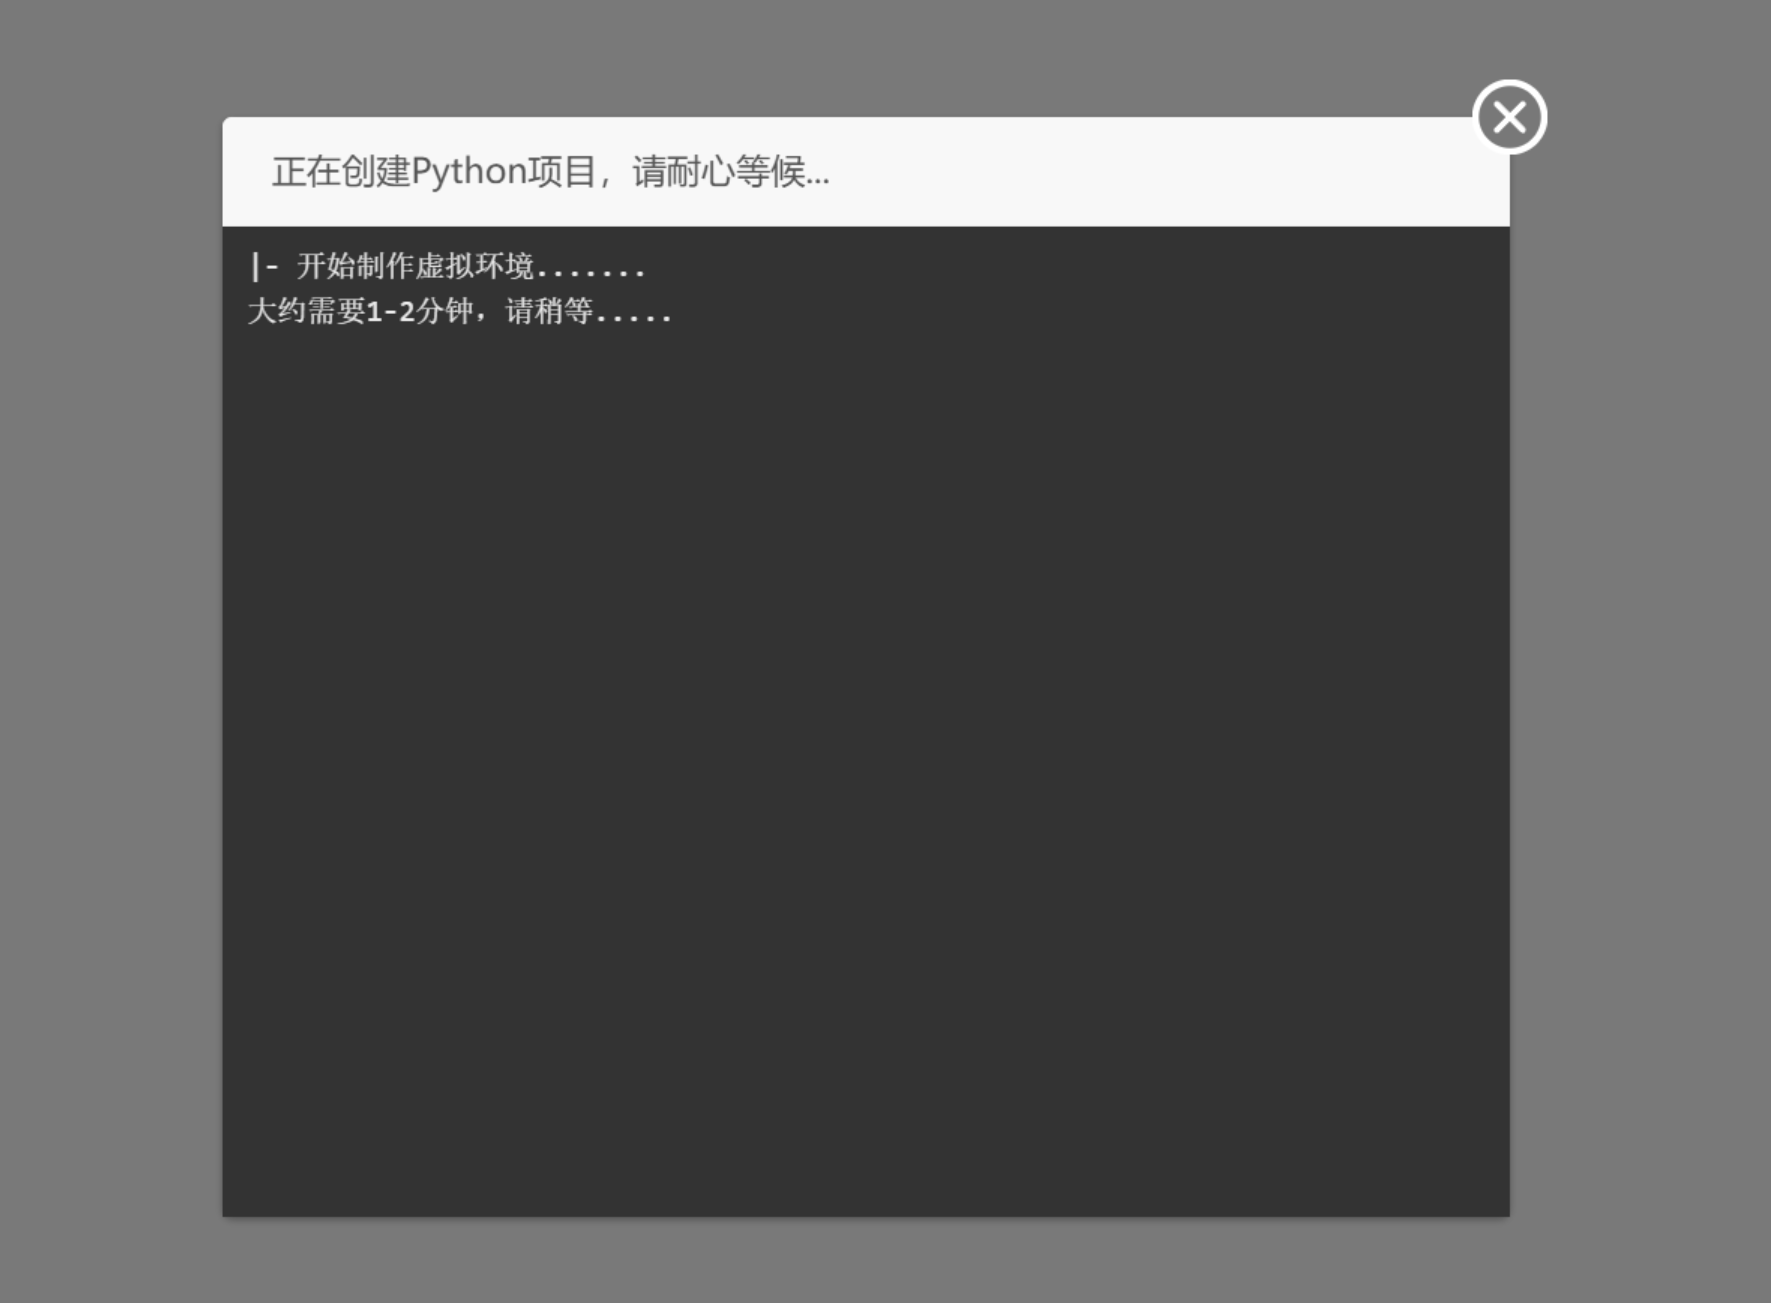
Wait for a while; BaoTa will automatically create a virtual environment and install dependencies.
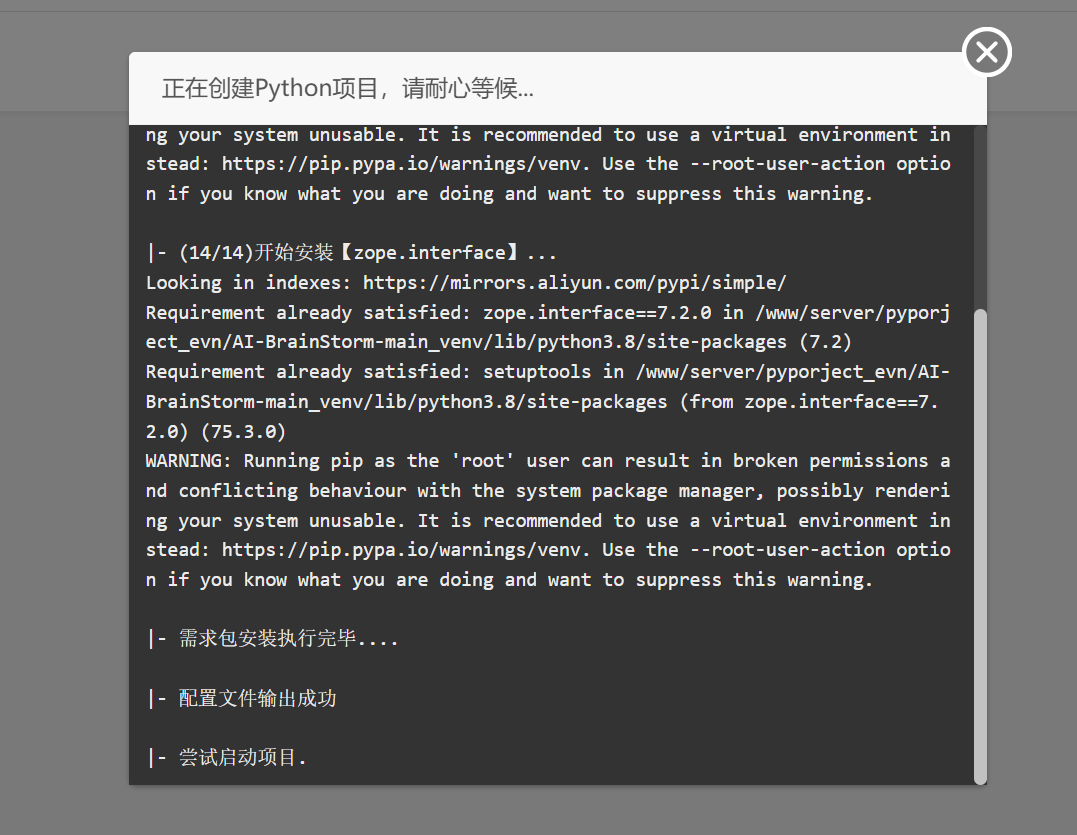
Once done, the project status will automatically change to ‘Running’ (if not, start it manually).
Then, in your browser’s address bar, enter http://your-server-ip:8000/ to open the AI brainstorming page. (If it doesn’t open, the firewall likely hasn’t allowed port 8000.)
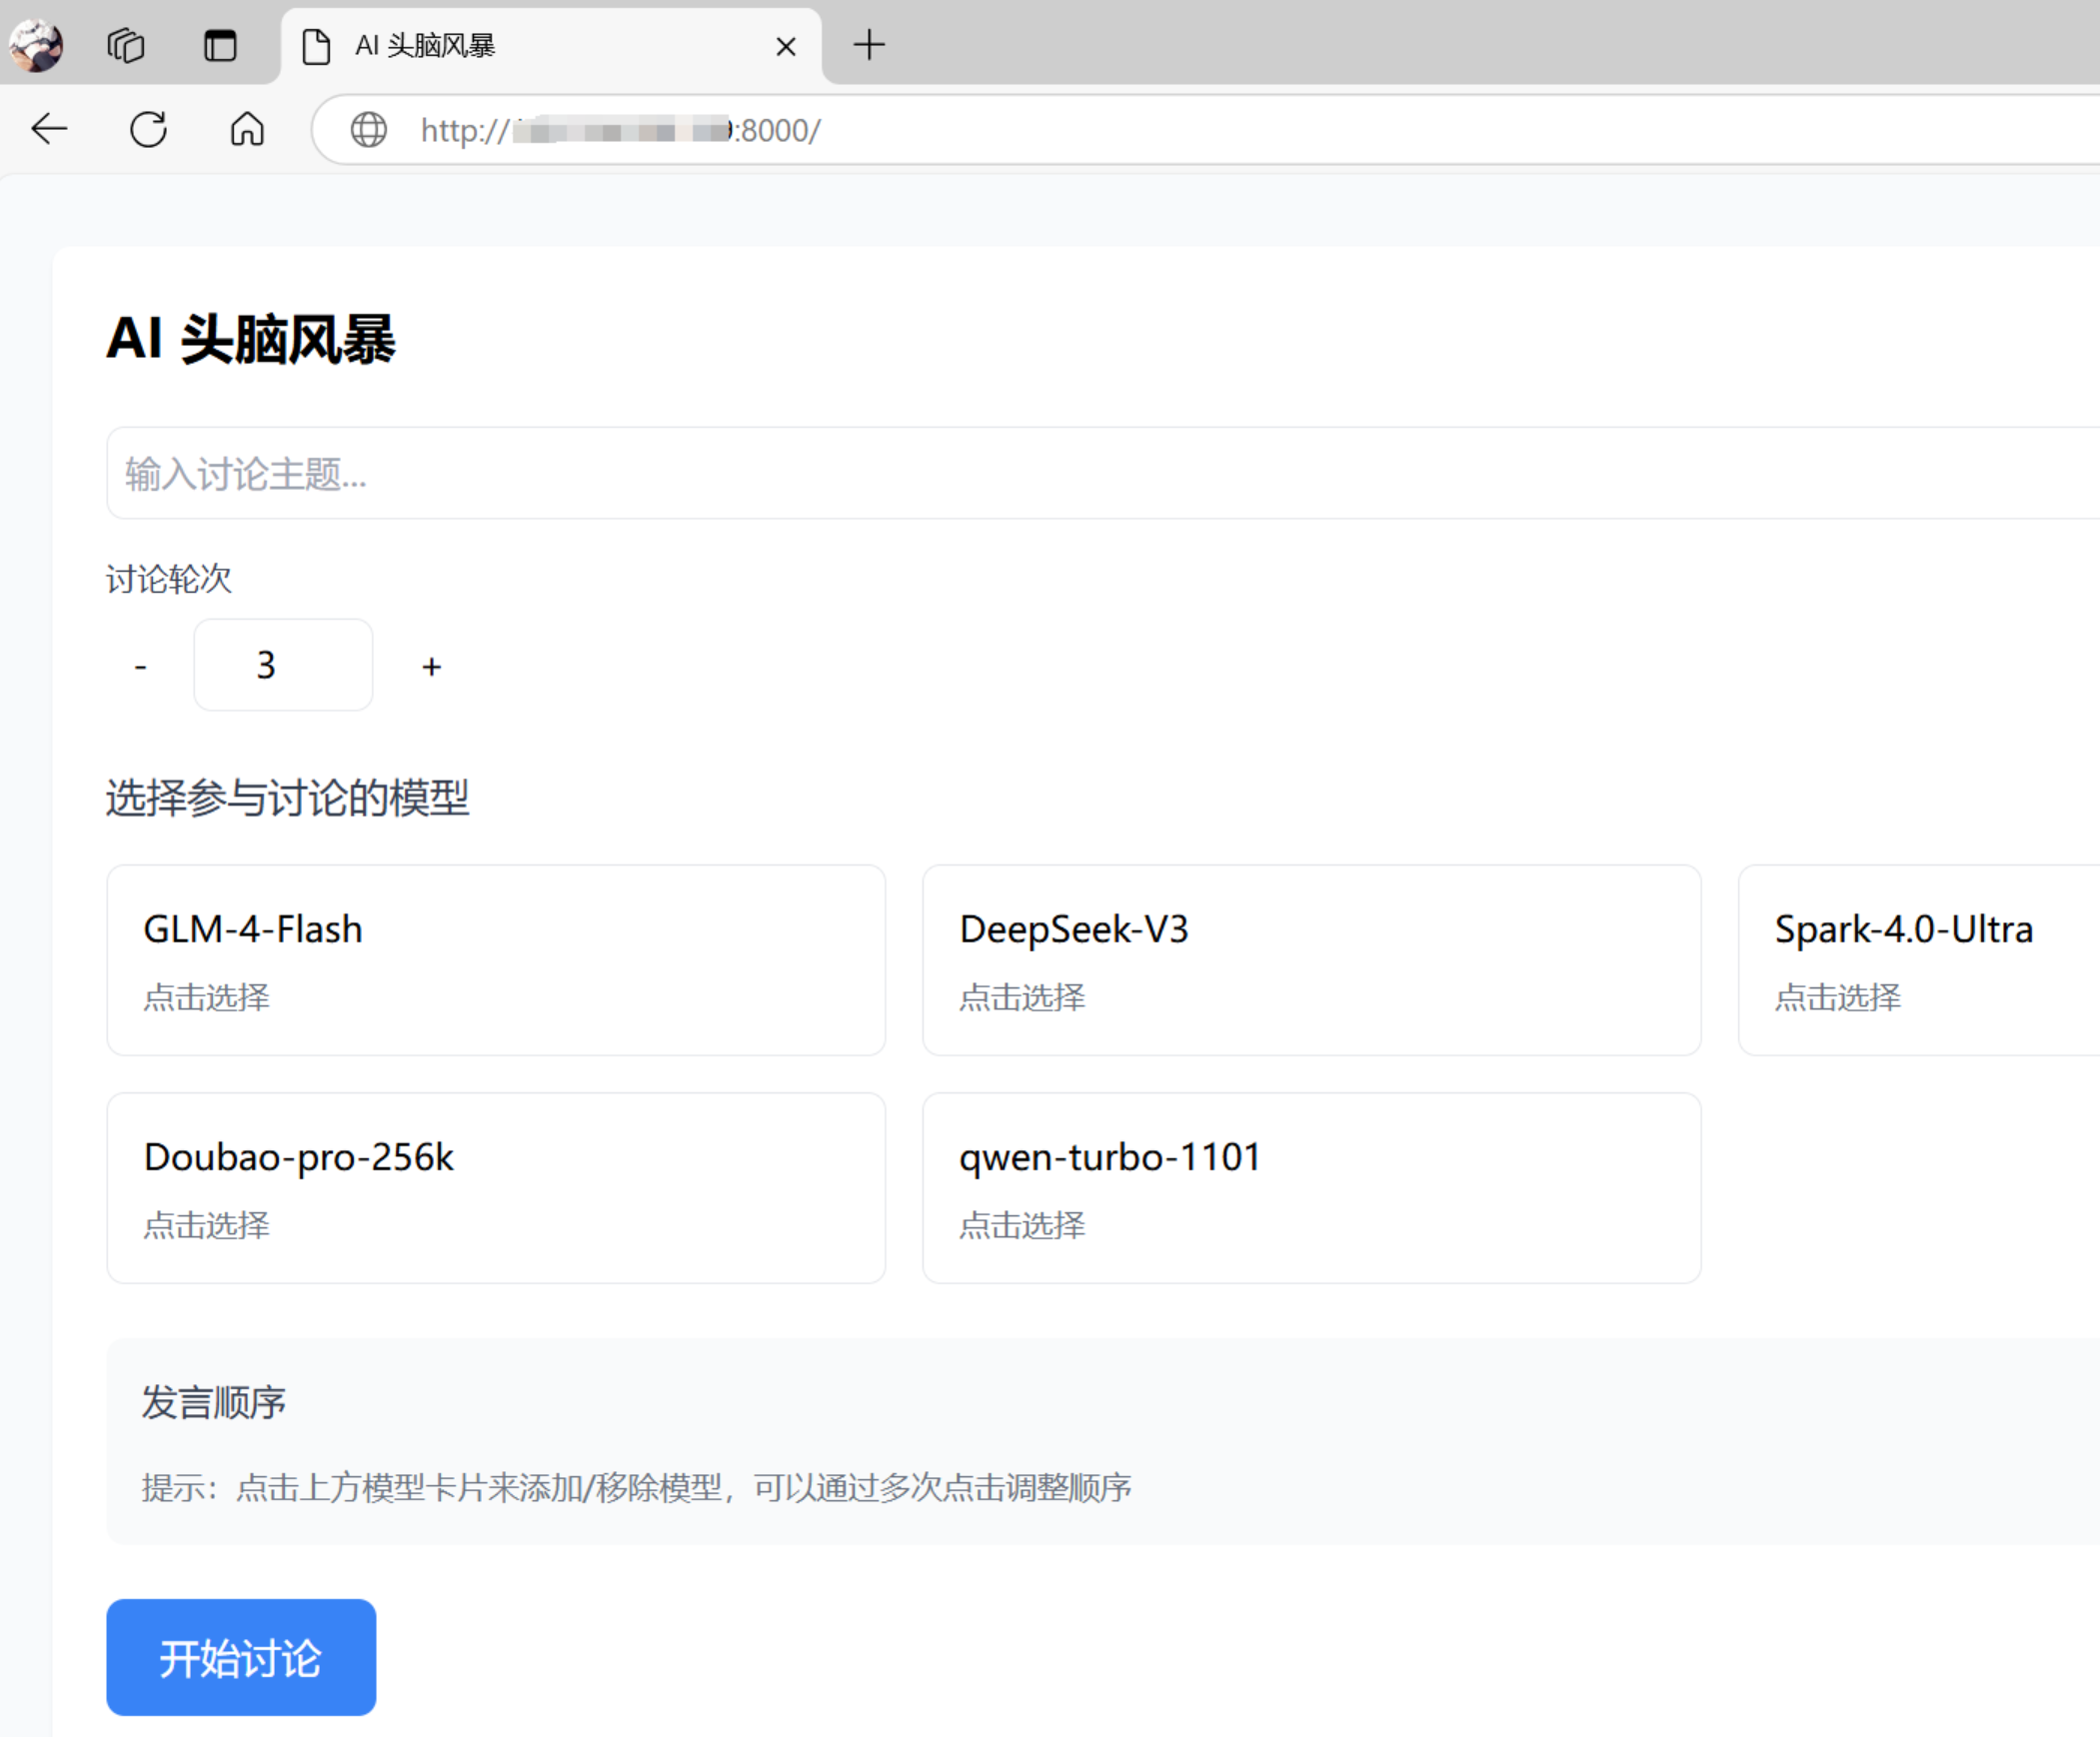
Done! Simple, right?
Now, for today’s card-style AI writing assistant project.
Again, go to the GitHub page:
https://github.com/Liu-Bot24/prose-polish-fork
Download the ZIP package directly.
Note: Select the ‘update-project’ branch; the other branch contains the original version.
Similarly, upload it to /www/wwwroot/ and extract it.
The brainstorming project was a Python project, while this one is based on Node.js, so navigate to ‘Website’ — ‘Node Project’.
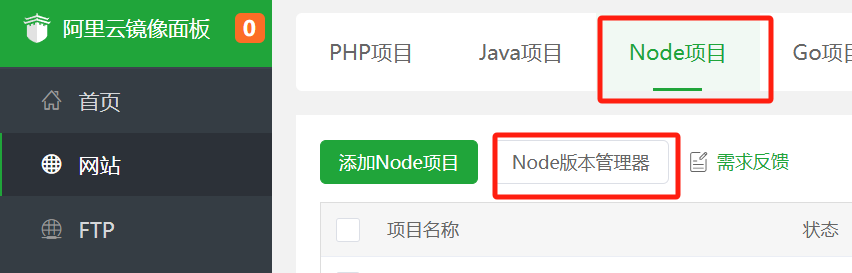
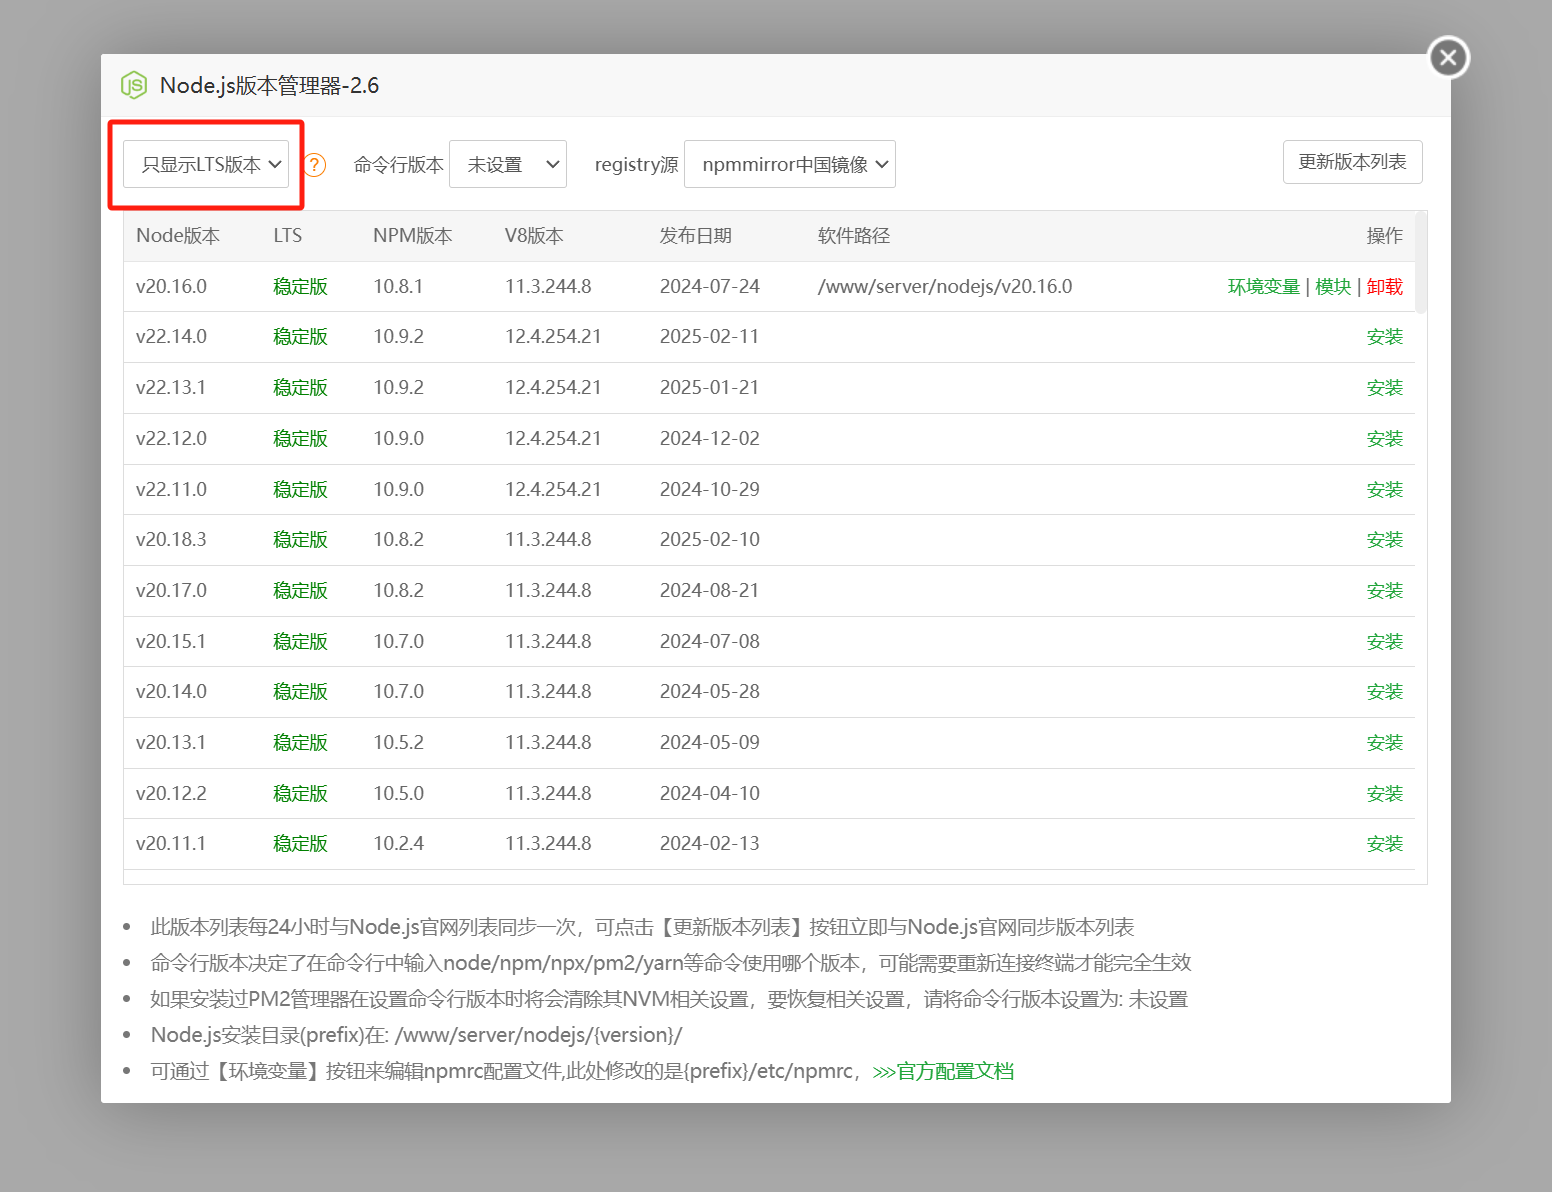
First, go to ‘Node Manager’ and install a recent stable LTS version of Node.
Then add a Node project.
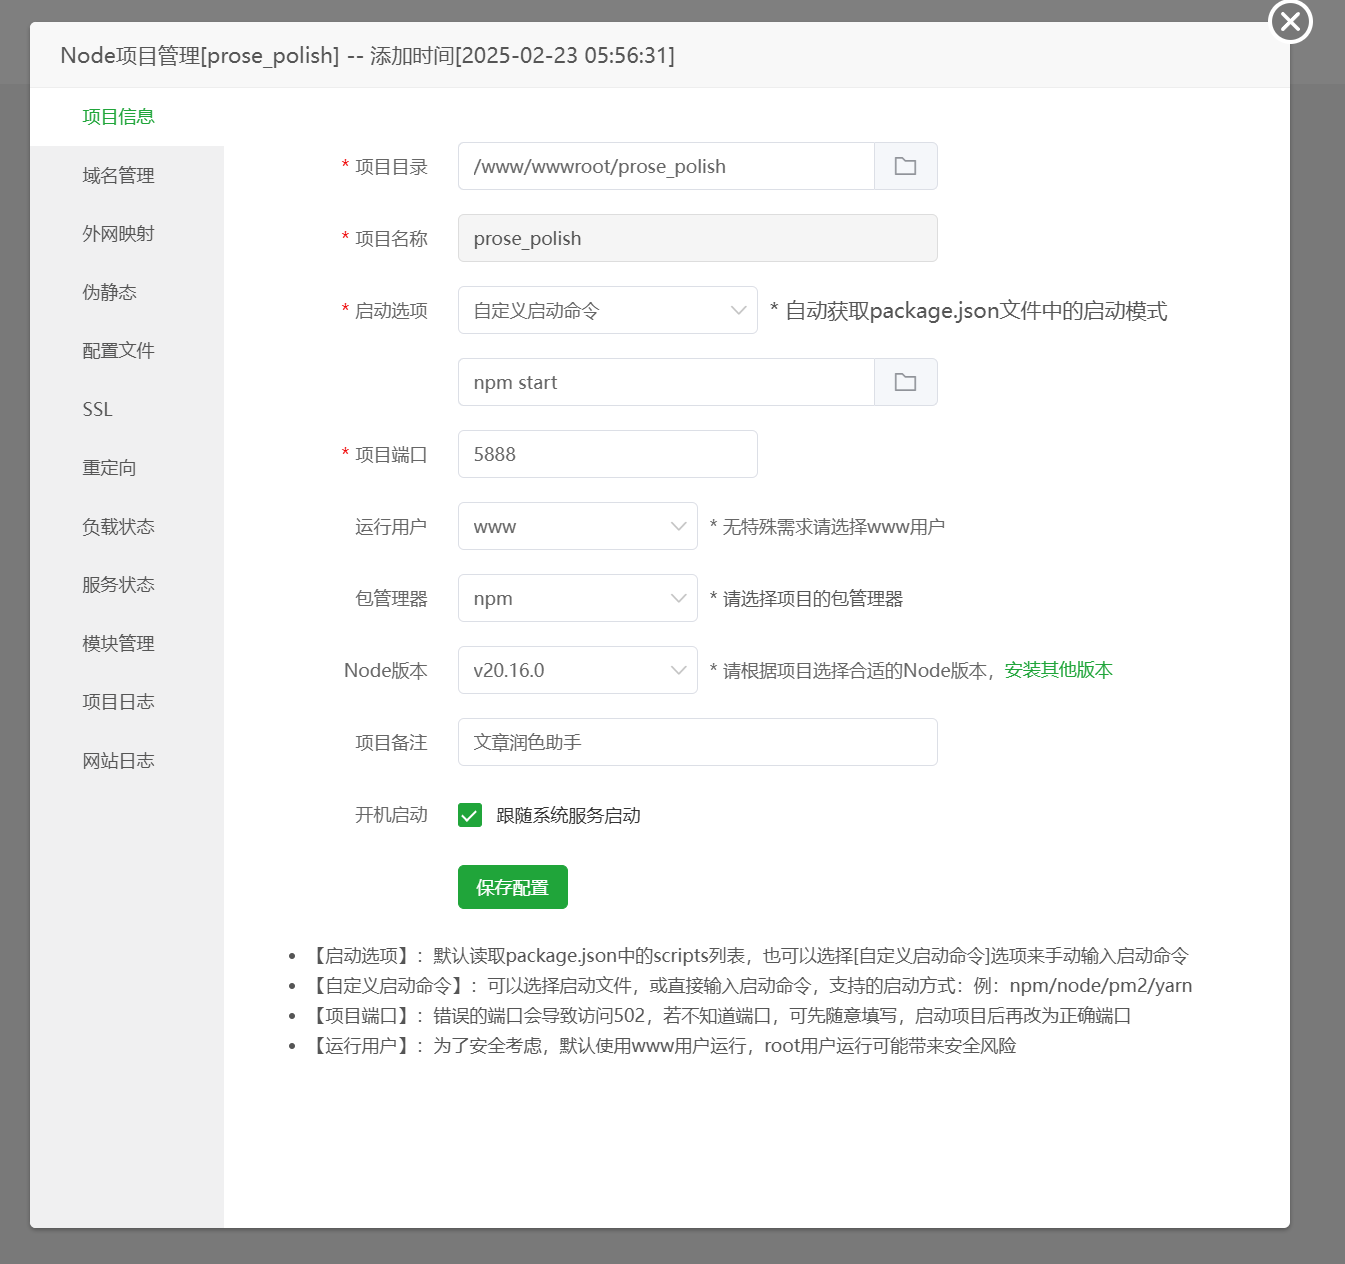
Set the project directory to the extracted folder.
Customize the project name as needed.
For start option, select ‘Custom start command’ and enter npm start.
Set port to 5888.
(Similarly, you need to open this port in firewall settings; I use this port in the code, and if you change it, you must update the code as well.)
Set run user to www, package manager to npm, and Node version to the one you installed earlier.
Save the settings, wait for BaoTa to finish automatic setup, and the project will run automatically.

Next, visit http://your-server-ip:5888 to open the web interface.
Note: You need to go to the project directory, find the config.example.js file, fill in your API key, save it, and rename the file to config.js for normal AI functionality.
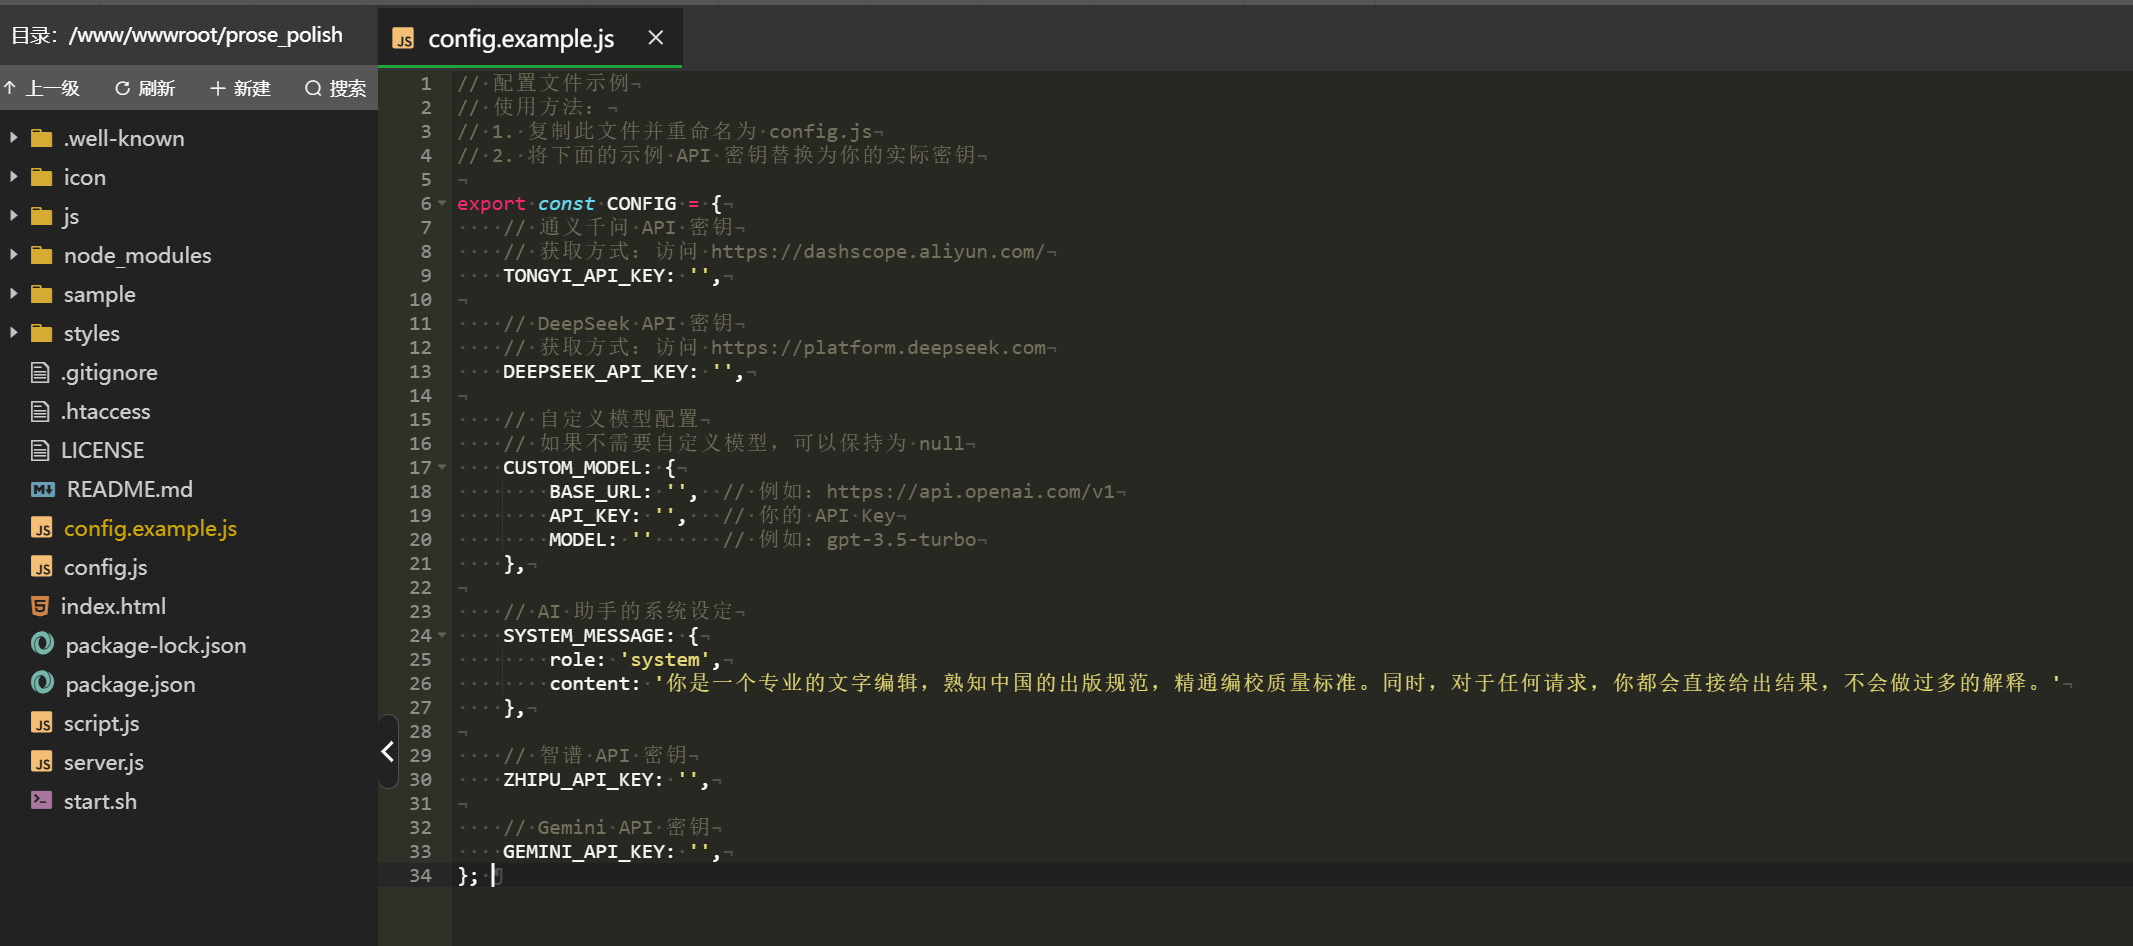
Here are the interfaces I use; if you want to continue using them, get keys from the respective platforms:
For Tongyi, get the API key from the Alibaba Cloud Bailian platform; the model used is qwen-max-2025-01-25, with 1 million free tokens;
For DeepSeek, using the SiliconFlow interface, get the API key from SiliconFlow;
(The methods for obtaining API keys for the above two platforms are mentioned in What to do when DeepSeek servers are always busy? Rather than wait, try reviving your chat via API);
For Zhipu, using the free glm-4-flash model, get the API key directly from the Zhipu Open Platform official website;
For GEMINI, the API key is a bit more complicated; it requires a US IP. Go to Google AI Studio (https://aistudio.google.com/apikey) to get it. I also use the free model, gemini-2.0-flash.
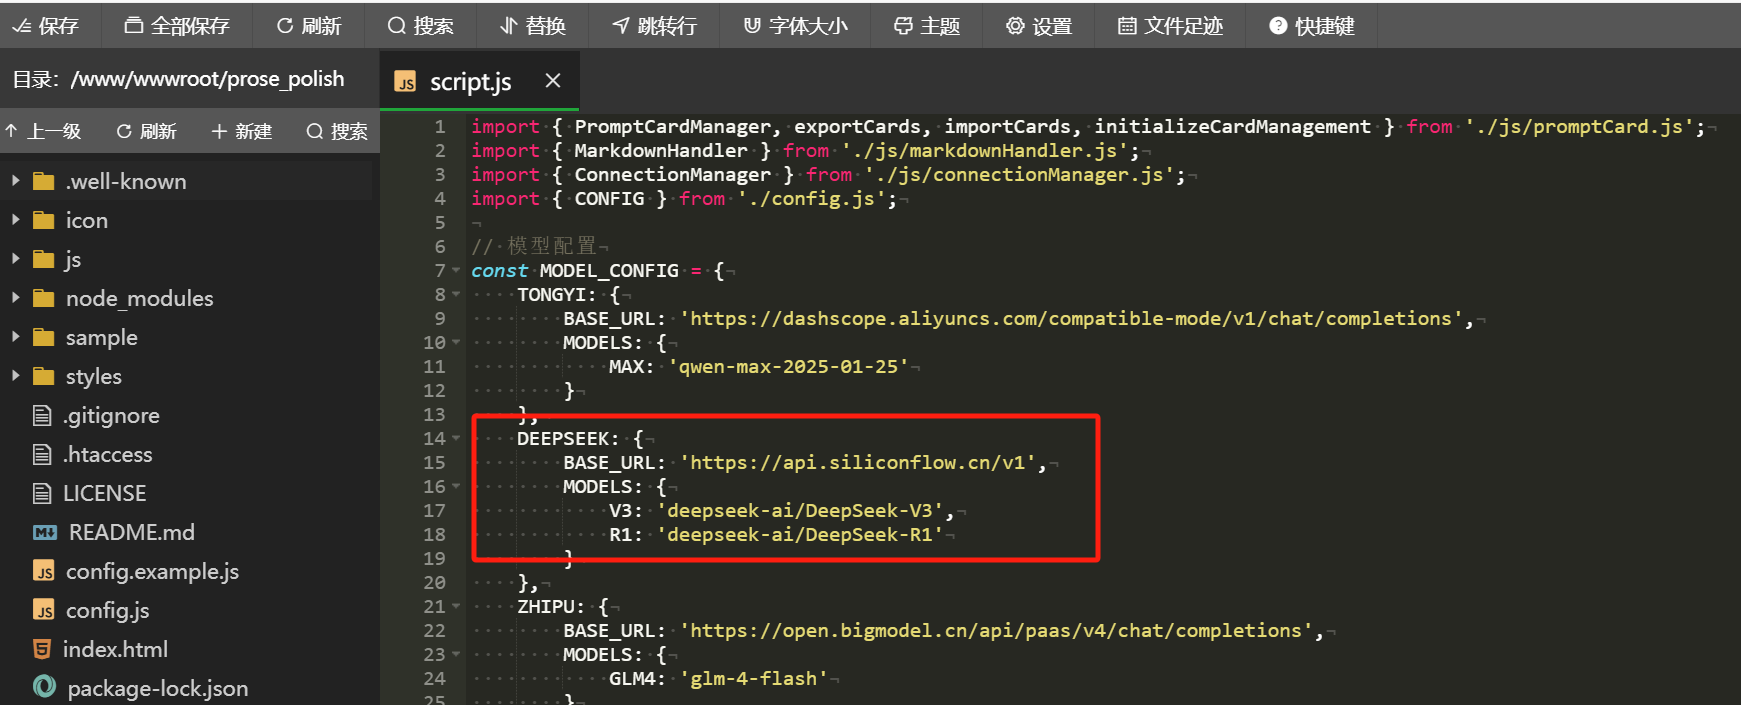
You can also modify the api’s base_url in the script.js file. For example, if you want to switch DeepSeek’s API back to the official one, just modify the red-boxed section below:
Change the base_url to https://api.deepseek.com/v1, and change the V3 and R1 models to deepseek-chat and deepseek-reasoner, respectively.
If you want to completely switch to your preferred AI, it also involves front-end modifications. I suggest using Cursor or Trae to let them help you make one-click changes.
Next, let’s talk about the BaoTa panel.
If you have a Linux server, you can directly go to the BaoTa panel’s official website:
https://www.bt.cn/new/download.html
Use SSH with this online installation tool for a one-click install.
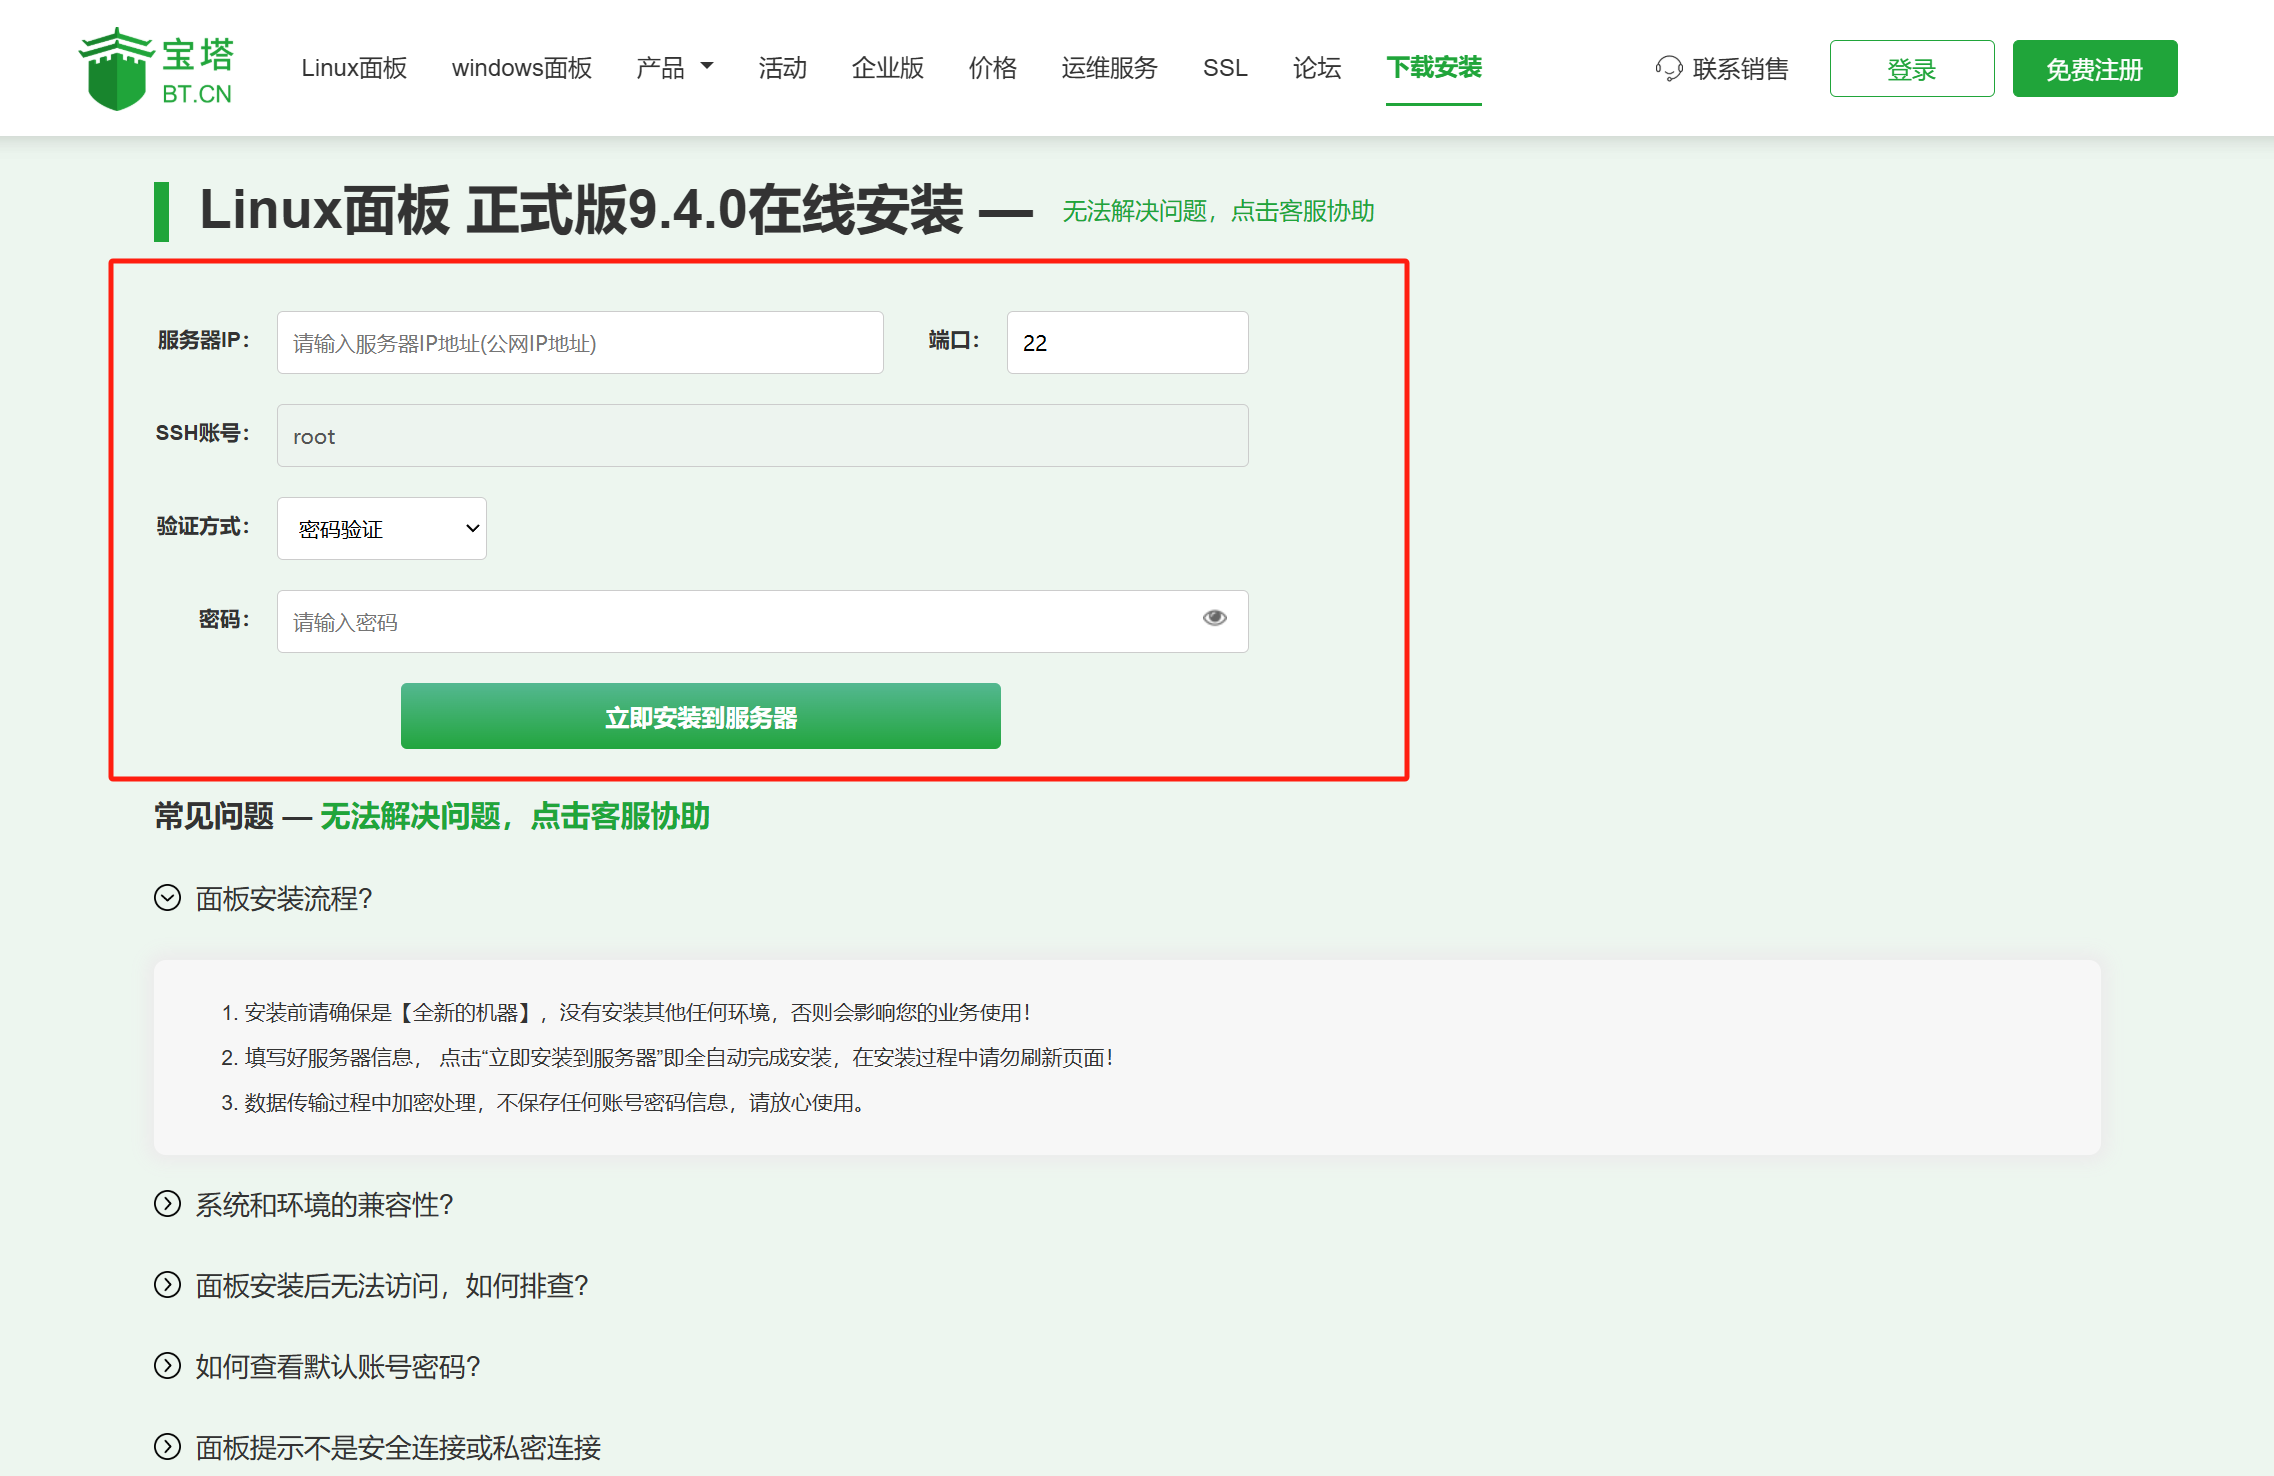
The official page also has FAQs.
They also have a Windows version of the panel, but I haven’t used it, so you’ll need to explore it yourself.
There’s also a quicker method: deploy it directly when purchasing the server.
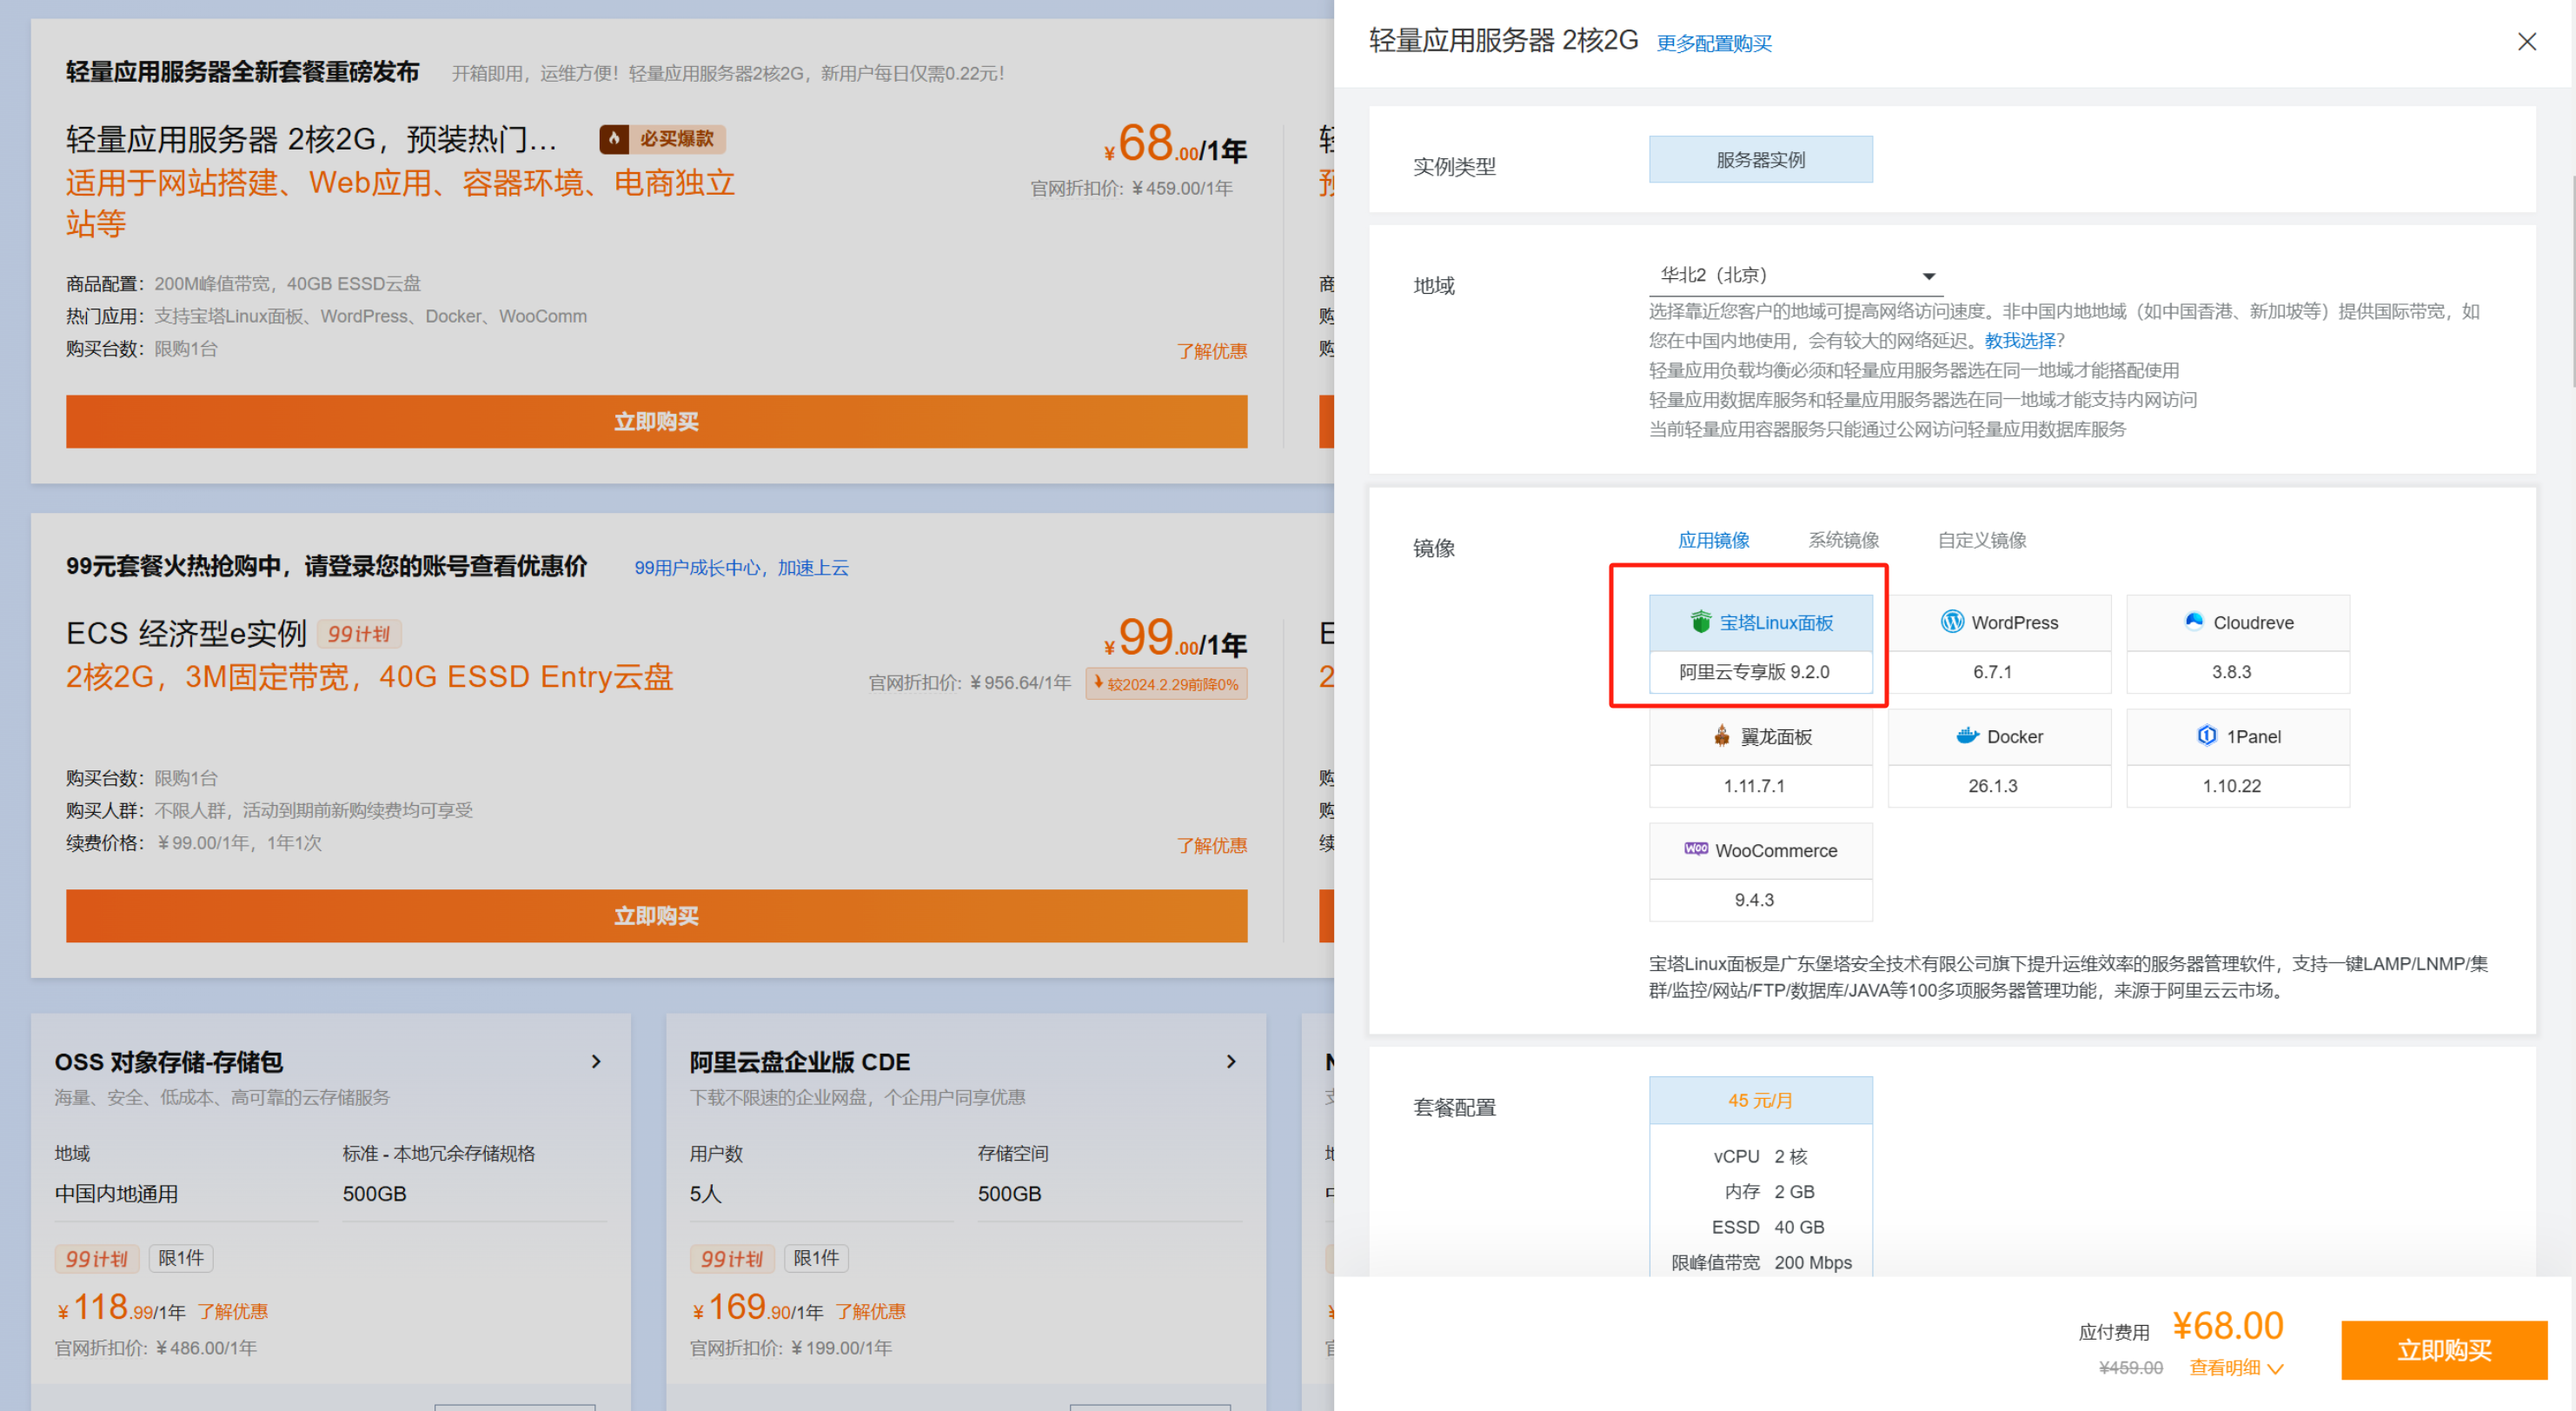
Most mainstream cloud servers support direct deployment of the BaoTa panel during purchase. Taking Alibaba Cloud as an example:
https://www.aliyun.com/minisite/goods?userCode=r18u1tal
The most commonly purchased are the lightweight application server and the ECS economy instance e, both 2G servers, perfectly sufficient for hosting an API web application.
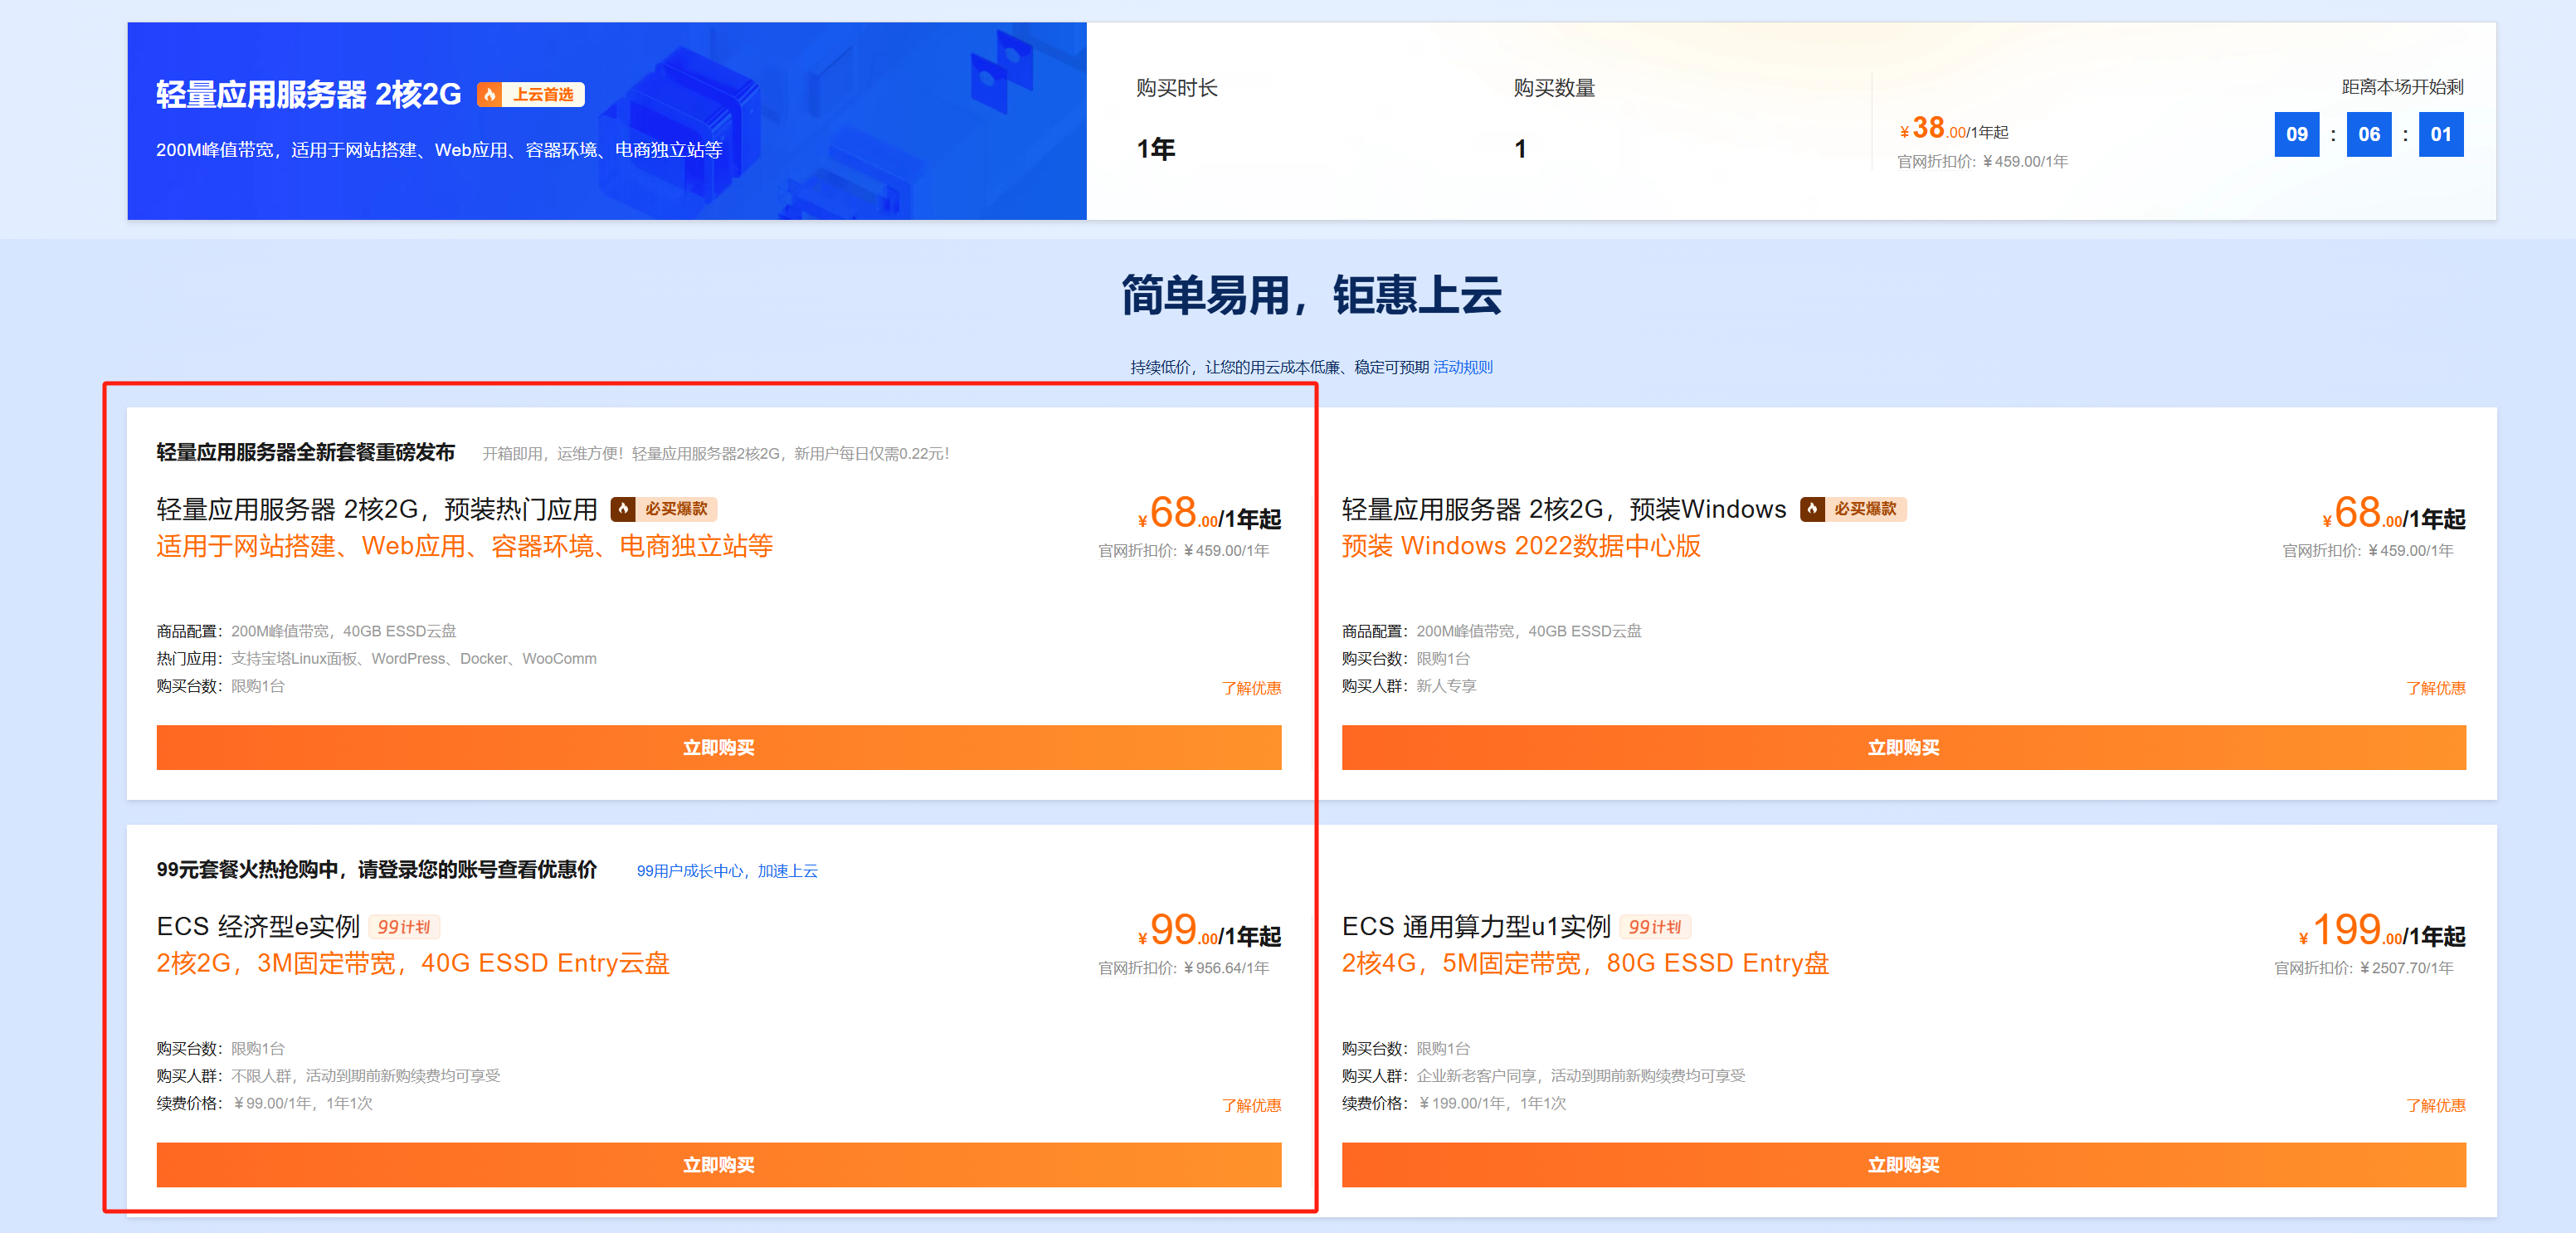
These two have similar performance. The difference is that the 68 yuan one’s renewal price increases the next year, while the 99 yuan one’s renewal price remains the same. Choose the former for annual disposal, and the latter for long-term use.
If you choose the lightweight application server, the method to deploy the BaoTa panel is:
During checkout, select the BaoTa panel image from the application images.
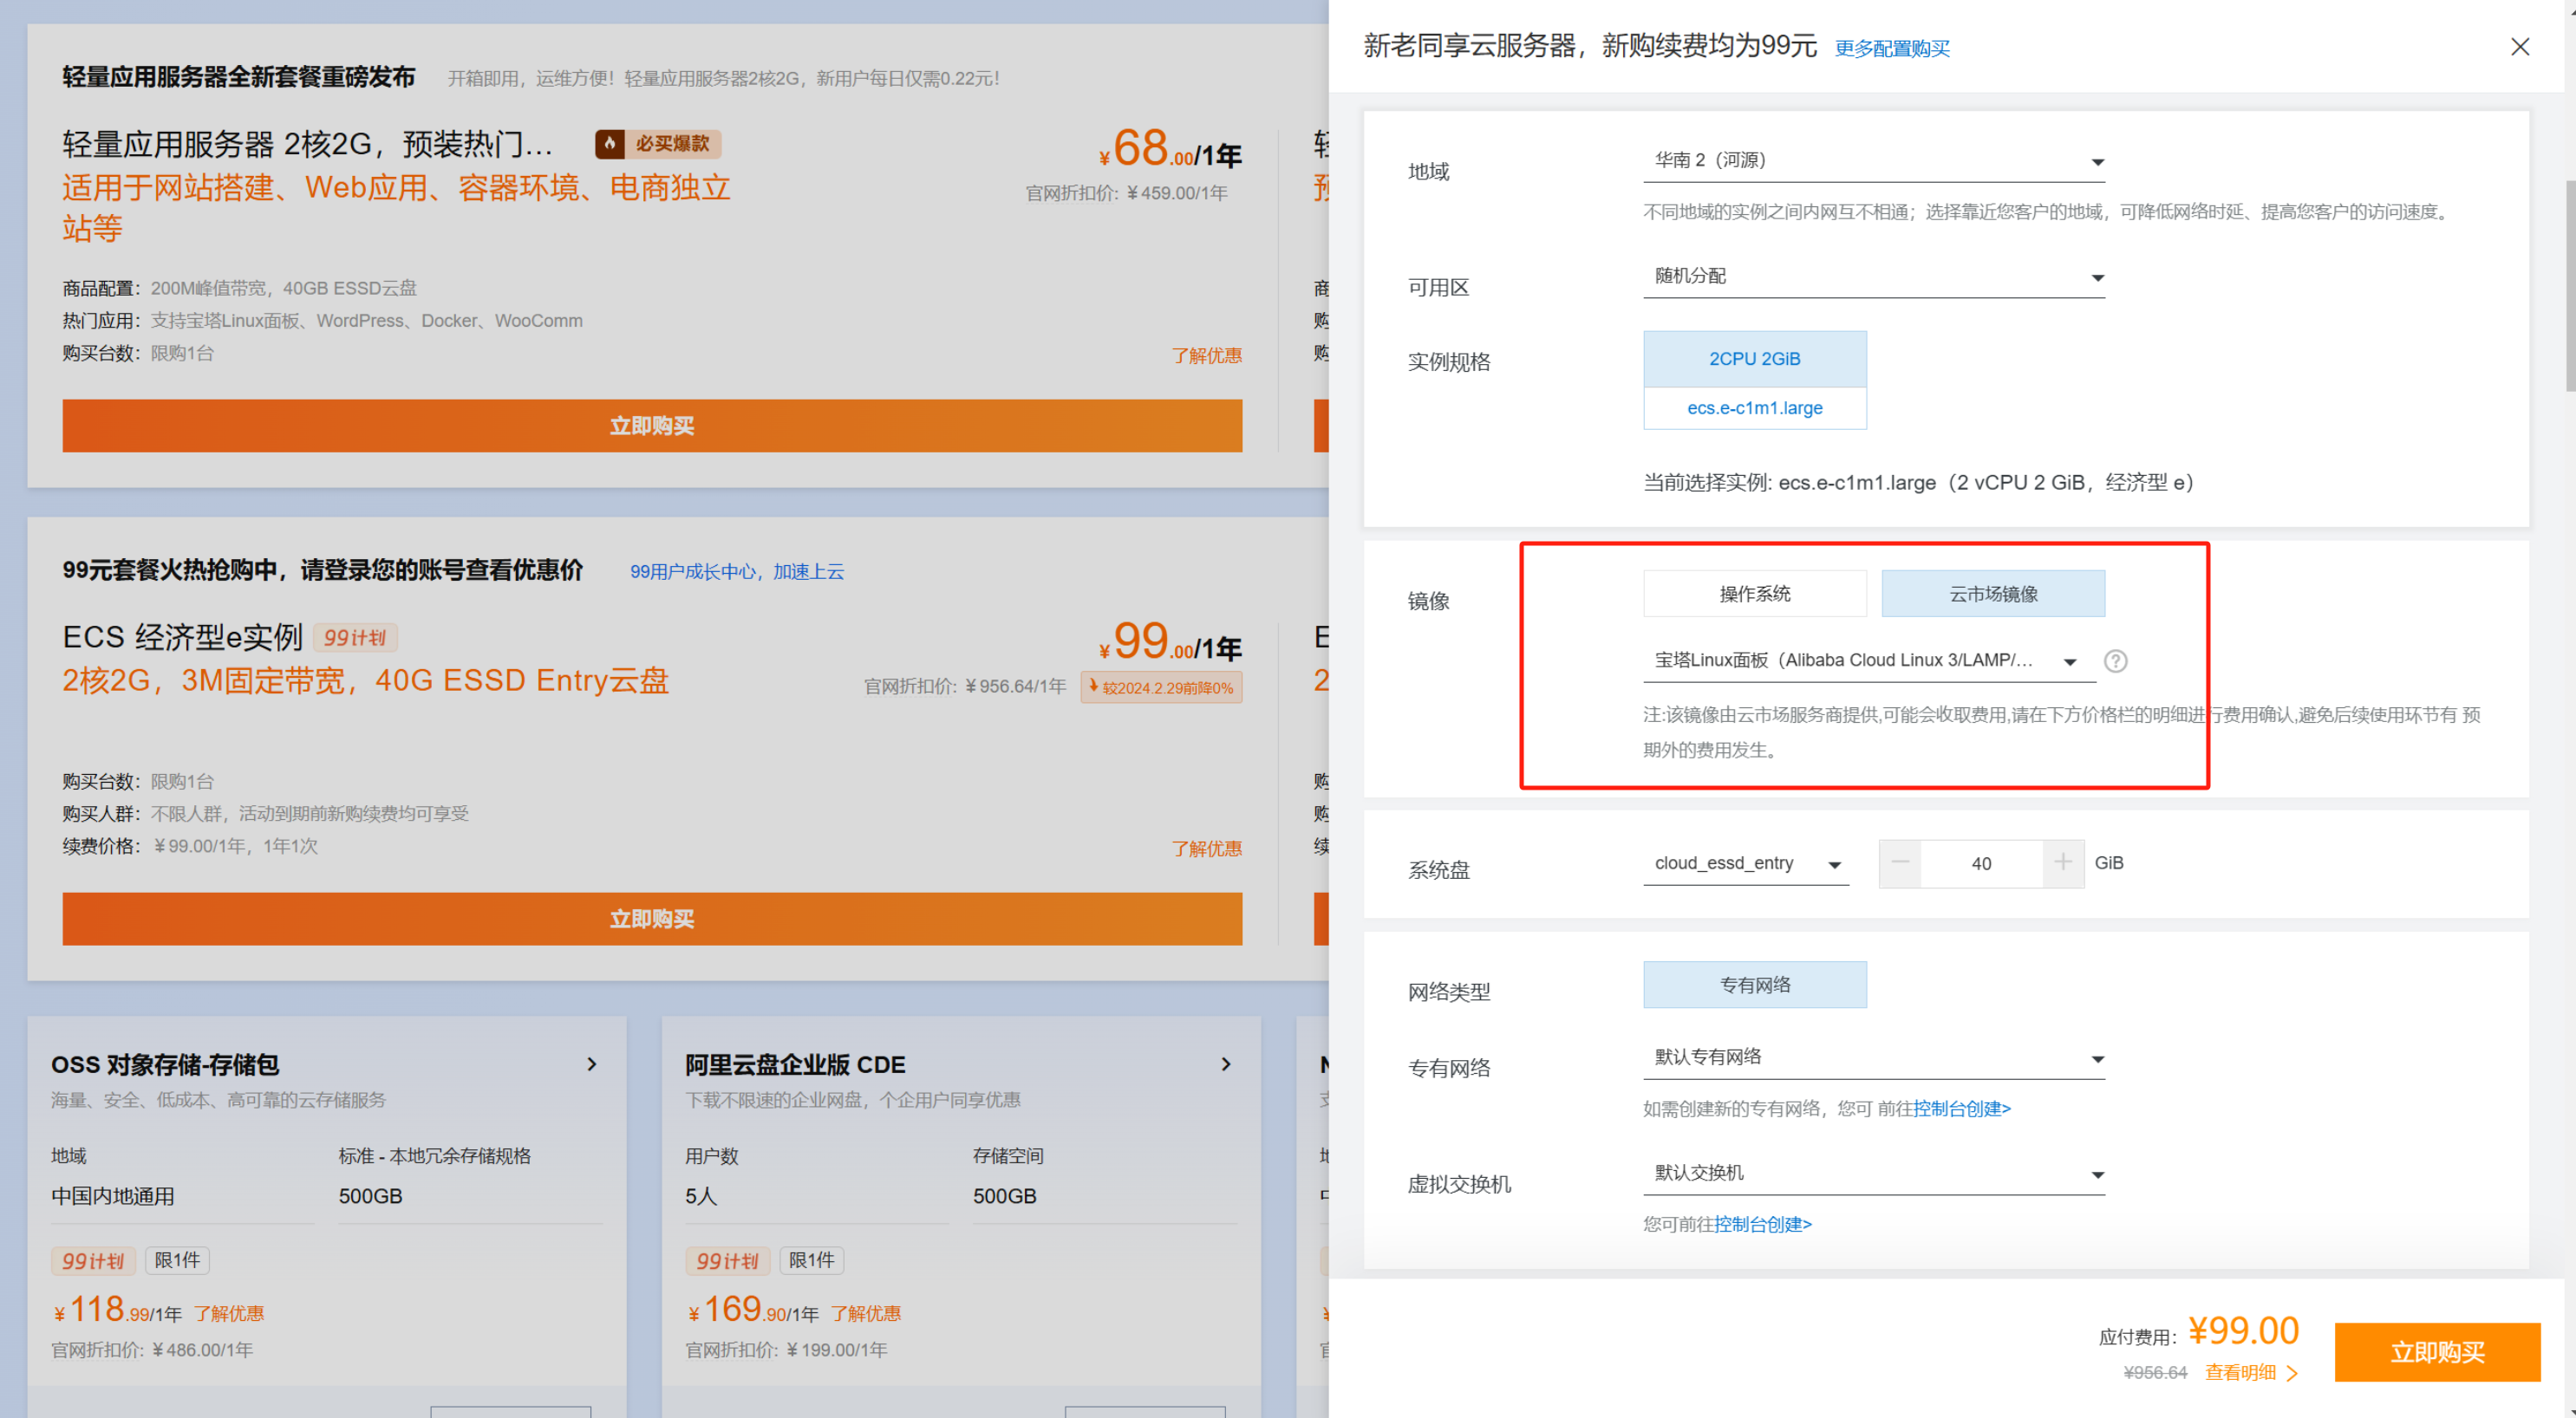
If you choose the ECS server, deploying the BaoTa panel is:
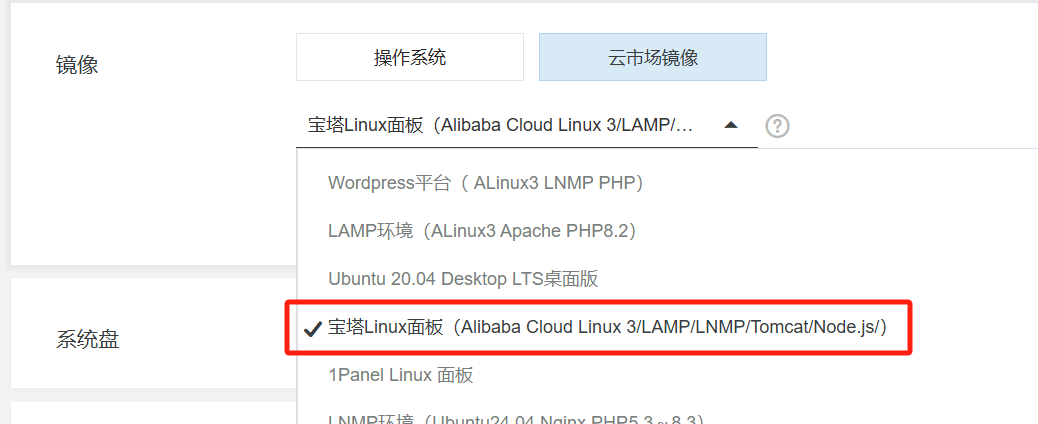
During checkout, switch the image to the cloud market image, then select BaoTa panel from the dropdown menu.
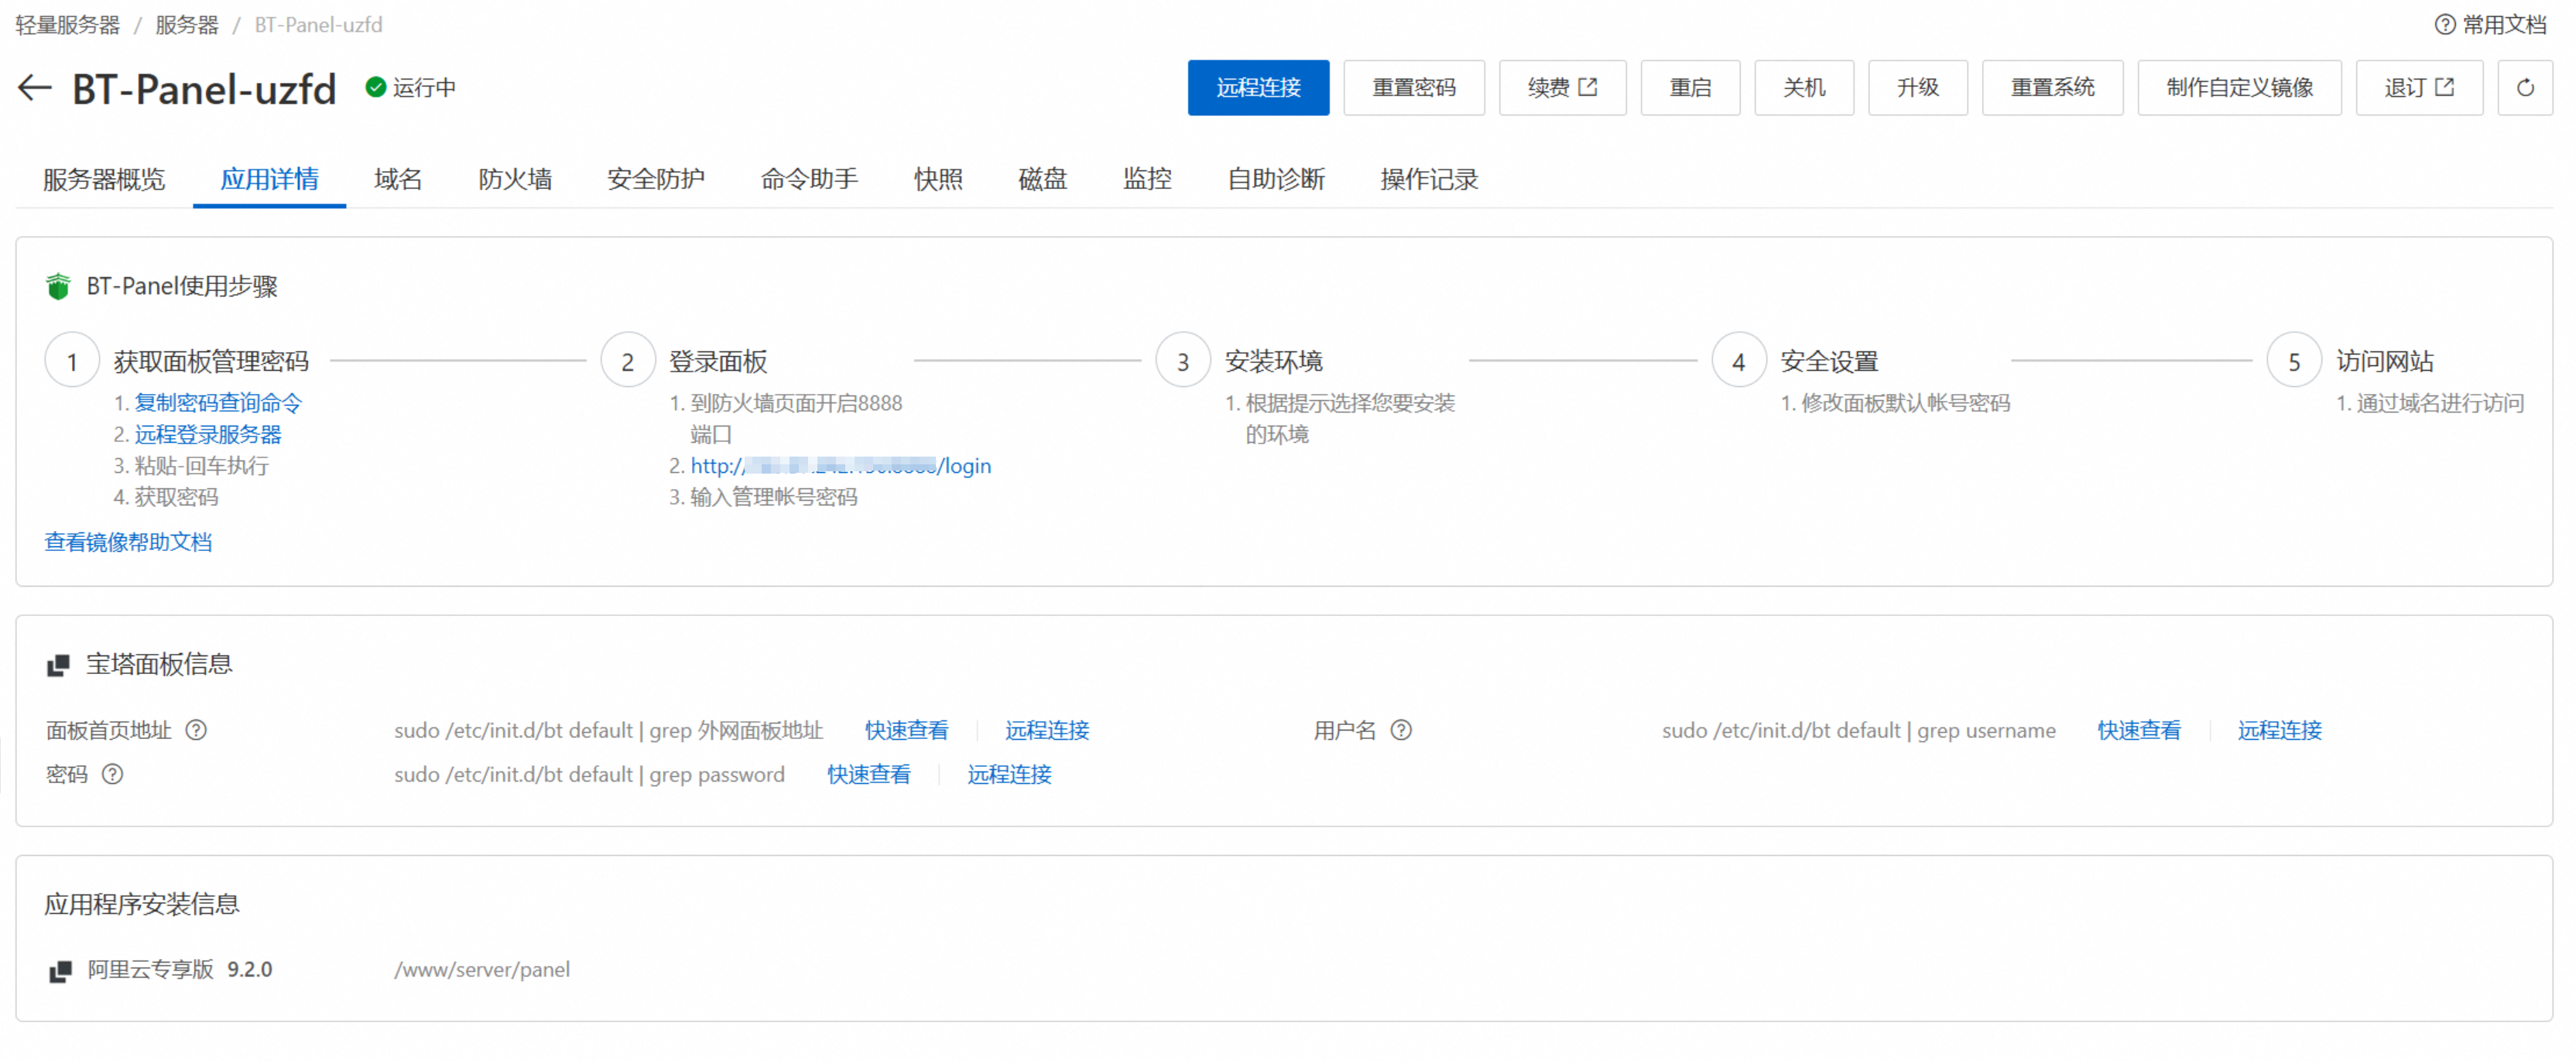
Afterwards, enter the server console, follow the prompts to obtain the admin account password and login port, and you can log in to the BaoTa panel.
Tencent Cloud and other platforms are largely similar.
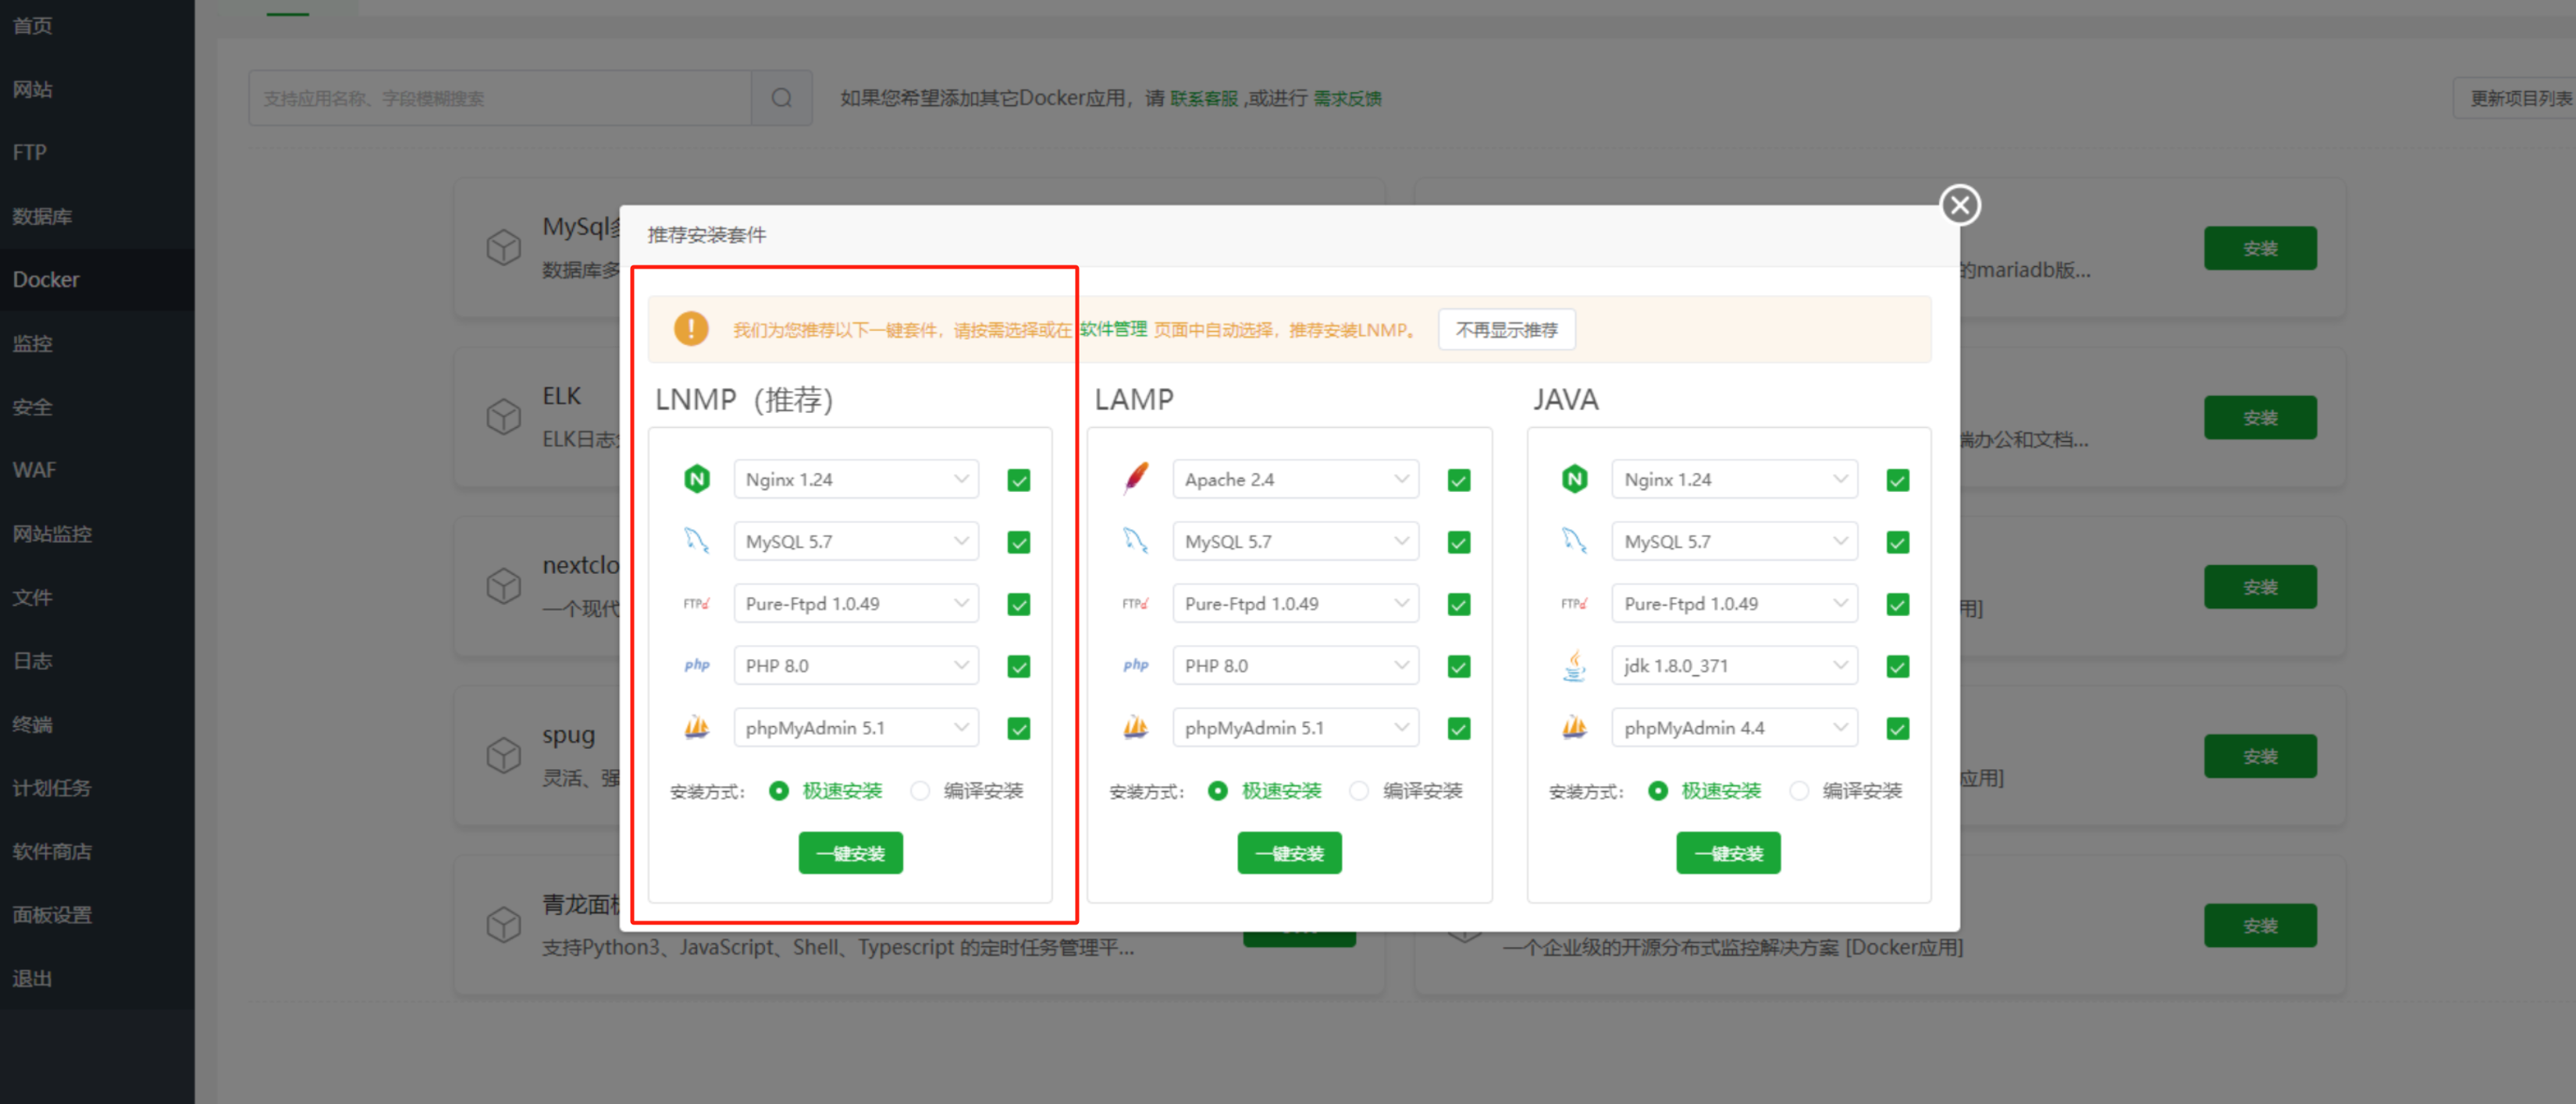
After entering the BaoTa panel, select the recommended LNMP one-click installation for the suite.
Now, you can connect to the file upload steps from the previous section.
If you plan to use Cursor to modify code directly on the server.
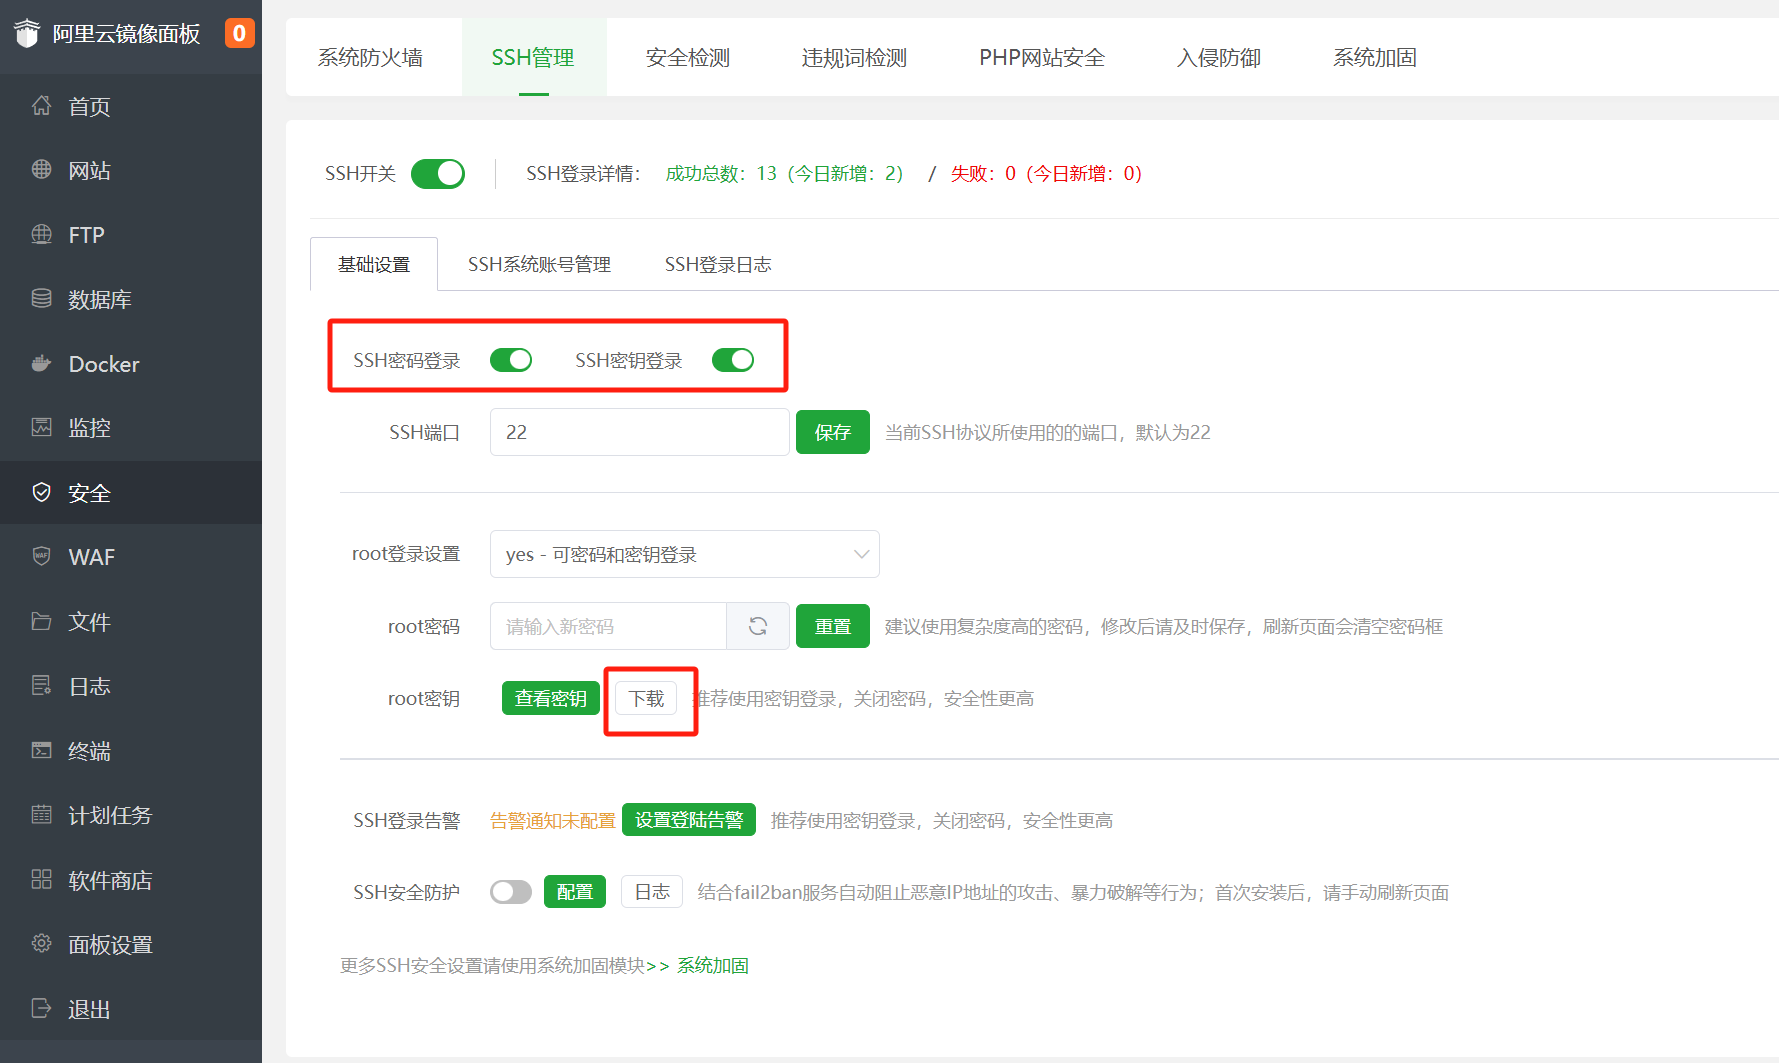
You first need to enable SSH key login in the ‘Security’ menu, then download the key. The filename should be in the format ‘ip_address_id_XXXX’; save it for later use.
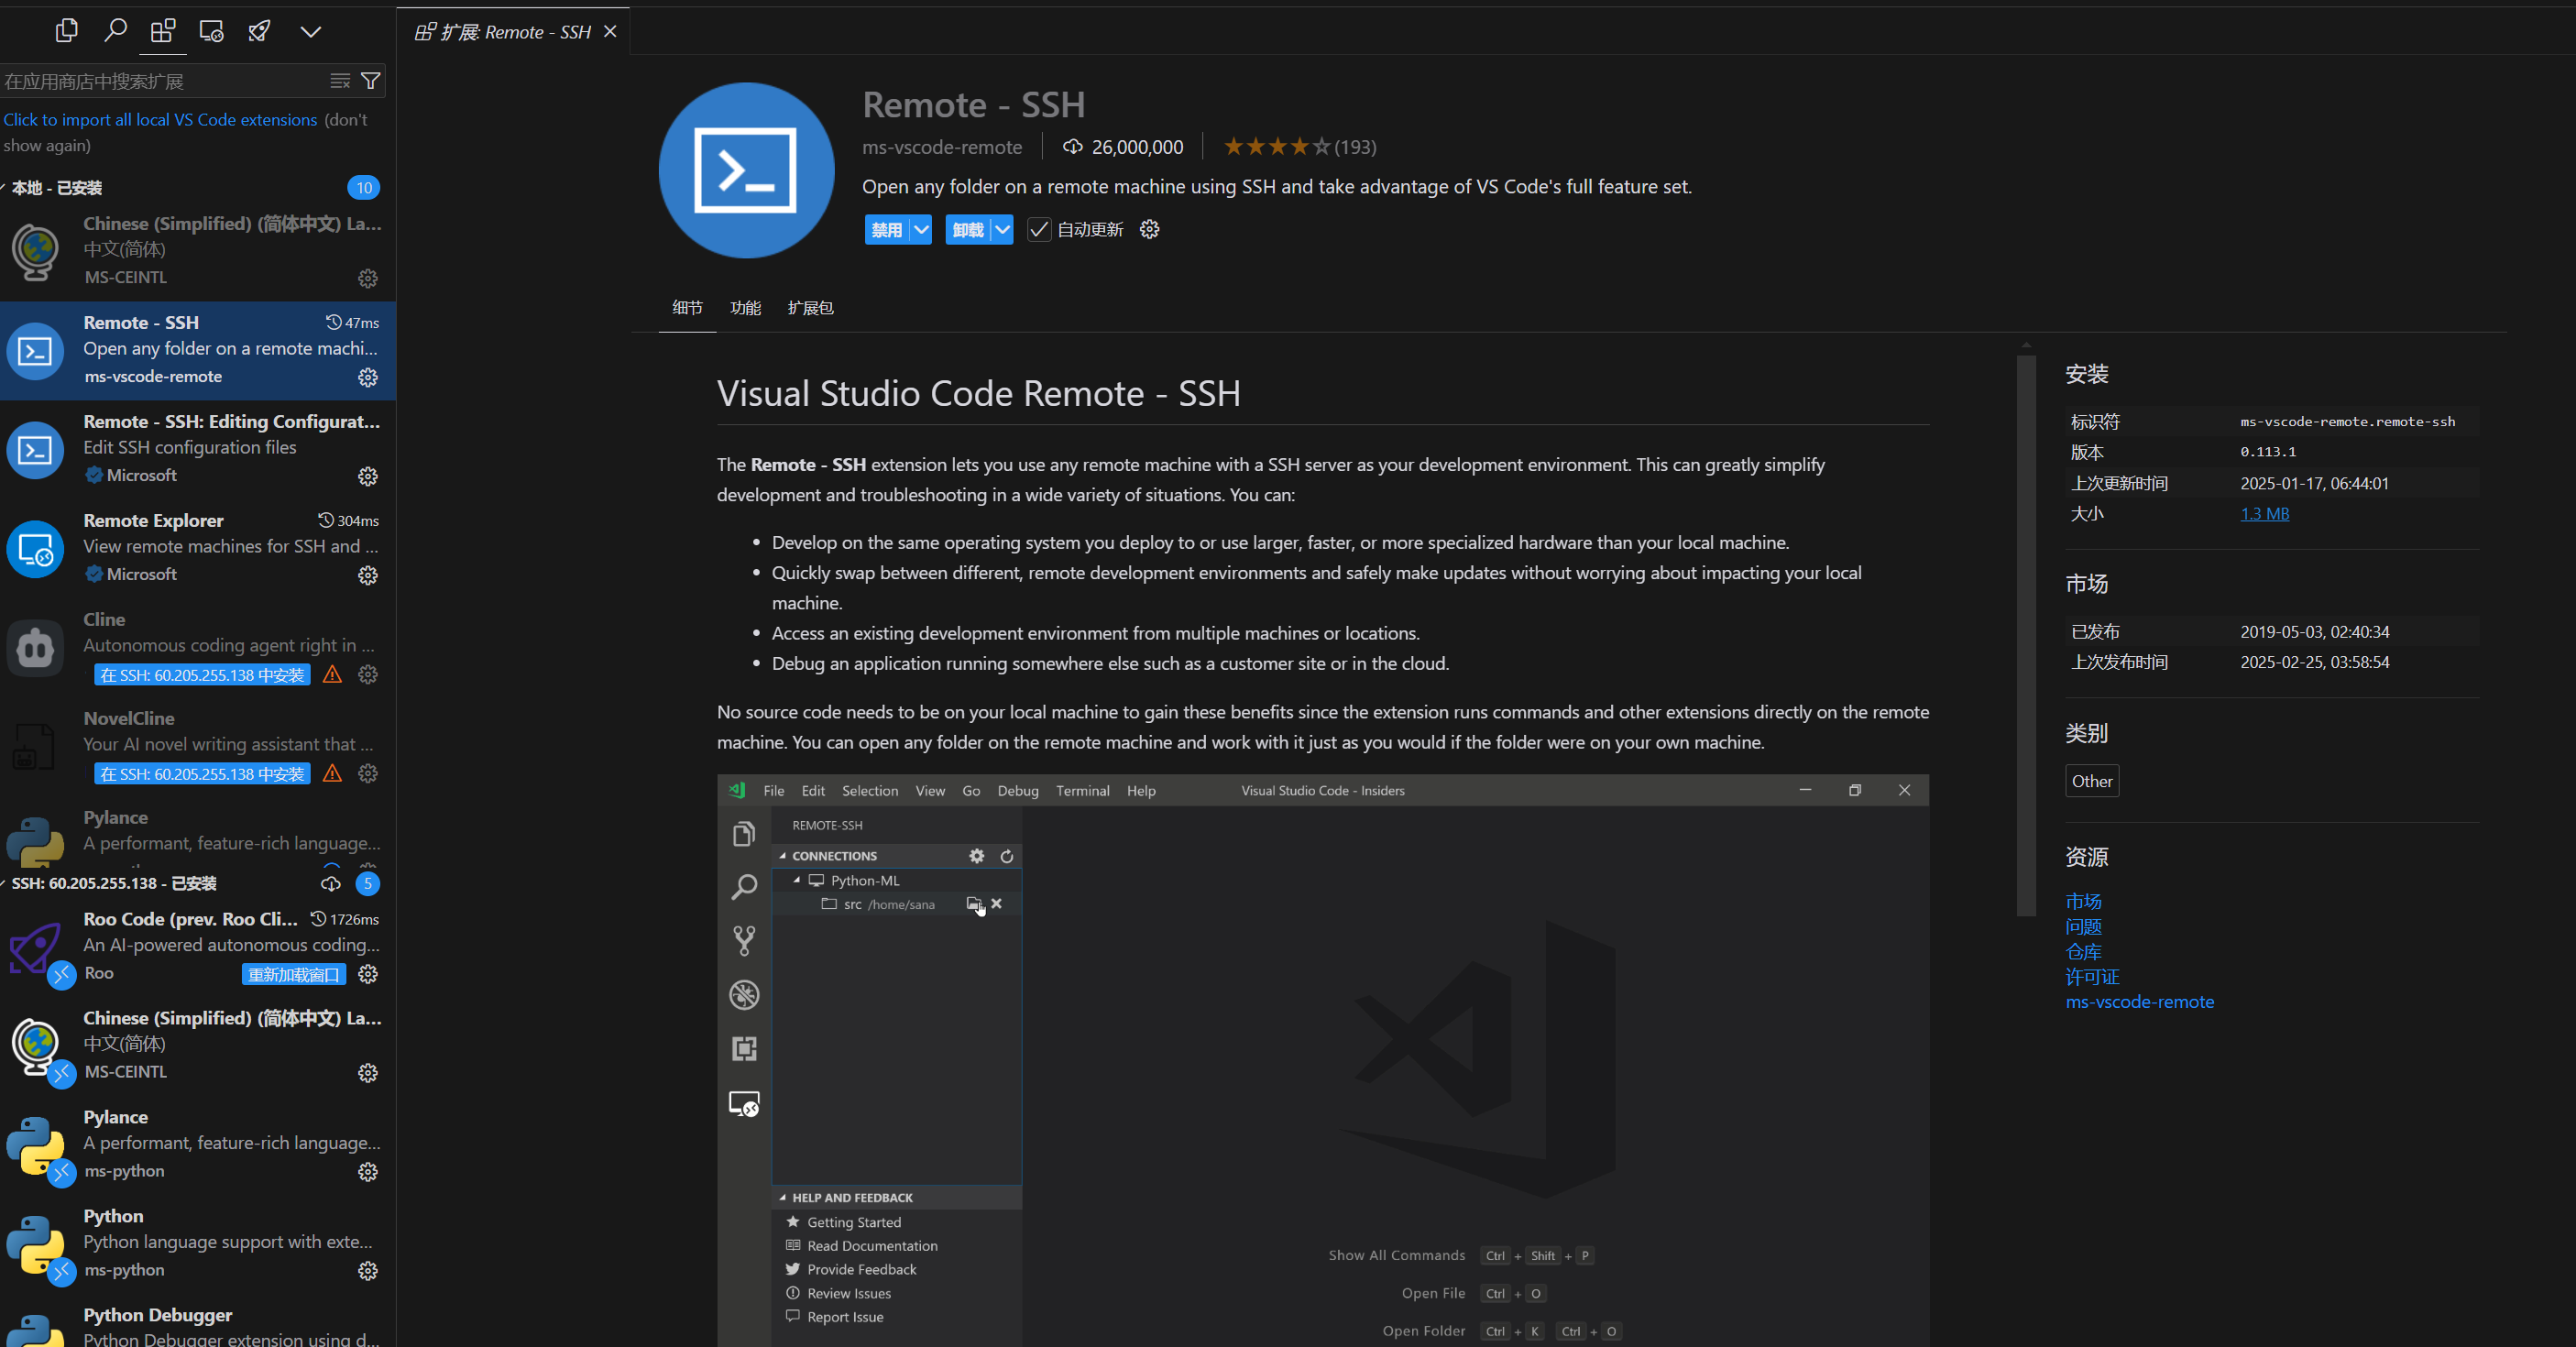
In Cursor’s app marketplace, install the Remote – SSH plugin.
Then, in a new Cursor window, you can choose to connect to an SSH host via SSH.
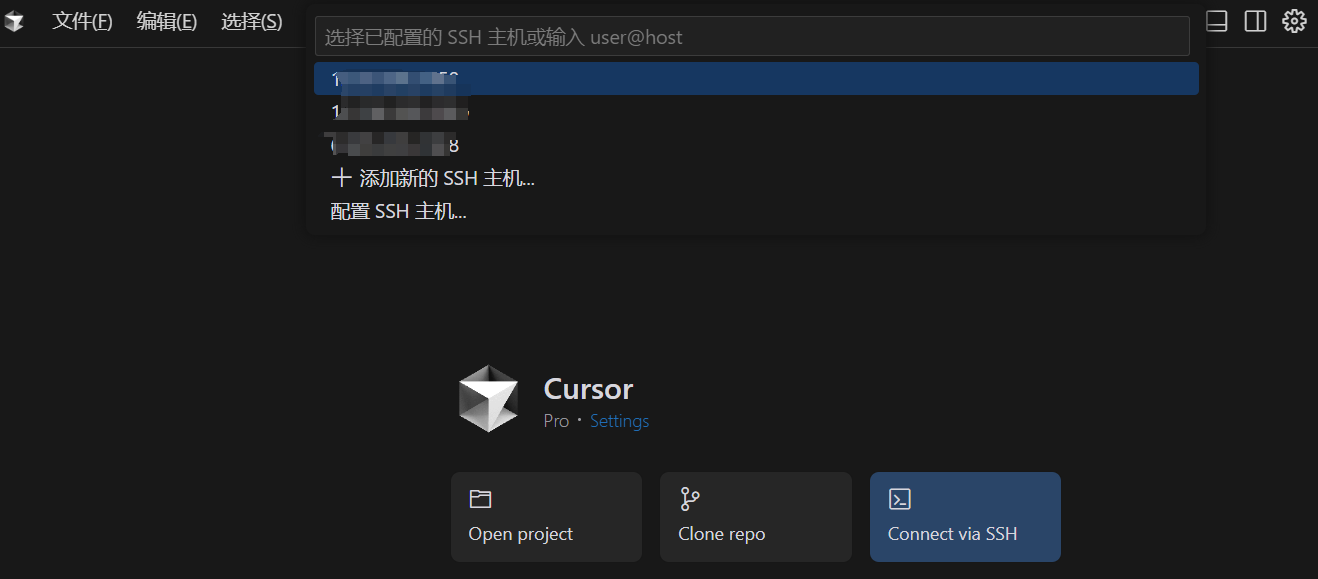
First, click ‘Configure SSH Host…’ to set it up.
Here, there are usually two config files; either is fine. For example, I use the first one.
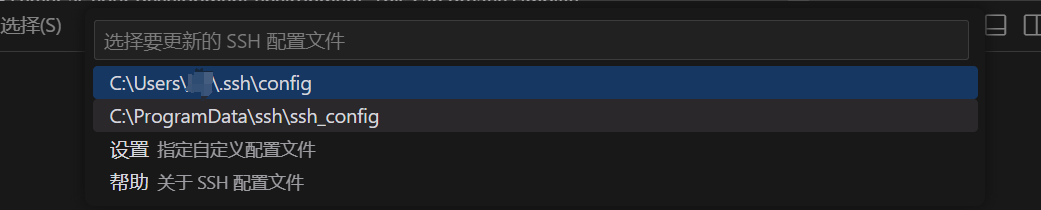
C:UsersUsername.ssh is a local folder; you can locate this path, open it, and paste the downloaded key there. Rename the key file to key.id_rsa.
After this, the key should be in the same directory as the config file.

Edit the content of the config file to:
Host server_ip (the IP from the key's filename before renaming)
Then connect via SSH again; you will see your server host (displayed as the IP address). Click on it.
The first time you connect, you need to select the system; choose Linux. (Except if you used the Windows version of BaoTa; I truly haven’t used that, so you’ll have to figure it out yourself.)

After a successful SSH connection, open the project folder extracted earlier in the BaoTa panel.

Now, you can remotely develop your project to your heart’s content using Cursor.
